Last updated: Apr 19, 2026
Winter freeze-thaw cycles in this city grind away at flashing, seams, and raised shingle edges. When spring hail arrives, those pre-worn weak spots can turn into active leaks overnight. This one-two punch means a roof that seemed fine after winter can start dripping days into spring storms, long before the main replacement season. You may notice attic condensation or sudden wet streaks after a hail event, especially if a prior freeze left soft spots or micro-cracks in the underlayment.
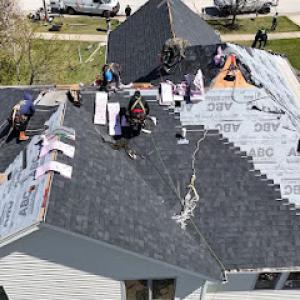
Localized hail paths matter in Aurora because storm scope can vary block by block across a large city. A roof that looks solid from the street can hide trouble on a higher exposure or a lower back slope. Before filing a claim, photograph and note differences by elevation and orientation when safe to access the attic or exterior roof edge. Look for tiny divots or granule loss on shingles, exposed nails, and any displaced flashing around chimneys, vents, or skylights. If you see staining or water intrusion in one area but not another, treat that as a red flag for an in-depth, area-by-area assessment rather than a cursory walk around.
Late spring through early fall is the practical replacement window here, because winter conditions are brutal on underlayment and flashings, and spring rain can disrupt tear-off and dry-in scheduling. If hail damage has accelerated wear in a particular section, you want to align any roof work with the dry season, when crews can fully remove, reseal, and reflash without weather-driven delays. If a leak point opens up after a storm during late spring, you may still be able to patch carefully to buy time, but plan for a more comprehensive replacement once the weather stabilizes.
Start with a targeted, block-by-block inspection after the next significant hail event, especially if a freeze-thaw cycle preceded it. Document exterior and interior signs of damage with dated photos from multiple angles and elevations. Keep a running list of small issues like lifted shingles, torn flashing, or moisture spots in the attic; those indicators often predict where a larger problem will form. When you're arranging a contractor or insurer review, prioritize those elevation-specific observations so the team can map a precise damage footprint rather than a generic roof-wide assessment.
If you notice active leaks after a hail event, address the area with temporary measures that don't trap moisture or damage nearby materials. Do not assume a single patched spot will hold if the underlying flashing has multiple stress points. Coordinate a plan that targets the most vulnerable sections first-especially where the winter freeze has already weakened connections. The right sequence can minimize secondary damage and keep the project moving through the spring window without losing time to weather or scheduling bottlenecks.
In this market, the cost spread for roof materials runs from asphalt shingles at about 350 to 550 USD per square to slate at 1200 to 2400 USD per square. Metal, tile, and synthetic/composite shingles fill the middle of the range. This mix lines up with the more common suburban homes that blend steep gables, chimneys, and the occasional low-slope rear addition. For a typical Aurora home, asphalt remains the baseline option, while slate represents the high end you'll encounter on specialized, long-lived projects. When planning, expect the final price to hinge on roof complexity, attic ventilation needs, and the ease of accessing steeper sections.
Aurora experiences hail-prone spring storms and freeze-thaw cycles that can push job timing into peak-season windows. Storm-driven demand compresses scheduling across the western Chicago suburbs, which can lift costs due to faster crews and material availability constraints. If a hail event hits, you may see a temporary rise in material and labor costs as suppliers scramble to restock, and local crews book fewer slots. In practice, this means your roof replacement quote can be noticeably higher during or right after a major storm, even if the underlying material choice remains the same.
Asphalt shingles offer the most predictable value for a walkable gable roof, especially when dealing with Aurora's typical older-suburb stock and mixed rooflines. If you're protecting a long-term budget with a moderate slope and standard flashing details, asphalt at 350-550 USD per square remains the most economical path. For metal, tile, or synthetic options, plan for a middle-to-upper tier investment. Metal tends to excel in durability and wind resistance on steeper sections, with costs ranging from 700 to 1200 USD per square. Clay and concrete tiles push higher still, with clay at 900-1800 and concrete at 800-1600 USD per square, reflecting both weight considerations and installation complexity on roofs with chimneys or skylights. Slate sits at the top end: 1200-2400 USD per square, and is typically reserved for homes with historic or high-end design cues where long life and curb appeal justify the premium. Given Aurora's mix of older homes, steep rooflines, chimneys, and occasional low-slope rear sections, the extra labor for access, edge work, and precise flashing can add costs beyond a simple walkable roof.
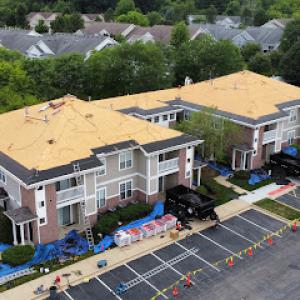
A significant portion of Aurora's housing stock features steep pitches and varying roof planes, which translates to more labor time and higher potential waste for custom detailing. The presence of chimneys and skylights adds to the complexity, especially if the roof plan includes multiple ridges or low-slope rear additions. In practical terms, expect higher bids for roofs with multiple penetrations, more intricate ridge lines, or where attic ventilation needs new detailing to meet performance goals. If your roof has a nonstandard pitch or blends tile or slate in portions, the price premium over standard asphalt can be substantial but may be offset over the lifespan by durability and reduced maintenance.
When hail and freeze-thaw cycles are in play, weigh the need for timely replacement against the current material's life expectancy. If the existing roof is approaching the end of its expected life and shows widespread damage, a replacement will likely be more cost-effective than patching. For slate or tile, evaluate structural support and roof framing-heavy materials may require reinforcement in older homes. If the goal is maximum value, consider how long you plan to stay in the home, local ice-dam tendencies, and neighborhood trends in replacement windows. In any case, align material choice with roof complexity, ensuring the final installation accounts for the unique mix of steep slopes, chimneys, skylights, and occasional low-slope segments that characterize many Aurora roofs.
Reputable Roofing & Siding
(630) 849-4548 reputableroofing.net
2480 Lakeview Ct, Aurora, Illinois
5.0 from 61 reviews
Reputable Roofing & Siding is a leading roofing and siding contractor specializing in roof repair, roof replacement, and siding installation services for both residential and commercial properties. Our expert team is skilled in providing high-quality, durable roofing solutions, including asphalt shingles, metal roofing, flat roofs, and more. We also offer premium siding services, including vinyl siding, fiber cement, and wood siding, to enhance the beauty and energy efficiency of your home or business. At Reputable Roofing & Siding, we prioritize customer satisfaction and provide free, no-obligation estimates to ensure you get the best value for your investment. Our experienced, licensed professionals are dedicated to providing A+ service.
RG Roofing & Exteriors
(630) 312-0613 rgroofing-exteriors.com
Aurora, Illinois
4.9 from 123 reviews
RG Roofing & Exteriors is a locally owned and operated company providing services in Aurora, IL, and surrounding areas, including North Aurora, Batavia, Montgomery, and all over Illinois, with decades of experience. We are known for delivering exceptional work and putting excellence into every project we undertake. Our specialties include: • Roofing Contractor • Siding Contractor • Construction Company • Remodeling Services • Roofing Services • Roofing Installation Services • Commercial Roofing • Contractor Services • Roof Inspection Services • Asphalt Roofing Services • Window Installation Near Me • Drywall Installation Contact us today for a free consultation and transform your space with the best in the business...!
Atlas Roof Roofing Companies & Roof Repair
(331) 212-8509 roofreplacementaurora.com
1444 N Farnsworth Ave #100, Aurora, Illinois
4.9 from 59 reviews
We are number one among roofing companies in Aurora. We offer a comprehensive array of roofing services, including commercial and residential roofing, re-roofing, roofing installation, and roofing repair. No matter what type of roofing you’re working with, our experienced roofing contractors can handle it all. We offer the widest selection of premium materials, as well, like shingle, metal, rubber, and flat roofing. There’s no need to hire multiple specialist roofing companies anymore. Our highly-trained and friendly roofing contractors will provide expert craftmanship as well as top-quality customer service. To top it all off, we offer the lowest rates you’ll find among any roofing companies in Aurora.

Global Exterior Experts
(877) 455-4562 www.globalexteriorexperts.com
1135 Mitchell Rd, Aurora, Illinois
4.7 from 282 reviews
Choose Global Exterior Experts for reliable roof replacement, storm damage restoration, and comprehensive exterior remodeling services throughout the Chicagoland area, including Aurora, IL. Our licensed, bonded, and insured team has 14+ years of experience providing residential and commercial roofing, siding, and gutter services. We use top-quality materials, provide exceptional workmanship, and prioritize customer satisfaction. As a BBB A+ accredited remodeling company, we've earned a reputation for honesty and integrity. Trust Global Exterior Experts to protect your home with expertise and care. Have questions about roof damage or need a free estimate? Get in touch with us today.
Astra Roofing
2426 Baldwin Ct, Aurora, Illinois
5.0 from 36 reviews
Welcome to ASTRA ROOFING where quality meets reliability in roofing and siding solutions. From repairs to installations, our expert team ensures your peace of mind under every roof. Explore our services and let us safeguard your home with excellence.
Illinois Twins Roofing
(773) 837-1176 itwinsroofing.com
Aurora, Illinois
5.0 from 34 reviews
Unexpected hail or wind damage? Let our team help you restore your home. Upgrade your roofing with our high-quality and affordable supplies.
A & J Roofing Corporation
1585 Beverly Ct Suite 112, Aurora, Illinois
4.9 from 33 reviews
Roofing contractor Siding Contractor Gutter Contractor
Affordable Roofing
(847) 701-4820 www.affordableroofing.net
1500 Dearborn Ave No. 11, Aurora, Illinois
4.8 from 130 reviews
Affordable Roofing has been the trusted name in roofing, gutter, skylight, windows, and siding services across Illinois for over four decades. Based in Aurora, our family-owned roofing company brings unparalleled expertise to residential and commercial properties throughout the state. With a team of seasoned roofers and certified CertainTeed master installers, we deliver exceptional results that stand the test of time. We understand your property is important. That's why we offer comprehensive services, from roof repair and installation to window, gutter, siding, and skylight solutions. Whether you're dealing with storm damage, renovations, or building a new structure, we're able to handle projects of any scale.
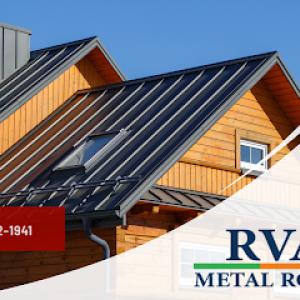
RVAX Metal Roofing
(773) 232-1941 roofingaurorail.com
438 N View St, Aurora, Illinois
5.0 from 18 reviews
RVAX Metal Roofing in Aurora: Your Trusted Source for Durable Roofs! 🏠🔨 Looking for durable and stylish metal roofs? Choose RVAX Metal Roofing! We offer high-quality, long-lasting metal roofs in various styles and colors. Our roofs are energy-efficient, professionally installed, and backed by exceptional customer service. Trust RVAX Metal Roofing in Aurora for reliable and stylish roofing solutions 📞 Contact us today and upgrade your roofing.
ANS Roofing & Siding
(630) 264-6282 www.ansroofingandsiding.com
221 W Benton St, Aurora, Illinois
5.0 from 9 reviews
At ANS Roofing & Siding, we pride ourselves on delivering top-quality roofing, siding, and gutter services to the Aurora, IL community. Established in 1997, our experienced team is dedicated to providing exceptional workmanship and customer service. Owner Nick personally consults with clients to ensure project specifics are met, while our friendly crew goes above and beyond to complete installations with precision. The office team keeps clients informed with updates and schedules, ensuring a smooth and transparent process from start to finish. Trust ANS Roofing & Siding for all your exterior home improvement needs.
Isel Roofing
(630) 923-2745 www.iselroofing.com
Aurora, Illinois
5.0 from 9 reviews
Isel Roofing is one of Chicagoland's Best Family Owned Roofing Business choices for all of your Residential and Commercial roofing needs. We're Licensed, Bonded, and Insured so you can be confident that we'll deliver only high quality workmanship!
Olsson Roofing Company
(630) 892-0449 www.olssonroofing.com
740 S Lake St, Aurora, Illinois
5.0 from 6 reviews
Since 1914, Olsson Roofing Company, Inc. has been providing unmatched roofing and sheet metal services.
For a full roof replacement, the permit process is the rule, not the exception. In this market, a straightforward over-the-counter maintenance approach doesn't apply to a roof change that covers the entire surface. The Building Department wants to see that the project is structurally sound and properly vented, not just that new shingles are installed. Expect the permit to reflect a broader scope than a simple material swap, with checks that reach beyond the visible finish.
Aurora's Building Department commonly reviews basic structural and ventilation components as part of the roofing permit. That means inspectors will look at deck integrity, attic ventilation plans, proper intake and exhaust venting, and how the new roof will tie into existing plumbing and mechanical penetrations. If there are low-slope sections or pockets with tiles or slate, those details may raise questions about flashing, drainage, and underlying substrate. Having a clear plan for these elements reduces back-and-forth during review.
Work with a licensed roofing contractor who routinely navigates the local process. A typical package includes a scope of work, roof layout, structural notes if any deck reinforcement is needed, ventilation calculations, and product specifications for the chosen shingles or tiles. Gather any architectural plans or historic-structure notes if the home has a vintage or unique roofline. Including a concise, stamped contractor plan set helps move the review along and minimizes delays caused by missing details.
Plan around roughly 1 to 2 weeks for permit processing in Aurora depending on department workload. That window can stretch in peak seasons or after weather-related backlogs. Coordinate with the contractor to schedule installation to fit within the permit timeline, avoiding weather-induced gaps that could complicate inspections. The permit will set inspection milestones, so align your installation schedule accordingly.
Expect inspections during installation and again after completion. The on-site inspection during installation verifies that work conforms to the approved permit plan, including flashing, ventilation, and connection details. The final inspection confirms that the project is properly finished and that all components function as intended, including attic ventilation balance and drainage alignment. If the inspector notes issues, address them promptly; re-inspection can add days to the schedule.
Keep communications with the Building Department concise and document-focused. Have the contractor submit a complete, accurate package the first time to minimize back-and-forth. Before work begins, review access to the attic and roof lines so inspectors can move through the site quickly. If an older home presents unusual framing or ventilation challenges, discuss those specifics up front to reduce surprises during permit review and inspections.
In this valley-driven climate, hail and wind damage is a common claim driver, and adjuster findings in Aurora often determine whether a roof is repaired by slope, by elevation, or replaced more broadly. That means the impression left by a single inspection can steer a project in a very different direction than anticipated. When hailstorms roll through, the adjuster's determination about roof section boundaries and the extent of damage becomes the practical hinge on your next steps, so approach this process with clear documentation and steady expectations.
Expect insurers to request detailed, date-stamped photos that capture both the broad roofscape and precise damage spots. Closeups of shingle edges, lifted tabs, flashing corners, and any surface granule loss are standard fare. Documentation of interior staining tied to a specific storm event is another key piece, so plan for photos that show attic conditions if staining or leaks exist. The timing of storm events matters, so organize records that link interior signs to the corresponding exterior impact.
Storm damage in this market can be highly localized, which makes a single front-slope photo set insufficient. Homeowners benefit from methodically photographing every roof plane, along with any soft metals, gutters, and collateral impacts such as fascia or deck connections. Don't overlook skylights, dormers, or low-slope additions that buttress the primary roof. When a contractor enters to assess, encourage a same-day, comprehensive set of images that tell a fuller story of how an event affected the entire structure, not just the most visible section.
Create a simple storm-event timeline that includes date, time, and a brief description of observed damage after the storm. Store photos in labeled folders by roof plane and by exterior feature, then zip them into a single package for submission. If interior staining is present, capture the path of any leaks from ceiling or wall to exterior origin, and note any pre-existing conditions that could be misconstrued as storm-related. Finally, maintain a steady, consistent photo angle approach-per-planarity, not accidental, to aid the adjuster in assessing scope accurately.
Connect with contractors who help homeowners navigate the claims process from damage assessment to final approval.
Reputable Roofing & Siding
(630) 849-4548 reputableroofing.net
2480 Lakeview Ct, Aurora, Illinois
5.0 from 61 reviews
Global Exterior Experts
(877) 455-4562 www.globalexteriorexperts.com
1135 Mitchell Rd, Aurora, Illinois
4.7 from 282 reviews
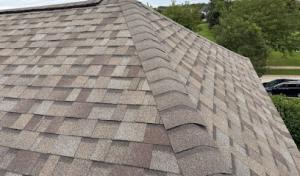
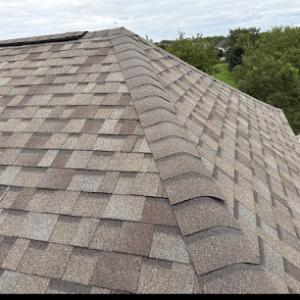
Asphalt shingles remain the practical backbone for most Aurora homes, especially given the broad stock of suburban single-family houses with varying roof pitches. After hail events, asphalt tends to be easier to repair or replace without special matching issues, so homeowners often find the process smoother than with premium brittle materials. When choosing asphalt, look for impact-resistant options and good wind ratings to ride out those spring storms. The local freeze-thaw cycles also favor shingles with strong granule retention and solid underlayment, helping resist micro-cracks that can appear after heavy hail.
Metal roofing serves a meaningful, though smaller, role in the Aurora market. Homes that prioritize snow shedding and resilience through repeated freeze-thaw seasons may benefit from metal's durability. Metal tends to shed ice and snow more predictably, which helps in steep or complex rooflines common on older suburban layouts. If considering metal, focus on panel joinery, flashing compatibility with existing roof features, and proper coating for local temperature swings. A metal roof can extend service life under Aurora's harsh spring storms, but compatibility with surrounding structures and attic ventilation matters.
Clay tile, concrete tile, synthetic/composite shingles, and slate appear in Aurora but require careful evaluation of structure, flashing details, and repair matching on older or higher-end homes. Tile roofs add distinctive curb appeal but demand a sound substrate and meticulous waterproofing. Concrete and clay tiles are heavier, so structural assessment is essential before replacing an existing roof deck. Synthetic or composite options can mimic natural materials with less weight and better impact resistance, yet flashing details, edge treatments, and color fade can complicate matching repairs after hail. Slate delivers elegance and longevity, but its brittleness and weight make on-site evaluation and proper installation critical. For high-end or heritage corners of the neighborhood, a precise integration with current flashing and roof-to-wall transitions is the key to a durable result.
The most popular roofing material in the US. Find pros who install, repair, and replace asphalt shingles.
Reputable Roofing & Siding
(630) 849-4548 reputableroofing.net
2480 Lakeview Ct, Aurora, Illinois
5.0 from 61 reviews
A & J Roofing Corporation
1585 Beverly Ct Suite 112, Aurora, Illinois
4.9 from 33 reviews
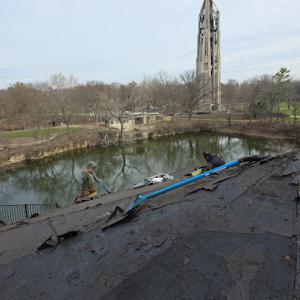
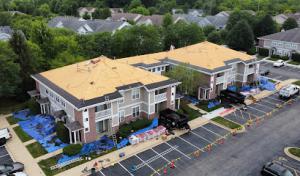
The valley-weather swings in this neighborhood push moisture into every edge, but the real trouble shows up where a flat or low-slope section meets a steeper main roof. Hail-driven impacts don't just dent shingles; they compromise joints, flashing, and the edge details that hold back water on low-slope additions, porch roofs, and garage connectors. In many homes, the aging skylight penetrations sit at these transitions, where trapped moisture can sit through thaws and reappear as leaks after a hard winter. The signal in Aurora is clear: you'll often see a quiet drip emerge from a perimeter seam long after the storm has passed.
Curb flashings and skylight perimeters are the most vulnerable points on properties with both steep main roofs and low-slope rear sections. The problem isn't the field shingles; it's the way drainage edges and transitions carry water from one style roof to another. Flat and low-slope sections are particularly sensitive to freeze-thaw cycles at joints, where expanding ice can pry apart sealants and membranes that seemed sound after autumn repairs. Porch roofs can hide problems for years if the flashing was never addressed with seasonal cleaning and resealing. Aging skylights often show warranty-exposed failures as the sealants dry and crack in the sun and cold.
Winter's freeze-thaw rhythm tends to reopen old repairs once spring arrives. In Aurora, that means moisture trapped at skylight perimeters and curb flashings can reassert itself just as temperatures swing above freezing. If a leak appears after a thaw, inspect the low-slope transitions first. If a storm coincides with a temperature drop, look for edge leaks along the drainage channels and edge metal where water can pool or back up.
Walk the home with a ladder when skies are dry, focusing on the transitions between steep roofs and low-slope sections. Look for cracked sealant around skylights, loose or missing metal edge flashing, and any staining or softness at the seam lines. Inspect porch and garage connectors for peeling coatings or rusting flashings. If winter storms left powdery granules near skylight frames or along low-slope edges, that's a sign water has been playing catch-up with the flashing. Prioritize targeted resealing and flashing repairs before the next freeze-thaw cycle to curb recurring damage.
Find specialists in TPO, EPDM, and built-up flat roofing systems for residential and commercial properties.
Reputable Roofing & Siding
(630) 849-4548 reputableroofing.net
2480 Lakeview Ct, Aurora, Illinois
5.0 from 61 reviews
Atlas Roof Roofing Companies & Roof Repair
(331) 212-8509 roofreplacementaurora.com
1444 N Farnsworth Ave #100, Aurora, Illinois
4.9 from 59 reviews
Aurora Promar Roofing
(630) 594-5348 aurorapromarroofing.com
31 W Downer Pl Unit 100, Aurora, Illinois
5.0 from 6 reviews
Replacement work tends to work best when winter brittleness has faded but before cold-weather sealing and adhesive performance become unreliable. In this climate, that means planning for a window that runs from late spring into early fall. The goal is to have material installed after the worst of the freeze-thaw cycles but before temperatures plunge enough to slow crews or weaken adhesive bonds. If a project straddles shoulder seasons, expect a tighter schedule and careful sequencing to avoid delays.
Spring brings the drama of hail and quick-moving storms, which can complicate timing. Tear-off work may be delayed by repeated rain, and decking moisture issues can surface as the old roof comes off. Build schedule flexibility into any plan planned during the early storm season. If a storm hits mid-project, crews may need to pause to protect exposed decking and underlayment, which can extend the overall timeline.
Summer heat can slow pace and affect how fast materials seal and dry. On larger replacement jobs, same-day dry-in becomes especially important to keep moisture out and maintain crew momentum. Hot afternoons can also challenge adhesive performance and shingle handling, so crews often stagger install stages and use cooler parts of the day for more sensitive tasks. Expect careful coordination to keep gaps tight and ensure weatherproofing is solid by the end of each workday.
Hail events tend to sharpen the urgency of a replacement, but timing still hinges on avoiding peak heat and the height of the storm season. If a roof shows accelerated wear from freeze-thaw cycles, planning a replacement for the late spring to early fall period helps ensure materials set correctly and long-term performance remains reliable. Coordinating with dosed weather forecasts reduces the risk of back-to-back weather interruptions and supports a smoother, more predictable project flow.
Get a clear picture of your project costs upfront - no commitment required.
Reputable Roofing & Siding
(630) 849-4548 reputableroofing.net
2480 Lakeview Ct, Aurora, Illinois
5.0 from 61 reviews
Global Exterior Experts
(877) 455-4562 www.globalexteriorexperts.com
1135 Mitchell Rd, Aurora, Illinois
4.7 from 282 reviews
Aurora's market is crowded with re-roofing contractors, so homeowners often sort first by storm response speed, cleanup practices, and whether the company regularly handles insurance-related documentation. Hail-season crews can appear quickly, but a fast response means more than showing up; it means arriving with a plan to cover water intrusion, tarping, and debris containment. The contractor's written process for documenting damage, communicating with the insurer, and coordinating temporary repairs matters. In a city with large older-suburb housing stock, you'll notice that the pace and method of work can swing from quick patchwork to careful, methodical replacement.
Long-established and family-owned firms have a visible presence in the area, which matters to homeowners trying to avoid storm-chasing crews after hail events. Look for local references and a track record of completed bids on nearby blocks. Ask how they handle chimneys, attic insulation, and other potential leak sources, not just shingle replacement. A good roofer will assess roof-to-wall transitions, vent closures, and any signs of moisture intrusion around chimneys or skylights. If a contractor can identify and propose fixes for those adjacent leak sources, that signals a more durable solution than a straight shingle swap.
Because chimneys, attic insulation, and residential reroofing all show up in contractor signals, homeowners often prefer roofers who can address adjacent leak sources rather than only replace shingles. Request a written assessment that includes suspected problem areas, a staged plan for addressing them, and a clear timeline. Verify their cleanup practices: containment of nails and debris, protection of landscaping, and post-work site restoration. Ask for copies of insurance certificates and a transparent method for documenting weather-related damage and repairs.
Avoid crews that rely on high-pressure sales, vague timelines, or unclear insurance coordination. Be cautious of companies with frequent staff turnover or minimal local references. A stable, locally visible firm with steady communication reduces the risk of incomplete repairs and future leaks.
Get a clear picture of your project costs upfront - no commitment required.
Reputable Roofing & Siding
(630) 849-4548 reputableroofing.net
2480 Lakeview Ct, Aurora, Illinois
5.0 from 61 reviews
Global Exterior Experts
(877) 455-4562 www.globalexteriorexperts.com
1135 Mitchell Rd, Aurora, Illinois
4.7 from 282 reviews