Last updated: Apr 19, 2026
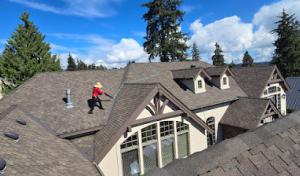
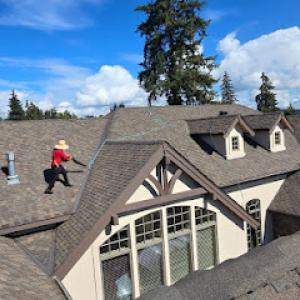
Bellevue homeowners usually target late spring through early fall because the city's wet winters and variable spring weather reduce the number of reliable tear-off and dry-in days. Plan the project for a consecutive stretch of dry, moderate days rather than chasing dates that look good on a calendar but routinely get spoiled by rain. The goal is to secure a continuous dry-in period so the roof deck and underlayment can dry fully after installation. In practice, that often means prioritizing projects when forecasts show a solid week without heavy rainfall and daytime highs that aren't extreme, since heat can speed moisture buildup in shaded, moss-prone areas.
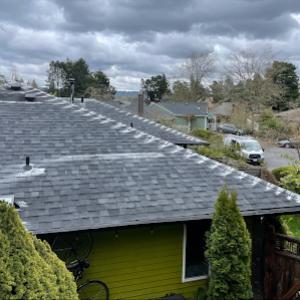
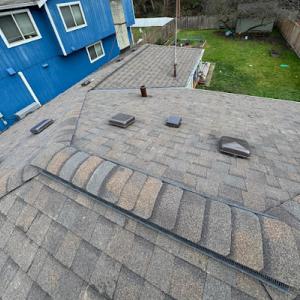
The city's location between Lake Washington and Lake Sammamish contributes to damp conditions that can keep roof decks and shaded roof planes wet longer after rain. Before any material comes off, inspect the roof for lingering moisture, dark algae or moss, and delamination in suspect spots. If the deck or any plywood shows signs of rot or soft spots, address those issues upfront. Bellevue's tree-lined neighborhoods create shade and debris loading that make moisture retention, moss growth, and slippery work conditions a bigger scheduling issue than summer heat. Expect moss removal and deck prep to be a bigger upfront effort than in drier climates, and plan accordingly for potential follow-up moisture checks after debris removal and before final sealing.
Shaded, windy hillside neighborhoods tend to accumulate leaves, needles, and pine debris even during a mild stretch. Create a clean, dry workspace on the roof and in the attic space by staging protective tarps and a robust debris plan. Place catches and fall protection so debris doesn't contaminate the interior or clog the gutters. Regularly sweep the roof surface as work proceeds to prevent moss spores from taking root in newly exposed areas. In taller, densely treed sections, designate a dedicated crew member to monitor moisture pockets after every rain event and between detrition steps to maintain a safe, dry surface for workers.
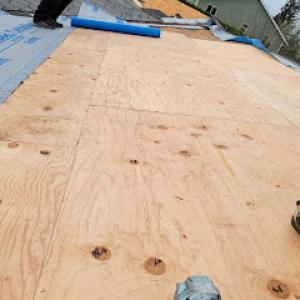
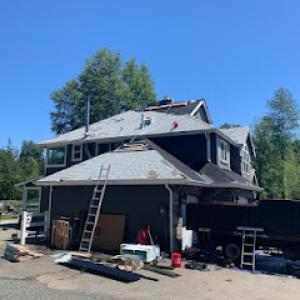
A controlled tear-off sequence matters here. Start at the ridge or highest row and work downhill to minimize water intrusion into the interior, especially in areas where the attic or ceiling is prone to condensation. Remove old shingles in manageable sections, then immediately apply underlayment and, where applicable, ice-and-water shield in eaves and valleys. In shaded zones, consider extended underlayment coverage or extra-fastener schedules to counter wind-driven rain that can creep in during short passing showers. After the underlayment is laid, perform a quick moisture check of the roof deck before proceeding to the next stage, ensuring there are no damp patches that could compromise fasteners or sealants.
Because dampness can linger, use breathable underlayment where appropriate and position roof vents to optimize airflow across the deck. In Bellevue's climate, using a robust moisture barrier at the eaves helps prevent ice damming and water intrusion during unusual cold snaps late in the season, even though the primary window targets dry periods. For decks with persistent shade or heavy moss, a pre-treatment or stabilization step may be warranted to reduce slippery surfaces and improve traction for workers. Consider temporary weather protection for exposed sections if a sudden rain event interrupts work, ensuring that previously installed components stay dry and undisturbed.
Work with a contractor who understands Bellevue's seasonal variability and can offer flexible scheduling in response to weather forecasts. Build a short, buffer-rich window into the plan so an extra dry day or two doesn't derail the entire project. If longer stretches of rain appear in the forecast, discuss the feasibility of postponing noncritical stages or advancing other parts of the job that do not depend on a dry roof surface. Clear daily communication about expected weather, dew point tendencies, and the day's material handling plan keeps moisture risk low and the project moving efficiently, even when Mother Nature throws a curveball.
Leaks in this area tend to appear after prolonged winter rain rather than during heat waves. The heaviest risk concentrates in valleys, around penetrations like vent stacks and skylights, and where additions or dormers create complex transitions from old to new roofing. If a roof shows any seepage after a wet spell, start with those junctions as the likely culprits. The goal is to catch moisture before it migrates into sheathing or interior ceilings, especially during periods when the forecast calls for back-to-back storms.
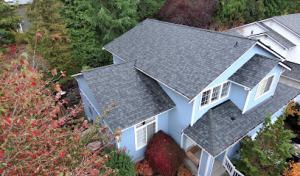
Mature neighborhoods with dense evergreen canopies see moss and algae spreading faster, particularly on north-facing slopes with limited drying sun. Moss growth isn't just cosmetic; it traps moisture and can lift shingle edges, compromising sealants and flashing over time. In Bellevue, you'll notice these issues accelerating at the eave lines and along ridge ramps where cooler air slows drying between storms. Regular attention to moss control and timely cleaning around problem areas can prevent moisture from finding its way into the underlayment.
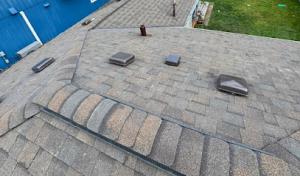
Shoulder-season wind and occasional hail can damage ridge components, flashing edges, and older shingles even when storms aren't dramatic. Small strikes or gusts can bend metal flashing, loosen sealant, or crease shingles, creating hidden paths for water to intrude during the next rain. Pay close attention to ridges, valley flashings, and transitions near dormers after strong winds or hail events, even if the neighborhood didn't experience a big storm. A quick roof check after these events can stop a creeping leak before it becomes visible inside.
Areas where roof planes meet new additions, dormers, or existing decks are especially prone to moisture intrusion if not properly lapped and sealed. Shingle wear, lifted tabs, or damaged sealant in these zones can go unnoticed until a heavy wet spell exposes the flaw. If you notice staining or damp spots near these transitions after a wet period, treat the area with urgency and inspect for missing or degraded flashing, compromised underlayment, or inadequate drip edge detailing.
Start with a targeted dry-out plan: inspect after the next extended rain, focusing on penetrations, transitions, and along the north-facing, moss-prone sections. Clear debris that can hold moisture from gutters and valleys, and address moss growth promptly with approved cleaners or professional remediation. If leaks persist after a heavy rain, prioritize prompt professional assessment to map out moisture pathways and secure sealing or flashing repairs before winter returns.
Find local contractors experienced in assessing and restoring roofs after hail, wind, and severe weather events.
Touchstone Roofing & Siding
(425) 428-8053 www.touchstonehomes.net
14150 NE 20th St Suite F1-429, Bellevue, Washington
5.0 from 136 reviews
Orca Roofing & Exteriors
(425) 584-6722 www.orcaroofing.com
16301 NE 8th St Suite 253, Bellevue, Washington
5.0 from 81 reviews
Three Tree Roofing
(425) 230-3300 www.threetreeroofing.com
1400 112th Ave SE, Bellevue, Washington
5.0 from 46 reviews
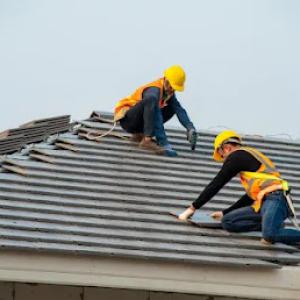
Asphalt shingles remain the workhorse choice for the city's large stock of single-family homes, especially when reroofing in a high-cost labor market. They pair well with existing homes built in the late 20th century through today, and their ease of installation translates to shorter dry-weather windows-an important consideration when the wet season pressurizes scheduling. In Bellevue's long wet season, asphalt shingles provide a familiar, forgiving surface that handles intermittent rains during reroofing without requiring exotic underlayment or complex flashing details. When choosing this option, prioritize shingles with good fire resistance, a robust warranty, and a发布weather-ready laminate layer that resists curling as seasons shift from damp to damp again. In practical terms, you'll want a contractor who coordinates nail patterns and roof deck venting so that moisture can vent quickly post-installation, minimizing the risk of trapped moisture under a fresh roof.
Metal roofing has a meaningful presence for homeowners who value faster water shedding and long-term durability during extended wet seasons. In areas where deciduous trees line hillsides and neighborly lots are close, metal's smooth, gull-wing shedding action reduces the chance of moisture pooling near eaves and around roof penetrations. The material's rigidity also helps when wind-driven rain arrives from unpredictable angles, which is common on hillside parcels. For Bellevue homes, a standing-seam metal system is often favored because it provides dependable weather tightness and a clean, modern look that complements Northwest architectural cues. When considering metal, discuss panel profiles, insulation strategy, and the compatibility of flashing with other roof assemblies to ensure seamless performance through multi-month wet spells. A well-sequenced installation plan-coordinating underlayment, from eave to ridge, and rapid sealing of penetrations-helps prevent moisture intrusion during the transition between rainy seasons and drier intervals.
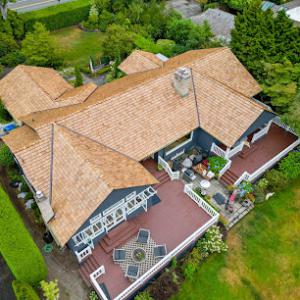
Wood shakes and shingles still matter locally because established neighborhoods frequently showcase Northwest architectural styles that lean on natural textures and warm tones. In Bellevue, moisture exposure and maintenance demands are a major ownership consideration. Wood surfaces can be exceptionally durable when properly treated and maintained, but prolonged dampness invites moss, mildew, and faster degradation if protection is skimpy. If choosing wood, select rot-resistant species and apply high-quality, breathable finishes that allow the deck to dry out between storms. Emphasize proper ventilation of the attic, a robust drip edge, and continuous eave overhangs to minimize water wicking into the deck. Regular inspections become a practical habit here, including checks for cupping, splitting, and flashing integrity after heavy rains. Scheduling maintenance in the shoulder seasons helps keep cedar or other wood profiles performing well through repeated wet periods.
Synthetic and composite shingles offer a modern alternative that can mimic natural textures while delivering improved moisture resistance and uniformity. For homeowners concerned about upkeep in a climate with frequent moisture exposure, these options often provide easier maintenance cycles and consistent performance across years of damp weather. In neighborhoods with varied tree cover and shade patterns, synthetic composites can maintain color fastness and resist moss growth better than some traditional materials. When evaluating this category, focus on dimensional stability, warranty specifics, and how the product responds to temperature fluctuations typical of the region, which influence expansion and contraction around flashing and penetrations.
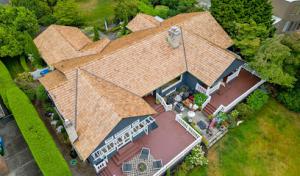
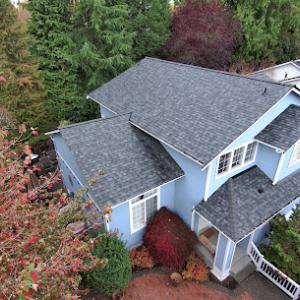
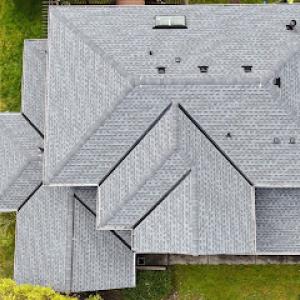
Homes in this market often blend several roof planes, dormers, chimneys, and skylights into one cohesive silhouette. That architectural variety creates a web of flashing details that must stay watertight through long, wet seasons. Each transition-where a dormer meets a main roof, around a chimney chase, or at a skylight curb-adds potential failure points if any sealing or flashing step is overlooked. In practice, this means careful coordination between components, accurate shingle-to-flashing integration, and meticulous surface preparation. When one detail slips, the resulting leak can migrate across multiple planes and only reveal itself after sustained rain, turning what looked like a small repair into a larger, more disruptive project.
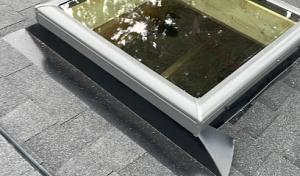
Skylights sit at the intersection of design and weather, and Bellevue's extended moisture exposure can expose issues that stay hidden in drier climates. Flashing integrity around skylights is only as good as the surrounding roof planes' maintenance, and deterioration often appears as subtle fluctuations in seal performance, unseen until a heavy rain event. If a skylight is older or improperly flashed, interior condensation, staining, or sudden leaks can appear after a season of dampness. The long, wet period amplifies the risk, so it is crucial to inspect skylight flashing and sealing during any reroof, not just surface tiles. In practice, that means checking for hairline gaps, degraded sealant, or rusted fasteners, and ensuring step flashing at skylight corners is continuous and properly aligned with surrounding shingle courses.
Higher-end custom homes in the area often feature steeper pitches or more intricate geometry, which translates into longer labor time, more staging complexity, and greater overall replacement effort. Platforms, edge protection, and access routes must be planned to minimize wind exposure and water intrusion during phases of the project. The more complex the roof, the more critical it becomes to stagger work so that no single plane is left vulnerable to prolonged moisture while others are being addressed. Contractors should lay out a step sequence that preserves watertight continuity, especially around dormers and skylights, and schedule high-precision flashing work for calmer weather windows. Realistic expectations about timelines are essential in these settings, as even small misalignments or rushed transitions can become costly fixes when moisture is involved. In short, Bellevue homes with complex roofs demand a disciplined, detail-forward approach that treats every flashing junction as a potential leak source until proven watertight.
Find contractors experienced in skylight installation, flashing, and leak repairs to bring natural light into your home.
Orca Roofing & Exteriors
(425) 584-6722 www.orcaroofing.com
16301 NE 8th St Suite 253, Bellevue, Washington
5.0 from 81 reviews
Three Tree Roofing
(425) 230-3300 www.threetreeroofing.com
1400 112th Ave SE, Bellevue, Washington
5.0 from 46 reviews
Silva Roofing & Repair
(206) 592-2492 silvaroofingandrepair.com
Bellevue, Washington
5.0 from 18 reviews
Touchstone Roofing & Siding
(425) 428-8053 www.touchstonehomes.net
14150 NE 20th St Suite F1-429, Bellevue, Washington
5.0 from 136 reviews
Touchstone Roofing & Siding is your trusted roofing contractor serving Bellevue and the surrounding areas. We focus on roof repair and maintenance, offering reliable solutions for homeowners and businesses. Whether you need roof repair in Bellevue or a complete roof replacement, our team is committed to delivering quality service. We also provide siding installations, gutter services, and general contracting to ensure your property is fully protected. At Touchstone Roofing & Siding, we prioritize customer satisfaction and work hard to complete every job with precision and care. Ready to improve your property’s roof, siding, or gutters? Contact Touchstone Roofing & Siding today for a free consultation and discover how we can help!
Eco Roofing Cleaning & Roof Repair
(425) 650-4703 ecoroofingnw.com
Bellevue, Washington
5.0 from 160 reviews
Eco Roofing Bellevue is a premier roof replacement company dedicated to preserving the beauty and longevity of your home’s roof. Specializing in roof replacement, roof cleaning and roof repair, we ensure that your roof not only looks pristine but also functions optimally to protect your home from the elements. Our team of experienced professionals uses the latest techniques and eco-friendly solutions to remove moss, algae, and debris effectively, preventing potential damage and maintaining your roof’s integrity.
Orca Roofing & Exteriors
(425) 584-6722 www.orcaroofing.com
16301 NE 8th St Suite 253, Bellevue, Washington
5.0 from 81 reviews
We are a Bellevue-based company serving the Puget Sound Region. We don't have salespeople; we have roofers who manage your project from start to finish. As CertainTeed ShingleMaster Select roofers, we are among the 1% of companies that provide workmanship warranties, offering 50-year coverage on labor, disposal, tear-off, and materials. We don't cut corners to ensure the highest standards of projects. We offer complete commercial and residential roof replacements and specialize in various roof types including asphalt shingles, standing seam metal, low slope, and tile (being the only Brava-preferred contractor in Washington). We also offer roof cleaning, attic insulation, gutter, window, siding, skylights, and deck replacement services.
Three Tree Roofing
(425) 230-3300 www.threetreeroofing.com
1400 112th Ave SE, Bellevue, Washington
5.0 from 46 reviews
Three Tree Roofing is proud to be the trusted Bellevue roofers that homeowners and businesses rely on. Our company approaches every project with a customer-centric focus. Our team brings years of experience, care, and craftsmanship to every project. We believe a strong roof does more than keep out the rain; it adds comfort, value, and peace of mind to your property. From asphalt shingles to metal and flat roofing systems, we provide solutions designed to handle the unique climate of the Pacific Northwest. What sets us apart is our commitment to clear communication, reliable scheduling, and treating every home like it is our own. At Three Tree Roofing, we are here to make sure your roof looks great, performs well, and stands strong for years
TH Roofing Company
(425) 866-4284 throofingcompany.com
Bellevue, Washington
5.0 from 41 reviews
H ROOFING COMPANY provides roofing solutions that will fit your budget, we serve residential and commercial projects, we do repairs, maintenance and even new construction. While we are in the development of the roof installation, we will always maintain communication with the owner of the work to keep informed about the progress. Always at all times we will give all our effort to do things right from the beginning and above all meeting the expectations of all our customers is one of our main objectives. At TH ROOFING COMPANY, our commitment is always to quality in workmanship, to use the best brands of roof manufacturers and in this way ensure the total satisfaction of all our clients.
Brooks Roofing & Repair
(425) 209-3829 brooksroofbellevue.com
11900 NE 1st St suite 509, Bellevue, Washington
5.0 from 35 reviews
Brooks Roofing & Repair provides professional roofing services in Bellevue for residential and commercial properties. Whether you need a quick leak repair, storm damage restoration, or a complete roof replacement, our experienced team delivers dependable solutions using high-quality materials. We work with all major roofing types and focus on long-lasting craftsmanship. Choose Brooks for trusted service and durable protection.
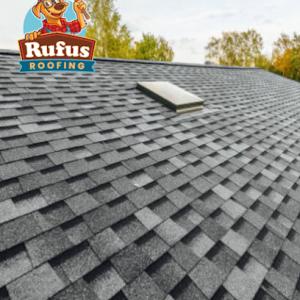
Rufus Roofing
(206) 739-0022 www.callrufusroofing.com
12207 NE 8th St, Bellevue, Washington
5.0 from 27 reviews
The #1 Roofing Contractor in the Puget Sound Area. We take pride in giving our clients a 5-star experience, from consult to completion of project
EA CONSTRUCTION LLC | Roofing Specialist
(425) 496-3158 eaconstructionwa.com
Bellevue, Washington
5.0 from 19 reviews
At EA Construction, we are your trusted roofing experts in Kirkland, WA, specializing in residential and commercial roofing services. Our team handles roof repairs, roof replacements, new roof installations, re-roofing, and roofing upgrades. Whether you need asphalt shingles, metal roofing, or flat roof solutions, we deliver high-quality results at competitive prices. Proudly serving Kirkland and surrounding areas. Contact us today for your FREE roofing estimate!
Silva Roofing & Repair
(206) 592-2492 silvaroofingandrepair.com
Bellevue, Washington
5.0 from 18 reviews
Based in the heart of Des Moines, WA. Roofing services including roofing repair, replacement, and installation! Other roofing services include gutter installation, gutter cleaning, and skylight installation! Silva Roofing and Repair, LLC is a trusted family-owned business specializing in roofing and repair services. Our small yet dedicated team takes pride in delivering top-notch craftsmanship and personalized attention to every project. Whether it's a minor repair or a complete roof replacement, you can rely on Silva Roofing and Repair to provide reliable solutions tailored to your needs. Trust Silva Roofing and Repair to safegaurd your property! Contact Silva Roofing and Repair, LLC to get a free quote! Licensed and bonded.
Four Seasons Roofing & Remodeling
(425) 388-9906 fourseasonsroofing.com
2018 156th Ave NE Suite 100 Bldg. F, Bellevue, Washington
4.6 from 71 reviews
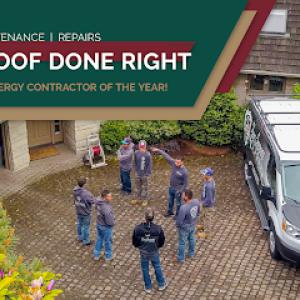
Four Seasons Roof & Remodel Services, Inc. is a locally owned company focused on providing quality roofing services for your home. With Four Seasons, you get a reliable, trustworthy and experienced team ready to take on whatever job you have. We were established in 1996, and offer lifetime warranted Metal Roofing, Cedar Shake, Rubber and Tile, among other materials. We are accredited by the Better Business Bureau with an A+ rating, and we are honored to have won the prestigious Puget Sound Energy Contractor of the Year Award for excellence in our field. Contact us today, as we are more than happy to provide you with a free estimate.
NearMe Roofing Company
(206) 487-4380 www.nearmeroofingcompany.com
Serving
4.9 from 338 reviews
Near Me Roofing Company, headquartered in Seattle, is a leader in residential roofing services, providing top-tier roof replacements, repairs, and cleaning across King, Snohomish, and Pierce Counties. We pride ourselves on offering the best in terms of pricing, quality, and availability, ensuring that our clients receive exceptional value and superior service every time. Whether you need a quick repair or a full roof replacement, our skilled team is ready to deliver prompt, reliable, and cost-effective solutions.
Emerald Mountain Roofing
(425) 698-3076 www.emeraldmountainroofing.com
Serving
5.0 from 65 reviews
Emerald Mountain Roofing, owned by Steve Rose with over 40 years of experience, offers top-tier roofing services in Lake Stevens, WA & all surrounding areas. We provide free estimates and prioritize transparent communication to ensure our clients are always informed. Known for our reliability and punctuality, we deliver on-time roofing solutions for homes and businesses. Our commitment to quality extends to our thorough post-construction cleanup, ensuring your property remains spotless. Trust Emerald Mountain Roofing for professional and dependable roofing services.
In this market, the base material price is just the starting line. The typical ranges you'll see for a full reroof are driven upward by Eastside labor costs and the extra time needed to coordinate weather windows. Asphalt shingles run roughly from 350 to 650 USD per square, a spread that reflects differences in shingle quality, warranty, and the labor intensity of steep or multi-plane roofs common in Eastside neighborhoods. Metal roofing sits higher, roughly 700 to 1300 USD per square, with price bumps for installation complexity, precision flashing, and roof-penetration work around mature trees and skylights. Clay tile can push higher still, about 1200 to 2800 USD per square, where weight, underlayment upgrades, and careful layout around dormers and angles matter. Concrete tile typically lands around 1000 to 2600 USD per square, with cost variation tied to legwork of heavy lifting, roof slope, and staging. Wood shingles or shakes are often 750 to 1800 USD per square, reflecting labor intensity and strict elevation of maintenance in wooded settings. Synthetic or composite shingles fall roughly between 520 and 900 USD per square, offering a balance of install ease and durability in sometimes challenging Bellevue weather.
Pricing in Bellevue is noticeably higher when the roof design includes steep sections, multiple peaks, or a canopy of trees that complicates access. Tree cover increases tear-off and cleanup time, while steep access adds safety scaffolding and methodical staging, both elevating labor hours beyond the material base. Complex roof designs-lots of hips, valleys, and transitions-also require more seam work, flashing, and careful water management. Expect additional days of staging and more meticulous debris handling to keep yards and driveways clear for neighbors and crews alike.
Dry-season windows are essential for minimizing moisture intrusion, especially when heavy precipitation can interrupt project flow. Bellevue's wet season tends to compress available installation days, so buyers should build in cushion days for weather delays and for coordinating with favorable drying times after tear-off. Because the neighborhood mix ranges from traditional craftsman to hillside mansions with intricate silhouettes, factor in extra lead time for ordering specialty underlayments or fasteners if your roof design demands it. A well-planned calendar helps avoid rushed work during peak demand and reduces the chance of moisture exposure between stages.
Don't let upfront costs delay a critical repair - these contractors offer payment plans to fit your budget.
Roofing Guys Bellevue
(425) 946-2280 www.roofingrepairguy.com
11900 NE 1st St, Bellevue, Washington
5.0 from 26 reviews
In this market, a full reroof typically requires a building permit, with plan review handled by the City of Bellevue Development Services. The permit process is not just a formality; it sets the project timeline and ensures the design meets neighborhood drainage, fire safety, and structural standards. For homes perched on treed hillsides or near shoreline views, having the city's review aligned with your contractor's sequencing helps prevent delays caused by last-minute changes.
Plan review in Bellevue is a collaborative phase. You submit roof system specifications, venting details, underlayment, and any roof penetrations for review. Depending on the project scope, reviewers may request clarifications or adjustments to meet code and site-specific conditions. Expect some back-and-forth, especially if the roof affects massing, drainage paths, or utility access. Keep the approved plans accessible on site for the duration of the work.
Inspections are a core checkpoint in Bellevue's process. Inspections are required at stages such as pre-sheathing and final. The permit must be posted on-site during the work, clearly visible from the street, so inspectors and neighbors can confirm the project is active and up to code. If setbacks or high-wind zones apply, additional inspections might be scheduled to verify fasteners and flashing meet local requirements for the wet season's moisture load.
Because permit processing and inspection scheduling affect start dates, reroof timelines should be understood as city review plus contractor coordination, not only installation days. Your contractor will need to coordinate with the Development Services office for review milestones and with written approvals in hand before crews can progress to the next phase. This coordination reduces the risk of weather-driven standstills wrapping around a permit hold.
Practical scheduling tips emerge from Bellevue's climate and permit cadence. Plan to align dry-weather windows with plan approvals, and anticipate review timeframes that can stretch during peak seasons. Share site access expectations with the crew-gated neighborhoods and hillside driveways can slow inspections-and ensure the posted permit remains visible until final. Proper timing helps keep moisture intrusion risks low while the project advances toward completion.
In this area, insurers typically respond to weather-related roof claims with documentation review and adjuster visits rather than automatic approval based on contractor opinion alone. Your expectations should be grounded in the reality that a thorough file with photos, dates, and progression of damage matters more than any single contractor assessment. The timeline can stretch through the wetter months when moisture is already an issue, so timely, accurate documentation helps prevent gaps in coverage.
A claim that involves reroof work can influence future insurability, especially if the work is not clearly documented as permitted and code-compliant. Carriers in this market increasingly evaluate wind resistance, impact performance, and installation quality when assessing risk after a claim. If previous repairs were hurried or poorly documented, coverage decisions later on may reflect higher scrutiny or limited options. Neighbors report that consistent quality and traceable workmanship can matter as much as the immediate repair itself.
During winter and shoulder-season storms, document leaks, interior staining, fallen branches, and exterior roof damage quickly because moisture evidence can change fast in ongoing rain. Clear, timestamped photos from multiple angles, plus notes on when you first noticed water intrusion, help anchor the claim. If you can safely access the attic, observe for condensation, damp insulation, or visible daylight through decking, and relay those observations to your insurer with precise dates. A prompt, organized record reduces surprises when adjusters review the file.
Connect with contractors who help homeowners navigate the claims process from damage assessment to final approval.
Touchstone Roofing & Siding
(425) 428-8053 www.touchstonehomes.net
14150 NE 20th St Suite F1-429, Bellevue, Washington
5.0 from 136 reviews

Brooks Roofing & Repair
(425) 209-3829 brooksroofbellevue.com
11900 NE 1st St suite 509, Bellevue, Washington
5.0 from 35 reviews

Four Seasons Roofing & Remodeling
(425) 388-9906 fourseasonsroofing.com
2018 156th Ave NE Suite 100 Bldg. F, Bellevue, Washington
4.6 from 71 reviews
Flat and low-slope roofing matters in Bellevue because the city includes a mix of modern custom homes, multifamily buildings, and commercial structures where drainage performance is critical during long rain stretches. Wet seasons dominate, so any design or material choice that hinders water movement can quickly become a moisture issue. This section focuses on practical checks you can perform before finishing a remodel or adding a low-slope segment to an existing roof.
Bellevue's frequent wet weather makes ponding, clogged drains, and membrane seam issues more consequential than in drier inland markets. Start by confirming that drainage paths are unobstructed and slope conforms to spec. Check for standing water after a steady rain and within a 48-hour window to ensure above-shear movement is adequate. Pay particular attention to scuppers, interior gutters, and downspouts near low areas, as even small reductions in drainage capacity can create long-lasting moisture pockets.
Low-slope sections are often mixed into otherwise pitched roof designs on remodels and additions, creating transition details that deserve separate inspection. Inspect transitions where a flat plane meets a steeper surface; these junctions often develop seam leaks, edge fastener corrosion, or underlayment gaps. Ensure flashing at parapets, curbs, and skylight boundaries is continuous and properly sealed. In Bellevue, local geometry frequently yields complex drainage paths-document these carefully and verify that membrane terminations remain overlapped and protected.
Establish a scheduled inspection cadence adjustable to the wet season. After heavy rains or wind events, recheck seam placements and fastener security in low-slope areas. Keep a proactive habit of removing debris from drains and ensuring that cap sheets and edge metals remain free of moss or organic buildup that can trap moisture.
Find specialists in TPO, EPDM, and built-up flat roofing systems for residential and commercial properties.
Orca Roofing & Exteriors
(425) 584-6722 www.orcaroofing.com
16301 NE 8th St Suite 253, Bellevue, Washington
5.0 from 81 reviews
Three Tree Roofing
(425) 230-3300 www.threetreeroofing.com
1400 112th Ave SE, Bellevue, Washington
5.0 from 46 reviews
Brooks Roofing & Repair
(425) 209-3829 brooksroofbellevue.com
11900 NE 1st St suite 509, Bellevue, Washington
5.0 from 35 reviews