Last updated: Apr 19, 2026
Scarborough sits on Maine's southern coast, so roofs are exposed to nor'easters that bring wind-driven rain, wet snow, and gusts that can lift shingles and stress flashing. That combination means even a minor crack or loose seam can become a pathway for water intrusion during a storm. The salt air near marshes and shoreline accelerates corrosion on metal fasteners and flashing, making an otherwise solid roof more vulnerable to progressive damage after a heavy wind event. In short, this climate pushes small weaknesses into bigger problems quickly, especially on older or flatter roof planes common in coastal homes.
Winter freeze-thaw cycles in coastal Cumberland County can reopen small shingle cracks and underlayment weaknesses, especially after snowpack and daytime melting. When moisture is trapped under shingles or flashing and temperatures swing above and below freezing, those micro-fissures expand and contract, widening over weeks. By the time a thaw comes, you could be looking at accelerated asphalt shingle granule loss, lifted edges, or a dislodged vent boot. If that snowpack sits on the roof for extended periods, meltwater has a direct path to any compromised spot, seeping into attic spaces and drawing heat loss into a vicious cycle that invites mold and ceiling staining.
Homes closer to the Scarborough shoreline and marsh-influenced areas face added moisture and salt-air exposure that can shorten the life of metal fasteners, flashing, and sealants. Salt exposure means corrosion can puncture through fasteners and tie-ins sooner than inland equivalents, and poorly sealed skylights or dormers become magnet points for salt-laden spray during storms. In wind-driven rain events, flashing that looks intact can fail under duress where roof-to-wall transitions meet high wind pressures. This is not a long-term issue in isolation-it compounds existing wear from snow and salt, risking sudden leaks right after a nor'easter.
After a coastal storm, walk the roof only if it's safe. From the ground, look for lifted shingles, dark stains along eaves, or granules found in gutters. Inspect visible flashing at corners, vents, and skylights for loose nails or gaps. If a ladder must be used, have a helper steady it and avoid roof-slope angles that feel unstable. In the attic, check for dampness, musty smell, or daylight showing through roof deck seams. Any confirmed or suspected damage should trigger a professional inspection, focusing on flashing integrity, underlayment condition, and fastener corrosion.
Between late fall storms and early spring thaws, schedule a thorough inspection that prioritizes the sea-facing side of the roof. Clear debris from gutters with care to avoid slick surfaces, and ensure downspouts pour away from the foundation. Apply corrosion-resistant coatings or sealants to exposed metal components if advised by a local roofer, especially around coastal flashings. Consider upgrading vulnerable fasteners to stainless or coated variants where salt exposure is highest, and reinforce any compromised shingles or underlayment edges before the first big melt. If a snow pack forms, remove it safely from eaves and low-slope sections to reduce palpitations of ice dam formation, but never by standing on a fragile, icy roof.
Coastal Maine weather means winters bring cold snaps, wind-driven snow, and salt spray that can complicate roof work. Snow loads and freezing temperatures make reliable installation difficult, so replacement timing naturally shifts toward late spring and early fall. The goal is to avoid the harshest cold and unstable conditions, while still finishing before the next round of winter weather risks. If a roof shows signs of urgent failure during winter, plan temporary measures to bridge to a milder window rather than forcing a start during a deep freeze.
Heavy spring rains in southern Maine raise leak risk on aging roofs, especially for asphalt systems that have seen several winters of exposure. A proactive pre-spring inspection helps pinpoint flashing gaps, worn sealants, and vent-boot deterioration before the rains become relentless. In practice, schedule a thorough roof check as soon as the thaw begins and before active spring storms arrive. Prioritize any shingles that are curling, missing, or showing exposed fasteners. Addressing these issues early reduces the chance of interior leaks during stormier weeks later in the season.
Summer heat in coastal Maine can accelerate sealant wear and expand-and-contract cycles around flashing and penetrations. Roofs that already have flashing or vent-boot issues often show failures after hot spells. If a system is nearing the end of its life or has known weaknesses, plan any necessary reseaming, re-flashing, or vent work for a cooler spell rather than in the peak heat of July or August. Addressing these items before the hottest stretch can prevent localized leaks during sudden heat-driven roof movement and sun exposure.
Fall offers a practical window to complete reroofing tasks after the humidity drops and before the first heavy snows. This period tends to provide stable temperatures for sealant cure and for the installation crew to lay down underlayment and shingles without weather-induced delays. Use the fall window to finalize details that affect moisture control, such as attic ventilation checks, underlayment integrity, and flashing alignment around eaves and chimneys. Ensuring these elements are solid before winter reduces the risk of winter-time leaks and wind-driven damage when Nor'easters start up again.
Scarborough's coastal storms can expose roofs to wind-driven water intrusion and salt-accelerated corrosion on metal components. The practical approach is a seasonal rhythm: inspect after winter, reinforce or replace vulnerable areas in late spring, monitor through summer heat, and complete fall work to lock in protection before winter returns. For homes with history of storm or ice damage, establish a short annual review with a trusted local roofer to catch emerging issues early and keep the roof resilient through the coast's full seasonal cycle.
Get a clear picture of your project costs upfront - no commitment required.
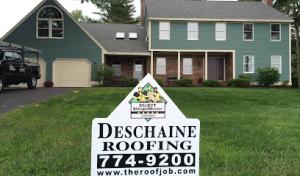
David J. Deschaine Roofing
(207) 774-9200 www.theroofjob.com
15 Pond View Dr, Scarborough, Maine
4.8 from 70 reviews
David J. Deschaine Roofing
(207) 774-9200 www.theroofjob.com
15 Pond View Dr, Scarborough, Maine
4.8 from 70 reviews
David Deschaine Roofing offers professional roof replacement & roof repair services for both residential & light commercial properties in Southern Maine. We also install vinyl siding, replacement windows and seamless gutters. Our installation crews will get you new roof or siding installed quickly and professional to help make your home look beautiful. We are fully insured and have thousands of references of happy customers. Call Us Today For A Free Estimate or go to our website and schedule you appointment online.
Unparalleled Roofing
(207) 536-2886 www.unparalleledroofing.com
Scarborough, Maine
5.0 from 4 reviews
Every home should have a reliable roof. If you're in Windham, Scarborough, ME or the surrounding area, Unparalleled Roofing is your go-to resource for all things roofing. Our local roofing company has proudly offered residential and light commercial roofing services throughout this area for the last seven years and counting. You'll have peace of mind when our skilled team is handling your roof concerns.
James & Whitney
(207) 869-5062 jameswhitneyco.com
Serving
4.9 from 141 reviews
James & Whitney, Maine’s trusted exterior specialists since 2008, proudly serves homeowners with expert roofing, siding, and gutter installations. Our dedicated team is committed to clear communication, innovative solutions, and delivering results that exceed expectations. We provide seamless service at every phase of your project—from the initial consultation to final installation—ensuring an exceptional experience and lasting quality.
HRM Roofing & Construction Company
(207) 776-9844 www.hrmroofingcompany.com
Serving
5.0 from 34 reviews
HRM Roofing is here to assist with all your roofing needs. Our roofing contractors in Portland, ME, ensure quick and efficient service delivery within the city. Make a note of our location and reach out to us for reliable and professional roofing services.
Horch Roofing
(207) 223-7022 horchroofing.com
Serving
4.9 from 168 reviews
Horch Roofing is a trusted provider of residential and commercial roof replacement, installation, and maintenance, as well as skilled gutter cleaning and installation. Whether you want rubber, asphalt, or metal roofing, we're the go-to choice. Since 2003, we've been ensuring properties in Falmouth, South Portland, Brunswick, Scarborough, Bath, Cumberland County, Freeport, Portland, Cape Elizabeth, and the area have the highest quality roofing. With our team of vetted roofing contractors and installers, you'll protect your home or business for many years to come and even improve its value. We're competent, efficient, and committed to providing you with eco-friendly services that will not only meet but also exceed your expectations.
C.M.L Roofing & General Contracting
Serving
4.9 from 221 reviews
CML Roofing & General Contracting is a local roofing and exterior remodeling contractor serving Southern Maine, including Portland, Falmouth, Cape Elizabeth, Westbrook, and nearby towns. We specialize in roof replacement and repair, skylights, siding, gutters, decks, windows, and doors. Our hard-working team brings decades of experience and backs your project with a 25-year workmanship warranty. With free, accurate quotes, financing options, and a focus on quality craftsmanship, we treat every home as if it were our own. Whether you need a minor roof leak repair or a full roof replacement, our local roofing company is here to help year-round.
A&J Construction
(207) 423-8797 aj-constructionme.com
Serving
5.0 from 31 reviews
Need trusted roofing help for your home or business? We offer fast and reliable roof repair and replacement. As a leading roofing contractor in Portland ME, we handle all types of roofing problems. From storm damage to leaks, we fix it all with care. A and J Construction takes pride in delivering quality work at fair prices. Our team works with shingles, metal, flat roofs, and more. We make sure your roof is strong and safe. Whether you need a small repair or full roof replacement, we are ready to help. Many homeowners and businesses choose us for lasting results. We also work with top construction contractors in Portland ME to complete every job the right way. Call now and schedule your free estimate with our team.
Superior Roofing
(207) 702-7663 superiorroofingofmaine.com
Serving
4.9 from 792 reviews
The crew at Superior Roofing provides reliable roofing solutions for homes and businesses. We work with shingle, rubber, and asphalt roll roofs, offering quality installations and long-lasting repairs. Whether you need a new roof for a construction project or a reroofing service to replace an aging system, we have the skills to handle it. If you're looking for a roofing contractor Windham, our team is ready to get the job done efficiently. No matter your roofing needs, we focus on delivering dependable service. Contact Superior Roofing today to schedule an appointment or get a quote!
E.W. Cole Home Improvements
(207) 415-8289 www.ewcolehomeimprovements.com
Serving
5.0 from 9 reviews
E.W. Cole Home Improvements is a general contractor specializing in roofing and siding installations in the Greater Portland, ME area. We install all types of roofing - metal roofing, shingle roofing, rubber roofing, as well as all types of siding - vinyl siding, cedar siding, fiber cement siding, etc. We also provide our customers with services that include door & window installation, deck & railing installation, roof inspections, and roof repairs, as well as many other contracting services. Contact us today to schedule an appointment.
M & Son Construction. Residential & commercial
(207) 956-1528 www.mandsonconstruction.com
Serving
4.8 from 72 reviews
M and Son Construction. Commercial and residential is a Contractor located in Portland, ME. We offer Roofing, Residential Roofing, Commercial Roofing, Metal Roofing, Siding, Windows, Framing, Doors, Interior Renovations, Exterior Renovations, Masonry, Decks, Commercial Services, Residential Services, Interior Painting, Exterior Painting, and other Contractor Services. We have a large, ready to work, crew! When we work for you, you are not only a customer but a friend. Call us now
J P & Family
(207) 253-5004 www.jpandfamilyinc.com
Serving
4.6 from 33 reviews
JP & Family is a home improvement business, we offer roof replacements, asphalt roofs, and rubber
Sensible Home Solutions
(978) 519-7802 www.sensiblehome.com
Serving
5.0 from 7 reviews
Sensible Home Solutions "Your Home, Our Duty-Designed with Integrity, Powered by Service, The Sensible Solution" As a veteran-owned and operated home improvement company, we specialize in roofing, siding, windows, HVAC, and electrical work. We deliver expert craftsmanship with honesty and reliability. Our mission is to protect your home with top-quality materials, energy-efficient solutions, and industry-leading warranties. From durable roofs to high-performance HVAC systems, we ensure every project is done right, on time, and at a fair price. With free estimates, transparent pricing, and a commitment to excellence, we make home upgrades stress-free. Trust experience. Trust integrity. Trust Sensible Home Solutions.
In this coastal town, roof design must contend with strong nor'easters, salt air, and heavy winter snow loads. The combination of wind exposure and moisture pushes two priorities to the front: wind resistance and moisture management. A roof that sheds snow efficiently and resists wind uplift helps minimize leak paths and ice dam risks. Materials and profiles that favor tight seams, sturdy fastenings, and solid underlayment choices pay off over the long run. The shoreline and marsh edges introduce additional salt exposure that can accelerate corrosion on metal components and fasteners if coatings aren't up to the task. Planning your roof around these conditions means prioritizing robust edge detailing, well-sealed penetrations, and periodic inspections after major storms.
Asphalt shingles and metal roofing are the most practical fits for Scarborough's mix of snow load, wind exposure, and common New England residential rooflines. Asphalt shingles offer straightforward installation, reliable wind resistance when a high-quality underlayment and proper nailing pattern are used, and a familiar maintenance rhythm for many local homes. Metal roofing brings exceptional wind performance, lighter weight relative to some other options, and robust resistance to moisture intrusion when installed with corrosion-resistant fasteners and proper flashing. Both choices align well with typical Scarborough rooflines, which often feature modest slopes and straightforward geometry that benefit from durable, easily serviceable systems.
Clay and concrete tile appear in the market data but are less naturally aligned with Scarborough's cold, snowy climate because freeze-related stress and structural weight are bigger considerations here than in warmer regions. Tile can struggle under freeze-thaw cycles, and the added weight requires a re-evaluation of roof structure to handle long-term snow loads. If tile is ever contemplated, it should be paired with a detailed structural assessment and a climate-specific installation plan to mitigate these risks. For most homes in this area, tile remains a less common, more specialized option rather than a go-to choice for new installs.
Wood shingles and shakes can suit coastal aesthetics in southern Maine, but moisture exposure and seasonal weather swings make maintenance discipline more important than in drier inland climates. Wood gives a classic look that complements salt-washed siding and coastal landscapes, yet it demands proactive care: regular treatments, vigilant moss and mildew control, and timely replacement of damaged sections after storms. In high-wind poses or salt-rich atmospheres, wood repeatedly shows up as a design choice with a corresponding maintenance commitment, so homeowners should plan for more frequent inspections and potential refinishing.
Regardless of the core material, a well-sealed roof with a quality underlayment is essential in this environment. Pay special attention to flashing around chimneys, dormers, and vent penetrations, as these are common leak points after winter storms. Snow guards or snow stops can help manage sliding snow on steeper sections, reducing the risk of ice dams below. Regular inspections after heavy winds or nor'easters are wise, focusing on fasteners, sealants, and any corrosion-prone metal components. For wood-based roofs, stay vigilant about moisture-related issues and consider a professional treatment schedule to extend life. With asphalt or metal, a proactive maintenance habit-clean gutters, clear debris, and prompt repair of damaged areas-keeps the roof performing well through Scarborough's seasonal rhythms.
Average installed costs in Scarborough run about $350-$700 per square for asphalt shingles, $650-$1400 for metal, $900-$1800 for clay tile, $900-$1800 for concrete tile, $500-$900 for wood shingles or shakes, and $450-$900 for synthetic or composite shingles. Those figures reflect local material sourcing and the lots of labor time that coastal homes require, especially when upgrading from older materials. In practice, a simple, inland-style roof swap can drift toward the lower end, while Scarborough's mix of exterior features often pushes projects into the mid-to-upper ranges.
Coastal storm and winter weather conditions push costs higher. When a major coastal storm hits, southern Maine contractors are juggling emergency repairs and regional demand spikes, which can increase roofing and repair pricing for a period after the event. If a roof is damaged by high winds or heavy snow and an immediate repair is needed, expect expedited scheduling fees, temporary tarps, and faster material turnaround, all of which can elevate the bottom line. Standards for sealing around chimney penetrations, skylights, and weather-exposed flashing tend to add labor time compared with inland homes.
Scarborough's older coastal homes frequently feature chimney penetrations, skylights, and weather-exposed flashing details that require careful flashing integration and more precise brick/concrete transitions. This often translates to higher labor hours and slightly higher waste removal costs. The coastline also means salty air can accelerate fastener corrosion, encouraging higher-quality fasteners and longer-term warranty considerations. Expect more detailed inspections and potentially multiple access points on a roof with complex framing, which adds to overall cost but improves long-term performance.
If damage is limited to shingles or minor flashing, costs may stay on the lower end for asphalt or synthetic shingles. However, upgrading to a metal roof or tile option in this area can significantly affect both upfront cost and long-term resilience against Nor'easter winds and snow loads. When budgeting, consider the trade-off between initial price and future maintenance, especially in a climate where moisture control and wind resistance are central homeowner concerns.
Don't let upfront costs delay a critical repair - these contractors offer payment plans to fit your budget.
In this coastal town, a full roof replacement generally requires a building permit before any shingle, metal, or tile work begins. The permitting process isn't just a formality; it helps ensure that the new roof meets Scarborough's wind resistance and moisture-control standards, which are especially important with the nor'easter winds and salt air you contend with. A common misstep is starting work without confirming permit status, only to face delays or stop-work orders once the code official notices the activity. To avoid that, talk with your chosen contractor about the permit early, and have them place the application with the Town of Scarborough at the outset. The steps tend to move more smoothly when a clear plan exists for the roof's fastening, underlayment, and ventilation-elements that influence performance in heavy snows and salty coastal air.
Permits are submitted to the Town of Scarborough Code Enforcement Department. This department keeps a close eye on projects that affect the exterior enclosure of the home, and a roof is no exception. When you apply, you should expect to provide details about material type, roof pitch, drainage, and attic ventilation; locally, these specifics tie directly to weatherproofing and the structure's ability to shed snow and resist wind uplift. Since inspections hinge on code compliance, having precise, up-to-date drawings or product specs on hand can prevent back-and-forth that costs you time. A neighborhood note: the closer alignment between your plan and Scarborough's climate expectations often translates into fewer surprises later in the project.
Inspections are scheduled during and after installation to verify code compliance and weatherproofing before the project is considered complete. The first inspection typically checks the underlayment, flashing around chimneys and vents, and the proper installation of ventilation to reduce moisture buildup under the roof. A subsequent inspection examines the finished surface, fasteners, and edge details to confirm that wind resistance and sealing hold under Maine's coastal conditions. If the inspection finds gaps or issues, the contractor must address them before the building is signed off. In Scarborough, a thorough inspection sequence helps ensure that the roof will endure winter storms and salt exposure, and it protects you from costly callbacks after a harsh season. Being prepared for inspections with clear communication and access will keep the project moving and prevent weather-related delays from turning into longer outages.
Scarborough's coastal exposure means insurers often focus on wind uplift, winter storm damage documentation, and condition evidence before settling roof claims. The combination of nor'easter winds, salt air, and heavy snow can leave subtle signs that only become clear after a storm passes. When a claim is filed, expect the adjuster to scrutinize not just the visible damage but the roof's overall condition, how well fasteners and underlayment held up, and any prior repairs that might influence accountability. This scrutiny is less about drama and more about ensuring the claim reflects long-term vulnerability to Scarborough's harsh weather, not isolated incidents.
Homeowners should expect adjusters to request photo documentation, depreciation estimates, and additional file review for storm-related roof losses in this market. Take clear photos from multiple angles, including interior attic evidence of moisture intrusion or framing concerns, and timestamped images of damaged areas after a storm. Preserve receipts and records of recent maintenance-especially sealant work, flashing repairs, and chimney or vent kickouts. Depreciation estimates can complicate settlement timelines, so organize a simple file that tracks when damage occurred, what materials were original, and any upgrades intended to reduce future risk. A concise narrative pairing photos with dates can help an adjuster see the full picture beyond the visible shingles.
State-level premium pressure in Maine affects roof decisions because replacement timing, material choice, and proof of storm damage can influence future quotes. Insurers weigh not only the damage itself but the likelihood of recurrence under coastal conditions. Replacement materials with proven wind resistance and moisture management can shift future premium considerations, so how a claim is documented now may affect upcoming renewal discussions. In practice, that means being precise about where and how damage occurred-whether from wind-driven debris, ice damming, or salt-soaked components-helps anchor a claim in the realities of Scarborough's climate rather than in generic storm storytelling.
Chimneys on traditional New England homes here are a visible and recurring part of the local contractor market. Mortar joints dry out faster with salt spray and freeze-thaw cycles, and flashing where the chimney meets the roof is a common failure point after winter storms. Inspect the chimney crown for cracking and ensure the step and counter-flashing are firmly sealed to the metal or shingles above. When a contractor trims around masonry penetrations, expect some masonry repair nearby; this is not a sign of poor roofing, but of the combined aging of masonry and roofing under windy, wet conditions. If a chimney cap is missing or ill-fitted, wind-driven rain can funnel into the attic or above the flashings, so verify cap condition and fit as a preventive step. In areas with heavy winter loading, look for cracked mortar and loose bricks that can shift when temperatures swing; address these before permeation worsens through the roof line.
Skylight repair is a recurring specialty locally, with leaks often tracing to curb flashing and aging seals. Start with a visual check for pool marks along the skylight curb and any staining on the inside ceiling near the skylight. Curb flashing should slope toward the exterior to shed water; if it appears lifted or corroded, resealing or re-flashing is warranted. Seals around the unit degrade due to sun, salt spray, and freeze-thaw cycling, so replace brittle gaskets and re-caulk with a durable, UV-resistant sealant. Wipe away any debris that can hold moisture at the curb and ensure the flashing integrates properly with adjacent shingles or metal edging. For persistent leaks, trace the path of moisture with a light pencil line on the interior ceiling to map leakage from the curb toward the interior as a guide for the repair.
In wind-driven rain and freeze-thaw conditions, penetrations often fail before the main field of roofing does. Check around both chimney and skylight penetrations after storms: look for rusted or loose fasteners, lifted flashing, and gaps at joints. Use a garden hose on a broad spray from below the ridge to simulate rain and watch for seepage paths inside the attic. If interior staining appears along a seam line or under a flashing, re-seal and re-flash as needed, prioritizing the most obvious entry points first.
Find contractors experienced in skylight installation, flashing, and leak repairs to bring natural light into your home.
Flat and low-slope roofing is present in the Scarborough market but is clearly secondary to pitched residential re-roofing work. This matters most for additions, porches, mixed-use buildings, and commercial properties rather than the typical single-family roof. On these lower-slope sections, drainage performance is the main local concern, especially after heavy spring rain and snowmelt. Plan for a roof design that promotes rapid, unobstructed flow toward gutters and scuppers, with properly pitched drain edges and sufficient slope to avoid ponding. Consider wide downspouts and regularly spaced roof drains to prevent standing water that can deteriorate membranes or flashings over time.
Low-slope assemblies rely heavily on continuous membranes and robust flashing details. Choose a roof system with a proven coastline performance, capable of resisting moisture intrusion from salt air and mist. Pay close attention to seam integrity around penetrations, transitions from horizontal to vertical surfaces, and edge detailing where the roof meets parapets or chimneys. In coastal settings, salt spray accelerates corrosion on metal components, so select corrosion-resistant flashings and fasteners. Ensure that parapet walls, gutters, and interfaces with upper pitched roofs are sealed to minimize wind-driven leaks during Nor'easters.
A proactive inspection routine matters more on these lower sections due to their drainage role and exposure to winter melt. After storms, check for sump-like ponding, compromised seams, and clogged outlets. In spring, verify that flashing around skylights, vents, and curbs remains intact and watertight. Clean gutters and downspouts regularly, and remove debris that can backlog water. Schedule seasonal walkthroughs with a focus on drainage paths, membrane wear, and any settling that could affect slope or sealant performance.
Winter storms, heavy rain, and rapid thaw cycles test low-slope roofs with higher sensitivity to drainage issues. During and after Nor'easters, surface water management takes precedence over aesthetic considerations; rank repairs that restore a smooth water path and reliable discharge. When damage is detected, address it promptly to prevent moisture from migrating into underlying structure, where salt exposure can compound deterioration.
Find specialists in TPO, EPDM, and built-up flat roofing systems for residential and commercial properties.