Last updated: Apr 19, 2026
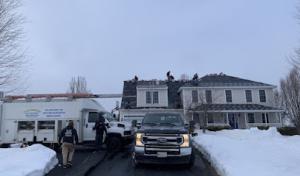
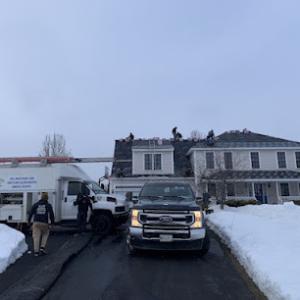
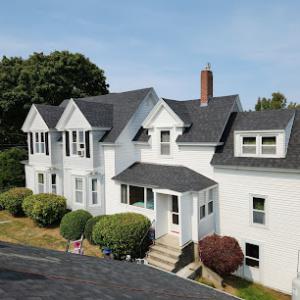
Coastal Maine winters repeatedly cycle around freezing, which is especially hard on shingles, flashing, and underlayment in Portland. The combination of salt-laden wind, high snow defensiveness, and frequent freeze-thaw cycles means the roof system endures repeated stress at the most vulnerable points. Late-winter snow load and ice damming are a recurring Portland-area roof problem, especially at eaves, valleys, and around older flashing details. On aging homes that sit on or near the peninsula, ice builds up where heat escapes through the attic and into the roof sheathing, then refreezes along the lowest edge, creating a dam that forces meltwater back under shingles. This is not a cosmetic issue-water infiltration often follows the dam into soffits, ceilings, and walls, where mold and rot quietly take hold.
Older roofing assemblies in these blocks were not built to withstand modern freeze-thaw patterns, nor to tolerate the coastal wind-driven spray that speeds salt exposure. Ventilation and insulation setups that were installed long ago can become uneven over time, producing warm spots on the roof that melt snow at the eaves while higher sections stay cold. That uneven temperature gradient is the recipe for ice dams: a warm roof edge pushes meltwater to refreeze at the gutter line, peering under shingles and through flashing. Valleys, compound roof intersections, and deteriorating flashing details around chimneys or dormers are especially prone. The salt air accelerates corrosion on metal flashing and fasteners, widening the risk of leaks after a thaw. If older insulation no longer keeps edge raves cold and dry, the dam-forming cycle becomes a yearly rhythm you can count on.
Start with attic and insulation checks. If the attic feels stuffy or looks drafty at the eaves, or if the insulation is compressed or missing near the soffit, air leaks are feeding those warm pockets. Seal gaps around penetrations and pursue a tight attic envelope to reduce heat loss into the roof. Improve venting with soffit b vents and ridge or roof vents to create a continuous flow that keeps roof surfaces closer to outdoor temperatures, slowing dam formation. In the short term, clear accumulated snow from the roof's edge carefully, using a roof rake from the ground to avoid ladder work on icy surfaces. Remove ice buildup along eaves and around gutters, but avoid chiseling or damaging shingles and flashing. If ice dams have already formed, avoid stepping on softened shingles; instead, focus on stopping the water pathway by applying temporary, approved sealing tapes or patches, then engage a professional to address the flashing and underlayment.
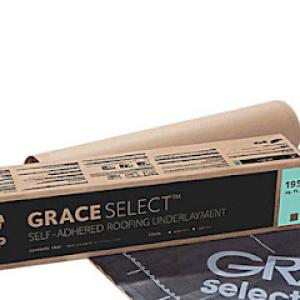
Consider a comprehensive upgrade to the roof assembly that targets both the enclosure and the heat management along the edge. Install a continuous ice and water shield along eaves and up a generous distance around valleys and chimney perimeters to block meltwater from penetrating the decking. Improve attic insulation to reach higher-than-average R-values for the region, and add or rework ventilation to create a balanced, cool roof deck during winter. Reflash and repair flashing details around dormers and chimneys with corrosion-resistant materials and secure seams to weather-tight standards. For older homes with known access or retrofit limitations, plan for staged improvements that upgrade ventilation, seal air leaks, and replace damaged underlayment in zones most affected by ice damming. When upgrading, choose materials and details that tolerate coastal exposure-durable underlayment, corrosion-resistant metal flashings, and shingles with proven performance in freeze-thaw cycles.
Portland's older housing stock often features roofs with multiple penetrations and complex geometry. Pay special attention to flashing at eaves intersections, valley terminations, and around skylights or dormer heads, where aging metalwork can fail first. In the context of the local climate, prioritize a roof deck and attic assembly that maintain consistent roof temperatures across the plane. Consider coordination with surrounding elements-gutters and downspouts should be sized and perched to promote rapid drainage of meltwater as soon as it forms, reducing the chance of backflow into the roof. In short, the most reliable defense is a well-sealed, well-ventilated roof that keeps edge temperatures close to the exterior, paired with robust, properly flashed detailing in the most vulnerable areas.
Casco Bay's wind-driven rain pattern can drive moisture right up the roofline, pushing against flashing transitions and roof-wall intersections with surprising force. On older coastal homes, where roofs meet chimneys, dormers, and skylights, a steady westerly or northerly breeze can shove damp air into seams that look tight but aren't fully sealed. Over time, this invites hidden seepage that shows up as softened sheathing, stained ceilings, or granular loss at the eaves. The takeaway is simple: even when a roof appears intact after a storm, persistent wind-driven rain can exploit small flaws in joints, fasteners, and sealants. A cautious eye on these areas-especially around vent stacks, chimney flashing, and where roof planes meet walls-can prevent slow, cumulative damage that weakens the roof deck.
Portland's salt-laden coastal air accelerates wear on metal components exposed to the elements. Fasteners, flashing, and exposed accessories may corrode faster than inland counterparts, reducing the effectiveness of waterproofing and increasing the likelihood of fastener-backed leaks. For homes with older gutters, drip edges, or metal flashings, the corrosion cycle is not cosmetic; it can loosen seals and create pathways for moisture to travel behind siding or under shingles. Regular inspection of metal-work, especially after winter thaw and during the spring storm season, helps identify staining, rust, or loose pieces before a small issue becomes a noticeable leak. When components show even minor oxidation, consider targeted maintenance rather than waiting for a dramatic failure.
Spring coastal storms in southern Maine intensify the risk of moisture intrusion even if there isn't a dramatic blow-off event. The combination of thawing snow, rain squalls, and stronger onshore winds can force moisture into overlooked valleys, eaves, and edge details. In Portland, that means roof edges and transitions deserve particular attention after winter and during early spring. Look for hairline cracks around shingles near the eaves, lifted tabs that permit wind-driven rain to travel under the surface, and poorly seated or aged underlayment in vulnerable zones. These indicators often emerge gradually, so ongoing seasonal checks are more effective than waiting for a visible crater of damage. If a roof shows wind-driven staining near joints or a damp feel in attic kneewalls after a storm, treat it as a warning sign rather than a one-off annoyance.
A practical, Portland-specific routine helps keep a roof resilient without chasing every micro-leak. Visual inspections after storms should focus on flashing around chimneys, skylights, and roof-wall intersections, plus the integrity of edge metal and drip edges. If fasteners are exposed or appear corroded, plan a targeted retrofit with corrosion-resistant options, rather than a full teardown, to preserve the existing roof deck structure. Pay attention to attic ventilation near roof-wall interfaces, since poor airflow can amplify freeze-thaw cycles and push condensation into less obvious seams. In homes with older asphalt or synthetic shingles, monitor for lifted tabs or blistering in shaded, windward corners where salt air compounds heat and moisture stress. While the sea breeze is a seasonal constant, the response is consistent: prioritize robust transitions, corrosion-resistant hardware, and proactive sealing at key junctions to limit moisture intrusion before it becomes a longer, harder problem.
Find local contractors experienced in assessing and restoring roofs after hail, wind, and severe weather events.

Mandette Roofing Plus
(207) 292-5555 www.mandetteroofing.com
94 Auburn St Ste 109, Portland, Maine
4.9 from 70 reviews

A&J Construction
(207) 423-8797 aj-constructionme.com
449 Forest Ave, Portland, Maine
5.0 from 31 reviews
M & Son Construction. Residential & commercial
(207) 956-1528 www.mandsonconstruction.com
12 Grove St, Portland, Maine
4.8 from 72 reviews
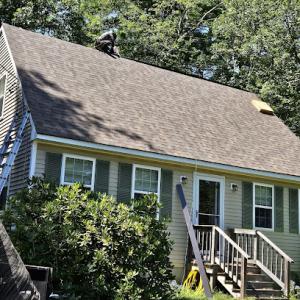
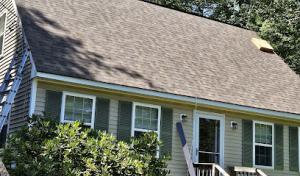
Asphalt shingles are the dominant practical choice in Portland because they fit the city's large re-roofing market and broad range of older house styles. You will find them on everything from salt-washed bungalows to more compact, historic grid plans. For ice dam prevention and freeze-thaw resilience, choose thicker, multi-layered asphalt shingles with good granule adhesion and a reinforced underlayment system. In coastal exposure, a higher wind-rated shingle can help resist wind-driven rain and salt spray at eaves and valleys. When installing, ensure proper attic ventilation and a sealed, continuous roof deck to slow heat transfer toward roof edges, which helps reduce ice dam formation on the narrow eaves that are common on older Portland homes. Seam integrity matters too: look for shingles with robust nailing zones and confirm that the roof deck is clean, dry, and free of voids before laying down new material. In practice, asphalt often pairs well with existing rooflines and adds a straightforward path to a durable, visually compatible finish for houses with mixed-age exteriors found around the peninsula.
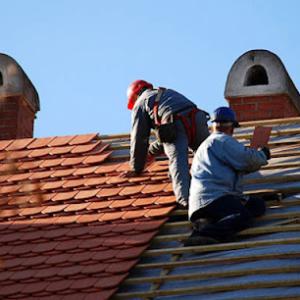
Slate remains locally relevant in Portland because the city has a meaningful stock of older and historic homes where slate is already present or architecturally appropriate. If your roof already wears slate, or if the structure and parapets suit a high-end, period-correct look, slate offers excellent longevity and a natural resistance to freeze-thaw cycles when well installed. The key here is structural soundness: slate is heavy, and older framing may require reinforcement or selective replacement of supporting members. The coastal climate demands meticulous flashing around chimneys, dormers, and eaves to prevent ice dams that can throw water inward along seams. When considering slate, plan for accurate slope management and professional setting to minimize risk of crack under winter stress. Slate can preserve architectural character while delivering strong performance against precipitation and salt-laden winds, making it a thoughtful choice for historically styled homes that already bear the material.
Clay and concrete tile are available in the market but are less typical for Portland's traditional housing stock and require attention to structural load and freeze-thaw durability. Tile can deliver excellent curb appeal and long service life, yet the added weight can necessitate structural reinforcement, especially on older builds with limited attic access or compromised joist systems. Freeze-thaw performance improves with proper headlap and ventilation, but weight, wind resistance, and potential for breakage in winter salt storms make careful assessment essential. If a tile option is appealing for a particular facade or a historic restoration, engage a licensed roofer to evaluate rafter capacity and to install underlayment and flashing that mitigate ice dam risk. In neighborhoods where tile has been historically used, it can blend seamlessly with surrounding material palettes while meeting modern durability expectations.
In this coastal, freeze-thaw environment, the material choice should prioritize a balance between compatibility with existing structures, resilience to ice dam formation, and ability to perform with limited maintenance in a humid, salt-laced air. Asphalt shingles offer practical versatility for a broad swath of the city's homes, while slate serves as a durable, heritage-aligned option where architectural context supports it. Clay and concrete tiles remain feasible but require thorough structural review and careful detailing to survive Portland's winter cycles. The best approach is to match material behavior to the specific structural realities of the house and to the visual expectations of the neighborhood, always ensuring robust attic insulation, proper ventilation, and meticulous flashing to manage meltwater and ice dams as winter tightens its grip.
In this coastal Maine setting, roof replacement costs are best understood per square, with asphalt shingles at the lower end of the market and slate at the highest end. Asphalt shingles typically run about 450 to 750 USD per square, making them the practical baseline for many mid-80s and earlier Portland homes where the budget is tight but reliability is non-negotiable. Synthetic or composite shingles land in a similar band, roughly 450 to 900 USD per square, offering better long-term performance without jumping to premium prices. Concrete and clay tiles scale higher: concrete around 800 to 1300 USD per square and clay from roughly 900 to 1500 USD per square, reflecting heavier weights and more involved installation. Fiber cement shingles sit between asphalt and the midrange composites, commonly 550 to 900 USD per square. Slate is the standout for longevity and curb appeal, but cost climbs to a wide range-roughly 1100 to 2600 USD per square-due to material expense and the meticulous work slate demands. These numbers provide a practical frame for Portland projects, with asphalt at the lower end and slate at the top end in the local market.
On older housing stock, tear-off reveals can drive the total beyond the base material cost. Damaged sheathing, sagging or inefficient ventilation, and the need for upgraded flashing or attic insulation are common after knocking off a tired roof. When inspection or underwriting reality catches those issues, expect to add structural or ventilation corrections to the replacement bill. In practical terms, a typical Portland job may escalate if the roof reveals rot or compromised decking, or if you need to upgrade soffit and ridge venting to meet air flow expectations. Budget accordingly, especially on historic or tightly spaced peninsula homes where space for staging and material handling is limited.
Demand concentrates from late spring through early fall in coastal Maine, which tightens scheduling and can affect pricing during the main replacement season. If you're aiming for a summer or early autumn install, expect tighter calendars and possible price upticks. Planning ahead, securing a solid start date, and allowing a window for weather delays helps keep the project on track without aggressive price spikes. When comparing bids, the implications of seasonality can matter as much as the material choice, particularly if crews are juggling multiple coastal projects in quick succession.
Superior Roofing
(207) 702-7663 superiorroofingofmaine.com
525 Riverside St, Portland, Maine
4.9 from 792 reviews
The crew at Superior Roofing provides reliable roofing solutions for homes and businesses. We work with shingle, rubber, and asphalt roll roofs, offering quality installations and long-lasting repairs. Whether you need a new roof for a construction project or a reroofing service to replace an aging system, we have the skills to handle it. If you're looking for a roofing contractor Windham, our team is ready to get the job done efficiently. No matter your roofing needs, we focus on delivering dependable service. Contact Superior Roofing today to schedule an appointment or get a quote!

Mandette Roofing Plus
(207) 292-5555 www.mandetteroofing.com
94 Auburn St Ste 109, Portland, Maine
4.9 from 70 reviews
Mandette Roofing Contractor. Roofing and Siding expertise in Portland ME and Nearby Cities. With over 20 years of combined experience in the roofing industry, Amanda and Eli founded Mandette to provide homeowners with the peace of mind they deserve. They understand that a roof is more than just shingles and nails - it's about protecting what matters most to you. That's why their team is dedicated to delivering exceptional client experiences and lasting results. We assist with insurance claims by performing repairs or replacements as specified by your insurance company. Our team will guide you through each step of the claims process and work directly with your insurance adjuster to ensure you receive the coverage you need for storm damage.
A&J Construction
(207) 423-8797 aj-constructionme.com
449 Forest Ave, Portland, Maine
5.0 from 31 reviews
Need trusted roofing help for your home or business? We offer fast and reliable roof repair and replacement. As a leading roofing contractor in Portland ME, we handle all types of roofing problems. From storm damage to leaks, we fix it all with care. A and J Construction takes pride in delivering quality work at fair prices. Our team works with shingles, metal, flat roofs, and more. We make sure your roof is strong and safe. Whether you need a small repair or full roof replacement, we are ready to help. Many homeowners and businesses choose us for lasting results. We also work with top construction contractors in Portland ME to complete every job the right way. Call now and schedule your free estimate with our team.
M & Son Construction. Residential & commercial
(207) 956-1528 www.mandsonconstruction.com
12 Grove St, Portland, Maine
4.8 from 72 reviews
M and Son Construction. Commercial and residential is a Contractor located in Portland, ME. We offer Roofing, Residential Roofing, Commercial Roofing, Metal Roofing, Siding, Windows, Framing, Doors, Interior Renovations, Exterior Renovations, Masonry, Decks, Commercial Services, Residential Services, Interior Painting, Exterior Painting, and other Contractor Services. We have a large, ready to work, crew! When we work for you, you are not only a customer but a friend. Call us now
Southers Construction
(603) 506-4367 www.southersconstruction.com
94 Auburn St STE 205, Portland, Maine
4.8 from 68 reviews
At Southers Construction, we focus on providing quality roofing, siding, window, deck, and door work for residents in and around Southern Maine, New Hampshire and Northern Massachusetts. Our services cover maintenance, repairs, and installations for all properties, residential or commercial. Our local and talented team of experts are here to help, providing free estimates that give you detailed information about your home. Call or contact us online today for your free estimate!
Tecta America New England
(207) 878-1732 www.tectaamerica.com
1093 Riverside St, Portland, Maine
4.9 from 11 reviews
Tecta America New England was founded as Delta Roofing in 1988, and in 2007 we became part of Tecta America, a national company with operating units from coast to coast. Our installation and service areas cover all of New England, making us one of the largest and most respected roofing contractors in the region.

Eduardo's Home Improvement
(207) 239-1761 eduardoshomeimprovement.com
410 Allen Ave, Portland, Maine
5.0 from 9 reviews
Eduardo’s Home Improvement is an insured company set up to serve each of our clients. We are made up of young but professional people who are dedicated to our work. We work with exterior and interior painting, siding, roofing, and flooring. Our goal is to always meet the expectations of our clients and work to the liking and manner that they prefer. Our experience in this field is of high quality and we always bring professionalism, quality, and kindness to each and every job. Eduardo’s Home Improvement is made up of people from various parts of Central America. Our company understands the responsibility that our clients place in our hands and therefore it is our duty to meet their expectations and requests.
E.W. Cole Home Improvements
(207) 415-8289 www.ewcolehomeimprovements.com
4 Hill St Apt 14, Portland, Maine
5.0 from 9 reviews
E.W. Cole Home Improvements is a general contractor specializing in roofing and siding installations in the Greater Portland, ME area. We install all types of roofing - metal roofing, shingle roofing, rubber roofing, as well as all types of siding - vinyl siding, cedar siding, fiber cement siding, etc. We also provide our customers with services that include door & window installation, deck & railing installation, roof inspections, and roof repairs, as well as many other contracting services. Contact us today to schedule an appointment.

Hunter Panels
(888) 746-1114 hunterpanels.com
15 Franklin St # B3, Portland, Maine
5.0 from 3 reviews
Hunter Panels, headquartered in Portland, Maine, manufactures thermal efficient Polyiso insulation for roof and wall applications. Hunter Panels currently manufactures its product from seven facilities in New York, Illinois, Florida, Texas, Utah, Washington and Pennsylvania.
C.M.L Roofing & General Contracting
Serving
4.9 from 221 reviews
CML Roofing & General Contracting is a local roofing and exterior remodeling contractor serving Southern Maine, including Portland, Falmouth, Cape Elizabeth, Westbrook, and nearby towns. We specialize in roof replacement and repair, skylights, siding, gutters, decks, windows, and doors. Our hard-working team brings decades of experience and backs your project with a 25-year workmanship warranty. With free, accurate quotes, financing options, and a focus on quality craftsmanship, we treat every home as if it were our own. Whether you need a minor roof leak repair or a full roof replacement, our local roofing company is here to help year-round.
Horch Roofing
(207) 223-7022 horchroofing.com
Serving
4.9 from 168 reviews
Horch Roofing is a trusted provider of residential and commercial roof replacement, installation, and maintenance, as well as skilled gutter cleaning and installation. Whether you want rubber, asphalt, or metal roofing, we're the go-to choice. Since 2003, we've been ensuring properties in Falmouth, South Portland, Brunswick, Scarborough, Bath, Cumberland County, Freeport, Portland, Cape Elizabeth, and the area have the highest quality roofing. With our team of vetted roofing contractors and installers, you'll protect your home or business for many years to come and even improve its value. We're competent, efficient, and committed to providing you with eco-friendly services that will not only meet but also exceed your expectations.
HRM Roofing & Construction Company
(207) 776-9844 www.hrmroofingcompany.com
Serving
5.0 from 34 reviews
HRM Roofing is here to assist with all your roofing needs. Our roofing contractors in Portland, ME, ensure quick and efficient service delivery within the city. Make a note of our location and reach out to us for reliable and professional roofing services.
Portland generally requires a building permit for a full roof replacement rather than treating it as permit-free maintenance. This distinction matters because a full replacement triggers a broader review of the roof assembly, ventilation, sheathing, and eave details that impact long-term performance in the coastal climate. If a project involves only minor repairs or re-shingling without changing underlying structure or ventilation, some jurisdictions may offer limited review, but in practice the city favors a permit for full roof work to ensure the assembly holds up under freeze-thaw cycles and salt exposure. Understanding whether your project qualifies as a full replacement ahead of time helps avoid delays and rework.
The city's process involves an online permit application, payment of permit fees, and scheduled inspections rather than purely over-the-counter approval. Start by collecting the building plans, structural notes, and any ventilation details from your contractor, since those documents streamline review. The online portal will guide you through selecting the appropriate permit type, attaching drawings, and identifying any required backups such as slope, soffit ventilation, and attic insulation details. After submission, expect an acknowledgment that the city may request clarifications or additional documentation before the permit is issued. Scheduling is done through the portal, so plan for a window of a few weeks from submission to permit issuance, depending on staff workload and the complexity of the roof system.
Portland inspections commonly verify ventilation, sheathing integrity, and overall code compliance at rough-in and final stages. At rough-in, inspectors look for proper vent placement, intake and exhaust pathways, and adequate attic or roof venting to prevent ice dams and condensation issues in the coastal climate. They also assess sheathing condition, fastener patterns, and any necessary underlayment or ice-dam barriers. The final inspection confirms that all specified components were installed per code requirements and that the roof assembly remains watertight and structurally sound. If your roof includes upgrades such as improved ventilation, synthetic underlayment, or enhanced attic insulation, be prepared to demonstrate those details during the final review.
Coordinate with a contractor who understands local weather patterns and material performance in freeze-thaw conditions. Have ready a clear scope that outlines ventilation improvements, underlayment choices, and any drainage or skylight considerations. Before submitting, confirm that the proposed roof design aligns with existing eave extensions, drip edge requirements, and coastal wind considerations. On inspection days, ensure access to the attic and roof lines, and keep a simple, visible record of venting and fastening methods to help inspectors verify compliance quickly. Scheduling inspections strategically around weather windows can reduce delays from rain or snow events that may complicate access or measurements.
Maine insurers generally still offer standard homeowner coverage for roof replacement claims in this area rather than treating it as an unusually restricted market. After a major coastal storm that affects this part of the coast, adjusters commonly want photos of existing damage, contractor information, and permit confirmation before processing claims. The emphasis is on documented, identifiable damage rather than vague concerns, so being prepared with a clear narrative helps the process move smoothly.
Because Portland roof damage is often moisture- and flashing-related rather than obvious catastrophic loss, documentation quality can strongly affect claim handling. Start with a dated set of photos from multiple angles: the roof surface, eaves, gutters, and visible flashings. Include attic shots showing any signs of moisture intrusion, such as staining, mold, or softened decking. Compile a simple timeline of recent storms and any prior roof work. Keep receipts for any temporary measures you used to protect the home, like tarping, and note the status of nearby trees or debris that could worsen damage.
Provide the adjuster with contact details for a licensed local roofer who has worked on aging coastal homes. The contractor should be able to reference typical Portland coastal issues-salt exposure, freeze-thaw cycles, and aging flashing-so the claim reviewer can gauge the scope accurately. If a contractor has completed recent storm-related repairs nearby, include that as context to demonstrate familiarity with local conditions.
Do not rely on memory for the damage narrative; mischaracterizing moisture versus wind-driven impact can delay claims. Avoid submitting only exterior photos without attic or decking evidence. If a prior patch or repair exists, document it clearly to show the current condition and how it connects to the storm-related claim.
Connect with contractors who help homeowners navigate the claims process from damage assessment to final approval.
Mandette Roofing Plus
(207) 292-5555 www.mandetteroofing.com
94 Auburn St Ste 109, Portland, Maine
4.9 from 70 reviews
Southers Construction
(603) 506-4367 www.southersconstruction.com
94 Auburn St STE 205, Portland, Maine
4.8 from 68 reviews
In this city, the older housing stock often married brick or stone chimneys with shallow roof lines, and legacy flashing that was never upgraded to modern weatherproofing. Those masonry chimneys can become stubborn leak points when freeze-thaw cycles push water under cracked mortar or poorly sealed joints, and wind-driven rain slaps at flashing corners. When a roof is replaced, that means you're not just swapping shingles-you're facing the task of retracing and reinforcing those penetrations so the new deck isn't carrying old vulnerabilities.
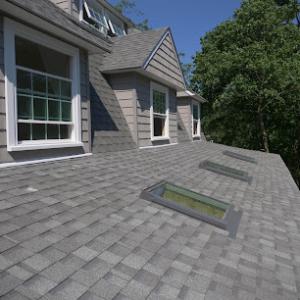
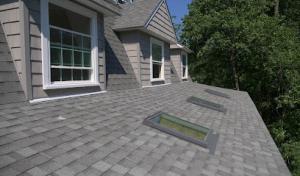
Skylights show up as a meaningful specialty among local contractors, not a luxury add-on. They demand careful attention to flashing details, precise integration with vent stacks, and matching curb or curbless installations to the existing roof pitch. In practice, that means you should expect a dedicated scope that treats the skylight as a living seam in the roof, not an afterthought. A well-sealed skylight here can extend the life of the entire roof, while a sloppy job will leave you chasing leaks through multiple seasons.
On older homes, the replacement typically ties new roofing into existing penetrations and trim details rather than sitting on a clean, open plane. That requires a careful hand with measuring and trimming to the surrounding fascia, rake, and drip edge so you don't create new water traps. Pay close attention to how shingles meet masonry trim and how the drip edge interacts with gutter systems. If a detail looks marginal during inspection, assume it will fail under the next winter's freeze-thaw and wind-driven rain. A thoughtful, locality-aware approach saves headaches when the next storm rolls in.
Find contractors experienced in skylight installation, flashing, and leak repairs to bring natural light into your home.
Superior Roofing
(207) 702-7663 superiorroofingofmaine.com
525 Riverside St, Portland, Maine
4.9 from 792 reviews
Mandette Roofing Plus
(207) 292-5555 www.mandetteroofing.com
94 Auburn St Ste 109, Portland, Maine
4.9 from 70 reviews
Southers Construction
(603) 506-4367 www.southersconstruction.com
94 Auburn St STE 205, Portland, Maine
4.8 from 68 reviews