Last updated: Apr 19, 2026
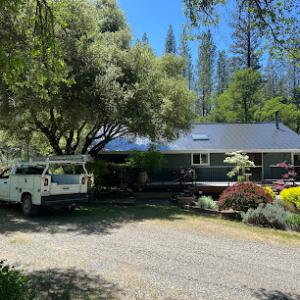
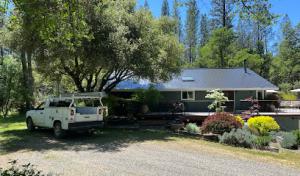
Grass Valley sits in the Sierra Nevada foothills, where roofs must handle both winter rain events and long dry seasons with strong summer sun exposure. The combination of heavy gusts, occasional hail, and wet storms means you need a roof that sheds water quickly, resists ice damming, and keeps the underlayment dry for extended periods. UV exposure from the dry season ages materials faster, and that accelerated aging amplifies the risk of wind-driven embers infiltrating roof lines. In practical terms, choose systems that maintain continuous, high-quality underlayment protection, provide solid drip edges, and minimize exposed fasteners where water can intrude. In short, your roof must perform reliably in a narrow window of harsh winter storms and blistering, sun-drenched summers.
Local roofing decisions are heavily influenced by California wildfire risk, which affects both material selection and insurer scrutiny on roof age and fire-rated assemblies. In this environment, a fire-conscious roof is not a luxury-it's a shield against premiums, coverage questions, and the time spent dealing with claims after embers drift through the ridges. Materials with higher fire resistance ratings, like certain metal or fiber-cement composites, can significantly reduce risk exposure compared to traditional wood or shake-options, especially on steeper pitches where embers travel. More than just the surface, opt for assemblies with proper ventilation, approved fire-rated underlayment, and proper clearance around eaves and vents. The goal is to create a continuous, non-combustible or limited-combustible envelope that can resist radiant heat and radiant ember exposure during a wildfire event.
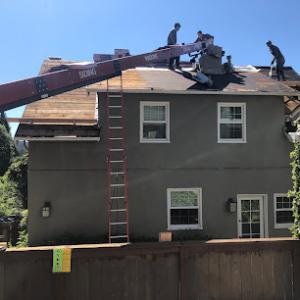
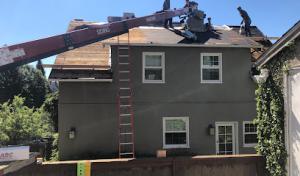
Replacement timing in Grass Valley generally favors the dry season because winter storms and seasonal rain can interrupt tear-off, drying, underlayment protection, and inspection scheduling. If you wait into the rainy months, you risk accelerated water intrusion, mis-timed tear-offs, and potential delays that push you into a weather-limited window. Plan a dry-season project corridor with your crew: confirm a window with no rain forecast, secure your chosen materials, and ensure the roof is completely dried and ventilated before new underlayment is laid. A tightly scheduled tear-off that proceeds from ridge to gutter line, with proper weather-tracking and daily inspections, minimizes exposure to weather and ember risk during the replacement. This is not a seasonal afterthought-it is a strategic move to preserve underlayment integrity and ensure a fire-rated assembly performs as intended from day one.
When selecting the actual roof system, prioritize assemblies rated for fire resistance and performance in wet-dry cycles. Metal roofing, synthetic composites, and certain clay or concrete tile options can offer superior fire resistance and durability under heat without sacrificing water shedding efficiency. Ensure the chosen product integrates with a rated underlayment system and a continuous edge-to-edge seal along hip and ridge lines. For steep pitches common in Grass Valley homes, verify that fasteners, flashings, and penetrations are corrosion-resistant and sealed to resist winter moisture while resisting ember entry during wildfire events. Consider long-term maintenance plans that include clearing debris from between ridges, tightening exposed fasteners after seasonal cycles, and confirming chimney or vent flashing remains fire-safe and watertight.
A proactive maintenance routine protects both winter performance and fire resilience. After the wet season, inspect for damaged shingles, lifted edges, or moisture intrusion near eaves and penetrations. Before the dry season, recheck sealants, hips, and ridges, and confirm ember screening around vents and attic intakes is intact. Keep defensible space principles in mind: vegetation clearance around the roof line and proper gutter maintenance reduce fire ignition risks and water damage alike. In Grass Valley, a roof strategy that blends winter reliability with wildfire-conscious materials and a disciplined replacement timeline stands the best chance of enduring the Sierra foothill climate with minimal disruption and maximal protection.
MEC Builds
(530) 210-8206 www.mecbuilds.com
2269 La Barr Mdws Rd, Grass Valley, California
4.9 from 313 reviews
MEC Builds | Roofing, Siding, Gutters, Skylights Looking for reliable roofing and exterior services in Northern California? MEC Builds is your Owens Corning Platinum Preferred Contractor, delivering expert solutions for roofing, siding, gutters, and skylights. Proudly serving Nevada County, Placer County, and surrounding areas in Northern California with top-quality craftsmanship and exceptional customer care. 📍 Service Areas: Grass Valley, Nevada City, Auburn, Rocklin, Truckee, Yuba City and more. 💼 Specialties: Residential and commercial roofing, roof installations, gutter systems, skylight upgrades, and siding solutions. Choose MEC Builds—where quality starts at the top! Contact us today for a free estimate.

Gold Country Roofing
(530) 477-2760 www.goldroof.com
731 S Auburn St, Grass Valley, California
4.9 from 67 reviews
We have been proudly serving Nevada County since 1980. We offer residential, commercial & industrial roofing (composition shingle and single ply PVC membrane), seamless gutters, blown-in attic insulation and more. We match the length of our workmanship guarantee to the length of the manufacturer's warranty. Financing is available. We are an employee owned company, so our crew has a vested interest in the integrity and quality of their work. Unlike companies that have high employee turnover or hire inexperienced workers, our crew is experienced and dedicated to being here for years to come, and truly stand behind the lifetime workmanship guarantee we provide.
Built Tough Roofing Solutions Grass Valley CA
(530) 270-7101 builttoughroofingsolutionsgrassvalleyca.com
850 Doris Dr, Grass Valley, California
5.0 from 28 reviews
Built Tough Roofing Solutions Grass Valley CA proudly serves Grass Valley and nearby areas with dependable, professional roofing services available 7 days a week. We specialize in roof inspections, roof repairs, roof installation, leak detection, shingle replacement, gutter cleaning, gutter installation, attic venting, attic vent installation, attic vent repairs, storm and wind damage repair, and full roof maintenance. Our team focuses on honest service, strong craftsmanship, and durable materials to keep your home protected year-round. If you’re searching for trusted roofing experts in Grass Valley, we deliver reliable results, fast response, and long-lasting protection.
Home Hardening Solutions
(530) 648-7058 homehardeningsolutions.com
875 Idaho Maryland Rd, Grass Valley, California
5.0 from 18 reviews
Home Hardening, Roofing, Gutters, Gutter Topper, Fire Safety, Land Clearing, Land Mastication, Brush/Tree/Debris Removal, Weed Abatement, Hardscaping, Windows, Doors, Decks, Siding, Vents, Soffits.

Sun's Roofing
(530) 575-2359 sunsroofing.com
13692 Edgewood Dr, Grass Valley, California
4.7 from 16 reviews
At Suns Roofing, we provide dependable, affordable, and professional residential and commercial roofing services. We believe in building lasting relationships with our customers and the people of our community. Our people skills, along with our knowledge and experience, set us apart from other roofing companies. Our experts will keep customers happy and safe. We stand behind our work, providing a guarantee to customers as well as many years of service.
916 Roofing
(916) 460-2475 www.916roofing.com
309 Marshall St, Grass Valley, California
4.6 from 11 reviews
Residential and Commercial roofing. We install all “title 24 COOL roofing products”. Specializing in Metal roofing, shingles and flat roofing systems.
Alex Your Roofer & Gutter Guy
(530) 557-7866 www.alexyourroofergutterguy.com
613 Walsh St Apartment F, Grass Valley, California
5.0 from 5 reviews
I speak Spanish and English and I do Roofing and Gutters and have been servicing Nevada County for over 25 years.
Quintana Roofing & Gutter
12175 Sutherland Dr, Grass Valley, California
3.8 from 5 reviews
Seamless Gutter & Roofing since 1967. Residential and Commercial. Locally Owned and Operated.
DB Roofing Solutions
(530) 367-7663 dbroofingpros.com
Serving
5.0 from 21 reviews
We are a family owned business of over 40 years in the roofing industry. We provide quality service throughout the Sacramento Valley and Sierra Foothills! We offer stellar customer service and unbeatable prices! We guarantee you'll have customer satisfaction with our exceptional service! We're so confident, we even warranty our workmanship! At DB Roofing Solutions, our goal is to not only provide homeowners with a quality roof, but a quality experience as well. We're eager to help you with all of your roofing needs, no matter the size or shape.
Roof Maxx of Grass Valley
Serving
4.9 from 46 reviews
Roof Maxx is a scientifically formulated, and 100% safe, plant-based roof rejuvenating spray treatment that was developed by Battelle Labs, the world's largest private research and development company. Our rejuvenating oil will restore your shingles' flexibility and waterproofing for five years, ensuring maximum property protection. And our warranty is transferable if you end up moving within that time. When you book an appointment, we'll assess your roof and decide if it's a good candidate for a Roof Maxx spray-on treatment. If it is, we can apply the treatment right then, without further delay. If it's not, we'll let you know why and whether we've discovered leaks or other major issues that need repair.
k2 roofing
(530) 320-1087 k2roofingca.com
Serving
5.0 from 8 reviews
K2 Roofing: Your trusted Auburn roofing contractor. We specialize in expert roof installation, ensuring your home is protected with quality craftsmanship. Beyond installation, we offer comprehensive roof maintenance programs to extend the life of your roof and prevent costly issues. And when unexpected emergencies arise, you can rely on K2 Roofing for swift and dependable repair services, giving you peace of mind knowing your home is in good hands.

Art Melick Roofing
(530) 888-1224 www.artmelickroofing.com
Serving
4.7 from 45 reviews
Flat roof specialist for the Auburn and Sacramento areas.
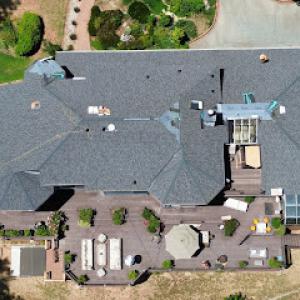
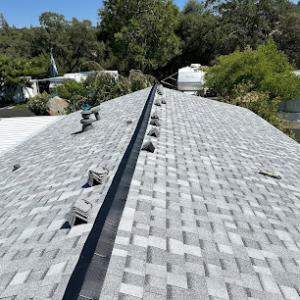
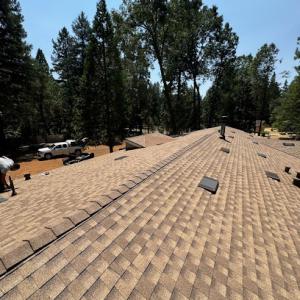
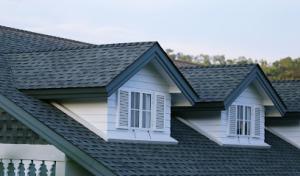
The dominant local material mix includes asphalt shingles, metal roofing, clay tile, concrete tile, wood shingles or shakes, and synthetic or composite shingles. In this foothill climate, the roof must handle wet winters and long, UV-heavy summers, while also aligning with fire-conscious ownership. Asphalt remains common for value and ease, but metal and tile see strong demand where residents want longer life and better performance under heat and embers. Knowing the mix helps you compare how a given roof feels when the weather shifts from sleet and drizzle to sunburn heat.
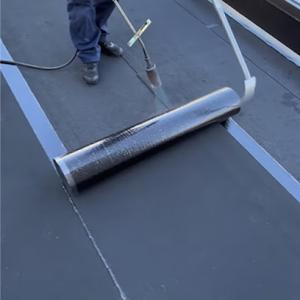
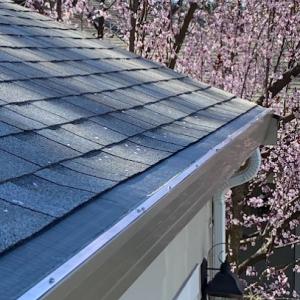
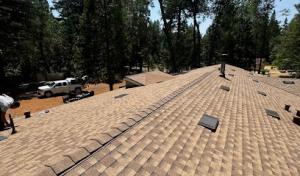
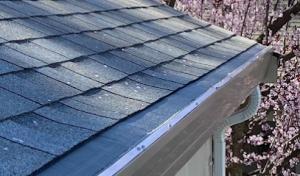
In our setting, underlayment durability is not a luxury-it's nearly as critical as the shingles themselves. Wet winters demand a barrier that can keep moisture out even when the roof deck is stressed by temperature swings. Flashing quality around chimneys, vents, skylights, and the eaves must be excellent to prevent slow leaks that show up during heavy winter storms. Heat resistance becomes a practical concern in the dry season: materials that resist UV degradation and maintain color-fastness help prevent early aging, curling, or loss of granules in asphalt, and keep metal or tile fasteners secure over decades. When evaluating options, you want a system with a well-thought-out underlayment, corrosion-resistant details, and matching fasteners designed for the local climate.
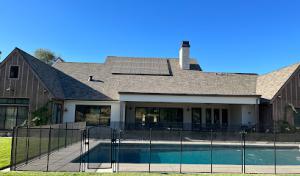
Tile and metal are active specialties in this market, reflecting demand for longer-life systems that can better align with foothill weather exposure and fire-conscious ownership concerns. Concrete and clay tiles provide excellent durability in the sun and resist wind-driven debris, while their heavier mass can help with overall roof stability. Metal roofing brings standout wind resistance, rapid shedding of rain, and top-tier hail performance in many situations. If you're prioritizing ember resistance and a longer service life, these two materials warrant close comparison on weight, compatibility with existing framing, and long-term maintenance needs. For tile, consider underlayment choices and the substrate's ability to handle weight; for metal, assess coating resilience and panel edges that minimize exposed fasteners.
Asphalt shingles and synthetic/composite options continue to provide a practical balance between initial cost and performance under mixed-season conditions. Modern asphalt options with approved underlayment systems can behave well in wet winters, while UV-stable finishes help during the dry season. Composite shingles often combine the advantage of longer warranties with improved impact resistance, which is valuable in a region where hail patterns can vary. When you weigh asphalt against synthetics, look for a system that explicitly addresses heat aging, dimensional stability, and compatibility with the local venting and insulation schemes.
Regardless of material choice, annual inspections after the wet season and before the peak of fire season save you from surprises. Check for missing granules on asphalt, worn sealants around flashings, and any signs of accelerated wear on metal panels such as corrosion at seams or fastener heads. Tile roofs should be inspected for cracked or displaced tiles after storms and during dry spells when expansion and contraction are most apparent. A proactive approach-tightening flashing, resealing vulnerable joints, and keeping debris off the roof and in the gutters-helps extend the life of a roof built to endure both foggy mornings and blazing afternoons.
In Grass Valley, winter storms and seasonal rain are a primary source of project delays and often expose weak flashing, underlayment failures, and leak-prone penetrations. The foothill climate means prolonged wet spells are followed by sudden downpours, so every gap where water can travel matters. If flashing around chimneys, vents, skylights, or roof-to-wall transitions looks tired or has failed seals, leaks can show up weeks after the rain starts. The window for catching these issues is narrow: a small drip behind a ceiling can become a full-on attic flood before you know it. Pay particular attention to valleys, edge metal, and step flashing where water paths converge.
Wind and hail events during shoulder seasons can damage exposed roofing materials and disrupt active reroof jobs in the foothill climate. Your chosen roof system may suffer shingle lifting, granule loss, or dented panels from a sudden gust or hail storm, compromising the expected layer of protection just when you need it most. This is when temporary covers fail if not properly secured, and a small wind-blown opening becomes a conduit for rain during the next storm. If a ladder or roof access point is left unprotected, a quick storm can turn a repair site into a leak-driven headache for days.
The local contractor signal mix shows meaningful demand for emergency repair and storm damage response, indicating homeowners often need rapid leak control rather than waiting for full replacement. When a drip becomes a waterfall during a storm, the first priority is to stop the leak and minimize interior damage. Have a plan for a temporary tarping or quick-seal solution that a capable crew can deploy the same day rain begins. Keep a short list of trusted responders who can arrive quickly, evaluate flashing and underlayment integrity, and secure vulnerable penetrations until a permanent fix can be scheduled. You'll detect a leak sooner and keep interior rooms usable while crews assess whether the underlying roof assembly needs flashing reinforcement, underlayment resealing, or a more substantial reroofing strategy. In those urgent moments, the right contact and a rapid containment approach can save you from escalating damage and costly delays.
When you can't wait, these contractors offer fast response times to stop leaks and prevent further damage.
Typical local pricing runs about $420 to $750 per square for asphalt shingles, $900 to $1600 for metal, $1200 to $2600 for clay tile, $1000 to $2100 for concrete tile, $700 to $1400 for wood shingles or shakes, and $600 to $1100 for synthetic or composite shingles. In foothill neighborhoods, those numbers are common when the job is described to homeowners. You'll see more variance if a roof has unusual pitches or spans multiple viewpoints on a steep hillside.
Costs in Grass Valley can rise when contractors must schedule around winter rain, shoulder-season wind events, or hot dry summer handling limits that reduce installation windows. If a reroof is planned between storms, expect tighter crews and potential overtime, which can push quotes up by a notch. Concrete and clay tiles add weight and may require reinforcement, extending both time and labor costs. Keep in mind that heavier tile systems are often paired with fire-conscious upgrades, which can add to the price but improve insurance posture.
Material choice matters more than average in this market because heavier tile systems, fire-conscious upgrades, and premium underlayments are often considered alongside insurance concerns in foothill neighborhoods. For example, synthetic or composite options can offer lower weight with decent fire resistance, while metal can provide long life and wind resistance. Remember that the cost per square is only part of the picture; installation cautions, such as feathering edges on steep slopes and protecting overhangs during winter rain, influence total project time and price.
When you're choosing materials, start with the conditions on your roof and your insurer's expectations. Schedule an early-season assessment to align product availability with dry windows in late spring or early fall. If your house presents mixed shade and sun exposure, discuss venting and underlayment choices that improve wet performance in our winters. Request a written breakdown that separates material costs from labor, and ask for a phased plan if you're coordinating roof work with gutters, skylights, or chimney work.
Don't let upfront costs delay a critical repair - these contractors offer payment plans to fit your budget.
Gold Country Roofing
(530) 477-2760 www.goldroof.com
731 S Auburn St, Grass Valley, California
4.9 from 67 reviews
A full reroof in Grass Valley generally requires a permit through the local jurisdiction serving the city and Nevada County area. That process is not a mere formality; it ensures the project aligns with structural safety and local climate realities. When you file, plan to provide details about underlayment, flashing, venting, and wind uplift design. In practice, the plan review often concentrates on how the new roof system will handle Sierra foothill winter storms, dry summer exposure, and the potential for wildfire-impacted insurability. The reviewer will want to see that the chosen underlayment meets moisture protection standards for wet winters, that flashing around penetrations is continuous and properly sealed, and that venting and attic insulation are sized to manage condensation and heat gain during long dry spells. Reroof projects are evaluated not as a simple surface swap, but as a cohesive roof assembly designed to perform under Grass Valley's unique mix of wind, rain, and sun.
When you submit drawings and specs, expect the plan review to scrutinize the underlayment's compatibility with the roof deck and climate, including how it handles intermittent snowfall and heavy rain events. Flashing work around chimneys, skylights, valleys, and eaves should illustrate continuous protection against water intrusion while accommodating seasonal movement of the roof structure. Venting must be addressed to prevent moisture buildup and ice dam risk in colder months, with attention to how soffit, ridge, and gable vents will cooperate with insulation and attic air exchange. Wind uplift considerations are also central, given the foothill exposure to gusty storms. The goal is a system that can resist uplift forces without compromising water tightness or venting efficiency. If a contractor relies on temporary protection or substitutes, the plan reviewer will look for clear justification and documentation of performance.
Inspections are typically scheduled at rough-in and final stages, so weather delays in Grass Valley can affect not only installation but also inspection timing and project closeout. Rough-in inspections verify that underlayment, ventilation paths, and flashing details are in place before the roof deck is concealed. Final inspections confirm that the completed system matches the approved plan and that wind uplift, waterproofing, and venting performance are installed as designed. Because winter storms can arrive with little warning and summer heat can extend dry-out periods, it is prudent to coordinate with the building department and the roofing crew to anticipate windows for both installation and inspection. If a postponement occurs due to conditions, ensure updated inspection appointments are requested promptly to avoid project delays and potential noncompliance findings. This coordinated approach helps maintain a timely path to closeout while preserving the integrity of the reroof in this climate.
Grass Valley homeowners are operating in California's wildfire-driven insurance market, where premiums have risen and carrier availability has become more selective in higher-risk areas. The shift means even solid roof upgrades can be weighed against tighter underwriting criteria and holdbacks. A short-notice renewal can become a negotiation about risk, so understanding how insurers view roof performance during heavy winter rain and the long dry season is essential. When a carrier views a roof as marginal or aging, replacements or upgrades may be pressured by underwriting timelines, so planning ahead helps avoid gaps in coverage.
Insurers may ask for roof age, prior damage history, photos, and documentation showing compliant fire-rated underlayments or other assembly details before approving coverage or replacement. In a high-fire risk belt, the specifics of the roof assembly matter almost more than cosmetic appearance. If the underlayment or sheathings meet fire-testing standards, that can influence both acceptance and the scope of any contemplated improvements. Gather and organize records from contractors, including product specs, installation dates, and any fire-resistive certifications you can verify.
Because storm and leak claims can overlap with wear-and-tear disputes, homeowners in this market benefit from preserving inspection records, dated photos, and contractor documentation before and after winter weather. Clear before-and-after images help clarify whether a leak stems from an isolated storm event or long-term deterioration. Keep a running file of snow and rain impacts, drainage checks, and any temporary repairs, so you have a transparent history if an adjuster later questions causal connections.
Prioritize roof assemblies with documented fire-rated components and proven performance in Sierra foothill conditions. Choose materials and configurations that balance wildfire resilience with winter-moisture performance, and ensure installation follows reputable, evidence-backed methods. Regular, dated inspections aligned with winter seasons create a credible paper trail that can support coverage decisions when insurers reassess risk.
Connect with contractors who help homeowners navigate the claims process from damage assessment to final approval.
MEC Builds
(530) 210-8206 www.mecbuilds.com
2269 La Barr Mdws Rd, Grass Valley, California
4.9 from 313 reviews
Gold Country Roofing
(530) 477-2760 www.goldroof.com
731 S Auburn St, Grass Valley, California
4.9 from 67 reviews
Home Hardening Solutions
(530) 648-7058 homehardeningsolutions.com
875 Idaho Maryland Rd, Grass Valley, California
5.0 from 18 reviews
In foothill neighborhoods, you'll notice that experienced Grass Valley contractors emphasize solid installation practices that hold up under winter wetness and summer sun. Look for crews that clearly outline fasteners, underlayment, and lofted ventilation in writing, and that bring a proven crew roster rather than a one-man show. A long local track record often correlates with better workmanship because crews stay consistent, know the local quirks of vaulted or steep roofs, and understand how to manage occupied reroofs without old-growth disturbance in the yard. When a contractor talks about wind resistance and fire-conscious detailing for both the roof and flashing, that signals readiness for Sierra foothill conditions. Check that roof penetrations-vent stacks, regulatory venting, and chimneys-receive sealed flashings with backer rods and corrosion-resistant metal, not quick, patchy fixes.
Grass Valley projects run through tight, busy neighborhoods where yards double as staging areas during reroofs. Local homeowners consistently value cleanup that is included in the service and that happens on a predictable schedule rather than as a surprise add-on. Ask for a cleanup plan that includes daily debris removal, ladder and material staging etiquette, and the disposal of old underlayment and shingles in closed containers. A reputable crew will contain debris within the job site and protect landscape beds, driveways, and irrigation lines from damage. If the crew uses tarp-down or containment barriers during tear-off, that's a practical sign of consideration for occupied homes, especially with families nearby and quiet zones near schools and churches.
Warranty messaging exists, but not as prominently as emergency response and reroof timetables. Verify what is covered on both workmanship and manufacturer sides before signing. Specifically, confirm coverage duration, transferability if you sell, what constitutes a workmanship defect (installation vs. material failure), and how failures are documented and repaired. Ask for a written outline that distinguishes who handles labor, what qualifies as a warranted repair, and response time expectations during peak rain or wildfire-smoke periods. In practice, homeowners benefit when a contractor can provide a clearly defined warranty map alongside a fire-conscious, winter-ready installation plan.