Last updated: Apr 19, 2026
In a high-desert Sierra-edge climate, your roof campaigns between brutal sun and brutal cold, with constant UV baked into the shingles and flashing. Freeze-thaw cycles crack and spall under closer inspection, especially after a windy spring or a fast warm-up that follows a frosty night. The UV load isn't decorative here-it dries adhesives, accelerates aging, and can delaminate coatings on metal and underlayment. Hail, wind-driven debris, and sudden temperature swings hammer the surface in the same season, multiplying wear on edge-fastening, fasteners, and seals. When you combine these factors, a roof that seems fine after a storm can deteriorate faster than a homeowner expects, reducing protective performance long before a visible failure shows up.
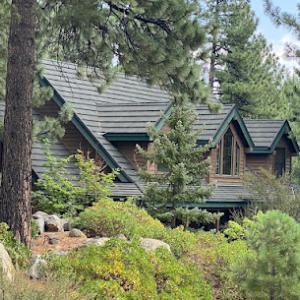
The city sits on the eastern side of the Sierra Nevada, where storm tracks can bring snow, wind, and spring hail into the same annual roofing cycle. That means your roof endures a full spectrum of threats within a single year, not a single weather event here and there. Asphalt shingles may blister, curl, or lose granules sooner under this continuous sun and ice exposure. Metal roofs resist hail better on impact, but panels and coatings can warp or fade if coatings aren't matched to the heat and UV load. Clay and concrete tiles hold up well against heat, yet freeze-thaw cycles can fracture mortar and degrade underlayment beneath. A slate roof offers longevity, but it's heavy and brittle in cold snaps; a single misstep during winter maintenance can lead to costly repairs. The takeaway: expect accelerated aging once the two-pronged stress-extreme heat and subfreezing nights-drills into the roof system.
In Reno, the best replacement window is typically the dry, moderate part of the year because winter cold, summer heat, and shoulder-season storms all complicate installation. Dry conditions reduce the risk of adhesive failure, membrane punctures, and misaligned flashing during critical weather events. Shortening exposure to wind-driven dust and sudden temperature shifts helps crews perform precise fastening, sealant curing, and attic ventilation setup. If possible, plan around late spring or early fall when humidity is lower, temperatures are moderate, and storms are less frequent. Scheduling during these windows minimizes the likelihood of weather-induced delays and ensures the roof system begins life with full performance in the harsh months ahead.
Choose roofing assemblies with proven resilience to freeze-thaw and UV in this environment. Underlayment should be a robust, cold-applied membrane that remains flexible through cycles of freezing and thawing. Fasteners and nail patterns must account for temperature-driven aluminum and steel expansion, avoiding overdriven or under-driven fasteners that can loosen with sun exposure. Ventilation matters as much as material: a well-ventilated attic reduces live roof temperature, curbing asphalt blistering and deck warping. For shingles, look for products with UV stability and algae resistance, plus warranty terms that reflect performance under freeze-thaw cycles. If considering tiles or slate, ensure the roof deck and support structure are rated for higher weight and prepared for thermal movement to prevent cracking and tile displacement. In this climate, the best choice isn't just about initial appearance-it's about sustained performance under sun, snow, wind, and hail, year after year.
Asphalt shingles dominate the local market because they fit the broad spectrum of residential price points and reroofing needs that pop up in our high-desert climate. The component mix handles the daily sun, the freeze-thaw cycle, and occasional hail relatively well when installed with a quality underlayment and proper nailing pattern. If you're replacing on a mid-range budget, asphalt remains the most straightforward, widely available option with trusted service life when paired with reinforced synthetic underlayment and a stout starter row. In sites with mixed exposure, consider darker granules for UV resilience and a wind-rated installation to stand up to Reno's gusts.
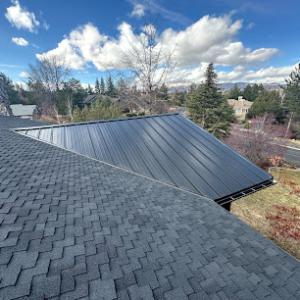
Metal roofing earns a steady share of attention because it blends snow shedding, high-UV exposure, and wildfire-adjacent considerations into one durable package. When you expect heavy sun and rapid temperature swings, metal panels move less with heat, which can reduce creep and edge-related problems over time. Look for a standing-seam system or through-fastened panels with a generous sealant strategy, and ensure fasteners are corrosion-resistant. For homes near the higher wind zones or with exposed eaves, the roof's edge detailing and wind-rated fasteners become a critical detail. A metal roof typically performs well through hail impacts compared to some other materials, but denting can occur, so consider panel profile and coating choices that minimize visible marks while maintaining long-term reflectivity.
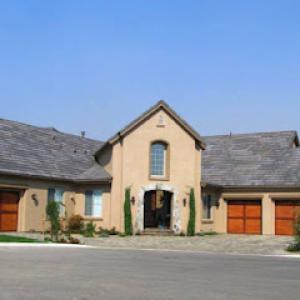
Clay and concrete tiles offer excellent UV resistance and long life, but they come with weight and structural considerations. Heavier systems can trigger a structural review during permitting, so confirm the attic structure and joist capacity before planning. Slate and synthetic slate provide a premium appearance with strong freeze-thaw tolerance; however, real slate is very heavy, demanding substantial roof framing and careful installation detail. Synthetic slate broadens the aesthetic range with lighter weight and easier handling, yet it still benefits from a properly designed substrate and adequate ventilation. If you encounter roof lines with multiple hips and valleys, ensure the fastener patterns and valley configurations are matched to the material's weight, since valley leaks are a common source of trouble after freeze-thaw cycles and hail impacts.
In practice, the best material is the one that aligns with your roof's exposure, slope, and surrounding landscape. A low-slope roof with significant sun exposure will benefit from a reflective finish and a robust underlayment, regardless of material. A steep, sun-bleached roof should prioritize durable UV-resistant coatings and a wind-aware installation method to resist edge lift. In mixed neighborhoods where houses share similar solar gain and wind patterns, you'll notice that asphalt shingles, metal, and concrete tile often sit side by side, each chosen for a specific balance of weight, cost, and performance in the local cycle of sun, snow, and hail. Use a qualified roofer to evaluate your attic ventilation, deck condition, and structural capacity before finalizing a material choice, especially if you lean toward heavier tiles or slate options.
Reno sees periodic hail and wind events that are significant enough to drive local insurance claim activity. When a storm slams through the Sierra front, shingles can be dented, granules knocked loose, and flashing joints stressed. That damage may not be obvious right away, but it compounds with sun exposure and freeze-thaw cycles, quietly weakening the roof over time. After a severe hail or wind spell, you should treat roof scrutiny as immediate, not optional. Inspecting for bruised shingles, lifted edges, or loose metal vent flashings within 48 hours of clear skies can prevent a small problem from turning into a costly emergency.
Spring hail and wind storms are a known scheduling disruptor in Reno and can create sudden demand spikes for inspections and temporary dry-in work. If your roof showed signs of impact or wind uplift after a storm, don't delay. The window for temporary dry-in is narrow, especially with storm forecasts and unpredictable spring melt. Secure at least a professional quick-look to assess shingle integrity, underlayment exposure, and flashing condition. Quick action can avert interior leaks during rapid weather changes and reduce the risk of wind-driven rain entering through compromised seams.
Winter snow and freezing temperatures in Reno can turn minor defects into active leaks when ice, wet underlayment exposure, or compromised flashing are involved. Freeze-thaw cycles push water into tiny cracks, widen them, and force moisture behind the roof deck. That means a seemingly dry attic can suddenly show damp spots or frost on colder mornings. If a drip appears mid-winter or you notice ice dams forming on eaves, treat it as a leak risk and respond with an emergency inspection. Don't wait for the leak to reach the living space; ice-backed moisture travels fast once warm days return and the sun hits a compromised section.
Keep a close eye on exposed fasteners, ridge vents, and metal surfaces after hail or wind events. Document with photos and note the date of any storm exposure. If anything looks off, call for an urgent inspection, especially if there are visible granule loss, lifted shingles, or displaced flashing. In the worst-case scenario, a temporary seal or tarp may be necessary to hold back rain while a professional evaluates and plans a proper dry-in and repair strategy. When winter approaches, a preemptive review of flashing joints and attic ventilation can reduce the chance of a small defect becoming a full-blown leak when temperatures swing and moisture loads rise.
When you can't wait, these contractors offer fast response times to stop leaks and prevent further damage.
Burke Roofing
(775) 453-1323 www.burkeroofinginc.com
180 E Grove St, Reno, Nevada
4.2 from 49 reviews
Great Basin Roofing
(866) 886-3976 greatbasinroofing.com
340 Western Rd Units 12-13, Reno, Nevada
4.9 from 188 reviews
With Great Basin Roofing & Solar you get more than great value, you get an entire team of residential and commercial exterior problem solvers. Plus, you get a lifetime warranty, fast turnaround on most jobs, and amazing customer service professionals who are here to make sure you're happy every step of the way. 100% Financing Available New Roof Re-roof Roof repairs Solar Roofs Solar panels Solar Batteries
Roof Crafters
(775) 831-4188 www.roofcrafterswest.com
2910 Mill St Ste A, Reno, Nevada
4.9 from 101 reviews
The Roof Crafters team is available 24 hours a day, 7 days a week, 365 days a year for customers throughout our Nevada service area, which includes Tahoe Reno Industrial Complex, Minden, Gardnerville, South Lake Tahoe, Truckee, Tahoe City, Incline Village, Fallon, Fernley, Yerington, Susanville, and Lovelock.
True Green Roofing Solutions
(775) 225-1590 www.truegreenroofing.com
316 California Ave #705, Reno, Nevada
4.9 from 47 reviews
Your roof is more than just protection—it’s an investment in your home’s future. At True Green Roofing Solutions, we combine expert craftsmanship, innovative materials, and a commitment to sustainability to create roofs that stand the test of time. Whether you’re looking for durability, energy efficiency, or timeless beauty, we bring your vision to life with roofing solutions built to last. We are your metal roofing experts!
East Fork Roofing
(775) 347-7797 www.eastforkroofing.com
2400 Tampa St Suite #101, Reno, Nevada
4.5 from 57 reviews
East Fork Roofing is a family-owned and operated roofing contractor in Reno, Nevada. We have been serving the community since 2016 and specialize in roof replacements, repairs, and maintenance. Our team of experienced and licensed roofers will work with you to find the best solution for your roofing needs. We offer free aerial-imagery estimates and financing options. We cater to larger, high-end, and snow country homes and have the size of team needed to service both small jobs and large and difficult jobs.
Burke Roofing
(775) 453-1323 www.burkeroofinginc.com
180 E Grove St, Reno, Nevada
4.2 from 49 reviews
Roof Repairs and New Construction - Specializing in Sun Tunnel and Sky Light Installation
Nevada Roofing Division
(775) 447-0705 www.nevadaroofingdivision.com
1277 W 7th St Suite B, Reno, Nevada
5.0 from 7 reviews
At Nevada Roofing Division, we bring more than just expertise to the table – we bring a legacy. Our years of dedication in the roofing industry have equipped us with invaluable insights, allowing us to deliver solutions that stand the test of time. With each project, we reaffirm our commitment to quality, ensuring our clients enjoy peace of mind. Whether it’s a minor repair or a full-scale rejuvenation, you can count on Nevada Roofing Division for unwavering protection.

Global Commercial Roofing
(775) 391-2514 commercialroofingnv.com
1201 Corporate Blvd #100, Reno, Nevada
5.0 from 7 reviews
At Global Commercial Roofing, we specialize in polyurethane spray foam roofing. We also handle any type of commercial flat roofing project, from modified bitumen, single ply TPO to silicone roofing. We also offer as commercial roof maintenance plans.
Robins Roofing
1050 Cinderella Dr, Reno, Nevada
4.2 from 5 reviews
Re-roof and new roof composition roofs are our specialty
Heritage Roofing
(775) 831-1144 www.heritageroofingsales.com
195 E 1st St, Reno, Nevada
5.0 from 1 review
*All Custom Metal Work is Done In-House *Residential & Commercial *Insured & Bonded *Paul Ferguson, President

Authentic Roofing
(775) 560-1450 www.authenticroofing.com
Serving
4.8 from 64 reviews
Family-owned and locally operated, we bring 39 years of roofing experience and have proudly served our community for 7 years. We specialize in new roof installation, re-roofs, roof repairs, and work on all types of roofing systems for residential and commercial properties. From Comp Shingle, Tile and metal roofs. Our team is committed to honest service, quality and craftsmanship, and protecting what matters most. We are honored to be recognized as Best of Sierra Nevada 2024 & 2025 winners, the Osborne Award from BBBSNN 2024 and Best of Reno 2025. Gives us a call if you want to scheduled an estimate or if you just have some question, we are here to serve!
Specialty Roof Repairs
(775) 830-5007 www.specialtyroofrepairs.com
Serving
4.9 from 15 reviews
we are a roofing contractor with 25 plus years of experience on residential roofing . We're License Bonded and Insured .
Mountain Vista Roof Systems
(775) 431-6367 mountainvistaroofing.com
Serving
5.0 from 159 reviews
At Mountain Vista Roof Systems, we are your trusted partners in safeguarding your home through excellent roofing service. With decades of experience, we offer top-notch solutions tailored to your needs. Our roofing team specializes in roof repairs, replacements, and installations, utilizing high-quality materials and the latest technology. Choose Mountain Vista Roof Systems for reliable and affordable roofing services, ensuring your peace of mind under every weather condition.
Reno homeowners often see a broad spread in reroof pricing because materials behave differently under the high-desert climate. In practice, asphalt shingles sit in a common mid-range of about 350 to 700 USD per square, which fits many mid-20th-century homes and lighter roof structures. Metal roofs run higher, typically 600 to 1100 USD per square, but they bring enhanced hail resistance and longer life in wind-prone years. If clay tiles are chosen, expect 900 to 1500 USD per square, while concrete tiles generally run 750 to 1200 USD per square. For premium aesthetics and durability, slate is usually priced from 1200 to 2000 USD per square, and synthetic slate sits in the 600 to 1100 USD per square range. These ranges reflect Reno's mix of steep pitches, vented attics, and sun-worn surfaces where heat exposure accelerates material aging.
Storm-driven demand can push prices higher. When hail or high-wind events trigger a rush of reroof decisions, contractors can book up quickly, and timing becomes a factor. In those windows, material shortages or expedited labor needs may lift the bottom-line by a noticeable margin. Planning ahead for an off-peak season can keep the project more predictable, even if a storm later reshuffles the calendar.
Heavier tile or slate systems can influence the overall reroof price not just because of material cost, but because of structural notes or added review that may be needed as part of the process. If a home has an older underlying deck or limited attic clearance, incorporating heavy tile or slate can require additional framing checks or reinforcements. Those structural nuances can add to labor time and, in some cases, to the price tag. In the Reno climate, where rafters and decking bear the load differently than in milder regions, expect this factor to come into play more often with stone or concrete tiles.
When budgeting, compare the long-term value in addition to the upfront price. Metal or synthetic slate can offer better performance against UV exposure, wind, and hail, potentially reducing maintenance costs over a 20- to 30-year horizon. For asphalt and concrete tiles, pay attention to underlayment age, roof slope, and existing ventilation-these elements influence both durability and the need for future repairs. If a reroof is anticipated to occur soon after a severe storm sequence, setting aside a contingency that accounts for potential demand spikes helps avoid sticker shock.
Don't let upfront costs delay a critical repair - these contractors offer payment plans to fit your budget.
Great Basin Roofing
(866) 886-3976 greatbasinroofing.com
340 Western Rd Units 12-13, Reno, Nevada
4.9 from 188 reviews
East Fork Roofing
(775) 347-7797 www.eastforkroofing.com
2400 Tampa St Suite #101, Reno, Nevada
4.5 from 57 reviews
A full reroof in Reno typically requires a permit through the City of Reno Building Department. Missing or delayed permits can hold up a project, trigger rework, or complicate resale disclosures. The city's permitting practice often treats reroofing as more than a simple like-for-like swap; submittals commonly require the roof type, deck condition, and venting details up front. Because the climate puts unusual stress on both decking and ventilation, inspectors look closely at how the roof structure handles snow loads from sudden freezes and thaws, and at how ventilation aligns with radiant heat from a high-desert sun. If the replacement involves heavier materials, a structural assessment may come into play, especially when the existing deck or framing shows age or evidence of previous weather-related wear. Plan for a permitting step that truly evaluates what sits above the sheathing, not just what you see from the outside.
When you submit for approval, avoid assuming that a like-for-like swap will satisfy the city. The permit package will likely include details on the chosen roof system, its attachment method, and a clear statement about deck condition and venting strategy. In practice, inspectors in this area expect documentation that demonstrates how ventilation supports attic air exchange during hot, dry months and how it remains effective after winter freeze-thaw cycles. If a tile or slate installation is on the table, be prepared for notes that address wind uplift, seismic considerations, and the potential need for additional fasteners or underlayment upgrades. Missteps here can lead to field adjustments or a delay in final sign-off, so review plan and deck health with care before submitting.
City inspections in Reno occur during and after installation, and heavier materials such as tile or slate may trigger structural notes and possible additional review. A typical sequence includes an inspection after roofing tear-off, then another during installation to verify fasteners, underlayment, and flashing details, followed by a final inspection to confirm attic ventilation and any required bracing or sheathing updates. Be prepared for the possibility that an inspection may uncover concerns about wind resistance, hail impact readiness, or snow load considerations on the chosen system. If issues are found, expect a defined path to resolution, which can involve add-on bracing, revised venting, or corrected flashing details. The goal is to ensure the roof not only looks right but also can endure Reno's demanding mix of sun, wind, and cold months over the long haul.
Reno's high-desert cycle-sun, freeze-thaw swings, wind, snow, and hail-puts roof systems under a unique strain. Insurance claims in this market often hinge on current roof-condition documentation and clear photos. If a hail event or windstorm hits, carriers will want a recent, dated record of the roof's state before and after the damage. That means organized pictures from multiple angles, plus notes on any existing wear, missing shingles, or higher-risk areas such as valleys, penetrations, and flashings. Being prepared with a concise, labeled album can keep the process moving and reduce back-and-forth delays.
There is no statewide insurer pullback pattern specific to Nevada in this market snapshot, but some carriers may tighten underwriting during higher-risk seasons. In practical terms, that can translate into a stricter appraisal of replacement options, more rigorous damage verification, or incremental approvals that extend the timeline. If a storm arrives during shoulder seasons when conditions are extreme, delays can occur as adjusters hail from different offices and schedules fill up. Expect requests for seasonal photos showing UV exposure and any noticeable wear that might influence depreciation or coverage decisions.
In Reno, roof age and material can affect underwriting and coverage decisions, which makes pre-storm photo documentation especially important. Metal, concrete, or synthetic products often weather the local cycle differently than asphalt, and insurers may scrutinize the remaining life expectancy of older roofs more closely after a hail event or windstorm. A well-kept, clearly documented roof helps demonstrate that the system was in good order prior to a event and can support timely decisions about repair versus full replacement.
Before the next storm season, walk the roof with a trusted helper and capture clear, well-lit photos of each section, close-ups of shingles, flashings, vents, and any prior repairs. Keep a dated folder of images, and note any preexisting issues such as curling shingles, granule loss, or sagging eaves. If a hail event occurs, photograph both the exterior surface and the interior attic space for signs of leakage or moisture intrusion. When filing a claim, provide a concise history of prior maintenance, recent weather impacts, and a simple map of affected areas to guide the adjuster. This neighborly diligence often translates into a smoother, faster path through the claims process.
Connect with contractors who help homeowners navigate the claims process from damage assessment to final approval.

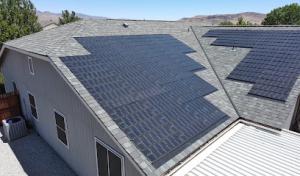
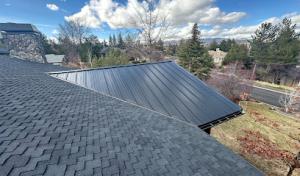
The strong sun exposure in this climate makes roof penetrations and flashing details around solar arrays and skylights especially critical. Plan for extra sealant attention at rafter tails and along any roof-to-penetration transitions. Use flashing with a proven vented drip edge and a high-sun UV rated sealant that remains flexible in freeze-thaw cycles. Check parity between the solar mounting stanchions, flashing planes, and the underlying roof deck to avoid any micro-movement that can lead to micro-leaks during winter swings. In mid-summer, verify that shingle or tile edges near mounts remain tight and free of heat-induced warping.
Because Reno reroof permits call for venting and deck-condition information, roof-mounted upgrades should be coordinated with the reroof scope rather than treated as an afterthought. Ensure the installer aligns the solar or skylight fastening plan with roof ventilation, attic baffles, and any required torch-down or underlayment upgrades. If a deck shows soft spots or moisture stain, address those before mounting equipment. The goal is a single, integrated waterproofing sequence where penetrations are treated in phase with new underlayment, flashing, and edge metal, not tucked in as a side project.
On homes with tile, metal, or steep-slope systems, solar and skylight work can materially affect how replacement sequencing and waterproofing details are handled. Tile and metal roofs demand compatibility between mounting hardware and deck substrate to avoid tile crush or panel lift during wind events. For skylights, consider prefabricated curb options that match your roof pitch and flashing profiles, or you may introduce bridging or step-flash complications. In steep slopes, use fall protection and ensure the roof surface is clean and dry before any penetration work. The aim is to preserve the integrity of waterproofing margins while integrating the penetrations into the overall roof replacement plan.
Find contractors who integrate solar panels or solar shingles into your roof for long-term energy savings.
Great Basin Roofing
(866) 886-3976 greatbasinroofing.com
340 Western Rd Units 12-13, Reno, Nevada
4.9 from 188 reviews
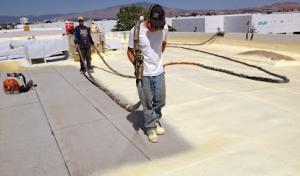
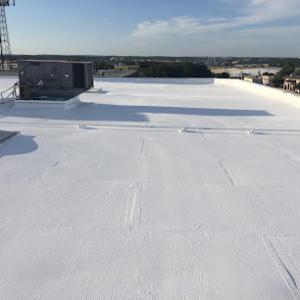
Although steep-slope systems dominate the residential market, a meaningful low-slope segment exists for additions, garages, porches, and mixed-roof homes. In this climate, the low-slope sections face an extra pass of sun and cold, with snow piling up and thaw cycles driving more rainwater through seams. When evaluating a reroof, look beyond the main visible roof and map every low-slope piece attached to the structure. Focus on transitions from walls to membranes, roof-to-wall flashings, and any penetrations that could carry water into attic or ceiling spaces.
Reno's winter snow and freezing temperatures make drainage and membrane condition more consequential on low-slope sections than on the main pitched roof. Ensure the garage and addition roofs have positive drainage with properly set slope and unobstructed outlets. Inspect underlayment for wear, punctures, or tiny cracks that can open during freeze-thaw cycles. A robust, continuous membrane with clean, unbroken seams reduces the chance of water migrating to fasteners, penetrations, or wall assemblies after a cold snap. Don't overlook drip edge and edge detailing where meltwater meets the gutter, as gaps here invite ice damming at the base of walls.
When Reno homeowners reroof only the visible main-house roof and defer attached low-slope sections, leak paths often remain at transitions, walls, and penetrations. Pay particular attention to roof-to-wall interfaces around soffits, vent stacks, and HVAC curb penetrations. Flashings must be continuous across wall terminations and over any parapets. In mixed-roof configurations, ensure the junctions between low-slope and steep-slope areas are sealed with compatible materials and properly flashed to resist movement from wind-driven rain and freezing cycles.
Keep low-slope areas clear of debris that can trap moisture and hide micro-cracks. After heavy snows or hail events, inspect for disturbed seams, lifted edge metal, or membrane delamination. Schedule a proactive sheet-metal review for edge details and any baby-proofing of fasteners where salt and grit can accelerate corrosion. Address issues promptly to preserve the integrity of the entire roof system, including transitions and penetrations that live at the edges of the main roof.
Find specialists in TPO, EPDM, and built-up flat roofing systems for residential and commercial properties.
Burke Roofing
(775) 453-1323 www.burkeroofinginc.com
180 E Grove St, Reno, Nevada
4.2 from 49 reviews

Global Commercial Roofing
(775) 391-2514 commercialroofingnv.com
1201 Corporate Blvd #100, Reno, Nevada
5.0 from 7 reviews