Last updated: Apr 19, 2026
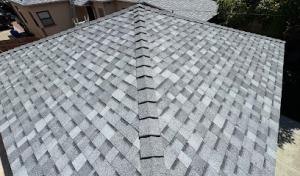
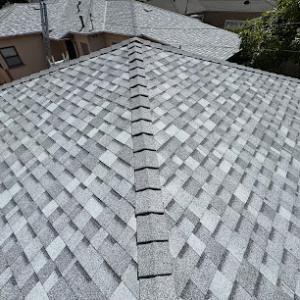
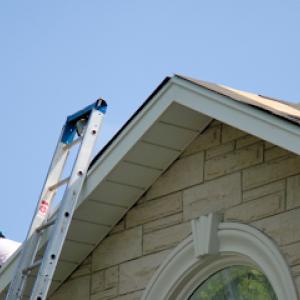
In this hillside part of the southeastern San Fernando Valley, the sun hits roofs with a sharper edge than many coastal neighborhoods. Summer heat and strong UV exposure press on sun-facing slopes all season, accelerating surface aging, softening sealants, and drying out underlayment faster than you might expect. If your home sits on a slope with a southern or west-facing pitch, you are likely to notice faster granule loss on asphalt shingles, faster color fade on lighter surfaces, and more frequent inspection needs near the peak sun hours. That sun-driven wear doesn't just affect appearance: it shortens the effective life of flashing and edge details, increasing the risk of slow leaks sneaking in between major dry spells. The message is urgent-surface aging doesn't wait for a "good" storm window. Plan proactive checks before the next heat wave, especially on flashing joints, roof penetrations, and the top edges where sun exposure concentrates.
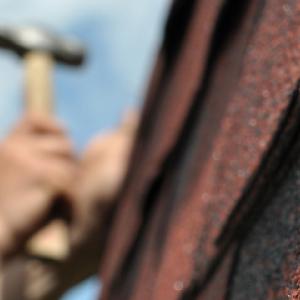
Fall Santa Ana wind events funnel through the Cahuenga Pass and canyon corridors that surround Studio City, lifting loose shingles and shifting ridge components when fast-moving drafts find unsecured areas. Even a handful of loose tabs or a misaligned ridge cap can become a problem that multiplies on a windy day when debris is driven under edges. These winds compress the window for safe tear-off or major repairs into a narrow, often treacherous timeframe. If a roof is already showing signs of edge lift, cracked sealants, or displaced ridge components, waiting for a calm day can push you into weather-limited schedules that carry higher risk to crews and the property. Secure all loose pieces quickly, and have a plan for immediate stabilization before a windy spell hits.
Studio City's Mediterranean pattern means many leaks first show up during winter rain after months of dry weather. Cracked flashings, aged underlayment, and tile slip issues can stay hidden through the dry season and suddenly reveal themselves when the first sustained rains arrive. That timing is cruel: after a dry spell, even minor weaknesses become visible, and what looked minor in a dry period becomes a full-on leak during a rainstorm. The risk is compounded on low-slope Valley roofs where drainage and deck integrity are tested by seasonal wetting. If you notice damp spots after a dry stretch ends, or hear suspected drip sounds during steady rain, treat it as a priority, not a nuisance, because the longer a dry spell ends without repair, the larger the potential damage when the next storm arrives.
When the calendar flips to shorter daylight and autumn gusts, treat your roof as a living system with a shrinking window for major work. Start with a proactive inspection of sun-exposed slopes, then verify ridge lines and flashing at all penetrations, paying particular attention to the conditions around skylights, vent pipes, and chimney branches that sit along the sun-warmed edges. If any looseness or movement is detected, secure it immediately and arrange a fast follow-up for resealing or re-fastening before Santa Ana season or an incoming storm. Create a rapid response kit for the crew: a small supply of matching sealant, protective tarps, and spare ridge cap screws, so that a windy day doesn't turn a minor uplift into a full tear-off emergency.
Walk the accessible slopes with a critical eye toward edge seals and flashing joints, especially on the south and west faces. Look for any shingle edges curling or lifting, and check ridge caps for cracking or displacement. Inspect around vents and skylights for hairline gaps that could widen with wind or rain. If you notice even small signs of aging or movement, plan a targeted repair window now rather than waiting for a rainstorm or a Santa Ana gust episode. The quicker a cautious fix occurs, the less risk of a damaged interior during the next seasonal shift.
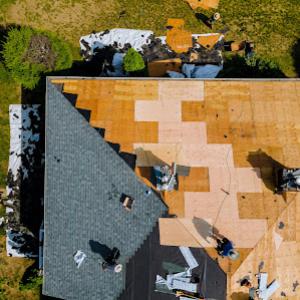
On hillside and view properties north of Ventura Boulevard, access to tile roofs often means navigating tight driveways, limited room for staging, and hands-on maneuvering around multi-level connections. When bringing materials up steep drive approaches, plan for a dedicated path and a small staging area at the edge of the lowest roof plane. Debris handling becomes a daily concern, so set up rollers or tarps that peel away cleanly to prevent dirt from sliding into the canyon. A practical approach is to schedule deliveries during a window of calm weather, and have a plan for catching any stray debris before it drifts onto neighboring properties or the street.
Visible tile may outlast the waterproofing below it, so decisions about replacement should focus on the underlayment and the components that tie the roof together. When reroofing, inspect the underlayment for wear, cracking, or moisture intrusion, especially around valleys and along transitions where Santa Ana winds can drive rain under the surface. Flashing around chimneys, skylights, and perimeters deserves close scrutiny, as improper seals here can create long-term leaks despite a sturdy tile surface. Battens and substrate condition determine how well new tiles will perform, so verify everything is properly aligned and fastened before laying fresh tile.
In this climate, clay and concrete tiles are common solutions, and their weight must be handled with careful staging and equipment. The slope and complexity of the roof influence how many workers are needed for a precise reset around corners, dormers, or multi-level junctions. If the roof has experienced previous leaks, consider a full assessment of the substrate and the nailer system before selecting tile profiles. The right mix of tile shape, color, and profile can help reduce future movement or cracking in a wind-prone canyon corridor.
Steeper hillside architecture and multi-level homes increase the labor intensity of tile work, especially around chimneys, skylights, and tight transitions where tiles must be cut to fit without compromising waterproof detail. For transitions, plan for extra flashing and careful seam treatment to maintain a continuous barrier against rain. When regrading or replacing roofs around dormers, framing changes and backcuts may be necessary to preserve both drainage and tile alignment. Communicate clearly with crews about level changes on the roof and confirm safe routes for wheelbarrows or scaffolding that won't damage delicate stucco or canyon vegetation.
Winter rain, persistent overhangs, and canyon winds can compress the window for tile work. In practice, aim for dry spells with moderate wind so crews can set tiles without frequent reseating. Santa Ana events, though bursty, can push work into tighter timeframes, so plan for contingencies in staging, especially for higher sections or shaded microclimates where moisture lingers. Close coordination with the crew to protect exposed underlayment during rain delays helps prevent confirmational leaks when the next dry spell returns.
Find contractors who specialize in clay and concrete tile roofs, known for their durability and curb appeal.

Quick Fix Roof & Gutter
(747) 298-7300 roofingpros.site
4021 Radford Ave #496, Studio City, California
4.7 from 68 reviews
Tectum Roofing
(818) 617-6677 tectumroofingco.com
11333 Moorpark St, Studio City, California
5.0 from 26 reviews


Universal Roofing Fixers
3450 Cahuenga Blvd W, Studio City, California
4.8 from 70 reviews
Universal Roofing Fixers is your go-to source for comprehensive roofing solutions. With a team of skilled professionals, we specialize in fixing a wide range of roofing issues. From minor repairs to extensive damage, we have the expertise to address your roofing problems effectively. Our goal is to provide reliable and lasting solutions that restore the integrity and functionality of your roof. Using quality materials and proven techniques, we ensure that your roof is fixed with precision and attention to detail. Trust Universal Roofing Fixers for dependable and professional roofing services you can rely on.
Everguard Roofing & Construction
(844) 790-6754 everguardroofingcalifornia.com
11712 Moorpark St STE 202B, Studio City, California
5.0 from 54 reviews
Proudly serving Los Angeles, Everguard Roofing & Construction specializes in high-quality roof repair, installation, and replacement with a focus on modern, energy-conscious solutions. As a family-owned company, we combine trusted workmanship with innovative options like cool roofs to help protect your property and improve efficiency — all with lasting results you can count on.
Honest Rate Roofing
(818) 873-7354 honestrateroofing.com
4000 Colfax Ave #2, Studio City, California
5.0 from 41 reviews
Honest Rate Roofing delivers trusted roofing solutions in Studio City, CA, and nearby areas. With years of experience, we specialize in roof repair, roof replacement, roof installation, shingle roofing, and asphalt shingles. Our team also provides detailed roof inspections to help protect your home or business. Known for our honest pricing, quality workmanship, and fast response, we’re committed to keeping roofs safe and sound across the community. Whether it’s fixing a small leak or installing a brand-new roof, we bring professionalism and care to every job.

Quick Fix Roof & Gutter
(747) 298-7300 roofingpros.site
4021 Radford Ave #496, Studio City, California
4.7 from 68 reviews
Quick Fix Roof & Gutter is your go-to company for prompt and efficient roof and gutter solutions. With our experienced team of professionals, we specialize in addressing a wide range of roofing and gutter issues with speed and precision. Whether it's fixing leaks, replacing damaged components, or providing maintenance, we have the expertise and tools to get the job done right. At Quick Fix Roof & Gutter, we understand the importance of a well-maintained roofing and gutter system. Trust us to provide quick and reliable solutions that restore the integrity and functionality of your property.
Tectum Roofing
(818) 617-6677 tectumroofingco.com
11333 Moorpark St, Studio City, California
5.0 from 26 reviews
At Tectum Roofing, we know how crucial a strong, dependable roof is for your home. That’s why we offer top-quality shingle, tile, torch down, and metal roofs for residential and commercial properties with up to a 50-year manufacturer warranty, giving you peace of mind for years to come. Our team of experts is here to provide exceptional service and make the whole process smooth and hassle-free.

Essential Roofing & Construction
(818) 938-2585 chooseessential.com
Serving
4.9 from 267 reviews
Essential builders is a family owned business for the past 10 years. We started this trying to help people achieve the right work for their money. Building homes or anything related to it can be a headache. Contractor not showing up? Work done improperly? Problems after completion? We solve all of those problems, with our in house employment we can deliver and job in a timely manner and provide proper warranties to put our customer at peace. With thousand of happy customer in the past years of working we have what it takes to complete you job!
Roofing Prodigy Valley Village
Serving
4.8 from 80 reviews
Roofing Prodigy Valley Village is a leading provider of superior roofing services in the Valley Village area. With a team of skilled professionals, we bring expertise and innovation to every project. Whether you need installations, repairs, or maintenance, we go above and beyond to deliver exceptional results. Our focus is on utilizing cutting-edge techniques and high-quality materials to ensure durable and reliable roofs. We understand the importance of a well-maintained roof, and our goal is to provide top-tier craftsmanship that exceeds expectations. Count on Roofing Prodigy Valley Village for expertly executed roofing solutions that enhance the protection and aesthetic appeal of your property.
Jextro Mode Roofers
(424) 328-6300 jextromoderoofers.pro
Serving
4.9 from 46 reviews
Jextro Mode Roofers are the experts in roofing solutions, serving the Toluca Lake area with reliable craftsmanship and impeccable precision. We offer a wide range of advanced techniques to cater to any roofing project's needs, from installations to complex repairs, ensuring your property stays protected and sturdy for years to come. Visit our website for more information.
Gold Star Roofing & Exteriors
(818) 740-5561 theexpertroofers.com
Serving
4.8 from 71 reviews
Experience top-quality roofing and exterior services with Gold Star Roofing & Exteriors. Our skilled team of professionals is committed to delivering exceptional results that exceed expectations. With our attention to detail and superior craftsmanship, we provide reliable installations, repairs, and maintenance for your roof and exteriors. We prioritize durability, functionality, and aesthetics, ensuring the protection and longevity of your property. Trust Gold Star Roofing & Exteriors for reliable and professional solutions that enhance the value and beauty of your home or business. Experience the difference we can make for your property today.
Rafael & Iris Roofing
(818) 629-9994 rafaelandirisroofing.com
Serving
5.0 from 72 reviews
We are specializing in all roofing material installation roof repair attic insulation install seamless rain gutters and solar panels install License number B,C-39 #1057349 Insured and bonded
The Roofing Team
Serving
4.8 from 71 reviews
The Roofing Team is a dedicated group of roofing professionals committed to delivering exceptional service. With years of industry experience, our team brings expertise and craftsmanship to every project. From installations to repairs, we handle each task with precision and attention to detail. We understand the importance of a well-maintained roof, and our goal is to provide reliable solutions that exceed expectations. Using quality materials and proven techniques, we ensure that your roof is built to withstand the elements and provide long-lasting protection. Trust The Roofing Team for reliable and expert roofing services.
AnyTime Roofing North Hollywood
(747) 347-2338 anytimeroofingincca.com
Serving
4.8 from 90 reviews
AnyTime Roofing North Hollywood is a trusted, family-owned roofing contractor proudly serving North Hollywood and the greater Los Angeles area for over 25 years. We specialize in roof replacement, roof repair, flat roofing systems, shingle roofs, tile roofs, and torch-down roofing for both residential and commercial properties. Our experienced team delivers high-quality workmanship using durable, industry-approved materials. As a licensed and insured roofing contractor, we are committed to honest pricing, transparency, and customer satisfaction. We proudly serve North Hollywood, Valley Village, Studio City, Sherman Oaks, Burbank, and surrounding Los Angeles communities. Contact AnyTime Roofing North Hollywood today for a free roof inspec
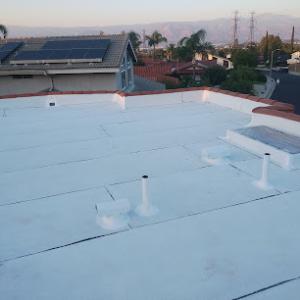
In this part of the Valley, sun exposure and canyon winds compress the time frames for keeping a low-slope roof in good shape. South-facing hillside sun cooks membranes and coatings, while Santa Ana-era gusts through the Cahuenga Pass can lift edges and drive sheets toward fatigue. Winter rain hits with more urgency when the roof already carries heat-stressed, aging components. For homes with flat or near-flat sections, the window for effective maintenance and timely repair can be shorter than on steeper, more insulated roofs.
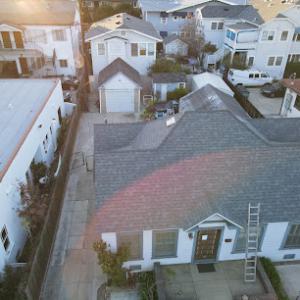
Studio City features many ranch, mid-century, and addition-heavy designs, with low-slope sections on flatter Valley lots where drainage design matters more than pitch alone. Pay attention to patios, rear additions, and garage conversions, where ponding, scupper problems, and transition flashing failures frequently show up during winter storms. If a low-slope terrace drains poorly or has a history of standing water after rain events, treat it as a priority for inspection and flashing checks. Also, because heat builds up on broad low-slope surfaces, reflective coatings and cooling strategies become practical considerations to extend roof life here.
Begin with a visual walk of the roof after a heavy rain or a rain-and-wind event. Look for areas where water pools longer than a few minutes, especially near parapets, scuppers, and downspout terminations. On patios or rear additions, verify that drainage lines route away from connections to perimeter walls and transitions to higher roof planes. Check edge shingles or membrane laps for micro-tears or lifted edges that can widen with seasonal expansion and contraction. In these low-slope zones, even small edge defects can become leaks during winter storms.
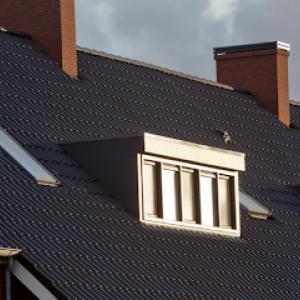
Transition flashing between a low-slope living area and a steeper roof or a wall detail must be solid. In Studio City's mixed housing stock, transitions around parapets, skylights, and vent penetrations are frequent leak points. Ensure that base flashing sits under counterflashing and that all penetrations are sealed with compatible sealants resistant to sun exposure and salt-air effects from Santa Ana winds. Fall and winter are prime seasons to recheck sealant lines; once sealants show chalking or loss of adhesion, plan timely resealing before a heavy rain cycle.
Heat buildup on broad, sun-exposed low-slope runs can shorten membrane life. This makes reflective or white/cool roofing coatings more relevant than in cooler coastal districts. If the existing system shows signs of accelerated aging-color fading, soft spots, or accelerated granule loss on asphalt-based options-evaluate a reflective coating or a membrane with heat-resistant properties. In areas with long sun exposure, a more robust coating strategy can buy months or even years of service life compared with darker, non-reflective alternatives.
Establish a twice-yearly inspection cadence aligned with seasonal transitions: after the dry season and after the wet season. This helps catch small issues before they become leaks during winter storms. Document any changes in ponding behavior or flashing integrity, and address minor repairs promptly to avoid cascading water intrusion through low-slope joints. In this part of the city, the goal is to maintain a clean, well-sealed edge around low-slope zones where moisture first encounters the roof system.
Find specialists in TPO, EPDM, and built-up flat roofing systems for residential and commercial properties.

Universal Roofing Fixers
3450 Cahuenga Blvd W, Studio City, California
4.8 from 70 reviews
Tectum Roofing
(818) 617-6677 tectumroofingco.com
11333 Moorpark St, Studio City, California
5.0 from 26 reviews
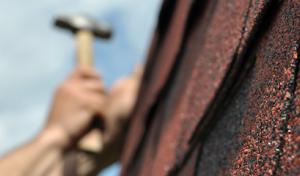
Asphalt shingles remain common for cost-sensitive reroofs, but in this hotter Valley exposure they need careful attention to attic ventilation and sun-facing slope wear. The south-facing decks and attics in many homes soak up intense sun, which accelerates shingle aging and can lead to premature granule loss or midlife failures if ventilation isn't up to the task. When you choose asphalt, pair a robust attic venting plan with a reflective or cool roof shingle option, and consider higher-than-average insulation to reduce heat transfer into the living space. In canyons and along hillside streets where wind funnels through gaps, select a shingle with a wind rating appropriate for the exposure, and ensure the roof deck is dry and solid before installation to minimize nail pop and curling over time.
Clay and concrete tile fit the area's Spanish and Mediterranean-style housing stock, but their weight and the condition of older roof framing can affect reroof scope on legacy homes. Before selecting tile, assess structural capacity and confirm that the existing framing and deck can handle the added mass. Tile roofs excel in heat resistance and long service life, yet they demand a well-sealed underlayment and careful attic ventilation to keep interior humidity in check. For hillside sites, consider a through-fastened or concealed-fastener system designed for seismic and wind considerations common in this market, and plan for regular inspections of tile integrity after heavy Santa Ana gusts and winter storms. If your home carries a historic or stylistic value, clay or concrete can preserve curb appeal while delivering durable performance, but budget for potential reinforcement and re-seaming of tiles on aging structures.
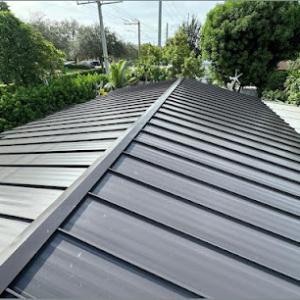
Metal and synthetic/composite systems are increasingly relevant for homeowners balancing heat performance, lighter weight, and modern aesthetics on remodels in the Studio City market. Metal roofs reflect radiant heat well, which helps keep attic temperatures down during long sunny spells and can reduce cooling loads. Synthetic composites mimic the look of traditional materials while delivering improved wind resistance on exposed hillside routes. For canyon winds and changing weather patterns, a metal or composite system should be paired with a high-quality underlayment, properly sealed seams, and appropriate fasteners to resist uplift. Aesthetics can be tailored to contemporary remodels without sacrificing performance, making these options a practical compromise when the project involves re-roofing older framing.
Across all materials, sun exposure and canyon winds shorten exposure to usable roof life, so periodic inspections matter more here than in milder climates. Watch for early signs of wear on slope edges where sun exposure is greatest, and schedule midseason checks after intense wind or rain events. In older homes, ensure that roof framing and deck integrity are sound before committing to a new material, since the right choice should harmonize with the structure's history and future remodel plans.
In this hillside community, pricing for reroofs or major repairs is notably influenced by access constraints along narrow streets and the need to maneuver gear on multi-level rooflines. The result is higher labor time and staging challenges that can push the final bill above benchmark figures for flatter, easier sites. When you're pricing a project, expect crews to quote higher for asphalt shingles or metal only if the scope demands careful navigation of steep grades, limited driveway space, or two-story transitions. Tile options-whether clay, concrete, or synthetic-tend to carry a larger premium because flashing, step detailing, and the need to reset distinctive architectural features (chimneys, skylights, curbs) require meticulous workmanship and careful material layout. In short, the terrain and house geometry here reliably lift the labor component, and that translates directly into cost pressure on the square.
For a typical studio-area reroof, the cost per square varies with material and complexity. Asphalt shingles, the most common choice for value, run roughly from the low 350 to the high 900 USD per square, but expect the upper end if access is tight or staging is a squeeze. Metal roofing sits higher, roughly 700 to 1500 USD per square, and can be cost-effective in the long run if replacement timing is tight due to sun exposure and wind. Tile options-especially clay-tend to be the most budget-sensitive when accounting for architectural details; clay tile falls around 1100 to 2600 USD per square, while concrete tile lands roughly 900 to 1600 USD per square. Synthetic or composite shingles offer a lower mid-range alternative, approximately 550 to 1000 USD per square, yet still require careful detailing for transitions. For a project on a hillside home with chimneys and skylights, those ranges shift toward the higher end, reflecting the labor of flashing and recurring reset labor.
Winter rain and Santa Ana wind events create jittery calendars in this submarket. When a leak or wind damage hits, crews scramble to secure staging and expedite replacements, often compressing timelines and increasing after-hours labor or expedited material orders. If you're budgeting a reroof during the shoulder seasons, you may still face a tight window between weather events and buyer demand, which can push contractor pricing up versus a slow season. Plan for a little extra contingency in your estimate to cover potential scheduling squeezes, especially for tile reroofs that demand precise flashing and custom detailing around chimneys and skylights. In practice, this means you'll want to lock in a schedule early and confirm that the chosen roofing material's installation sequence aligns with the existing roof geometry to minimize costly rework.
Get a clear picture of your project costs upfront - no commitment required.
Universal Roofing Fixers
3450 Cahuenga Blvd W, Studio City, California
4.8 from 70 reviews


Quality Roofing Specialists
(310) 340-1643 qualityroofingspecialists.com
Serving
5.0 from 91 reviews
A reroof in this area travels through the Los Angeles permit and inspection system, not a separate standalone city process. That means your project will share the same review cadence and expectations as other urban rebuilds, with staff looking for a coherent sequence from permit release to final sign-off. In practice, that translates to a clear sequence: plan review, installation compliance checks, and a final inspection that confirms weatherproofing integrity. The goal is to avoid surprises that can stall work or trigger rework once crews are on site.
Inspections commonly verify several key details that matter for longevity and performance under Santa Ana winds and winter rain. Underlayment must be properly installed to shed moisture and resist wind-driven leakage. Flashing around chimneys, vents, skylights, and transitions should be continuous and well-seated to hold up against high-descent winds through canyon corridors. Ventilation is checked to prevent heat buildup and moisture-related damage inside the attic space. Overall weatherproofing is assessed at critical points-especially along roof-to-wall intersections and penetrations-so a sound, durable seal is achieved before project closeout. Rough-in and final sign-offs depend on scope, so larger jobs will demand more documentation and staged approvals.
Homes that involve larger remodels, structural changes, or more complex assemblies can trigger added documentation or plan review beyond a straightforward same-type reroof. In Studio City, a retrofit that touches framing, seismic connections, or unusual water management details may prompt engineers or plan reviewers to request extra calculations or detail drawings. If that happens, expect a longer turnaround and closer coordination with the contractor to align on the approved scope before continuing. Staying proactive-having complete layouts and product specs on hand-helps keep the process steady and reduces the risk of delays.
In a hillside neighborhood where sun angles bake rooftops and Santa Ana winds sweep through canyons, insurance markets tighten in ways that surprise even long-time homeowners. A roof's age, material type, and the clarity of documentation can sway underwriting and renewal decisions even when there is no active claim. The result is a quiet but real pressure to keep records sound and the roof in line with what carriers expect for this climate and terrain.
Because a certain portion of the City's housing sits near brush and hillside features, wildfire-related regional risk gets folded into premium accuracy and carrier scrutiny more than a simple wear-and-tear assessment would. A roof that shows better resilience to heat, ember exposure, and wind-driven debris may be viewed differently than one that looks dated or incomplete in recovery from a past event. That nuance matters when the market shifts with seasonal fire weather and statewide risk assessments.
Detailed photo records, installation receipts, and proof of completion of any work are especially useful here when insurers review replacement history or storm-related damage claims. A clean timeline showing when major components were installed, upgraded, or repaired can help distinguish routine maintenance from significant hazard improvements. In practice, gather and preserve these items in a dedicated file, ready to share with an adjuster who is weighing a roof's overall resilience in a wildfire-prone landscape.
In a market where coverage and terms can hinge on the smallest details, a proactive approach pays off. Regular, visible maintenance that keeps the roof sound, paired with organized documentation, reduces guesswork for insurers and supports steadier renewal discussions over time. Keep an eye on ventilation, flashing integrity, and the condition of tiles or shingles chosen to endure California summers and canyon winds.
Connect with contractors who help homeowners navigate the claims process from damage assessment to final approval.
Universal Roofing Fixers
3450 Cahuenga Blvd W, Studio City, California
4.8 from 70 reviews

Honest Rate Roofing
(818) 873-7354 honestrateroofing.com
4000 Colfax Ave #2, Studio City, California
5.0 from 41 reviews
Quick Fix Roof & Gutter
(747) 298-7300 roofingpros.site
4021 Radford Ave #496, Studio City, California
4.7 from 68 reviews