Last updated: Apr 19, 2026
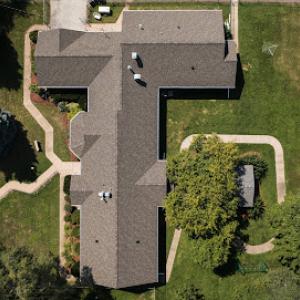
Rock Island sits in the Quad Cities storm corridor where spring and summer hail and wind events drive a high volume of roof damage inspections and insurance claims. That means after each major hail swath or wind burst, the roofing system in many homes faces a tight clock for evaluation, repair planning, and approval. The risk isn't just cosmetic-water intrusion, interior ceiling staining, and accelerated shingle or underlayment deterioration can push small leaks into costly interior damage quickly. When the next severe outbreak rolls through, the flip side is a crowded field of claims, crowded schedules, and a real risk that timing slips past the window insurers expect for proper coverage.
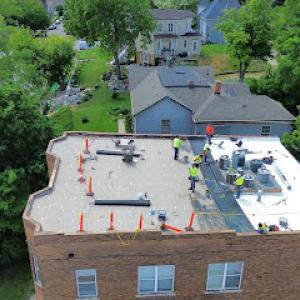
Local project starts are often delayed not by contractor availability alone but by adjuster scheduling and claim approval timing after regional storm outbreaks. Insurance workflows operate on the insurer's regional cadence, which can slow to a crawl during peak storm weeks. If a major hail event hits on a Thursday, you should expect adjusters to be tied up through the weekend and into the following week, with field adjuster visits potentially staggered across several days. That cascading delay can push your project weeks beyond the initial repair window, especially for heavier tile or premium roof systems that demand more detailed evaluation and documentation.
Homeowners in this Illinois market commonly need before-and-after photos, a detailed contractor estimate, and code-related documentation when filing hail or wind claims. Before any claim gets approved, insurers will want a clear, compelling narrative of the damage: precise photos showing hail impact, wind-driven lifting, and any incidental interior damage. The before-and-after images should capture roof planes, valley intersections, flashing, edges, and fascia. A contractor estimate should itemize the scope-shingle or tile replacement once and sealing or flashing repairs where needed-so the adjuster can compare your numbers against their contractor's scope. If there are code-related concerns-venting, bracing, or updated flashing standards in your area-have documentation ready to show how the proposed repairs align with current code or insurer guidance.
Immediately after a storm, create a dated damage log that ties specific roof areas to weather events. Use a smartphone to take high-resolution photos from safe ground angles and, if possible, a ladder-supported close-up on affected sections away from power lines. Schedule temporary measures if leaks are visible: tarping during forecasted rain can prevent interior damage and creates tangible urgency for the adjuster. Contact your chosen roofing contractor early to start a professional assessment that you can attach to the claim. Have the contractor prepare a detailed estimate with itemized line items and a brief explanation of the work's necessity, including access, debris disposal, and disposal fees if applicable. If you have supplementary documentation-homeowner policy specifics, prior claim history, or recent weather repair notes-compile them for the filing bundle.
When the adjuster arrives, accompany them or ensure another knowledgeable person is present to answer questions about the roof's condition and the scope of repair. Clarify whether the claim covers temporary protective measures, debris removal, and any needed code-related upgrades. If a discrepancy arises between your contractor's estimate and the adjuster's assessment, request a revision meeting or an agreed-upon scope addendum in writing, including revised timelines. Keep a clear record of all communications-dates, names, and outcomes-so nothing slips through the cracks during the storm season's peak. The key is maintaining momentum: prompt documentation, a solid contractor estimate, and precise, complete information that aligns with the insurer's review process.
During periods of severe activity, adjuster appointments may be scheduled in blocks to address multiple claims in a single visit route. If your roof is a heavier system or the home's age requires more complex repair work, anticipate a more involved review and a longer lead time before construction can begin. Have a backup plan for alternate roofing materials or temporary coverings in case a rapid upfront decision isn't possible. Keeping these contingencies ready prevents weather exposure from turning a manageable repair into a prolonged, moisture-filled setback.

Colonial Roofing Systems
(888) 884-9001 www.colonialroofingsystems.com
510 30th Ave, Rock Island, Illinois
4.9 from 42 reviews
Colonial Roofing Systems is a customer- service-oriented company dedicated to providing fast, reliable, high-quality roof restoration and other related services for property owners in need of trusted, expert help with their roof's storm restoration. We have been serving our customers with pride since 1989. Please give us a call (888) 884-9001 and let us come to your home for a free roof inspection.

2 Guys & a Gutter
3720 46th Ave, Rock Island, Illinois
4.7 from 3 reviews
2 Guys & a Gutter Provides Gutters Guards, Free Estimates, Copper Gutters, Color Option Is Available, Gutter Repair, Gutter Cleaning, Roof Cleaning Services to the Rock Island, IL Area.
Twin Bridge Roofing & Construction
Serving
4.9 from 35 reviews
We're a general contractor you can trust when your homes been damaged by wind or hail. We complete all aspects of the insurance claim from start to finish! Licensed, bonded and insured for your protection and piece of mind!
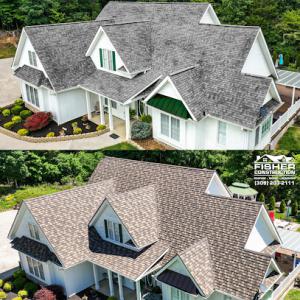
Fisher Construction
(309) 203-2111 fisherconstructionllc.com
Serving
5.0 from 52 reviews
Fisher Construction is the top choice for exterior remodeling in the Quad Cities, serving both residential and commercial properties. Our skilled team specializes in roofing, windows, siding, gutters, and doors, delivering top-quality craftsmanship and lasting results. We are fully licensed, bonded, and insured in Iowa and Illinois, and we’re committed to maintaining the highest industry standards. Customer satisfaction is our priority, and we strive to make every project seamless and stress-free. We also offer free estimates to help you plan with confidence. Trust Fisher Construction to handle your exterior remodeling needs with professionalism and care.
Hugaert Roofing
(563) 210-4351 hugaertroofing.com
Serving
5.0 from 150 reviews
Everything from complete roof replacement to replacing one shingle. If you need anything taken care of on the exterior of your house, siding as well, call us today! If your home was damaged for any reason be sure to call us, we work great with insurance as well. Very professional and knowledgeable. We work hard to make sure the customer is always satisfied. Local and family owned!
R3 Roofing & Exteriors
Serving
4.7 from 215 reviews
When it comes to your house, don’t mess with the rest, trust the best. We Can Fix It! At R3 Roofing and Exteriors, we believe in the long-term quality and comfort of our client’s homes. That means not cutting corners in the name of making things “easier”. In that sense, you can say that we subscribe to more “traditional values”, and care about detail and care above all else. When you call, we will prepare to serve you as soon as possible. We will also be sure to arrive with everything you need for your unique situation.
Solid Construction
Serving
5.0 from 8 reviews
Look no further than Solid Construction Whether you need help on a small project or a larger job, we want to take the load off your shoulders by providing our specialized services. Solid Construction is a leading and reputable construction company covering roofs, storm damage, gutters, siding, repairs, new construction and more! We're committed to providing quality and precision to go that extra mile to provide and cover our clients needs. Contact our office today for a free estimate to find out what we can do for you!
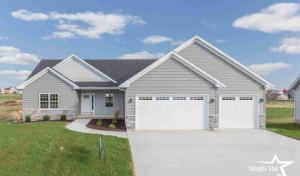
Shingle Star Roofing Company
Serving
4.9 from 28 reviews
If you're looking for a trusted roofing company in the Davenport, IA and The Iowa Quad Cities area, look no further than Shingle Star. Turn to us for all your residential roofing needs
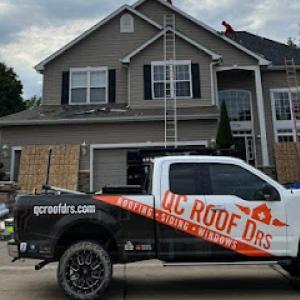
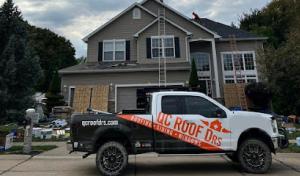
Roof Drs
Serving
4.9 from 539 reviews
🏠The only doctors still making house calls! Roof Drs, located at 1313 N. Harrison St., Davenport, IA, is your go-to roofing contractor for top-quality roofing services. With nearly 60 years of combined experience, we serve the Quad Cities and surrounding areas, specializing in residential and commercial roofing solutions. As GAF Preferred Contractors and CertainTeed Select Shingle Masters, we offer expert roof repair, roof replacement, roof installation, and storm damage repair. Our team is committed to meticulous craftsmanship, reliability, and providing the best warranties. Contact Roof Drs for dependable roof inspections and a full range of siding, window, and gutter services to enhance your property's integrity.
Quint Cities Restoration
Serving
4.9 from 35 reviews
Quint Cities Restoration is made up of professionals who live and work in the Quint Cities area. Our goal is to help keep our community beautiful, whether it’s after a storm or general home care. As restoration professionals, we will assist in making the process easy to ensure the proper coverage is received and the project results in a quality finished product. Every claim and project is given individual attention and handled with professionalism from start to finish. Quint Cities Restoration has 7 main areas of focus, including Roofing, Siding, Gutters, Interior and Storm Restoration.
Storm Recovery Roofing & Siding
(309) 524-3109 stormrecovery.com
Serving
5.0 from 26 reviews
Storm Recovery Roofing & Siding is a qualified roofing and siding company in Illinois & Iowa. Our project managers deliver outstanding service and support. All of our work is guaranteed and complies with the highest industry standards. If you need to repair your damaged roof or replace your outdated siding, we can help. We specialize in restoring homes and commercial buildings. If your gutters are broken and causing water damage to your property, we can replace them too! You can count on us to help you with the insurance claim process and restore your home exterior back to new.
A1 General Contracting
Serving
5.0 from 17 reviews
A1 General Contracting, LLC is a Quad City based contractor that specializes in exterior storm restoration work. We are locally owned and operated. Licensed and bonded in Illinois, and Iowa. offering services for residential and commercial. Mainly roofing, siding, and gutters. Insurance claims is our specialty. Free estimates and consultations for any exterior work, and some interior. A proud member of the Better Business Bureau. We are an Owens Corning Preferred Contractor. Call us today for you home's needs.
Winters bring repeated freeze-thaw cycling that is especially hard on shingle seals, flashing joints, and vulnerable roof penetrations. In this climate, the water trapped under granules or around flashings expands and contracts with each thaw, then refreezes, which can loosen fasteners and widen gaps. Over multiple seasons, the cumulative strain shows up as more persistent leaks around dormers, chimneys, and vent pipes, and on lower-slope sections where sun exposure is limited. When ice forms in eaves or along rake edges, the weight and pressure can also push against underlayment and edge metal, accelerating preexisting wear.
Snow and ice conditions in this river city can slow access for inspections and repairs, which increases the chance that small leaks remain active until weather breaks. When roofs are slick, a quick look from the attic or from a ladder is often the safest first step, but a full exterior assessment should wait for a clear, dry day. If there is active ice damming, do not attempt to remove it with metal tools or pressure; rapid removal can damage shingles or cause leaks to widen. Instead, focus on interior signs of leakage, such as staining on ceilings, musty odors, or damp insulation, and plan a professional assessment during a dry spell.
Replacement timing in Rock Island is commonly pushed toward late spring and early fall because those windows are drier and more moderate than winter and peak summer. The goal is to align with calmer weather and consistent daytime temperatures to protect underlayment and sealants during installation. If a roof shows repeated freeze-thaw damage, prioritize repairs to restore flashing integrity and ventilations before a full replacement, but avoid staging errors that leave vulnerable penetrations exposed through the winter. When planning replacement, anticipate extra consideration for older housing stock with heavier tile systems or complex venting that may require staged work and careful coordinating with crews.
After a severe freeze-thaw cycle, conduct a targeted walk-around to identify lifted shingles, torn granules, or loose flashing around chimneys and plumbing stacks. Mark any suspicious areas with chalk or tape from ground level to guide a safe roof assessment. If leaks are present, place a temporary, breathable tarp or water barrier over the affected area to buy time, but avoid covering vents or turbines that require proper ventilation. Schedule a licensed roofer to perform a thorough inspection, focusing on seal integrity, flashing joints, and penetrations, and plan for targeted sealing or resealing as needed to prevent future intrusion during the next thaw.
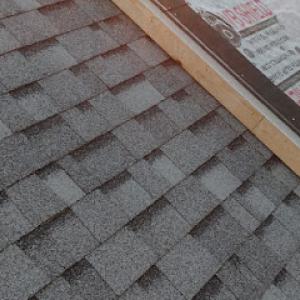
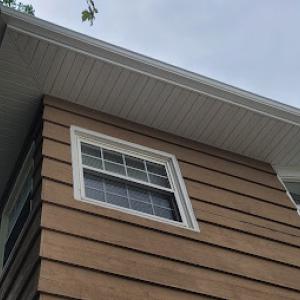
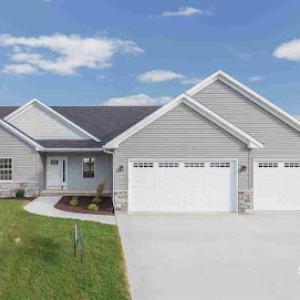
Asphalt shingles dominate replacements in this area, and for good reason. They pair well with the typical Rock Island roof lines and attic ventilation setups while handling the wide Mississippi climate swings. In a neighborhood that sees winter freeze-thaw cycles and hot, storm-prone summers, think performance that resists wind uplift and resists hail impacts where possible. When you're evaluating this option, prioritize shingles with a higher impact resistance rating and a sturdy underlayment system. A fastener pattern that locks down in gusty winds and a solid nailing zone near the drip edge can make these roofs more durable through spring hail events and summer thunderstorms. In older stock, where sheathing may have wear from decades of weather, ensure the deck is solid and tightly spaced before installing anew.
Metal roofs are increasingly common where homeowners want quick protection and a long service life. They offer excellent performance in hail storms and fierce winds, and they shed rain and melt snow rapidly-benefits in the Quad Cities climate. Look for panels with robust coastal-style or interlocking seams, and confirm that the fastening system is compatible with the existing roof deck and attic ventilation. Metal can be an ideal match for steeper pitches and for homes where the roof structure tolerates a lighter load than tile. For storm season, ensure proper sealant around penetrations and verify tray and ridge venting to avoid heat buildup in attic spaces.
Wood shakes and shingles deliver the classic curb appeal that many Rock Island houses crave, but they require careful maintenance to handle sun exposure, humidity, and freeze-thaw cycles. The natural fibers can absorb impacts more than some composites, so a higher-quality sealant and a proactive maintenance plan matter. If installed, expect attention to surface treatments, moss or lichen control, and inspection after hail to spot delamination or granule loss on nearby asphalt beds. A visually striking roof that endures weather swings hinges on proper nailing patterns and a solid, rot-free deck. On older homes, confirm that roofing overlays or retrofits do not compromise attic ventilation, especially during hot months.
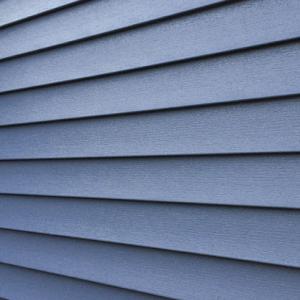
Synthetic and composite shingles blend durability with a more forgiving installation profile. They often resist hail better than traditional asphalt and can provide a longer service life in a climate with heavy freeze-thaw cycles. These systems benefit from modern granule formulations and flexible underlays that handle temperature swings. For best results, pair them with an underlayment designed to resist moisture migration and a fastening system that remains secure through variable Rock Island winds. If the home's geometry includes steep slopes or complex ridges, ensure the selected product is rated for those conditions and that the installation method accounts for wind uplift on exposed edges.
Clay and concrete tiles offer exceptional longevity and a distinctive look, but their weight and stiffness call for careful assessment. Heavier assemblies can trigger added documentation or plan review through the City of Rock Island Building Division, so anticipate a thorough evaluation of roof structure and deck capacity. Tile systems perform well in heat and storm cycles when fastened securely and paired with a compatible underlayment and flashing strategy. If the roof is over older framing, consider a structural review to confirm absorption of winter freeze-thaw stresses and wind loads.
Rock Island pricing can rise after major Quad Cities storm events when regional demand spikes for inspections, tear-offs, and insurance-related re-roofing. After a derecho or a heavy hail season, contractors may queue up substantial jobs, and lead times extend. That dynamic pushes both material procurement costs and labor rates upward for a window of weeks to a couple of months. When planning, expect a potential premium if a hail storm hits nearby neighborhoods and local crews are booked solid.
Costs in this city vary sharply by material. Asphalt shingles run about 350 to 750 USD per square. Metal roofing generally sits between 700 and 1200 USD per square. Clay tile is 900 to 1800 USD per square, while concrete tile runs 800 to 1500 USD per square. Wood shingles or shakes fall in the 600 to 1100 USD per square range, and synthetic or composite shingles are typically 450 to 850 USD per square. These bands reflect local supply, transportation, and the need to match older roof lines and attic venting with modern underlayment standards. A higher upfront price often correlates with longer expected life and better hail resistance, which matters after spring and summer storms.
Projects involving unusual assemblies, heavier tile systems, or added city review typically carry more pre-installation coordination than a standard asphalt re-roof. In Rock Island, multi-layer roofs, slate or tile over existing structures, or complex venting and insulation fixes can extend timelines and increase labor intensity. Expect additional trips, increased disposal, and potential temporary protection costs during severe weather windows. Budget for extra pre-installation time and confirm that the chosen crew can safely handle the specific assembly without compromising warranty.
Storm seasons concentrate demand, and that concentration often tightens scheduling. If a claim is involved, insurance timing can influence when work starts and how payments align with material deliveries. For heavier or statement roof types, plan for longer permitting coordination and possible vendor lead times. In practice, building a contingency of 10-20% above the base material range is prudent when storm-driven demand is high, and selecting a material with readily available stock can help keep the project on track during peak periods.
Get a clear picture of your project costs upfront - no commitment required.

A re-roof in Rock Island typically requires a permit issued by the City of Rock Island Building Division. The permit acts as a formal notice that the work will be inspected for safety and code compliance, and skipping it can lead to fines, stop-work orders, or future remodeling headaches. Because the turnover of inspectors can vary seasonally, expect some back-and-forth if the project starts during peak weather windows. In practice, your permit file should reflect the type of roofing system you're installing, the existing structure's quirks, and any adjacent exterior work that might trigger extra reviews.
City inspections are used to verify underlayment, flashing, ventilation, and overall code compliance rather than treating roofing as a no-contact replacement. That means you should plan for at least one inspection after the roof deck and underlayment are in place, followed by a final inspection after the new roof is completed. If a flashing detail or attic ventilation change is involved, the inspector may want to see those components up close and confirm they meet local code requirements. The process can feel meticulous, but that attention helps prevent leaks and wind-driven failure that are all too common after Quad Cities weather swings.
Processing times can vary locally, and larger or unusual roof assemblies such as clay or tile may require additional documentation or plan review before work proceeds. If your home has an older roof structure or a retrofit-friendly attic, the city may request structural details, fastening schedules, or water management plans. Providing clear notes about roof shape, vent placement, and any overhang changes can smooth the path to approval. The key is to stay proactive: submit early, respond promptly to any requests, and align your contractor's schedule with the permitting timeline to avoid delays during spring and summer storm seasons.
Rock Island summers are warm and storm-prone, which affects both crew productivity and how roofing materials are handled on install days. On the hottest days, heat can soften asphalt and synthetic shingles, making handling more careful and slower. Metal roofing panels heat quickly, so keep gaps ventilated and edges protected to avoid warping. Scorching UV exposure also ages underlayment sooner if it sits exposed for extended periods before flashing is set. Plan for early starts and finish-ups while shade and mid-afternoon heat break, and coordinate with material deliveries to minimize long stretches of roof exposure.
Fall winds and tree debris are a practical local issue because they complicate cleanup, expose weak flashing, and can interfere with final inspection readiness. Leaves, small branches, and acorns collect in valleys and along gutters, potentially hiding damage or new gaps. During cleanup, crews should blow or hand-remove debris from the roof and gutters, then inspect for shingle lift or flashing gaps that debris may have masked. Fallen branches can bend or dislodge vent pipes and edge metal, so flashing integrity should be checked after a windy period. Keep a tidy work zone to avoid debris interfering with fasteners, especially near overhangs and dormers.
Spring storm season and fall debris season create two separate maintenance checkpoints for Rock Island homeowners rather than a single annual roof check. After spring storms, document hail marks, cut back granule loss, and verify sealant joints and flashing are intact before heavy rains resume. In autumn, schedule a dedicated debris cleanup and a second, targeted inspection to confirm gutters and downspouts are clear, chimney and vent flashings are secure, and the roof is ready for winter winds. A two-step rhythm helps ensure wind-driven debris or hail damage doesn't linger and compromise the upcoming season.
In Rock Island, freeze-thaw movement and storm exposure make flashing details around skylights and chimneys a recurring leak concern. Snow and ice can push against roof penetrations, widening gaps where water can seep in even after a light rain. The harsh months after storms often reveal itself first at these points, not along broad expanses of shingles. Recognize that a small drip from a skylight or around a chimney is not just a cosmetic issue-it can signal a failing seal or degraded flashing that will worsen with another freeze cycle.
Local inspections commonly focus on flashing integrity and ventilation, so penetrations and transitions receive more scrutiny than cosmetic roof wear alone. Messy sealants or mismatched flashing materials can mask a deeper problem, especially where old roofs sit over wood decks or where vent stacks meet the field. If flashing appears wavy, corroded, or loose, that is a strong cue to pause any planned aesthetic fixes and prioritize proper flashing repair or replacement. Ventilation around attic vents and soffit-to-roof transitions also matters, because poor exhaust can trap moisture that accelerates rot beneath the roofline.
Because many contractors advertise chimney and skylight work, homeowners here are clearly encountering leak issues at those details often enough to shape hiring decisions. The consequence of delaying repairs is not only ongoing water intrusion but potential interior damage to ceilings, insulation, and framing after strong storms. A leak at a chimney or skylight often spreads laterally before it becomes visually obvious, making timely diagnosis essential.
When assessing a roof after a hail event or heavy wind, schedule a targeted evaluation of all penetrations, flashing transitions, and associated vents. Request documentation of flashing replacements, sealant updates, and any decking exposure found during the inspection. For repairs, insist on color-matched, durable flashing materials and properly sealed joints to minimize future creeping leaks through seasonal cycles.
Find contractors experienced in skylight installation, flashing, and leak repairs to bring natural light into your home.
Peterson Roofing & Home Improvement
(563) 386-8613 www.petersonroofing.com
Serving
4.7 from 47 reviews