Last updated: Apr 19, 2026
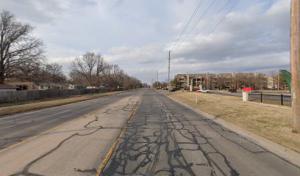
Storm season in this area brings repeated spring hail and high-wind events that drive roof claim activity higher than in many lower-severity markets. The moment hail or a gusty surge ends, the risk doesn't vanish. Damaged shingles, lifted tabs, and compromised sealants can look fine in the glare of daylight but fail under the next round of heat and sun. That means a quick, no-nonsense inspection for missing granules, dented metal edges, loose flashing, and soft spots is essential. If granules wash away in a rainstorm or if shingles curl at the edges, a closer look is warranted. In blistering heat after a storm, the damage you couldn't see in the shade or indoors can reveal itself as buckling, waviness, or adhesive failures when the roof expands with temperature. Immediate recognition of these cues helps prevent further interior damage and major repairs down the line.
Derby homeowners deal with frequent spring hailstorms and wind events that drive roof claim activity higher than in many lower-severity markets. That reality means insurers and adjusters interpret damage quickly once a claim is opened, but they also expect precise, organized evidence. Photograph the attic space around penetrations, vent areas, and chimney flashings after any storm. Capture sun-exposed surfaces at different times of day to show color loss, granule loss, and the edge damage that can indicate hail strikes. Create a simple timeline: the storm date, the first noticeable changes, and every step since-photos dated and stored in a single folder. Documentation should cover both visible damage and signs of latent issues, like separated sealant beads or damp ceiling spots that could signal hidden leaks. When talking to the insurer, reference nearby reports of hail size, wind gusts, and the storm path to anchor the claim in local experience. A clean, consistent file speeds the process and reduces back-and-forth questions during peak claim windows.
In Derby, repair schedules can back up after regional storm outbreaks because storm-response and re-roofing are both highly prevalent among local contractors. Plan for tight windows between assessment and replacement, and anticipate possible delays if multiple homes are awaiting material deliveries or crew availability. If a contractor suggests staged work, weigh the risk of weather exposure against the comfort of spreading out labor, especially on steep pitches or complex roof lines. When timeframes tighten, prioritize protective measures: temporary tarps over exposed plywood, careful edging to avoid wind-driven debris, and ensuring gutters stay functional to channel water away from the interior. Transparent communication with the roofer about weather windows, especially during the hottest stretches, can prevent misaligned expectations and reduce the chance of rework.
Hot summers after storm season can worsen hidden shingle and sealant damage that was first caused by hail or lifted tabs. UV exposure accelerates deterioration of asphalt, sealant bonds, and underlayment fasteners, turning minor issues into leaks weeks later. Look for soft spots when stepping on the roof, unusual creaks from vent seals, and interior staining that matches storm dates rather than seasonal leaks. A proactive approach emphasizes not just replacing damaged sections but addressing the root of accelerated wear: confirming the integrity of underlayment, re-securing raised nails, and resealing flashing. In practice, that means a thorough inspection after the first hot spell post-storm and a targeted repairs plan that mitigates further weather-driven damage.
Build a recovery plan around rapid assessment, solid documentation, and a realistic repair path that accounts for the peak claim season. Prioritize safe work practices, especially on steeper pitches and during windy days. Keep clear contact points with the chosen contractor, set expectations for inspection timelines, and establish a contingency plan for weather-driven delays. With storms a frequent neighbor, staying prepared and organized ensures that when the next hail event hits, the right steps are already in motion, reducing risk of cascading damage and expediting recovery.
In a market where hail and wind storms push claim volume up, the car-like pace of paperwork matters. Carriers commonly request photo documentation, evidence of pre-existing conditions, and an adjuster inspection before approving a full replacement. When damage is suspected, start compiling a simple file: exterior photos of any dented or creased shingles, granule loss in gutters or downspouts, and close-ups of roofing vents, skylights, and edge fasteners. Keep a dated log for elevations, soft metals, interior leaks, and the first date of observed damage. In this region, protecting interior ceilings and attic spaces with temporary, noninvasive measures can reduce secondary damage while the claim progresses.
Take wide shots of the entire roof from multiple angles, then zoom in on problem areas such as curled edges, missing granules, and dented flashing. Document any pre-existing conditions with clear, dated photos if possible, so the adjuster can distinguish between wear and new storm impact. Capture eaves, soffits, gutters, and downspouts, since heavy debris and metal deformation are common after spring events. If an interior leak is suspected, photograph ceilings and any staining with timestamps. Keep a consistent, chronological sequence of images; this helps prove the progression of damage when the claim enters a busy spring-through-summer period.
Expect an adjuster to request access to the attic and a walk-through of attic insulation, roof sheathing, and visible penetrations. A thorough inspection often includes measurements and, if applicable, infrared scans or moisture meters. Prepare for a potentially tight timeline, since multiple households in Derby can be filing after a major hail event. If you disagree with an assessment, request a re-inspection and provide your photo log and notes. A calm, organized presentation-photos aligned with dates, a simple narrative of observed leaks, and a paper trail of communications-tends to move the process forward more smoothly.
Because claim volume rises after spring storms, acting promptly is advantageous. Early documentation allows you to flag problem areas before they escalate, especially in areas with frequent wind-driven hail. Keep a close eye on soft metals, ridge caps, and flashing, which can fail quietly and lead to interior moisture days or weeks later. If a claim is approved, align your contractor selection with the insurer's preferred process to minimize coverage gaps or delays.
Some insurers serving hail-prone Kansas markets offer or require impact-resistant roofing discounts, which can affect replacement material choices in Derby. When evaluating replacements, consider how the roof's slope, shade, and surrounding assets influence impact exposure and wind resistance. Discuss the implications of an adjuster's findings on shingle or panel type, and plan for a roof that stands up to repeated hail events while maintaining long-term performance and curb appeal.
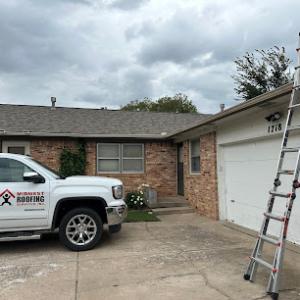
Connect with contractors who help homeowners navigate the claims process from damage assessment to final approval.
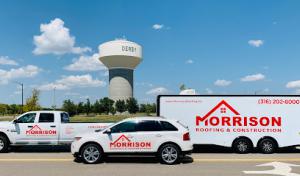
Morrison Roofing & Solar
(316) 202-2573 www.morrisonroofing.biz
2250 N Nelson Dr, Derby, Kansas
4.6 from 95 reviews
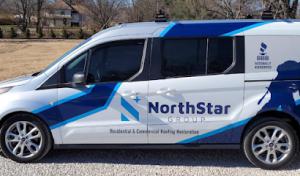
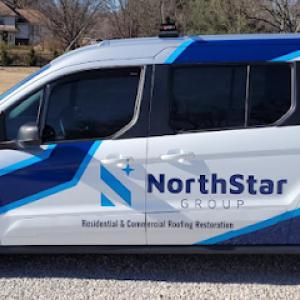
NorthStar Group Contracting
(316) 243-9770 www.northstarcontractinggroup.com
421 N Baltimore Ave, Derby, Kansas
5.0 from 7 reviews
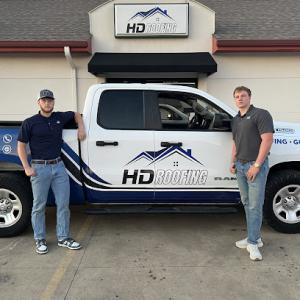
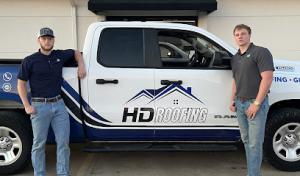
HD Roofing
(316) 669-4297 hdroofingks.com
200 N Baltimore Ave, Derby, Kansas
5.0 from 109 reviews
HD Roofing is a leading roofing contractor based in Wichita, KS, proudly serving Sedgwick County, Derby, Goddard, Maize, and surrounding areas. We provide top-tier residential roofing, commercial roofing, asphalt shingle roofing, storm damage repair, and more. Our unwavering dedication to quality craftsmanship and expert insurance claims assistance sets us apart from other roofing companies. At HD Roofing, we treat every project as a reflection of our commitment to delivering long-lasting results. If you're looking for reliable roofing services in Wichita, call us for a free estimate today. 'Built strong, built right – every time.' Discover why HD Roofing is Wichita’s most trusted roofing contractor!
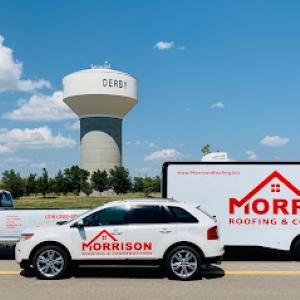
Morrison Roofing & Solar
(316) 202-2573 www.morrisonroofing.biz
2250 N Nelson Dr, Derby, Kansas
4.6 from 95 reviews
We work closely with our clients to customize the services we provide based on their specific needs and circumstances. We are fully licensed and insured. We specialize in working with insurance companies and directly with the insurance adjusters. Our goal is to make filing a claim or completing a home project, an effortless process for our customers. We honor a 5 year workmanship warranty and perform a walk-through with every homeowner, making sure there’s 100% satisfaction!
NorthStar Group Contracting
(316) 243-9770 www.northstarcontractinggroup.com
421 N Baltimore Ave, Derby, Kansas
5.0 from 7 reviews
NorthStar Group has been serving the community for over 13 years, providing trusted roof and gutter replacements for both residential and commercial properties. As a locally owned and operated company, we’re proud to be BBB Accredited with an A+ rating and backed by a strong record of satisfied customers. We offer free consultations and storm damage assessments giving you peace of mind before the project begins. Every job comes with a workmanship guarantee, so you can count on lasting quality and reliable service.
Vega Roofing
(316) 299-3551 vegaroofingict.com
15629 East 63rd Street South, Derby, Kansas
4.2 from 41 reviews
We are your roofing neighbor, since 1990. Call or text us 24/7 @ 3162993551. Don't need a roof ? Be apart of our $200 cash referral program.

Landwehr Roofing & Construction
2348 N Nelson Dr Ste 4, Derby, Kansas
4.2 from 5 reviews
We are a local and family owned business, and we proudly serve our clients in and around the Wichita and surrounding areas including the state of Kansas.

Above & Beyond Roofing & Construction
(316) 719-2819 www.aboveandbeyond-ks.com
Serving
4.9 from 64 reviews
Above & Beyond Roofing & Construction is your no nonsense, get it done and get it done right construction company! We offer a wide range of general contractor services for commercial and residential properties including deck building and remodeling, roofing services, egress windows, fencing, gutters, siding services, windows and door services in Derby, Andover, Kechi, Goddard, Maize, Rose Hill and the surrounding areas. Our goal is to be the best Wichita general contractor. We have a never-ending desire to exceed expectations. Whether it’s deck building and remodeling, roofing services, egress windows, fencing, gutters, siding services, windows and doors–Above & Beyond Roofing & Construction will do what it takes to get the job done right!
Rhoden Roofing
(316) 925-7956 rhodenroofing.com
Serving
4.9 from 1013 reviews
Rhoden Roofing is a roofing contractor in Wichita, KS that services Sedgwick County, Haysville, Wichita and nearby areas. Our roofing company offers residential roofing, commercial roofing, asphalt shingle roofing, storm damage repair and many more. What make us standout is our affordable financing options plus our insurance claims assistance. We also have industry certifications such as GAF Master Elite, Malarkey Emerald Premium Contractor. If you want to experience how your most trusted Wichita roofing company embrace our motto “We Stand Behind our Work for the Lifetime of your Roof”, call us now for free estimate!
Shamrock Roofing & Construction Wichita
(316) 600-0480 shamrockroofer.com
Serving
5.0 from 64 reviews
We’ve been in business since 1977, bringing nearly 50 years of roofing experience to homeowners and businesses across Wichita. We specialize in roof replacement, roof repairs, and storm damage restoration caused by hail and wind—backed by proven processes and long-term accountability that short-lived contractors can’t match. Our team provides free roof inspections, clear estimates, and hands-on insurance claim support to make the process simple and stress-free. Fully licensed, bonded, and insured, we deliver quality craftsmanship, strong warranties, and reliable service from start to finish.
That Roof Dude
(316) 669-4665 thatroofdudeks.com
Serving
4.9 from 48 reviews
At That Roof Dude, we specialize in comprehensive roofing, gutter, and siding services for both residential and commercial properties throughout Kansas. Our expert team offers 21 point roof inspections and excels in roof repairs, replacements, and emergency roofing solutions. We also assist with insurance claims, ensuring a smooth process for our clients. Committed to quality and customer satisfaction, we prioritize the integrity and longevity of your property's exterior. Contact us today at or visit our website to schedule your roof inspection.
Farha Roofing
(316) 831-7510 farharoofing.com
Serving
4.9 from 518 reviews
Farha Roofing is your expert residential and commercial roofing contractor serving Wichita and surrounding communities. Our local Wichita roofing contractors concentrate on high-quality work with affordable pricing. Rest assured that our Wichita roofers will complete all your roofing projects on time and with professional-level craftsmanship. We are licensed and registered to help you handle any storm damage or other insurance-related claims. Our focus is to build a lasting relationship with our customers and provide a seamless experience when looking for Wichita roofers. Wichita, KS is where Farha's award-winning roofing services began and we are still providing excellent customer service, and top-notch craftsmanship over a decade later.
Midwest Roofing Services
(316) 368-3883 www.midwestroofingservices.com
Serving
4.9 from 178 reviews
Midwest Roofing Services, Inc. is a family-owned roofing contractor based in Wichita, Kansas, serving the community since 1955. We provide reliable roof replacement services for both residential and commercial properties, including roof replacement Wichita. Our skilled team installs a variety of roofing systems, such as PVC, TPO, EPDM, Modified Bitumen, and Built-Up Roofing (BUR). Additionally, we offer gutter installation and repair services. We also handle hail damage and storm repairs, ensuring your property stays safe and protected. Trust Midwest Roofing Services,Inc. for all your roofing needs—contact us today to learn more about our affordable and efficient solutions!
Eaton Roofing & Exteriors
(316) 943-0600 www.eatonroofing.com
Serving
4.9 from 887 reviews
***If you have storm damage, give us a call*** Eaton Roofing & Exteriors is celebrating 30 years in business and enjoys a reputation as one of Kansas's largest residential re-roofing contractors. Since 1993, we have repaired and installed thousands of roofs across Kansas. Our exteriors business is focused on window, doors, siding & decks. We have offices in Wichita, Topeka, Salina and Hutchinson and are proud to work in numerous communities throughout the state. We are Here For The Life of Your Home. We're fully licensed and insured- State Registration #19-007451.
Milder spring and fall windows are often preferred in Derby because summer heat can complicate asphalt installation conditions and winter freeze-thaw can stress materials and accessories. If you're aiming for steady progress, plan for mid-April through early June or late September through mid-November when temperatures tend to stay moderate. Those windows reduce the risk of heat-softened shingles or brittle ice and provide more predictable drying times for underlayment and felt. When you insist on a fall start, target the lull between harvest winds and holiday preparations to keep crews moving without weather-forced standstills.
Autumn wind events in the Derby area can disrupt tear-off and dry-in schedules even when temperatures are otherwise favorable. High gusts pull back tarps, complicate landing zones, and push debris into vulnerable gaps. If a major storm roll-in looks likely, expect crews to adjust logistics, sometimes delaying start times by a day or two to ensure safety and material protection. Have a contingency plan for weekly timelines that accounts for wind-driven delays, and coordinate with your contractor to pre-stage roofing materials on calmer days so a window isn't wasted when the weather shifts.
Project timing in Derby is often shaped by storm-driven demand spikes, not just weather, so homeowners may face longer waits after major hail events. After a large hailstorm, contractors get booked quickly, and supply chains can tighten, pushing back non-emergency projects. If your home sustains damage during peak storm season, prioritize documenting damage early and communicating clearly with your roofer about your preferred start date, while staying flexible about the actual the timeline. Proactively scheduling inspection and staging work during lulls can help you ride out the surge without losing valuable installation days.
Coordinate your tear-off and dry-in to occur on days with dry, moderate heat and low humidity to minimize cure times for adhesives and fasteners. If you're replacing a roof in a high-wind season, ask about securing oversized debris netting and secondary containment to protect landscaping and vehicles during the tear-off. For homes with complex rooflines or multiple penetrations, align the schedule so crews can complete sections sequentially, reducing the risk of rework caused by late-season temperature swings or shifting winds. Keep a clear line of communication with the crew lead about preferred start dates, weather contingencies, and how rain delays will be handled so the Derby project remains on track.
Get a clear picture of your project costs upfront - no commitment required.
Vega Roofing
(316) 299-3551 vegaroofingict.com
15629 East 63rd Street South, Derby, Kansas
4.2 from 41 reviews

Asphalt shingles remain the dominant value choice in Derby, thanks to a solid balance of upfront cost and decent longevity. Typical installed costs sit in the mid-range for this area, aligning with the provided local ranges around $350 to $650 per square for standard asphalt. Because hail exposure is common, many homeowners in this market compare upgraded impact-resistant shingles against standard architectural varieties. The decision often hinges on anticipated storm frequency and the likelihood of insurance-covered replacements after a hail event. If choosing asphalt, consider Class 4 impact-resistant options to improve claim outcomes while keeping cost reasonable. In practice, you'll see projects lean toward impact-resistant shingles when hail risk is high, even if the premium over standard shingles is modest.
Metal roofing can command higher pricing in Derby partly because homeowners use it as a hail- and longevity-driven upgrade rather than a basic replacement. Metal installations typically fall toward the upper end of the spectrum, reflecting both material durability and the speed of installation in storm-affected periods. The general range for metal is roughly $700 to $1,400 per square. If hail is a frequent worry, metal's resistance to denting and its longer service life can translate into lower hassle and fewer insurance hassles down the line, making the higher upfront cost easier to justify. Expect scheduling pressures to rise after severe weather events, which can nudge labor costs upward even when the permit portion stays modest.
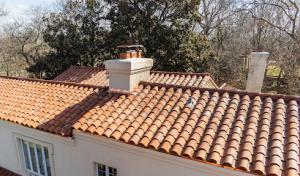
Clay and concrete tiles bring a premium price tag, with clay in the roughly $1,300 to $2,600 per square band and concrete from about $1,100 to $1,900 per square. In Derby, these options appeal to homes with specific architectural charm or where long-term durability against hail is a priority. The upfront investment is substantial, but tile roofs can offer excellent shingle-to-surface longevity and a different insurance narrative due to their resilience. Weather-driven demand can stretch scheduling and labor costs, particularly after back-to-back hail seasons, so timing and contractor availability matter when choosing tile.
Wood shingles/shakes live in the mid-to-upper range, roughly $800 to $1,600 per square, and synthetic or composite shingles sit lower, around $550 to $1,100 per square. In Derby, wood can be less common due to fire codes and hail impact concerns, while synthetics offer hail-resistant performance without the weight penalty of some natural materials. If storm history and insurance considerations push you toward a more resilient yet reasonable choice, synthetics can offer a balanced path.
Across materials, the storm-driven market means faster decision-making after hail events, and labor scheduling pressure can push reroof pricing higher even when permit fees stay modest. A practical approach is to model your decision around both the expected hail exposure and your long-term goals for durability, resale value, and insurance outcomes. In a high-claim environment, the decision spectrum often narrows to: standard architectural asphalt with decent impact resistance, or a more durable upgrade (metal or tile) when the budget and appetite for longer-term peace of mind align.
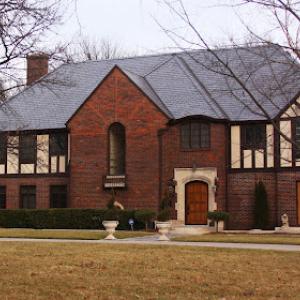
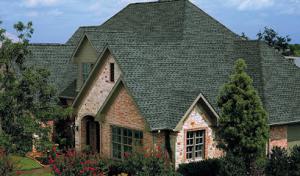
Derby's housing stock features a balanced mix of asphalt shingles, metal roofing, clay tile, concrete tile, wood shingles or shakes, and synthetic or composite shingles. That variety isn't accidental: it mirrors the local climate and the way homes age here. Asphalt shingles remain a staple for many neighborhoods because of their familiarity and repairability, but a growing number of homes choose metal for its wind resistance and longevity. Clay and concrete tiles show up on a portion of homes with higher roof lines or design accents, while wood shingles or shakes and synthetic options fill out the spectrum for those seeking a distinct look or lighter weight alternatives. When choosing, focus on how the material handles Derby's typical storm calendar rather than appearance alone.
Frequent hail and wind events in this market mean impact resistance and repairability should take priority over aesthetics. Some brittle or crack-prone coverings may crack more readily under repeated hail strikes, leading to accelerated deterioration and patchwork repairs after each season. In practical terms, look for systems with documented impact performance ratings or known repairability pathways. A roof that can be promptly sealed and restored after hail not only protects interior spaces but also reduces the frequency of costly unexpected replacements. For metal, tile, and synthetic options, verify that fasteners and flashing are rated for high-velocity hail environments and that the overall roof geometry minimizes wind-driven uplift.
Summer sun exposure accelerates aging of asphalt surfaces and sealants, so consider shingles or membranes with robust UV resistance and longer-lasting granule retention. Metal roofs should be evaluated for heat dissipation and paint or finish longevity in bright sun. In winter, freeze-thaw cycles stress accessories and flashing across material types, from asphalt ridge vents to clay and concrete tile, and even wood shingles. Look for systems with proven freeze-thaw performance, proper underlayment choices, and well-sealed penetrations. The best options provide a balance: strong heat and hail performance in summer with dependable sealing and flashing durability through Kansas winters.
When assessing options, prioritize roofing assemblies that support effective hail damage assessment and straightforward insurance documentation later. A well-chosen material should offer solid impact resistance, compatible fasteners, and reliable flashing details across ridges, valleys, and penetrations. If a chosen material is heavier (like certain tiles), ensure the underlying structure is adequate or prepared for load adjustments. For asphalt in particular, pair with a high-quality underlayment and compatible sealants to reduce the risk of accelerated aging from sun exposure. Regardless of material, establish a routine for seasonal inspections after major hail events and before winter, focusing on fasteners, flashing, and any visible cracking or granule loss.
A full roof replacement in Derby normally requires a permit through the City of Derby Building Department, whether the contractor or homeowner applies. The process is meant to ensure the repair aligns with local codes and wind/hail considerations that are common in this area. Resist the impulse to skip or delay the permit in the rush of a storm recovery-doing so can create bigger headaches down the line if a deficiency is found later or if you need to prove compliance for insurance or resale.
Derby inspections occur at critical stages and final acceptance is required before occupancy, so scheduling can affect project start and completion timing. Plan for the inspection windows early in the project, and leave room for weather delays that are all too common during hail season. If your contractor signals an inspection delay, treat it as a red flag rather than normal courtesy-timely inspections keep the project on track and reduce the risk of rework.
Permit coordination is a joint responsibility. It's wise to confirm who files the permit, who coordinates inspections, and who signs off at the end. If you are handling it personally, verify that all required documentation, including material specs and project scope, is submitted correctly. If a contractor handles it, get a clear written plan outlining timelines for each inspection so that delays don't derail your roof replacement timeline.
Keep a dedicated calendar for inspection dates and permit expiration, and set reminders a week in advance. Have ready access to the permit number and inspector contact details, and maintain open lines of communication with the contractor about any weather-related hold-ups. Understanding the Derby-specific flow of permits and inspections helps you avoid surprises and keeps your project moving toward a proper, compliant completion.
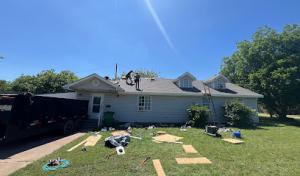
Hail storms are a routine risk, and Derby homes regularly contend with bruised asphalt and lifted shingle tabs after a severe hit. Bruising can look minor-just a dull spot-but it weakens the surface and accelerates granule loss, which shortens life and invites premature aging. Wind can grab loose tabs and peel them back, exposing the underlayment and sheathing to water infiltration. The consequence is often hidden until a heavy rain reveals an attic or ceiling stain. The best defense is a careful post-storm inspection focusing on edge fasteners, nail heads, and any loosened adhesion around the tabs. If a tab is raised, address it promptly before wind or further hail causes larger seams to fail.
Winter in Derby brings repeated freeze-thaw cycles that push and pull at vulnerable junctions. Small gaps around vents, flashings, and skylights can expand into leaks as ice forms and thaws. Caulking and sealants degrade with age, and minor storm damage left unrepaired can widen, creating a cascade of leaks during the first warm rain. Pay particular attention to penetrations where flashing intersects with shingles, as these are common failure zones after a storm. A proactive repair approach-replacing worn flashing and resealing edges before a thaw or hard freeze-can prevent larger, more expensive damage later.
Wind-driven rain often finds weak flashing around skylights and other roof penetrations after storms. Small leaks at these points can travel along joists and appear far from the original entry, complicating diagnosis. Inspect skylight flashing for loose corners, torn sealant, or deteriorated counter-flashing. High-contrast signs like water marks on interior ceilings near skylights deserve immediate attention. Ensuring solid flashing, proper pitch, and compatible sealants reduces the chance of minute leaks turning into obvious stains after a storm.
Find contractors experienced in skylight installation, flashing, and leak repairs to bring natural light into your home.
In Derby, hail and wind events turn roofing decisions into urgent, repeat-work cycles. Quick response and solid cleanup are visible priorities in the local contractor market because stabilizing homes fast after a storm matters as much as the finish on the roof itself. The strongest signal tends to come from contractors who have stood up to post-storm volume for years and before that focused on residential service.
Long-established, residential-focused roofers stand out in the market signals you'll see after a hail strike. Look for teams that routinely handle re-roofs, storm damage work, and emergency response rather than one-off specialty or luxury systems. When you call, notice whether the crew can mobilize quickly, secure ladders and tarps, and begin debris cleanup right away. In Derby, you'll value a crew that can protect the interior, prevent leaks during temporary weather, and coordinate with your insurer with calm, organized documentation.
Ask for local references who had a similar roof type to yours and weather history. Confirm liability and workers' comp coverage, and verify that the contractor can provide a detailed, itemized scope with a written start-to-finish plan. Request an on-site evaluation that includes hail impact checks on shingles, flashing, and vents, plus a documented mitigation plan to minimize interior damage during the interim period. Ensure the roofer will assist with insurance paperwork by documenting damages clearly and promptly after inspections.
Coordinate a realistic schedule that accounts for rapid storm-season demand, weather gaps, and supplier lead times. A dependable Derby contractor will outline a phased plan: protect, inspect, document, and begin replacement as soon as the insurer approves, staying communicative through every weather-impacted milestone. Expect clear updates on material choices, sequencing, and site cleanup so neighbors can see the project moving forward without surprises.
Avoid teams with vague timelines, limited local references, or a pattern of leaving jobs mid-storm or delaying cleanup. A dependable crew will show robust insurance documentation, positive local reputation, and a track record of timely, code-conscious installations. If a contractor pressures fast timetables or skips on-on-site evaluations, reconsider.
Choose a Derby storm roofer who demonstrates prompt response, thorough documentation, and steady, residential-focused experience. Prioritize communication and a plan that aligns with your insurer's expectations, so your home stabilizes quickly and securely after every hail and wind event.
Flat and low-slope roofing shows up in Derby's contractor market, but it isn't the dominant residential replacement category like steep-slope re-roofing. That mix matters when you're planning repairs or a replacement, because inspection standards and typical workmanship lines differ between roof types. If your home includes porch covers, additions, or attached low-slope sections, expect that storm damage inspection needs to carefully trace the transitions between roof types. Storm response should account for how those changes behave under pressure from hail, wind, and temperature swings.
When a storm claim is filed, ensure the inspection doesn't stop at the main upper surface. Look specifically at how the low-slope areas tie into the higher roof with flashing, transitions, and edge details. In Derby, wind-driven rain can push water toward joints and seams along these interfaces, so pay attention to uplift on parapets, drip edges, and any counter-flashing that couples the materials. Freeze-thaw cycles in the season can magnify tiny gaps into tricky leaks, especially where the low-slope section meets a steeper plane. Ask for a paired assessment: one pass on the primary steep roof, and another on any flat or low-slope appendages, with notes on how water is directed away from the structure.
Edge details matter more than they might in other markets, because Derby's wind and hail exposure stress the outer perimeter first. Keep gutters and downspouts clear to reduce ponding at transitions, and watch for scuffed or lifted flashing where the two roof types meet. Regular reminders to re-seat loose membranes, reseal fastener penetrations, and test sealants before winter help prevent leaks that winter winds can exploit. If you notice damp spots along ceilings away from the main attic space, investigate the junctions between the low-slope areas and the steeper roof-edge rows and scuppers are common culprits in storm-damaged years.
Find specialists in TPO, EPDM, and built-up flat roofing systems for residential and commercial properties.

Solar-integrated roofing appears only as a minor specialty in Derby's contractor market compared with storm repair and standard re-roofing. That means you'll likely encounter solar options through a handful of established roofers who also perform high-volume hail repairs, rather than a wide array of dedicated solar installers. When evaluating solar-roof plans, align them with the same practical standards you would use for any hail-prone roof: durability, compatibility with your roofing material, and the resilience of any integrated electrical work.
In Derby, hail exposure can drive quick turnarounds on roof work, so replacement timing matters for solar projects. If your roof is approaching end-of-life or has sustained significant hail damage, consider staging decisions that minimize re-work. A roof that is nearing replacement can be an ideal platform for a solar installation, but only if the underlying structure shows sound decking, solid ventilation, and a weather-tight installation. Delayed solar projects can encounter scheduling bottlenecks after severe storms, so plan for a window that accommodates both roof repair and electrical commissioning.
When choosing solar options, prioritize systems that complement your roof's protective function. Panels or flexible integrated elements should not compromise your ability to inspect and access the roof after hail events. In practice, this means ensuring panel layout allows for straightforward shingle or tile replacement without dismantling large sections of the solar array. If you have asphalt shingles or metal, verify that mounting hardware is rated for Kansas hail trajectories and variable wind loads.
Because Derby is a storm-driven roofing market, future service access after hail events should be part of any solar-roof planning discussion. Confirm that the installer can provide timely post-storm service, panel cleaning, and maintenance without long dispatch times. Consider a plan that includes periodic inspections focused on both roofing integrity and the condition of integrated solar components after hail season peaks.
Find contractors who integrate solar panels or solar shingles into your roof for long-term energy savings.
Morrison Roofing & Solar
(316) 202-2573 www.morrisonroofing.biz
2250 N Nelson Dr, Derby, Kansas
4.6 from 95 reviews