Last updated: Apr 19, 2026
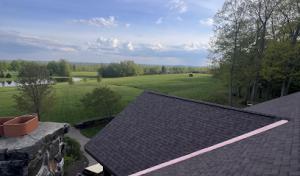
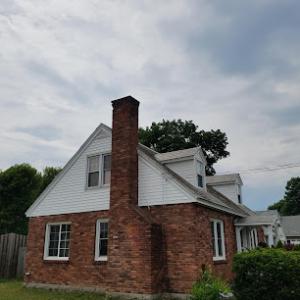
In this Mohawk Valley setting, cold winters create relentless freeze-thaw cycles that gnaw at shingles, flashing, and decking. Repeated thawing and refreezing push and pull at the roof system, loosening fasteners and splitting edges. When ice builds up at the eaves, meltwater has nowhere to go, so it backs up under shingles and flashing, intruding into underlayment and the attic. Older steep-roof housing stock often carries venting details that are inadequate for heavy snow melt, making ice dams and melt-refreeze leakage a consistent, year-after-year risk. The result is accelerated wear on shingle edges, widened laps, and moisture migrating through the decking before it can dry out.
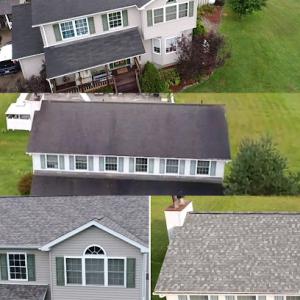
You'll notice frost-like ridges along the eaves, dark streaks or staining on interior ceilings, and occasional damp spots on walls or ceilings near exterior walls. Shingle edges may curl or crack earlier than expected, and you might find loose or shifted flashing at chimneys, vents, or skylights after a thaw. On steeper roofs, flashing movement from thermal stresses during freeze-thaw cycles becomes a recurring culprit, especially where sealants have aged or where vent flashings aren't properly integrated with the roofing plane. Ignored, these signs compound over the season and lead to rot, warped decking, and higher risk of interior water intrusion during storms or rapid warming.
Addressing ice dam risk starts with roof-to-attic moisture control. You should verify that attic insulation fills the space to reduce warm-air intrusion toward the roof deck. Blocked or undersized soffit and ridge vents can trap cold air poorly, so ensure proper venting alignment and unobstructed intake and exhaust paths. If you already see recurring ice buildup along the eaves, consider installing a secondary channel or ice-dam membrane in critical areas, paired with meticulous shingle sealing at eave edges. Improve flashing details around penetrations and edges, and replace aging sealants that lose elasticity in cold weather. When warm conditions briefly arrive, clear loose ice and ensure safe access to the roof so there is no risk of further damage during attempts to remove ice dams. In older homes, temporary heat cables may be used cautiously in a controlled manner to reduce heavy ice buildup, but only after a professional evaluates the roof structure and insulation to avoid creating new problems.
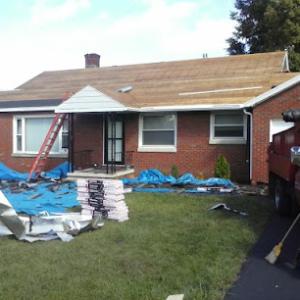
In this market, roof replacement work is commonly pushed toward late spring through early fall because winter conditions complicate tear-offs, deck drying, and shingle sealing. Planning ahead for this window yields the best chance to resolve deep-set damage and restore a watertight roof system before the next winter. When a roof is already showing frequent ice-dam symptoms, coordinating a replacement with proper underlayment, enhanced ventilation, and upgraded flashing details can dramatically reduce future freeze-thaw damage and extend the life of the new roof. A well-timed replacement with attention to ventilation and deck drying minimizes the repetitive cycle that wears out steep-roof stock.
Spring storms in this area can bring strong winds and hail that batter shingles and set back already tight seasonal roofing schedules. The combination of wind-borne hail and rapid temperature swings creates micro-damages that may not be obvious at first glance but worsen with each thaw cycle. If you notice pocked or loose shingles after a storm, treat it as a sign to inspect the roof's edge, valleys, and penetrations for lifted granules, small cracks, or exposed underlayment. Delays in addressing these signs can mean more extensive water intrusion once rain resumes, or when meltwater refreezes near eaves and in drip edges. You need to document damage quickly and plan a targeted, timely evaluation with a contractor who understands how freeze-thaw cycles behave on older steep-roof stock.
In this upstate New York market, claim activity commonly rises after severe storms, making prompt photo documentation and side-by-side pre- and post-loss condition records especially important. Take clear, dated photos from multiple angles: the entire roof line, any visibly damaged shingles, gutters, valleys, and near penetrations like chimneys or vents. Keep a simple log noting exact dates and storm details, then compare with previous records if available. If you've got attic footage or ceiling reveals showing signs of moisture, include those as well. When you contact a contractor or an adjuster, present those images alongside a written timeline of erosion or impacts you've observed. Early, precise reporting can streamline work windows and avoid status delays during the narrow repair season.
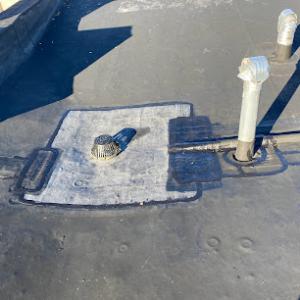
Autumn wind and leaf load are a local maintenance issue because debris retention can trap moisture at valleys, eaves, and around penetrations before winter. Leaves clog gutters and downspouts, creating standing water that can back up under shingles and into flashing. Valleys accumulate organic debris, which holds moisture against underlayment and can accelerate freeze-thaw deterioration. The result is a higher risk of ice dam formation once cold snaps hit. Conduct a targeted fall check: clear gutters, inspect flashing at chimneys and roof-to-wall transitions, and ensure valley coverings are intact. If you find softened or delaminated shingles, or if granules have accumulated in gutters beyond normal wear, address these items promptly to protect interior spaces when the first snow arrives.
Find local contractors experienced in assessing and restoring roofs after hail, wind, and severe weather events.
Mike Peters Contracting
(518) 752-5683 www.mikepetersandsonscontracting.com
Serving
4.7 from 63 reviews

Gateway Construction Solutions
(518) 381-0367 gatewaysolutionscorp.com
228 Locust Ave, Amsterdam, New York
4.9 from 43 reviews
Our goal is to provide excellent service & go beyond your expectations of how your home/business should operate. Maximizing new technologies, construction standards, & innovation. Our dedicated team has over 30 years of combined experience. We are here to service your roofing needs.
Newell Stone Contracting
(518) 867-7663 newellstone.com
Serving
5.0 from 21 reviews
Making sure your roof is sound and secure is incredibly important, yet many homeowners neglect their roofs. Like everything in your home, it requires maintenance. If you haven't had your roof inspected recently, we're here to help. Maintaining your roof is a low-cost way of ensuring that your home – and your family – stay safe.
B&B Roofing
(518) 887-4043 bandbroofingllc.com
Serving
4.7 from 12 reviews
Family owned and operated roofing business that has been in business since 1983.

Ultimate Roofing
Serving
4.9 from 57 reviews
We are a professional roofing company serving Albany and the Greater Capital Region. We have been in business since 2007 and have been committed to providing high quality residential and commercial roofing services to homeowners and companies in the area. Whether you have a general roof repair, an emergency roof repair, or are in need of a full roof replacement for your home or place of business, we have you covered. Our commitment to first class customer service and support coupled with our experienced roofing field and office teams makes us the #1 roofing choice in Albany. Roof financing is also available to help you get your roof addressed without the stress of how to pay for it.
Albert Adamkoski Roofing
Serving
4.6 from 27 reviews
Albert Adamkoski Roofing brings more than 20 years of experience with roof repairs and roof replacements for residential and commercial clients. Whether you need help with a quick and easy shingle repair, have a custom metal roof, or a commercial roof essential to protecting your building we can help.
Mike Peters Contracting
(518) 752-5683 www.mikepetersandsonscontracting.com
Serving
4.7 from 63 reviews
We offer first class roofing , siding , and seamless gutter services . We can also get you financed . Go with the trusted name established since 2006
The View Roofing
(518) 925-6421 www.theviewroofing.com
Serving
5.0 from 9 reviews
We would love to help you with any of your home improvement projects.
Advanced Roofing
(518) 384-0204 www.roofadvanced.com
Serving
5.0 from 12 reviews
We offer comprehensive roofing services, including preventative maintenance and repairs for roofs of all shapes and sizes. Proudly serving Albany, Schenectady, Troy, Rensselaer, Clifton Park, and Saratoga, NY, for over 30 years. Roof Repair | Roof replacement | Gutter Cleaning | Roof Maintenance. Specializing in metal, asphalt, shingle, flat, tile residential and commercial roofing. Call today or visit our website for a free quote.
Leak Proof Roofing & Construction
(518) 612-7369 www.leakproofroofingandconstruction.com
Serving
4.6 from 14 reviews
Serving the Duanesburg and Schenectady areas, Leak Proof Roofing & Construction has built a reputation for excellence since 2019. This trusted contractor specializes in comprehensive roofing services, from minor repairs to complete replacements, ensuring every project is handled with precision and care. Beyond roofing, their expertise extends to professional deck building, siding installation, and general contracting. They are dedicated to delivering superior craftsmanship and a wide selection of materials, transforming and protecting your home with quality that stands the test of time.
Ally Roofing
Serving
4.4 from 103 reviews
We are a family operated company with years of hands on experience in the roofing industry. We care for our customers and their homes like we care for our own. That is why if you need An Ally we are here for you.

S&G Roofing
Serving
4.8 from 558 reviews
Since 2011, S&G Roofing has been a trusted presence in New York's Capital Region, offering professional roofing and siding services. Specializing in everything from new installations to storm damage repair, their expert team provides durable solutions for both homeowners and businesses. As a leading roofing contractor and supply store, they are equipped to handle a wide range of needs, ensuring quality craftsmanship and lasting results. Serving communities across the Capital District, S&G Roofing is your premier partner for all things roofing.
Kornerstone Roofing
(518) 707-1795 kornerstoneroofing.com
Serving
5.0 from 198 reviews
Kornerstone Roofing is a trusted, family-owned roofing contractor proudly serving Round Lake, NY and surrounding areas since 2020. We specialize in residential and commercial roofing, metal roofing, storm damage repair, and skylight installation. What sets us apart is our commitment to exceptional craftsmanship, personalized solutions, and building lasting relationships with every client. Each project is built on a foundation of trust, quality, and meticulous attention to detail—ensuring your property stays protected for years to come. Contact Kornerstone Roofing today for a free estimate!
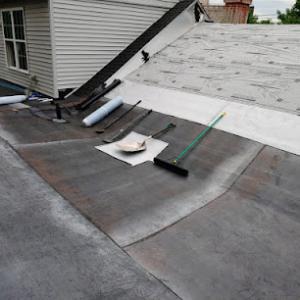
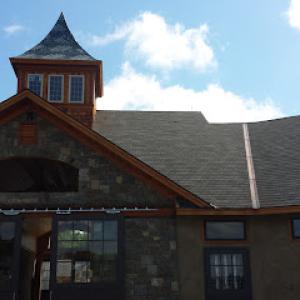
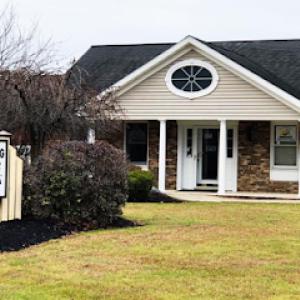
Asphalt shingles dominate because they fit the city's large base of practical re-roofing projects and are typically the most budget-manageable option in this market. For an older, steep-roof stock, a modern 30-year shingle can close gaps caused by freeze-thaw cycles and reduce ice dam risk when paired with proper attic ventilation and effective drip edges. When you choose asphalt, prioritize architectural or thicker shingle profiles that shed snow better and resist lifting under wind-driven snow. Have the roof inspected for existing deck condition, since a cracked or softened deck can limit the lifetime of a new layer.
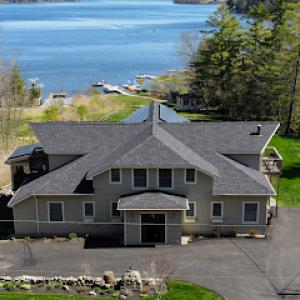
Metal roofing has a meaningful local presence and is often considered by homeowners looking for better snow shedding and long-term performance through repeated freeze-thaw seasons. If your house has a history of ice damning, metal can help minimize meltwater backing up under shingles. In practice, look for panels with a standing-seam design and a standing-snow-friendly layout. Ensure the structure can support the chosen metal weight and that fasteners and flashing are rated for winter temperatures. Metal can be costlier upfront, but it tends to resist the cycles that stress older roofs in this climate.
Slate and tile appear in the local material mix, but their weight, repair complexity, and installation cost matter more on older structures where framing condition and deck integrity must be evaluated carefully. Slate delivers excellent durability, but it requires a reinforced deck and precise installation. Clay and concrete tiles offer strong freeze-thaw performance when properly installed, yet their weight can exceed what an aging roof structure was designed to carry. If you're considering tile, start with a professional assessment of rafters, sheathing, and the roof slope to avoid underperforming repairs later.
Begin with an inspection focused on insulation, ventilation, and ice dam history. If water intrusion or visible ice dams exist, prioritize a solution that improves ventilation and provides reliable edge protection-drainage and drip edges are not optional. For homes with limited attic access, choose a material that balances ease of installation with effective snow shedding. Finally, consider how the roof deck and flashing will interact with your chosen material to minimize future freeze-thaw damage.
When planning a roof replacement, you'll notice material costs vary by type, and the numbers in Amsterdam reflect practical realities for older steep-roof housing stock. Typical local material ranges run about $400-$750 per square for asphalt shingles, $700-$1500 for metal, $1500-$3000 for clay tile, $1200-$2400 for concrete tile, $550-$1100 for synthetic/composite shingles, and $1800-$3800 for slate. Those ranges are the starting point for budgeting, not a final figure, and they align with projects that face the region's freeze-thaw cycles and the need to re-establish reliable moisture barriers on aging roofs.
In Amsterdam, costs often rise when older roofs require multiple tear-off layers, deck repair from long-term ice dam moisture, or flashing work around chimneys and penetrations common on older homes. Tear-off complexity can add substantial labor time, especially on steep pitches where fall protection and safety protocols extend the day. Deck repair may be necessary after years of ice dam moisture that has softened or delaminated boards, and flashing around chimneys, vent stacks, and skylights frequently needs careful tailoring to match historical roof planes. These elements can push the project above the base material price, particularly if damaged substrate requires replacement or reinforcement.
Project pricing can also move with seasonal demand spikes after spring storms and with the shorter regional installation season that concentrates replacement work into warmer months. In practice, that means you may see tighter scheduling and higher bids in late spring and early summer, followed by a lull as crews optimize for the peak window. For older homes, that timing matters more: the window is narrow, and utility crews may be juggling multiple projects tied to thaw-freeze cycles. Planning ahead for a longer lead time and confirming crew availability during the core May-to-September window can help keep costs predictable.
Choosing a higher-end material like slate or clay tile delivers substantial longevity but starts with a higher upfront price. In areas prone to ice dam formation, the settlement of a long-term solution-paired with proper underlayment, attic ventilation, and improved flashing-can reduce maintenance costs over time. Synthetic/composite shingles offer a middle ground, often delivering durability closer to asphalt with less weight and somewhat lower installation complexity. For anyone weighing replacement in this climate, the right combination of underlayment, insulation, and ventilation, matched to the chosen roofing type, is as important as the per-square price.
Don't let upfront costs delay a critical repair - these contractors offer payment plans to fit your budget.
Mike Peters Contracting
(518) 752-5683 www.mikepetersandsonscontracting.com
Serving
4.7 from 63 reviews
A full roof replacement in Amsterdam normally requires a building permit rather than being handled as informal maintenance. This city's older, steep-roof housing stock, coupled with the winter freeze-thaw cycle, means a permit helps ensure the work complies with local structural and drainage standards that affect ice dam risk and attic ventilation. Expect the permit process to cover not only the new roofing material but also any underlayment, flashing, venting, and the potential need for alterations to gutters or ice barriers.
When applying, you should provide a clear project scope, including tear-off methods, replacement roofing type, and any vent or chimney work. Include contractor licensing, insurance, and a detailed material list. The county and city departments will use these details to verify that the proposed work aligns with local codes, especially where older homes require careful attention to attic insulation and ventilation to mitigate ice dam formation.
Coordinate inspections after tear-off and again before final approval. The first inspection confirms the roof deck is sound and ready for underlayment and installation. The second inspection is a final sign-off to verify all components have been installed correctly and comply with applicable codes. In Amsterdam, it is common for inspections to address drainage, drip edges, and proper ice and water shield placement to reduce future freeze-thaw damage.
Review timing can vary between the City of Amsterdam and Montgomery County jurisdictional processes, so plan ahead. It is prudent to align scheduling with both the city's permit review timeline and the county's inspection windows to avoid delays that push closeout past favorable construction weather. Start the permit process early in the project timeline, especially when coordinating with tear-off windows and the late spring through early fall construction season. Ensure all required documents-permits, contractor qualifications, and inspection appointments-are in order well before the work begins.
In upstate New York, standard homeowners policies generally cover wind and hail roof damage, which is relevant after spring and summer storm events. That protection matters in this city's older, steep-roof housing stock where ice dams and freeze-thaw cycles can exacerbate leaks and deck wear. When a storm passes, a thorough assessment of widespread damage versus isolated patches helps determine whether a claim is warranted and how it should be framed for your insurer.
There is no blanket statewide insurer pullback defining this market, but pricing and underwriting can tighten after active loss periods across the region. For an Amsterdam home, that tightening often translates into stricter documentation requirements and longer claim timelines. Understanding that dynamic helps keep expectations grounded: responses may stall if the file lacks timely, credible evidence, especially if multiple properties in the neighborhood are filing simultaneously.
Adjusters commonly want detailed photos, material specifications, and contractor estimates, so homeowners should document storm dates, visible impacts, and any temporary emergency protection. Clear, dated pictures of ice dam buildup, fascia and gutter damage, and interior staining are valuable. Keep a simple ledger of repair attempts and temporary measures like tarps or boards. Being proactive with this record can streamline the review process and reduce back-and-forth.
In a climate with persistent freeze-thaw cycles, immediate steps matter. After a storm, remove standing water where safe and protect damaged areas from further precipitation if possible. If an area shows signs of active leakage, arrange for a temporary, weatherproof covering and notify your insurer promptly. A well-documented claim that ties storm timing to observed damage tends to move through the process more smoothly, even in a market where conditions shift after substantial losses.
Local hiring patterns favor affordable, quick-response contractors in Amsterdam, where leak response and practical re-roofing often take priority over premium design. When a storm hits or a freeze-thaw cycle stretches existing roofs, homeowners tend to seek fast crews that can start, finish, and clean up with minimal disruption. Keep this in mind as you evaluate options.
Many active contractors emphasize re-roofing and cleanup as core services. Ask how tear-off disposal is handled, what protections will be used to shield your landscaping and driveway, and how final cleanup is performed. A contractor who can clearly describe safe, tidy site practices tends to reduce the chance of post-work surprises, especially on steeper pitches common in older stock.
The presence of several long-established local companies means you can compare newer fast-response crews against firms with deeper area tenure and replacement experience. Look for a track record with asphalt shingles and other common Amsterdam roof types, and note whether the team has experience with ice-damming prevention and proper attic ventilation details that matter after harsh winters.
Request references from neighbors with similar houses and roofs. Inquire about how the crew protects the home during work, how weather windows were managed, and how any incidental damage to siding or landscaping was addressed. Confirm that the crew will clearly communicate schedule changes and provide a designated point of contact during the project.
Beyond price, assess punctuality, clear written scope, and a realistic timeline. A good local roofer will offer a practical plan for winter-hardy repairs, outlining steps to mitigate ice dam risk and address freeze-thaw wear without unnecessary delays. In Amsterdam, the best choice often balances dependable response with solid, experienced replacement know-how.