Last updated: Apr 19, 2026
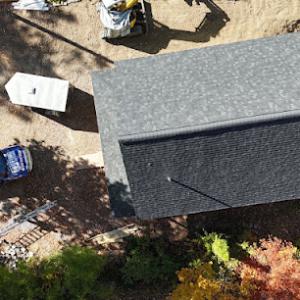
Cold winters with regular snowfall create a relentless freeze-thaw cycle. Each night's freeze followed by a daytime thaw flexes shingles, flashing, and underlayment, accelerating aging in common Saratoga Springs stock like asphalt and metal roofs. You may notice hail-like granule loss, curling edges on shingles, or flashing that feels loose after a thaw-heavy spell. These symptoms don't just mar the look; they unlock pathways for moisture to intrude into the attic, rafters, and ceiling systems. Left unchecked, minor defects compound into leaks, ice dams, and interior stains well before the next season's worst storms.
Snow accumulation and winter storms in this part of upstate New York routinely delay roof access. A shingle crease, a loose boot, or a small attic leak found late in fall may remain exposed until weather windows open. That delay matters: every thaw cycle in late fall winters the wear you can't see yet, and a small problem becomes a big one once the ground is clear and crews can safely reach the roof. Plan for a window where roof work can be performed without rushing through a blizzard or a rapid freeze, because hurried work often misses a critical detail.
In this climate, flashing movement is a leading early warning sign. Check around chimneys, skylights, vent pipes, and edge metal where sealant ages or shifts with temperature swings. Shingle tabs that appear cupped, curling, or lifted at the edges signal moisture ingress channels forming beneath, especially where valleys and intersections funnel meltwater. Pay attention to interior stains near ceilings and walls, which often map to a slow attic leak. Proactive detection in dry, calm weather reduces the risk of sudden leaks during the next freeze.
Replacement timing is typically concentrated from late spring through fall because winter conditions make tear-off, dry-in, and inspection scheduling less predictable. If you're weighing a roof upgrade or repair, align planning around those windows so crews can fully complete tear-off, proper insulation, and weatherproofing without interruption. Coordinating with a reputable local crew who understands freeze-thaw behavior is essential: they'll sequence underlayment, flashing re-seal, and venting so the roof can tolerate the first thaw and the next snow load without backsliding.
Seal obvious gaps around penetrations with a quality exterior sealant before snowfalls intensify. Inspect for loose or popped shingles after a thaw cycle and secure or replace them promptly. Clear outlets for drainage and ensure gutters and downspouts are free of ice dams or debris that could back up meltwater onto eaves. Schedule a fall-to-spring roof health check with a trusted local contractor so you're not scrambling when spring storms roll in and the next winter's freeze-thaw starts.
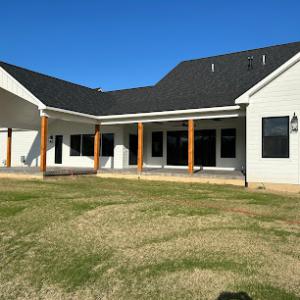
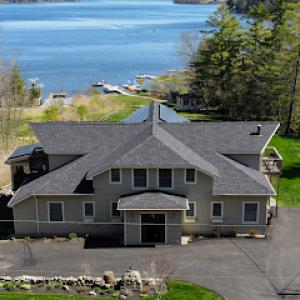
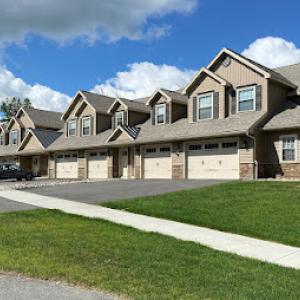
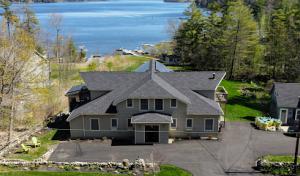
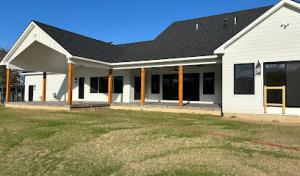
In Saratoga Springs, the dominant local material mix includes asphalt shingles, metal roofing, clay tile, concrete tile, wood shingles or shakes, and slate, which is broader than many upstate markets and reflects both historic and newer housing stock. That variety matters because the right choice hinges on how your roof handles snow, ice, and repeated freeze-thaw cycles. Start by identifying what your house was built to support. If you live in a historic district or your roof covers an older structure, preserving the feel of slate or wood may be appealing. If your home is newer or faces heavy snow loads, modern materials that shed snow effectively can offer practical advantages. Regardless of style, understanding how each option responds to winter extremes helps you narrow the field without sacrificing durability or curb appeal.
Asphalt shingles remain a practical, versatile choice across the mix. They're familiar to most local roofers, which makes maintenance and repairs straightforward when winter storms complicate access. In areas with freeze-thaw cycles, look for shingles with good granule adhesion and a robust underlayment. A layered asphalt system can tolerate ice dams better than a single-layer setup, provided attic insulation and ventilation are solid. If you're weighing a replacement on an older roof, consider a high-quality architectural shingle that gives you additional surface texture for shading ice pockets. Regular snow clearing and attention to attic venting remain smart practices, since improper ventilation compounds ice dam risk.
Metal roofing has meaningful contractor support in this market and is often considered by homeowners looking for a roof better suited to snow shedding and long winter exposure. Metal shines in snow country because of its slick surface that discourages ice buildup and its resilience to freeze-thaw cycles. For Saratoga Springs winters, a standing seam metal roof with a protected edge detail and proper snow guards can minimize dangerous snow slides and reduce maintenance during the season. When choosing metal, ensure color and coating choices align with the local climate (cooler finishes can help limit interior heat gain on sunny days) and that the system is paired with a compatible underlayment and ventilation plan for optimal performance.
Clay and concrete tiles bring classic looks and strong durability, but they behave differently under heavy snow. Clay tile tends to be heavier and more brittle in extreme cold, so a strong structural evaluation is essential before replacement. Concrete tile is more forgiving in freeze-thaw cycles and can shed snow if installed with adequate slope and supportive framing. Both options demand meticulous attic ventilation and a solid deck because trapped moisture and ice can push tiles and underlayment to failure. If replacing a historic roof with tile, plan for the added weight and the possibility of tightening the framing.
Wood shingles or shakes offer a warm, traditional aesthetic that suits many older or historic neighborhoods. They demand excellent ventilation and a consistently dry roof plane to resist warping and splitting after freezing and thawing. In snowy climates, wood can be susceptible to moisture infiltration if leaks develop, so regular inspections after winter storms are wise. If you value authentic texture and plan to stay in place for the long term, select a treated wood option with proven rot resistance and consider a thicker, more durable profile to improve performance in snow.
Slate remains locally relevant in Saratoga Springs, so homeowners replacing older roofs may need to decide between preserving a heavy traditional system and switching to lighter modern materials. Slate delivers impressive longevity and a proven track record in freeze-thaw environments, but it is heavy and costly, and it requires a strong structural backup. If your house already supports slate and you're content with its weight and maintenance profile, a high-quality installation with proper underlayment will continue to perform well through many winters. If replacing slate, weigh long-term durability against the cost and structural implications of moving to a lighter system. In either case, ongoing inspections after heavy snows help catch issues before they cascade into more substantial repairs.
In Saratoga Springs, you'll see pricing that reflects both material durability and the local climate, especially freeze-thaw cycles and heavy snow. Typical local pricing runs about 450 to 900 USD per square for asphalt shingles, 700 to 1200 for metal, 1100 to 1700 for clay tile, 900 to 1500 for concrete tile, 700 to 1100 for wood shingles or shakes, and 1500 to 2800 for slate. These ranges cover common homes in older neighborhoods that can still accommodate lighter materials, as well as newer houses designed for long winter performance. If your home has historically accurate siding or a steep slope, expect the per-square price to edge toward the higher end, even before any add-ons.
Costs can rise when older homes require careful tear-off, deck repair, flashing updates, or handling of heavier materials such as slate and tile. In practice, that means a standard replacement on a mid-century house might come in at the lower end if the board sheathing is sound and the existing roof is straightforward to remove. But if old rafters show signs of moisture damage, you'll face additional labor and potential repairs that push the bill up. Heavier materials like slate or clay tile demand extra crew time, specialized equipment, and longer installation windows, which translates to higher bids. In neighborhoods where historic preservation is a consideration, you may also encounter slightly higher disposal or handling fees due to waste management rules and careful tear-out requirements.
Seasonal demand affects pricing and scheduling locally because late spring through fall is the main replacement window, while winter storms and spring rain can compress contractor availability. In other words, if you wait until a busy window or after a late-spring ice event, you may face tighter schedules and higher bids simply because crews are booked. Conversely, shoulder periods can offer more flexible calendars and potentially modest labor-rate adjustments, though material lead times still matter for heavy options like clay, concrete, and slate. Planning ahead for a window before the first frost helps lock in a steadier price and a smoother project flow.
When budgeting, assume the listed material ranges but prepare for added costs if tear-off, deck repair, or flashing updates are needed. For slate or tile, factor in extra ballast for safety gear and potential crane or rigging fees if the house layout or street access complicates delivery. If you're considering a lighter, lower-maintenance choice, asphalt or metal can provide predictable pricing and solid performance during upstate winters, with less risk of rapid price spikes from weather-related scheduling gaps. Finally, share your roof's slope, chimney work, and ventilation needs with bidders; these details help avoid surprise adjustments once work begins. In Saratoga Springs, preparation and timing are as much a part of cost as material choice.

Saratoga Roofing
(518) 992-6405 saratogaroofingco.com
120 West Ave Suite 217, Saratoga Springs, New York
4.9 from 151 reviews
Saratoga Roofing - Premium Workmanship, Premium Materials, Premium Roofing We are Saratoga County's roofer! From minor repairs to full roof replacements, skylights to gutters, we are the roofers you can trust. Not only do we provide honest, quality workmanship, we are committed to serving our community proudly. With premium materials combined with our professionally trained installers and technicians, we are able to provide high quality results that will last. In addition, we guarantee all of our projects with our LeakProof and Professional Workmanship warranty. We proudly stand behind our motto: Premium Workmanship, Premium Materials, Premium Roofing. Call us today for your free estimate or in-home consultation!
Roofing Saints
(518) 977-7663 www.roofingsaints.com
120 West Ave Apartment 207, Saratoga Springs, New York
4.6 from 10 reviews
Roofing Saints has been repairing and replacing roofs in the Capital District for over 20 years. We know how hard it can be to find a Roofing Contractor that does quality work at an affordable price. We knew that Saratoga Springs had many Residential Roofing Contractors, so it would be tough getting started. But we also know, from firsthand experience, that there aren't many Roofing Contractors that are fair with their pricing and offer a Lifetime Warranty with all Roof Replacements and we wanted to fill that need in the Roofing Industry. Roofing the way it should be!

Roof Maxx of Schenectady, NY
Serving
4.9 from 69 reviews
Roof Maxx of Schenectady offers a cost-effective and eco-friendly alternative to traditional roof replacement. Our 100% natural, plant-based treatment extends the life of your roof by up to 15 years, saving you thousands. We serve Albany, Schenectady, Troy, and surrounding areas with free assessments and estimates, backed by a five-year transferable warranty. Protect your home, reduce landfill waste, and avoid the mess and expense of roof replacement. Contact our team today!
Infinite Roofing & Construction
63 Putnam St Suite 202, Saratoga Springs, New York
5.0 from 1 review
Roofing and Siding company serving Saratoga Springs from our downtown Saratoga location. We are contractors with 20 years of experience in roof replacement, repair and siding installation plus windows and gutters. Top rated and certified by GAF, James Hardie, Certainteed and IKO manufacturers. What that means for you is when we come out, we'll give you an honest assessment, consultation and estimate on your new project to maximize your return on investment: whether that be for a new roof replacement, new siding installation, adding seamless gutters to your home or a simple repair for your existing roof or siding. New installation work comes with an in-house 10 year labor warranty plus guaranteed financing options for all homeowners.
Full Coverage Contracting
(518) 800-7663 www.fullcoveragecontracting.com
Serving
4.7 from 51 reviews
Welcome to FULL COVERAGE CONTRACTING, INC.. We are a full service Construction Company specializing in Commercial and Residential Roofing. We offer a wide range of customizable services to fit all of our customers’ needs.
DiCristofaro Construction
Serving
5.0 from 11 reviews
Certified and insured contractor with 25+ years experience. Providing reliable, professional and quality roofing and contracting services to the Capital Region. Free consultation and estimates available by appointment. dicristofaroconstruction@gmail.com Facebook: @dicristofaroconstruction
KC Entities Roofing & Siding
(518) 703-0680 www.kcroofingandsiding.com
Serving
5.0 from 99 reviews
KC Entities Roofing and Siding is a women-owned, family-operated roofing contractor serving Saratoga, Albany, Clifton Park, New York, and the entire Capital Region. With over 20 years of experience, we specialize in roof installation for both residential and commercial properties. Our team handles shingle, metal, and rubber roofing projects, ensuring quality craftsmanship on every job—big or small. Trust us to provide reliable and professional roofing services to protect your home or business. Visit our website to learn more about our services or to schedule a consultation. At KC Entities Roofing and Siding, we are dedicated to meeting all your roofing needs.
Kornerstone Roofing
(518) 707-1795 kornerstoneroofing.com
Serving
5.0 from 198 reviews
Kornerstone Roofing is a trusted, family-owned roofing contractor proudly serving Round Lake, NY and surrounding areas since 2020. We specialize in residential and commercial roofing, metal roofing, storm damage repair, and skylight installation. What sets us apart is our commitment to exceptional craftsmanship, personalized solutions, and building lasting relationships with every client. Each project is built on a foundation of trust, quality, and meticulous attention to detail—ensuring your property stays protected for years to come. Contact Kornerstone Roofing today for a free estimate!
Revere Roofing
(518) 357-0551 revere-roofing.com
Serving
5.0 from 35 reviews
Revere roofing is a full service roofing and window and siding business. We have 35 years of experience in the Capital Region and beyond.
Capital Weatherproofing
(518) 310-6777 www.capweatherproofing.com
Serving
5.0 from 29 reviews
Capital Weatherproofing specializes in fluid-applied flat roof membrane systems for residential and small multi-family buildings throughout Albany and the Capital District. We focus on hard-access, multi-story flat roofs—including 2–3 story walk-ups and tight urban sites—where traditional roof replacement is difficult or cost-prohibitive. Our work centers on Gaco fluid-applied membrane systems to address ponding water, chronic leaks, and aging flat roofs where extending service life is the practical solution. Based in Albany, we serve a 40-mile radius, providing honest evaluations and manufacturer-aligned installation standards.
J&C Construction Services 1
(518) 528-8587 www.jcconstructionservicesonecorp.com
Serving
4.9 from 11 reviews
J&C Construction Services 1 Corp specializes in professional roofing services, including inspections, installations, repairs, attic venting, skylight installations and repairs, and storm or wind damage restoration. With a strong reputation built over years of experience, we proudly serve clients in the greater Albany area and its surroundings. Our team uses top-quality materials and follows industry best practices to ensure lasting results and customer satisfaction. Whether you need routine maintenance or urgent repairs, we’re here to help. Contact us today for a free estimate and experience roofing done right.
Capital Gutters
(518) 213-2153 www.capitalgutters.com
Serving
5.0 from 72 reviews
Capital Gutters provides gutter installation, cleaning, and repair services to the Capital, Syracuse, and Rochester areas.
A full roof replacement in Saratoga Springs typically requires a permit through the City of Saratoga Springs Building Department. That means you start by submitting plans that show the material, scope, and basic details of the work. The department isn't just checking for a signature; they're assessing that the roof assembly will stand up to our freeze-thaw winters, snow loads, and the mix of older and newer homes found in the area. Expect the review to look beyond just the sheetrock of the attic and toward how the underlayment, flashing, and ventilation will perform across seasons.
The local process involves permit submission and review before work begins, with inspections scheduled during and after installation rather than only at final completion. That staggered schedule is not a nuisance but a practical safeguard: a mid-project check can catch missteps that would otherwise cause ice damming or hidden moisture issues once a heavy snowpack builds. In neighborhoods with slate-capable houses or retrofits into older structures, inspectors often want to see details up close, especially where roof lines intersect with dormers, chimneys, or skylights. You'll likely be asked to produce vent details and confirm that the attic remains adequately ventilated after the new roof is in place.
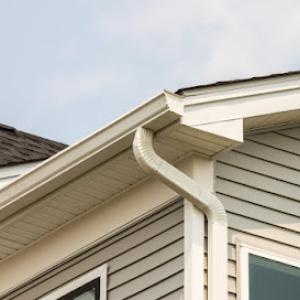
City review may focus on underlayment, flashing, and ventilation details, and any minor structural work tied to the roof can trigger additional processing. The emphasis on underlayment matters because proper layers help resist thaw-related moisture traffic and wind-driven rain that can sneak into vents or eaves during warm spells followed by sudden cold snaps. Flashing around chimneys, vent pipes, and transitions to gutters must be integrated with tight seams and corrosion-resistant materials. Ventilation isn't optional in this climate: inadequate attic airflow can lead to condensation and premature shingle deterioration under heavy snow and freeze-thaw cycles.
Plan to coordinate timing with contractors so that permits are in place before material delivery and roofers begin work. Schedule inspections promptly-deadlines can compress windows when weather is favorable, and delays can extend exposure of the roof system to winter conditions. Keep a clear line of communication with the Building Department and the contractor about any design changes, especially if an aging roof has structural quirks or if the plan includes any minor structural work tied to the roof. Being proactive helps prevent slowdowns when the weather shifts, which is a real risk in this climate.
In the Saratoga Springs area, insurers commonly want documentation of roof age, visible damage, and a proper inspection report before approving hail or wind-related claims. That means your claim can stall or be denied if the paper trail isn't clear, even after a significant storm. A straightforward, professional inspection report from a qualified roofer provides essential credibility, especially when the damage isn't obvious from ground level or is mixed with age-related wear.
Adjusters in this upstate New York market may request photos, repair estimates, and evidence of prior maintenance rather than treating every storm event as grounds for rapid full replacement. Photos need to capture both wide views and close-ups of edges, flashing, and any granule loss or curling. Having a pre- and post-storm set of images helps demonstrate what happened and when. An itemized repair estimate that aligns with the inspection findings also strengthens the position that only the affected areas require attention, rather than a wholesale roof replacement.
Because blanket approvals are less common locally, homeowners benefit from documenting damage immediately after wind or hail and keeping records of earlier repairs. Quick action matters, but so does quality documentation. Save weather reports and service dates, and note any nearby storm paths or hail reports. If there was prior maintenance, gather receipts or a summary from your previous contractor. This context can prevent disputes about pre-existing conditions being mischaracterized as storm damage and can help an adjuster see the true incremental need.
Start with a professional roof inspection as soon as a storm passes, focusing on wind-lifted shingles, boot and flashing integrity, and any soft spots that suggest underlying fastener issues. Photograph the roof from multiple angles, including attic vents and pipe flashings, to show both surface and interior indicators of moisture intrusion. When you file, present the inspection report, photos, and a clear repair plan that matches the damage documented, rather than a generic expectation of replacement. Staying organized with this evidence reduces back-and-forth and helps ensure a fair assessment aligned with the actual wear observed on the roof.
Connect with contractors who help homeowners navigate the claims process from damage assessment to final approval.

J&C Construction Services 1
(518) 528-8587 www.jcconstructionservicesonecorp.com
Serving
4.9 from 11 reviews
Winter storms and snow accumulation in Saratoga Springs can delay material delivery, site access, and safe tear-off conditions. When you plan a winter project, map out a realistic window that accommodates weather swings and potential road closures. Build in extra time for crews to clear driveways and lay down tarps, and arrange for secure material storage on the ground or on a protected rack. Clear communication with the supplier about expected snow days helps keep the sequence intact.
Spring thaw and heavy rain raise the risk of leaks during active replacement, which makes dry-in planning especially important in this market. Prioritize a continuous, weather-conscious workflow: stage underlayment and flashing before temperatures rise, and have a plan for rapid tarping of open areas during late-season showers. If shingles or metal are being delivered in early spring, confirm accessibility with a cleared path and a stable staging zone to protect new materials from moisture and mud.
Autumn winds and storms can interrupt projects, while summer heat and humidity can affect material handling and curing times. In fall, secure loose debris promptly and watch for sudden gusts that can shift panels or shingles. During hot spells, schedule heavy lifts for early morning or late afternoon to avoid heat warping or worker fatigue. Ensure roof vents, underlayment, and sealants are kept dry during any brief lull in wind or rain.
Coordinate a phased schedule that aligns with predicted fronts and subfreezing nights. Develop a dry-in plan that anticipates late-season snow, spring rainstorms, and shoulder-season heat, so that your project can transition smoothly from teardown to weather-tight finish without compromising the roof's longevity. Maintain clear, updated access routes and keep neighbors informed about access and noise windows.
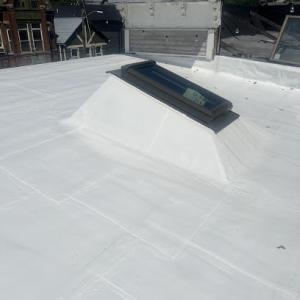
Low-slope and flat-roof assemblies appear in select residential additions and some commercial properties, but they are not the dominant roof type in this area. The mix means knowing how a low-slope setup behaves in our freeze-thaw winters is essential for long-term performance. Snow and spring moisture stay on the roof longer than on steeper profiles, which increases exposure to fast-drying sun and repeated freezing cycles. This combination can aggravate wear on joints, seams, and edge details if not designed with careful drainage and durable materials.
Snow can linger on a low-slope surface longer than on a pitched roof, which translates to extended wet exposure through the thaw and refreeze cycle. When snow finally slides off, it can expose vulnerable flashings and underlayment to rapid temperature swings. Plan for a roof assembly that handles that thaw period without puddling or ice dam risk behind parapets or at transitions. Consider a drainage plan that promotes quick shedding at the edges and a robust, slope-appropriate insulation strategy to reduce condensation below the deck.
Because the city inspection process may review underlayment and flashing details, low-slope assemblies need careful documentation when replacement work is permitted. Choose a tested, code-compliant underlayment with proven resistance to moisture migration and ice-formation at seams. Flashings should be continuous and well-sealed at all perimeter intersections, penetrations, and penetrations through the parapet. When replacing, document material types, seam configurations, and fastening patterns so inspectors can verify the installation meets the expected standard for a climate with recurring freeze-thaw cycles.
Flat-roof specialization exists but remains a secondary path versus the main roof styles seen here. For a low-slope addition or retrofit, lean toward assemblies with strong seam integrity, reliable flashing details, and a clear plan for snow management at openings and edges. In this climate, the right combination of underlayment, flashing, and edge insulation makes a low-slope roof behave more like a steeper profile through the harsh months, reducing wet exposure and extending service life.
Find specialists in TPO, EPDM, and built-up flat roofing systems for residential and commercial properties.

In this market, homeowners often emphasize getting a solid re-roof quickly with cleanup included and clear value for the work performed. When you talk to contractors, look for responses that outline a realistic timeline, debris removal, and a practical plan for handling snow-related wear before the next winter. The emphasis here is on execution and service as much as price, so observe how promptly a crew can respond to an inspection request and how they document yo-yo weather impacts on the roof.
Saratoga Springs features a notable share of long-established and family-owned firms. That matters because warranty follow-through and seasonal callback service tend to align with relationships built over years. When evaluating candidates, ask about post-installation availability during thaw cycles and who you call if flashing or fasteners flex with a freeze-thaw cycle. A company with local endurance often demonstrates steadier staffing and a predictable service pattern after installation.
Manufacturer-certified firms exist but are not dominant here, so you should verify both workmanship warranty terms and whether the installer can support material-specific systems such as metal or slate-adjacent work. If you lean toward metal or slate-adjacent configurations, confirm the crew's experience with those systems in our climate, including edge detailing and snow-load considerations. Ask for project photos or references that show successful performance through several winters.
Insist on a clear, itemized proposal that names what is included in cleanup, how the teardown is handled, and what happens if a severe thaw or storm alters the schedule. Favor contractors who present a practical sequence for work-covering weather contingencies, temporary protection, and guaranteed follow-up checks after installation. In this market, your choice should balance dependable service with proven capability to manage the specific wear patterns produced by our freeze-thaw winters.