Last updated: Apr 19, 2026
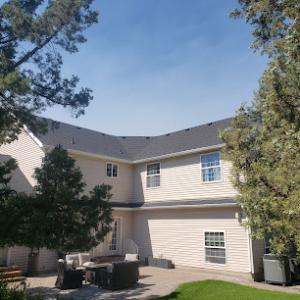
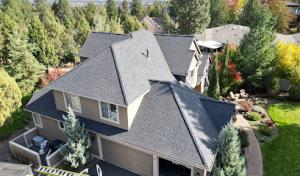
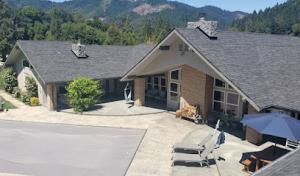
Redmond's high desert climate blends hot, sunny summers with cold winters, so roofs here age from both UV exposure and freeze-thaw cycling. Sun-drenched exposures bake shingles and underlayment, while nighttime freezes push moisture in and out of seams or penetrations. Over time, the combined stress accelerates material fatigue, fractures, and flashing degradation far more than mild, steady rain would. A roof that sits under strong alpine sun all day will show wear on surfaces that might look fine from the ground, including granule loss on shingles and chalking on any coatings. The winter cycle then compounds those vulnerabilities when meltwater refreezes at eaves, valleys, and joints, creating micro-cracks and ice dam risks that a milder climate would not typically see.
Snow accumulation in winter followed by daytime thawing can push water into vulnerable roof details before overnight refreezing seals it into place. In practice, that means flashing around chimneys, vents, and skylights can experience repeated wetting and freezing, which slowly loosens seals and widens gaps. Valleys and ridge caps endure the most seasonal stress because they collect runoff and are frequently exposed to sun-warmed surface temperatures that promote rapid expansion and contraction. The result is a vicious cycle: moisture intrusion at a micro level becomes heat-dried, then frozen at night, creating micro-delamination or hairline cracks that propagate with each seasonal temperature swing. The worst areas often sit where roof planes meet other materials, or where any previous repairs were done with mismatched products or improper sealing.
Replacement timing in Redmond is often driven less by constant rain exposure and more by sun degradation, thermal movement, and winter weather stress. A roof that has held up well through a dozen winters may still show respectable surface appearance, but the underlying structure-sheathing, nails, and underlayment-can be compromised invisible to a casual eye. If granule loss, curling shingles, or loose or flashing seals are detected during a routine inspection, those signs tend to foreshadow accelerated aging under this climate. In general, consider that materials exposed to strong UV and repeated freeze-thaw cycles do not age in a straight line; a segment of a roof can fail earlier than neighboring sections if it already carried extra load or if heat reflection from nearby surfaces is particularly intense. Planning replacements with a focus on long-term UV resistance and robust, climate-appropriate underlayment helps avoid premature failures after a few seasonal cycles.
Choosing roofing materials that tolerate sun and cold cycles can extend life in this environment. Metal roofing often handles UV exposure well and sheds snow efficiently, but flashing and panel joints must be well-sealed to cope with freeze-thaw movement. Synthetic or composite shingles can provide good UV resistance with lower weight and decent freeze-thaw performance, but they still rely on a sound underlayment and proper ventilation to avoid heat buildup in attic spaces. Clay tile and slate offer excellent long-term durability in dry, sunny conditions, yet their weight and brittle response to cold require careful structural evaluation and professional installation to withstand thermal stress. Fiber cement shingles deliver a balanced option with solid resistance to UV and weather, though expansion and contraction should be accounted for in fastener choices and panel spacing. Each selection benefits from a vapor-permeable, water-resistant underlayment and an appropriately vented roof assembly to manage condensation and attic temps.
A proactive approach helps manage Redmond's unique demands. Start with a thorough annual inspection focusing on flashing seals, ridge and hip caps, and any penetrations where ice dams are likely to form. Look for granule loss in sun-exposed sections and any surface degradation that suggests accelerated UV wear. Ensure attic ventilation remains adequate to minimize heat-driven expansion in summer and to temper snowmelt-driven moisture during shoulder seasons. Pay attention to underlayment integrity, especially in areas with prior repairs or heavy foot traffic for maintenance. Early resealing of seams and timely replacement of damaged fasteners can prevent costly leaks and help the roof better weather the next winter's freeze-thaw cycle. Redmond's climate rewards a cautious, forward-looking replacement schedule that prioritizes UV-stable materials, robust flashing details, and a ventilated, moisture-managed roof assembly.
In this high-desert climate, a few inches of snow can look innocent, but the ice and freeze-thaw cycles underneath can silently crack underlayment, loosen fasteners, and push shingles up where you can't see it. Winter snow and freezing temperatures in Redmond can delay active roofing work and increase the risk of ice dam formation at eaves. That delay isn't a pause; during a freeze, water that melts on the roof can refreeze at the eave, backing up under shingles and saturating decking. The result is hidden damage that only shows up after a thaw or once leaks appear inside the attic or ceiling. Plan for the cold months to be a true test of any roof's integrity, not a quick summer fix.
Fall wind and early storm systems are a local timing issue because homeowners often try to finish reroofs before winter conditions set in. That impulse is understandable, but rushing a roof you're still shaping to cope with gusts and precipitation is dangerous. Ensure you're not sealing in a vulnerable layer just as the first cold fronts arrive. A well-timed inspection now can identify missing or damaged flashing, loose edge shingles, and ventilation gaps that would become critical once snow piles on top. If you're planning a late fall project, guard against weather windows that leave you working in bluster, drizzle, or icy ramps-these conditions reduce accuracy and raise slip risks for crews and homeowners alike.
Ice dam risk is not theoretical here. Proper ventilation and a correctly installed underlayment can slow or stop ice dam progression, but a borderline attic with poor insulation will push meltwater toward the eaves, creating leaks and wood rot. Your roof's life hinges on addressing heat loss at the soffit, sealing gaps around chimneys and vents, and ensuring ridge and soffit ventilation work in concert with a durable underlayment. If you notice icicles forming along the eave line or a sudden increase in attic humidity during a cold snap, treat it as a red flag rather than a quirky winter souvenir.
Storms and wind are opportunistic here. Oregon insurers commonly see roofing claims after wind and hail events, and Redmond homeowners need recent photos and contractor documentation when damage follows a storm. After a storm, document everything: remote or blown-off shingles, dented flashing, lifted gutters, and any interior signs of leakage. Photograph the loft and attic after the dust settles, and keep a dated record of contractor assessments. When a claim is possible, your file should clearly demonstrate the sequence from wind or hail impact to any interior staining or attic moisture so the insurer can verify what happened and when.
If you suspect damage from winter snow, ice, or wind, act promptly but safely. Schedule a thorough inspection as soon as weather allows, focusing on shingle integrity, flashing, vent pipes, and ventilation paths. Treat the roof as a system: good underlayment, solid ventilation, and secure fasteners are all critical to surviving Redmond's demanding winters. A proactive approach now reduces the chance of costly, lingering leaks once spring warmth returns.
Find local contractors experienced in assessing and restoring roofs after hail, wind, and severe weather events.
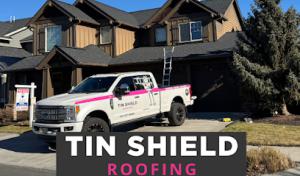
Tin Shield Roofing
3826 SW Cascade Vista Dr, Redmond, Oregon
5.0 from 48 reviews
River City Roofing Bend/Redmond
(541) 612-1517 roofrivercity.com
222 NW 7th St Suite 104, Redmond, Oregon
5.0 from 19 reviews
Central Oregon Roofing
(541) 382-2432 www.centraloreroofing.com
494 SW Veterans Way #8, Redmond, Oregon
4.2 from 43 reviews
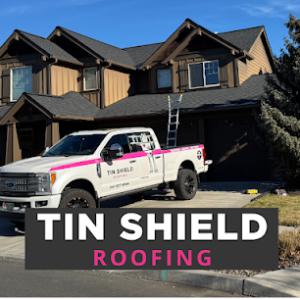
Tin Shield Roofing
3826 SW Cascade Vista Dr, Redmond, Oregon
5.0 from 48 reviews
TinShield Roofing is a family-owned business based in Redmond, OR, serving all of Central Oregon, including Bend, Prineville, Sunriver, and Sisters. With 13 years of experience, our expert team specializes in roof, siding, and gutter repair and replacement, as well as storm damage restoration and insurance claim assistance. Known for our 5-star service, honest advice, and fast turnarounds, we make the repair process smooth and stress-free. We offer free inspections and estimates with no obligation. Call or visit us today to get started!
541 Roofing & Heat Coil
511 SW Canal Blvd Suite 3, Redmond, Oregon
5.0 from 24 reviews
Do you need a new roof on your home or business? 541 Roofing & Heat Coil offers exceptional roofing services as a trusted veteran-owned and operated business with over 14 years of experience. We serve Redmond, OR, and the surrounding areas, committed to delivering utmost value to our residential and commercial property owners. Customer satisfaction is our top priority, and we proudly offer a 10-year warranty on our repair services, ensuring your peace of mind. Our preference is to prioritize cost-effective roof repairs whenever feasible, providing you with the best possible solution. No roofing project is too small for our dedicated team, who are licensed and insured to ensure your protection
River City Roofing Bend/Redmond
(541) 612-1517 roofrivercity.com
222 NW 7th St Suite 104, Redmond, Oregon
5.0 from 19 reviews
River City Roofing is a residential and commercial roofing contractor servicing Central Oregon. We install residential, multi-family and commercial flat roofing membranes, coatings, shake, shingles and metal roofing systems.

Masters Roofing
(541) 598-6444 mastersroofingllc.com
Redmond, Oregon
5.0 from 9 reviews
At Masters Roofing, we understand that your home or business is a valuable asset that deserves top-quality care and protection. That's why we have made it our mission to provide exceptional roofing services to our clients, delivering outstanding results that exceed expectations. Our team of experienced professionals is committed to upholding the highest standards of integrity, craftsmanship, and customer satisfaction. With a strong focus on safety, efficiency, and innovation, we utilize the latest technology and techniques to ensure a seamless and durable roofing solution for every project.
Central Oregon Roofing
(541) 382-2432 www.centraloreroofing.com
494 SW Veterans Way #8, Redmond, Oregon
4.2 from 43 reviews
Welcome to Central Oregon Roofing, the Oregon's oldest and most trusted name in Commercial and Residential Roofing. With a legacy of excellence, we take pride in delivering top-notch roofing solutions to both businesses and homeowners alike. Our commitment to quality craftsmanship, attention to detail, and customer satisfaction sets us apart as the go-to roofing experts in Central Oregon. As a sister company of Eagle Roofing, specializing in flat roofs, we offer a comprehensive range of roofing services tailored to meet diverse needs. Conveniently located in both Redmond and Bend, our dedicated teams are ready to serve even large construction roofing needs. Central Oregon Roofing where experience meets reliability.
High Desert Contracting
244 SW Rimrock Way Apt 55, Redmond, Oregon
5.0 from 3 reviews
My business specializes in residential roofing. My goal is to put out the best quality and ensure my customer are satisfied. Here at High Desert Contracting I strive for perfection and quality craftsmanship.
Arm N Hammer Roofing
(541) 903-0606 anhroofingllc.my.canva.site
3270 SW Metolius Ave, Redmond, Oregon
3.4 from 7 reviews
Specialize in New Roofs, Re-Roofs, Roof Snow Removal, Siding, Decks, Tile
Eagle Roofing Company
(541) 389-8305 eagleroofingbend.com
494 SW Veterans Way #8, Redmond, Oregon
5.0 from 1 review
Installing commercial low slope single-ply roofing systems for over 30 years!

Sonny's Roofing
(541) 788-0541 patagoniaroofing.com
Serving
4.9 from 28 reviews
Who knows how to solve your roofing issues better than a local roofing company? Sonny's Roofing, LLC often receives calls about winter storm damage and leaky roofs in Bend, OR. and surrounding areas. We'll have your roof fixed in no time. Take advantage of our budget-friendly services. We offer free estimates!
Skyline Roofing & Construction
Serving
5.0 from 10 reviews
Skyline Roofing and Construction is a local, family-owned roofing and construction company serving Central Oregon including Madras, Redmond, Bend, Sisters, and Prineville. With more than 20 years of roofing and construction experience, we specialize in all phases of roofing, repairs, remodeling, additions, concrete, and structural modifications.

Royal Roofing & Construction
(541) 848-1636 royalroofingllcbend.com
Serving
5.0 from 10 reviews
Bend's trusted roofing experts! The father-son duo at Royal Roofing and Construction has over 25 years of combined experience. Our family business, founded by Santiago Valladolid and his son, Daniel, is dedicated to providing top-notch roofing solutions. Whether it's composition, metal, low-slope membrane, or tile roofs, we have the expertise to handle it all. Plus, we offer comprehensive roofing maintenance including leak repairs, ventilation upgrades, shingle replacements, and gutter cleanings. No task is too small for us. Explore our services and our story at Royal Roofing and Construction's website to get your free estimate. Let us protect your home with quality and care! CCB# 245947
Greenlee Roofing
(541) 316-9567 greenleeroofing.com
Serving
4.9 from 245 reviews
Greenlee Roofing is a Roofing Contractor located in Bend, OR. From residential and commercial roofing to snow removal, Greenlee Roofing has a long track record in Central Oregon for supplying high-quality services for a fair price. We are committed to delivering high-quality design and exceptional craftsmanship with every project.
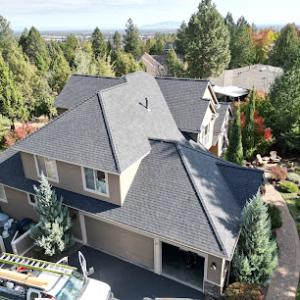
In a high-desert climate with intense sun and repeated freeze-thaw cycles, the way a roof handles UV exposure and winter stresses becomes a daily reality. Snow-shedding performance matters not just for keeping driveways clear, but for minimizing ice dam risk and attic moisture swings. Materials that perform well under thermal cycling and stay sound after repeated freeze-thaw cycles will outlast those that rely on brittle components or heavy protective coatings that degrade in sun. The goal is a roof that sheds snow, resists sun-driven wear, and maintains a stable seal around fasteners and seams.
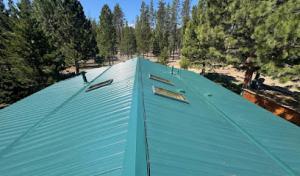
Metal stands out as a practical option when snow needs to move off quickly and the glare of sun is constant. In this climate, a standing-seam or fastened panel system with a high-grade coating handles thermal expansion better and resists paint fade. Look for panels with proven snow-shedding performance and a coating that minimizes chalking and color fade after years of sun exposure. The underlayment should be a compatible, breathable system that accommodates metal's expansion and contraction. Pay attention to ridge and hip details; long, clean lines with integrated flashing reduce potential ice dam routes and leaks. If choosing metal, prioritize quality fasteners and sealants rated for temperature swings, especially around eaves and skylight penetrations.
Asphalt remains a dominant option, but UV exposure and freeze-thaw stress make product quality and installation details more consequential here. Choose architectural or dimensional shingles with a thicker, more robust fiberglass or polyiso core designed for high sun exposure. A reflective or cool-roof granule blend helps resist heat buildup that accelerates aging. Proper ventilation in the attic, a solid underlayment, and careful sealing at valleys, drip edges, and penetrations are essential to prevent premature failures. In this climate, the integrity of fasteners and adhesive seals matters more than in milder regions, so insist on quality installation and load-compatible nails.
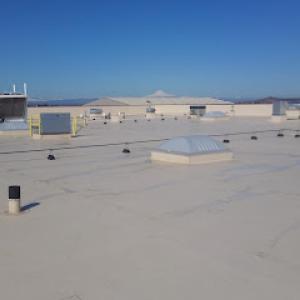
Clay tile, slate, fiber cement, and synthetic/composite products must be evaluated carefully because winter loading and thermal cycling can affect heavier or more brittle systems differently than in wetter valley climates. Clay and slate offer longevity, but their weight requires a structural assessment and correctly engineered fasteners to handle freeze-thaw cycling. Fiber cement and composites can be a balanced choice, but avoid those with softening finishes or uneven edges that sun can degrade unevenly. In all cases, ensure the roof deck, underlayment, and flashing are rated for the local temperature range and that installation accounts for expansion and contraction.
Regular inspections after heavy snow and at the end of the heating season help catch microcracks, loose fasteners, and flashing wear before leaks form. Given the sun exposure, check for granule loss on asphalt shingles and the condition of coatings on metal roofs. Keep venting clear to prevent attic moisture buildup during the warm transitions. Choose products with UV stability claims and verify that installation details align with the climate's demands, including nail patterns, sealant compatibility, and seam integrity.
Explore specialists in steel, aluminum, and standing seam metal roofs built to last 50 years or more.
River City Roofing Bend/Redmond
(541) 612-1517 roofrivercity.com
222 NW 7th St Suite 104, Redmond, Oregon
5.0 from 19 reviews

Typical Redmond material pricing runs about $350-$700 per square for asphalt shingles, $800-$1500 for metal, $1000-$1800 for clay tile, $600-$1100 for synthetic/composite, $1200-$2400 for slate, and $700-$1100 for fiber cement shingles. In your budget, consider that lightweight alternatives like fiber cement and synthetic shingles can land closer to the lower end, while premium metals or true slate can push toward the upper end. For a mid-sized reroof, expect material costs to align with these bands, but be ready for local add-ons if your roof has unusual angles or a complicated layout.
Costs in Redmond can rise when winter weather compresses the working season and when fall demand increases as homeowners try to complete reroofs before snow and freezing temperatures. That means you'll typically see tighter schedules and tighter bids as crews race to wrap before the first real freeze. If your project timing straddles late fall, you may encounter a premium for expedited ordering, material staging, and crew availability. Planning ahead in the shoulder seasons can help you keep costs steadier.
Projects involving structural changes, ventilation revisions, or heavier roofing materials can cost more locally because the City of Redmond permit process may trigger plan review. Even without diving into permitting details, it's useful to anticipate added labor for improved ventilation, firmer underlayment, or upgrading insulation to match a new roof. Heavier options such as clay tile or slate not only raise weights but often require additional framing or reinforcement, which translates to higher on-site complexity and price.
If you're replacing asphalt shingles, budget toward $350-$700 per square; metal $800-$1500; clay tile $1000-$1800; synthetic/composite $600-$1100; slate $1200-$2400; fiber cement $700-$1100. Expect seasonal spikes, and plan for potential extra costs if your roof design needs more structural work or ventilation improvements.
Get a clear picture of your project costs upfront - no commitment required.
Tin Shield Roofing
3826 SW Cascade Vista Dr, Redmond, Oregon
5.0 from 48 reviews
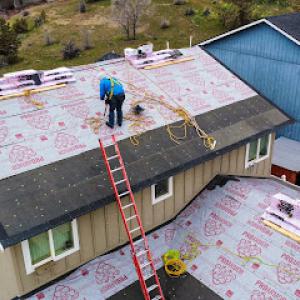
On a typical reroof project in this Deschutes County area, a building permit through the City of Redmond is required. The permit process is designed to ensure that new underlayment, ventilation, and overall roof structure meet local standards that handle the high-desert sun, heavy winter freeze-thaw cycles, and rapid temperature swings. The application form specifically asks for the project scope and details on underlayment and ventilation, reflecting the practical needs of Redmond's climate. If structural changes are planned, be prepared for a plan review step that can add time to the process but helps prevent field issues after installation.
As the homeowner, gather a clear description of the work planned, including roof type, any structural modifications, and the exact underlayment and ventilation strategy being used. The City of Redmond expects documentation that demonstrates proper attic and eave venting, adequate soffit and ridge ventilation, and a continuity of underlayment appropriate for freeze-thaw cycles and UV exposure. In areas where the roof transitions to skylights or vent pipes, include details on flashing, penetrations, and ice/water shield placement. Submitting complete information reduces review time and helps avoid delays when inspectors arrive.
After the new roof is installed, a field inspection is scheduled to verify that the work matches the approved plan and meets local requirements for ventilation, underlayment type, and flashing details. This inspection is a tangible checkpoint before the project can move forward toward final release. The final inspection is required before the permit can be closed out or released. Coordination with the inspector should align with the most weather-stable window in Redmond's season, ensuring that roof assembly components perform under the region's freeze-thaw cycles without unnecessary exposure to moisture.
Think ahead about venting pathways and how snow loads interact with ridge and soffit openings. Because sun exposure accelerates UV-related wear on shingles and underlayment, confirm that the chosen products are rated for high-desert conditions and that installation details preserve ventilation efficiency. If alterations to the roof's structure are considered, discuss them early with the permit reviewer to avoid later rework that could trigger additional inspections. Keeping the permit paperwork organized and aligned with the installation plan streamlines both review and final release.
The high-desert sun and freeze-thaw cycles in Central Oregon take a toll on roofing materials fast. After a wind or hail event, you should expect that damage isn't always obvious from the ground. Shingle granules, lift of edges, or bruised panels can signal problems that aren't visible until inspected up close. In Oregon, roof claims are not unusual after wind and hail events, so adjusters will look for a clear trail of damage and a reasonable replacement plan that aligns with local climate stress.
There is no statewide insurance pullback, but some carriers tighten coverage for higher-risk roof types and expect code-compliant replacement details. For you, that means documentation matters. Expect adjusters to request detailed photo documentation and contractor estimates that show both the scope of repair and the preservation of ventilation, underlayment, and proper flashing. A well-supported claim that demonstrates a durable, code-conscious fix stands a better chance of moving smoothly through the process.
Because reroofs commonly require permits and inspections, homeowners should keep permit records, scope details, and final approval documents with the claim file. Collect photos showing wind or hail impact from multiple angles, notes on any missing shingles or lift, and a concise timeline of the event. If you work with a contractor, secure a written scope that ties every repair to the observed damage and long-term performance in the Central Oregon environment. This bundled evidence helps prevent back-and-forth delays and supports a faster, more predictable settlement.
Connect with contractors who help homeowners navigate the claims process from damage assessment to final approval.
Tin Shield Roofing
3826 SW Cascade Vista Dr, Redmond, Oregon
5.0 from 48 reviews
River City Roofing Bend/Redmond
(541) 612-1517 roofrivercity.com
222 NW 7th St Suite 104, Redmond, Oregon
5.0 from 19 reviews
Spring rain in Redmond often exposes weaknesses in underlayment and flashing around roof penetrations after winter weather has already stressed those details. Snow and freeze-thaw cycles leave seams brittle and fasteners loose, so a soggy attic close to the first steady spring showers can reveal drips you didn't hear about in December. When the rain arrives, listen for tinging sounds at skylights and along any metal flashing. If you see staining or damp spots on ceilings below skylights, or you notice moisture near transitions, treat those signs as red flags rather than coincidences.
Skylights are a frequent homeowner concern in this market, and the local signal from contractors is clear: the work tends to recur. A skylight that seemed solid last fall can start leaking after a winter with heavy snow and repeated freeze-thaw cycles. The shingle-to-flashing interface is a common failure point, particularly where curb flashings meet the roof plane. If a skylight area feels warm to the touch on sunny days or the curb shows any lift, that's a warning. Replacement details must prioritize a tight seal around the curb, reinforced flashings, and a properly pitched drainage slope to shed meltwater away from insulation and seams.
Transitions, curbs, and other low-slope drainage details are more failure-prone here than simple open-field roof areas. In Redmond's mix of UV exposure and cold nights, membranes can crack, and fasteners can back out, allowing water to follow the path of least resistance. Pay attention to any chlorinated or chalky residue along the line where the skylight or parapet meets the roof or where two roof planes meet. A slow drip from these junctions often means the underlayment or flashing has lost its integrity, not just the visible surface.
Local contractor signals emphasize catching issues early. Regular inspections after heavy spring rains and after major thaw cycles help prevent more costly repairs. When a flashing or curb joint shows any movement, or if the low-slope area holds standing water after rain, schedule a targeted assessment. The goal is to confirm that the drainage path remains unobstructed and that the roof's protection around penetrations remains continuous and uncompromised.
Find contractors experienced in skylight installation, flashing, and leak repairs to bring natural light into your home.
Winter snow and freezing temperatures can slow or postpone roofing work in Redmond, making late-season emergency replacements more difficult. If a project extends into cold snaps, materials may take longer to set and crews may need extra safety precautions. Plan for short daylight and frequent frost delays that can push production into marginal conditions. Spring moisture can affect installation pace and underlayment performance, so scheduling around lingering wet periods matters locally. If days stay damp for more than a week, crews may need to pause to protect underlayment and keep asphalt or synthetic underlayment from absorbing moisture. Expect gradual progress during the shoulder weeks when rain fronts arrive with more regularity.
Fall is a high-pressure season in Redmond because homeowners race early storms to finish projects before winter conditions return. The window to complete a reroof before snow or sleet arrives is tight, and crews often juggle multiple jobs. Start early, lock in a start date well before the first true cold snap, and keep contingency days in the plan for sudden weather shifts. If a roof has significant sun exposure, UV-driven wear can accelerate aging, so prioritize a solid inspection list to avoid surprises once crews are on site.
Coordinate with a reputable local crew that understands attic ventilation and underlayment choices suited to high-desert conditions. Schedule inspections and damage assessment ahead of the prime rain and snow months, and confirm material orders align with the forecasted sequence to minimize indoor storage needs. Build a small buffer into the plan for frost delays, spring mud, and autumn wind events, then set clear milestones for teardown, deck installation, and final sealant cure. This approach helps avoid half-finished projects that linger through winter.
Redmond's contractor market leans heavily toward re-roofing rather than only new construction, which matches the needs of existing homeowners replacing aging systems. When you start conversations, expect crews that handle more than a single material type and can adapt to the specific wear patterns caused by Central Oregon's sun and freeze-thaw cycles. Look for teams that have a steady lineup of crews on the schedule, not just a single foreman who might be stretched thin. Many visible contractors are long-established, affordable, and family-owned, so homeowners often compare responsiveness and project management as much as price.
In this market, speed and debris control aren't afterthoughts; they're selling points. A reputable Redmond crew should return calls promptly, provide a clear window for start dates, and honor that window. During the project, expect daily site tidiness: securely tarped areas, orderly material staging, and a controlled path for foot traffic around your yard and drive. Ask how they handle wind-blown debris during high-desert seasons and what measures protect landscaping and irrigation systems from damage.
Ask for references from neighbors with similar roof types and ages, particularly those exposed to strong sun and freeze-thaw cycles. A strong local crew will discuss ventilation improvements, underlayment choices, and snow-shedding considerations that suit Central Oregon winters. Since many Redmond homes are aging structures, evaluate how the crew plans to address existing penetrations, venting, attic access, and potential moisture points that mis-timed re-roofs can aggravate.
Beyond price, assess how project management is handled here: written schedules, milestone updates, and a single point of contact. A reliable crew will outline a step-by-step plan from material delivery to final inspection, including weather contingencies. Confirm how they document progress and handle post-install questions, because ongoing responsiveness matters long after the last nail is driven.