Last updated: Apr 19, 2026
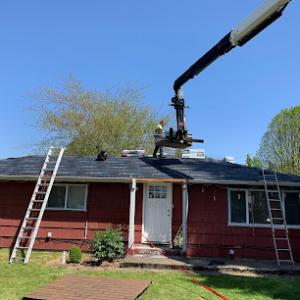
Springfield's marine-influenced climate brings long wet stretches in winter that make tear-off scheduling and dry-in protection more critical than in inland Oregon markets. When the rain returns, shingles and underlayment can take on moisture quickly, and exposed decking can begin to age before a crew even finishes the first section. That means the timing plan for a roof replacement should assume a higher probability of weather interruptions and tighter dry-in windows. If a project starts late in the season, every rain day pushes the schedule and increases the risk of cold, damp conditions slowing the crew and complicating each step from deck prep to shingle lay-down. This is not the time to chase a minimal window; it's the time to build contingency into the plan.
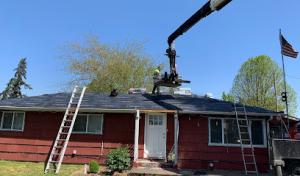
The preferred replacement window is primarily late spring through early fall because spring and autumn rain can interrupt short work windows and leave homes vulnerable if crews fall behind. In practice, that means aiming for a start between late May and early October, with a strong preference for late May to August when the weather is reliably drier. In Springfield, a tight dry spell is precious, and higher wind days in late summer can also affect tear-off and fastening. The plan should prioritize a continuous sequence: tear-off, deck inspection, underlayment, and final shingle installation completed back-to-back within a single dry spell when possible. If a delay is unavoidable, pivot quickly to a protected method of keeping the roof dry, such as expedited underlayment installation and temporary flashings to minimize moisture intrusion.
Dry-in protection matters more here than in markets with longer dry seasons. Expect crews to spend extra time on tarping and sealing all penetrations once a section is decked. In wet months, roofers in this area may stage material on the roof only when the deck is fully covered and the underlayment is secured in sections that won't be interrupted by forecasted rain. You'll see temporary barriers around the eaves, careful seam sealing, and rapid-finish techniques to reduce any lingering moisture under the first layers. If a storm rolls in, crews should have a quick-swing plan to cover exposed areas and protect interior spaces, because even a short shift in the weather can push moisture into vulnerable ceilings.
Dry summer periods in Springfield can accelerate UV aging when underlayment or exposed roofing materials sit too long before completion. The practical takeaway is to coordinate material deliveries and staging so that long-lead components arrive just in time for installation, not weeks early. When a roof sits open during a blink of a sunny spell, the sun exposure can dry out and weaken underlayment or starter materials prematurely. A coordinated schedule minimizes the risk of accelerated aging on high-sun days, and it reduces the chance of rework caused by heat-accelerated decking drying out unevenly or shingles shrinking slightly before full seal is achieved.
Plan around the typical late-spring-to-early-fall dry window, but build in flexibility for a handful of weather-guard days. If you're replacing during shoulder seasons, talk through contingency options with the crew-like temporary weatherproof barriers and expedited underlayment sequences-so a setback doesn't domino into a longer delay. Prioritize a single, continuous overall process: tear-off, inspection, underlayment, and shingle installation completed within a single dry-run block. Clear communication with the crew about forecasted wet days helps preserve your interior and reduces the likelihood of doubled visits or extended exposure.
In Springfield, winter storms commonly combine heavy rain with wind, a pattern that drives active leak calls and can delay exterior repairs at the same time damage is occurring. That means your roof may look solid between storms, but a single frontal system can drive water into vents, seams, and old flashing where it hurts most. When storms roll in from the west with gusts that shake your soffits, a small issue becomes a full-on leak quickly. Keep a close eye on flashings around chimneys, skylights, and roof-to-wall transitions during those windy, wet spells, and don't assume a dry few days means the problem has gone away.
Because claim-triggering events in Oregon commonly involve wind, hail, or heavy rain, Springfield homeowners need photo documentation immediately after storms before temporary repairs conceal the damage. Take wide shots of the roof line, then close-ups of affected areas-valleys, edges, and any wet spots on ceilings inside the attic or upper floor. If you notice wind-driven debris, don't wait to record it. Photos with a dated timestamp help your insurer distinguish a sudden event from long-term wear. If a contractor places temporary tarps or makes quick patches, document the work and the exact location of the leak before and after. This keeps your claim transparent and speeds the process, especially when the goal is to prevent further interior damage while a proper repair is planned.
Short rain breaks in spring and fall make temporary tarping and fast leak response especially important when full repairs cannot be completed the same week. The dry windows in this area are narrow, so a leak can worsen while exterior work is paused. When a storm ends and a dry lull appears, act quickly: secure temporary protection over the most vulnerable spots, especially along eaves and valleys, and schedule a rapid roof inspection to map out the next steps. Prioritize leaks that threaten attic insulation, interior ceilings, or electrical fixtures, since moisture exposure accelerates rot and mold risk. If interior discoloration or dripping appears after a new round of rain, treat it as a red flag and escalate to urgent temporary measures rather than hoping it will dry out on its own. In practice, consistent vigilance during the spring and fall windows helps prevent long delays and additional interior damage as crews coordinate weather-dependent re-roof work.
Find local contractors experienced in assessing and restoring roofs after hail, wind, and severe weather events.

Oregon Shield Roofing & Construction
(541) 915-3326 oregonshieldroofing.com
945 N 28th St unit 43, Springfield, Oregon
5.0 from 69 reviews
High Ridge Roofing & Gutters
(541) 357-4953 highridgepro.com
1265 35th St, Springfield, Oregon
4.9 from 139 reviews

River Roofing
(541) 952-3261 www.riverroofing.com
1484 S B St, Springfield, Oregon
4.7 from 120 reviews
Oregon Shield Roofing & Construction
(541) 915-3326 oregonshieldroofing.com
945 N 28th St unit 43, Springfield, Oregon
5.0 from 69 reviews
At Oregon Shield Roofing and Construction, we are dedicated to providing high-quality Asphalt Shingle and Metal roofing services to residents in and surrounding areas. Our team of experienced roofers is committed to delivering exceptional results on every project, no matter the size or complexity. Trust us to protect your home with our top-notch roofing solutions.
High Ridge Roofing & Gutters
(541) 357-4953 highridgepro.com
1265 35th St, Springfield, Oregon
4.9 from 139 reviews
High Ridge has been installing, replacing and repairing residential and commercial roofs, gutters, skylights, and siding for decades. Our experience has taught us a lot about the unique roofing requirements of the Northwest. We’re certified Malarkey residential roof installers. That means qualified installers, quality materials, and protection for our clients. Our success corresponds directly to the long term satisfaction of our clients. Period. That is why we go the extra mile to keep you happy from the free estimate to follow-up maintenance, and everything in between. Give us a call today and let's get started on your project!

Klaus Roofing Systems of Oregon
(541) 275-2202 www.klausroofingoforegon.com
Springfield, Oregon
4.8 from 151 reviews
Klaus Roofing Systems of Oregon specializes in reliable roof inspections, repairs, and replacements. We also provide expert attic efficiency solutions, including cellulose insulation, rigid foam insulation, air sealing, ductwork solutions, and more. Schedule a free service estimate to learn more. We proudly serve Oregon homeowners in Albany, Corvallis, Cottage Grove, Eugene, Lebanon, Salem, and areas nearby.

River Roofing
(541) 952-3261 www.riverroofing.com
1484 S B St, Springfield, Oregon
4.7 from 120 reviews
Residential and Commercial Roof Replacement and Repair.

Pressure Point Roofing Eugene
(541) 348-8979 eugeneoregonroofers.com
3320 Industrial Ave, Springfield, Oregon
4.7 from 94 reviews
At Pressure Point Roofing Eugene, LLC, our goal is for customers to have “Peace of Mind from the Top Down” and to have one point of contact for their exterior improvement project. Over the course of nearly three decades in business, we have become one of the leading names in residential and commercial roofing in Oregon’s Southern Willamette Valley
Grace Roofing & Construction
(541) 505-0706 www.shelteredbygrace.com
4660 Main St Suite 200, Springfield, Oregon
4.7 from 40 reviews
Grace Roofing and Construction is a roofing contractor operating in Lane County. We specialize in roofing, but offer many other services as well. With over 25 years of experience, we strive to give you the best quality roofing products within your budget. Roofing services that we offer are: -Roof replacement services -Roof repair services -Emergency roof repair -Re-roof services -Skylights -Sun tunnels
Roman Roofing & Construction
(541) 747-9038 romanroofingandconstruction.com
4107 Industrial Ave #12, Springfield, Oregon
4.7 from 15 reviews
Roman Roofing And Construction, LLC understands how important your home and business is to you and the significant investment involved for quality roof installation or roof restoration. As a reputable and professional roofing repair contractor, we offer years of roofing experience that includes a complete and comprehensive range of roof services that are designed to enhance curb appeal, provide energy efficiency and increase the value of your business or commercial property.
Above The Rest
(541) 606-0509 rooferseugene.com
2020 Main St, Springfield, Oregon
4.2 from 50 reviews
The premier Eugene roofing company. Roof repair, replacement, new roofs... all under one roof. Licensed, bonded, and insured.

Swift Roofing
(541) 200-6846 swiftroofing.us
1090 Gateway Loop, Springfield, Oregon
5.0 from 7 reviews
We follow rigorous procedures, developed by leading international manufacturers, to ensure the very best roof installation. We use the latest technology to ensure top quality service from start to finish.
Mckenzie Roofing
(541) 744-2448 www.mckroof.com
1500 S A St, Springfield, Oregon
4.3 from 43 reviews
McKenzie Roofing is a locally owned and operated company established in 1995 and serves Eugene, Springfield and Lane County communities, providing excellent service and workmanship using quality materials, backed by the strongest industry warranties
Carter Construction Roofing & Gutters
3584 Yolanda Ave, Springfield, Oregon
4.5 from 17 reviews
Carter Construction was founded on pure grit and determination to bring you the best possible product with the least amount of hassle.
Uber Roofing
(541) 430-0626 uberroofingroseburg.com
3851 S E St, Springfield, Oregon
4.6 from 10 reviews
Roofing service that provides roofing estimates reroof flat roof membrane IB roofing IKO Cambridge Roofing provides Roseburg with Roofing Service area roseburg Sutherlin Myrtle Creek a Cottage Grove a Winston a Coos Bay Eugene Reedsport North Bend
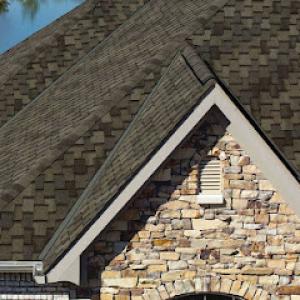
Asphalt shingles are a dominant choice in Springfield, fitting the city's large re-roof market and generally lower replacement cost range. The local climate-with wet winters and frequent rain-means you'll benefit from shingles that lay down quickly, resist wind-driven moisture, and offer straightforward maintenance. For most homes here, standard asphalt options balance performance with a predictable year-round schedule, helping you align roof work with the short dry window that Avoids mid-winter exposure and frequent, costly delays. When you're evaluating shingle brands, look for those with good granule adhesion and proven algae resistance, since persistent moisture plus shade from mature trees is common around many neighborhoods.
Metal roofing is also prevalent locally and is often considered by homeowners looking for stronger wet-weather performance and longer service life tradeoffs. In this climate, metal benefits from excellent resistance to moisture infiltration and fast installation that helps you capitalize on Springfield's narrow dry season. If your roof experiences heavy rain, hail exposure, or frequent seasonal temp swings, metal can deliver reduced maintenance over time and enhanced wind performance. However, weight, existing underlayment compatibility, and the need for precise flashing details deserve attention, especially on older homes with less typical framing. When you're weighing metal, factor in the long-term resilience against the region's wet-season reality and the potential for louder roof activity during downpours.
Tile, wood shake, and slate are present in the market but require closer attention to structural load, moisture exposure, and maintenance in Springfield's rainy season. Clay and concrete tiles offer distinct aesthetic choices and strong longevity, yet their weight can demand structural reinforcement if the existing deck or rafters aren't engineered for heavier assemblies. Concrete tiles generally handle moisture well but can be susceptible to freeze-thaw cycles in mixed weather, so proper installation and underlayment are essential. Clay tiles bring a classic look but may be more prone to cracking under heavy branches or hail, with moisture intrusion a risk if tiles shift or break. Wood shakes deliver a rustic, vibrant appearance but demand regular maintenance to prevent moisture-related issues in the damp winters. Slate provides exceptional longevity and a refined profile, but its substantial weight and cost require careful load assessment and professional installation. For homes in this market, tile and slate are best considered when a structural assessment confirms capacity and when you're prepared for the ongoing maintenance cycle that moisture-rich seasons encourage.
The common thread across all materials is moisture management. In Springfield's wet-season reality, ensuring proper underlayment, venting, and moisture barriers is as crucial as the choice of surface material. The short dry window should shape your project plan: flexible scheduling, weather contingency, and material readiness matter to minimize exposure risk and maximize quality. For every option, confirm that flashing details around chimneys, dormers, and vents are designed to combat persistent rain, and discuss roof-to-wall transitions with your contractor to prevent slow-moisture seepage at joints. If you're leaning toward a premium material, pair it with a proven moisture-control strategy that matches the home's specific exposure-shade patterns, tree coverage, and nearby waterways all influence how moisture behaves on your roof. The goal is a roof system that not only endures Springfield's wet seasons but also preserves interior comfort by keeping attic and ceiling condensation to a practical minimum.
Local average costs run about 350 to 650 USD per square for asphalt shingles, 900 to 1500 for metal, 1100 to 1800 for clay tile, 800 to 1500 for concrete tile, 700 to 1300 for wood shingles or shakes, and 1500 to 2600 for slate. Those figures reflect Springfield's mix of older homes, mid-century bungalows, and newer single-family builds, plus the region's tendency toward using a mix of materials in surrounding neighborhoods. When you're budgeting, assume the intent to stay within the listed ranges unless unusual site conditions or material upgrades drive the numbers up.
Springfield's wet-season rhythm means a rain-slicked job site can push the crew off the roof more often than in drier markets. Delays aren't rare, and they cascade into higher labor costs because crews burn more hours trying to stay on schedule during the narrow late-spring to early-fall dry window. If a re-roof has to be compressed into a shorter stretch, you'll see added expense from quick decking checks, expedited material handling, and potential re-trips to address weather-driven snag fixes. In practical terms, plan for a buffer of time and a modest cost cushion to absorb these weather-related shifts.
Even when weather cooperates, a Springfield re-roof often encounters additional dry-in labor. Extra time may be needed to protect the interior, manage vapor barriers, and stage materials so they stay dry between showers. If decking or ventilation checks reveal needs beyond the original scope, price can rise to cover the added labor and any short-notice material substitutions. The consequence is that the wet-season workflow tends to be more logistics-driven than in drier climates, with scheduling and crew coordination becoming a meaningful price factor.
Material price bands above capture the typical spectrum you'll see in Springfield, but real-world pricing can shift with supply chain quirks, local demand spikes, or a string of wet weeks. For example, metal or tile can command higher upfront costs, yet may offer longer-term durability in this climate where moisture management is crucial. If a chosen system requires premium underlayment, better ventilation, or enhanced decking, those needs push the project into the higher end of the local ranges.
Begin with the base ranges for your preferred material, then add a contingency for weather-driven schedule shifts and any decking or ventilation inspections that appear likely in your home's condition. With the typical Springfield re-roof, recognizing that rain delays and the tight dry window are not outliers helps set realistic expectations and avoids surprises when the first rung of the ladder taps a drip from a lingering shower.
Don't let upfront costs delay a critical repair - these contractors offer payment plans to fit your budget.
Above The Rest
(541) 606-0509 rooferseugene.com
2020 Main St, Springfield, Oregon
4.2 from 50 reviews
In Springfield, a building permit is typically required for a full re-roof rather than being treated as a no-permit maintenance item. This distinction is crucial because it governs when and how you coordinate with local officials, and it can affect the project timeline if inspections are delayed or incomplete. If a contractor suggests you can skip permitting, keep in mind that pulling a permit up front helps protect you from later setbacks, especially since weather windows can squeeze any replacement schedule.
The local process generally involves submitting project details including roof area and material type, paying the permit fee, and scheduling required inspections. The paperwork may include a simple sketch of the roof footprint, a summary of the materials chosen, and notes about underlayment and flashing. While the formality can feel tedious, these steps are designed to ensure the roof replacement stands up to Willamette Valley moisture and storm exposure from the McKenzie River drainage area. Expect a short review for code compliance, plus confirmation that the project aligns with any neighborhood or historic guidelines if applicable.
Springfield may require decking and ventilation inspections when replacement or repair work exposes those components. If the underlayment is removed or the roof deck is exposed during replacement, inspectors will likely verify proper ventilation and deck integrity before covering it back up. This is not a nuisance-it's a practical safeguard against trapped moisture and premature board rot. Be prepared for the inspector to check attic vents, soffit intake, and ridge vent paths to ensure air flow is balanced and effective after the project.
A final inspection is needed to close the permit. This inspection confirms that the new roof lines up with local codes, that all penetrations and penetrations flashing were installed correctly, and that any required ventilation and decking work meets standards. If something minor isn't completed to the inspector's satisfaction, you'll receive a correction notice and a window to address it. Delays in scheduling the final inspection can push back the date you're officially signed off, which matters if the weather shifts and the dry window narrows.
When the skies open and winter winds whip through the Willamette Valley, local insurers watch for the classic triggers: wind, hail, and heavy rain. Those patterns line up with Springfield's winter storm rhythm, and post-storm documentation becomes a critical part of any claim. The goal is to build a clear picture of what happened, what was affected, and what remains sound. Without solid evidence, the process can stall or yield less favorable outcomes.
Insurers frequently ask for photos that show the roof's condition before and after the event, along with a roof age estimate and sometimes an inspection report. A simple, well-organized packet can speed things along: roof photos from ground level and from the attic or attic access, a dated timeline of the storm, and notes on any interior signs of leakage. Having a professional assessment on file-even a basic inspection report-helps clarify what was damaged and what merely shows wear. In this market, these records are more than courtesy-they're often required.
Claim activity can ripple into underwriting and premiums in Oregon. Carriers may become selective about roof material type and remaining service life at renewal, especially after a single large event or a series of weather swings. That means even a well-documented, legitimate claim can influence future policy terms. The safer path is to maintain transparent records, track roof age honestly, and be aware that the insurer's view of risk can shift after a storm.
If a storm hits, prioritize temporary protection to prevent further damage and photograph the roof from multiple angles after any stabilization work is done. Share the evidence promptly with the insurer, and follow up with any requested reports or inspections. Keeping the narrative consistent-date-stamped photos, a clear sequence of events, and corroborating notes-helps prevent miscommunication and keeps the repair timeline on track.
Connect with contractors who help homeowners navigate the claims process from damage assessment to final approval.


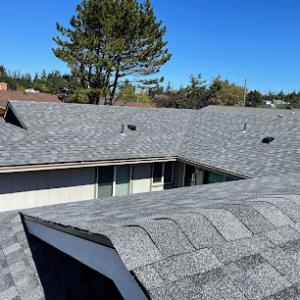
Springfield's prolonged wet season makes skylight flashing reliability more important because repeated rain exposure can turn minor installation defects into chronic leaks. When evaluating a skylight, look for flashing that sits flush against the curb and sides, with no gaps or raised nails that could trap moisture. After a reroof, inspect the flashing at least twice during the first winter storms; slow weeps can become drips if pooled water finds an edge. If a skylight sits near a long run of roof, confirm the sealant around the perimeter remains flexible and hasn't cracked from temperature swings.
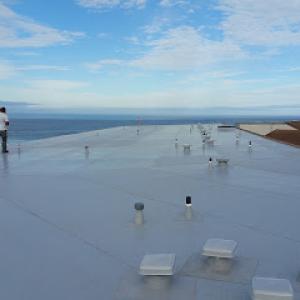
Low-slope sections are more vulnerable during Springfield's rainy months when drainage slows and repair windows are limited by weather. Pay close attention to any roof area that steeps toward a gutter or downspout, especially where multiple penetrations converge. During the dry window, consider testing water shedding in those zones with a light spray test to spot slow flows or standing moisture. If a roof has a notable low spot, plan for a near-term remedy or a temporary shield to bridge the wet season, since repairs can be postponed when every window is short.
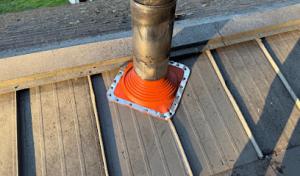
When re-roofs expose decking or ventilation issues around penetrations and transitions, those details may trigger added inspection attention. Decking should be sound and dry-cut edges protected; ventilation stacks need proper collars and sealed throats to prevent moisture siphoning. Transitions between different roof planes deserve extra scrutiny, as plastic vent boots and metal step-flashing can degrade with seasonally driven expansion and contraction. Mark any suspect sealants for replacement during the reroof, and verify that all penetrations ride on a solid, dry substrate.
In between projects, schedule a quick seasonal check focusing on skylights, low-slope seams, and transitions. Springfield winters demand proactive attention, so address any hairline leaks or damp patches promptly before they widen with the next rain storm. A neighborly reminder: keep a clear path to attic vents and ensure no stored items block air flow near the roof line.
Find contractors experienced in skylight installation, flashing, and leak repairs to bring natural light into your home.
High Ridge Roofing & Gutters
(541) 357-4953 highridgepro.com
1265 35th St, Springfield, Oregon
4.9 from 139 reviews
River Roofing
(541) 952-3261 www.riverroofing.com
1484 S B St, Springfield, Oregon
4.7 from 120 reviews

Pressure Point Roofing Eugene
(541) 348-8979 eugeneoregonroofers.com
3320 Industrial Ave, Springfield, Oregon
4.7 from 94 reviews
Because Springfield has a large re-roof market, workmanship consistency on tear-off, dry-in, and cleanup matters as much as material choice for long-term performance. A solid install that seals every seam and vent reduces the chance of leaks when the Willamette Valley wet season returns. Homeowners should look beyond the product label and ask for a clear record of the crew's sequence, weather accommodations, and site-protection practices.
Local homeowners often compare warranty coverage closely because repeated rain exposure can reveal installation defects quickly after a project is finished. Seek coverage that clearly defines workmanship periods, coverage for flashing and underlayment, and what constitutes a valid claim. In this market, a warranty that documents routine inspections or a scheduled follow-up can save drama if a drip or moisture issue arises after a heavy winter.
Manufacturer-backed systems can matter more in Springfield when homeowners want documentation that supports future resale, insurance questions, or leak disputes. A credible system warranty pairs with a properly installed roof to offer transferable protection and written confirmation of components and installation steps. Request explicit confirmation that the chosen system meets the manufacturer's installation criteria and that the installer adheres to those standards on every project.
Ask for a detailed installation plan that includes tear-off methods, dry-in procedures, and cleanup checkpoints. Look for a warranty packet that lists all covered components, clear post-installation inspection timelines, and the process for filing a claim. Consider requesting a local reference list or a short, documented post-installation check to verify that the project remains water-tight through the first frosty or rainy season.