Last updated: Apr 19, 2026
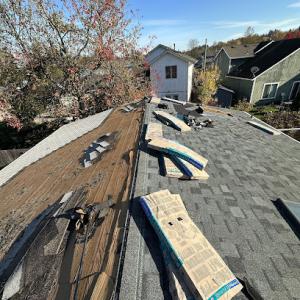
In this climate, extended winter rainfall means full tear-offs are most safely scheduled outside the wettest stretch. That means aiming to complete the heavy lifting of the old roof when the forecast shows a sustained dry window, not just a couple of sunny hours between storms. The risk of exposed decking soaking through during a mid-winter tear-off is real, so you prioritize sequencing that keeps the decking as dry as possible during removal and underlayment installation. In practical terms, that translates to choosing a start date that aligns with a forecasted dry spell, not with a convenient personal calendar, and preparing to push the plan if the next storm arrives sooner than expected.
Project delays in this area are weather-driven, not heat-driven. Rain interruptions can stall dry-in sequencing, underlayment exposure, and the timing of inspections. You should expect a plan that shifts with the rain: underlayment needs a dry period to lay and set, and shingles or panels require a stable moisture-free surface for proper adhesion and sealing. Build a schedule with built-in rain days and a contingency window after the last rain to confirm roof integrity before finalizing any interior work or exterior cosmetic steps. The timing hinges on reliable rain forecasts and a flexible contractor who can shift days without losing the overall project momentum.
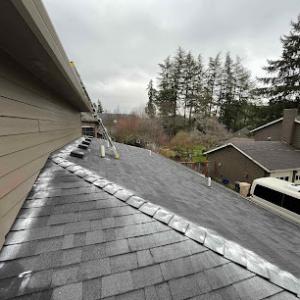
Oregon City sits in a Willamette Valley pattern that fosters moss growth on shaded neighborhoods above the rivers. Wet-season timing must account for moss control as part of the reroof plan. If you have moss concerns, plan for pre-cleaning and treatment during a dry-access period, followed by rapid protection of the underlayment and sheathing once exposure begins. Scheduling around shade-heavy windows and overhangs is essential because moss thrives where moisture lingers. A contractor who understands these microclimates will target dry windows that minimize continuous moisture exposure to the roof deck while applying moss-preventive measures in advance of the tear-off.
Because the city's roofing calendar centers on rain windows rather than fixed start dates, you need a contractor who offers real-time adaptability. Build a plan with clearly defined weather thresholds for moving from tear-off to deck drying to underlayment installation and from dry-in to final cover. In practice, that means agreeing on a primary window, plus a granite set of fallback dates when rain threatens, with a communication protocol for immediate adjustments. Your goal is to avoid back-to-back weather setbacks that compress the safety margins around deck moisture, underlayment exposure, and the inspection sequence. If you live in an area with persistent showers, expect a calendar that reads more like a weather forecast than a calendar-be ready to pivot quickly to protect the roof's long-term performance.
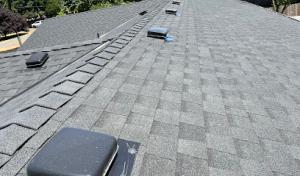
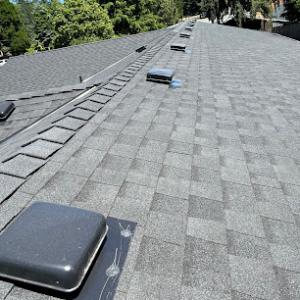
Oregon City's wet climate supports moss and algae growth that can shorten the service life of asphalt shingles and stress underlayment if left unmanaged. The combination of frequent rain, cool temperatures, and shaded roof surfaces creates a perfect environment for moss to establish itself, especially on older roofs or those with organic debris. In practical terms, expect moss to appear first on north-facing or north-equivalent planes and on sections shaded by nearby trees. Regular, targeted attention during the reroof cycle helps prevent moisture that can penetrate shingle granules and compromise underlayment over time.
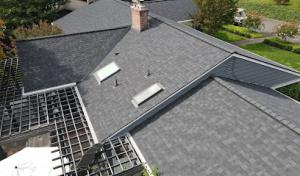
Homes in more shaded settings and tree-influenced neighborhoods around established residential areas are more likely to see persistent dampness on north-facing roof planes. Shade slows drying after wet spells, allowing moss and algae to take hold. When planning a reroof, assess which roof planes stay damp longest and how that correlates with tree canopies and neighboring structures. In such cases, prioritizing cleaning, moss treatment, and a robust drainage plan for those planes reduces the risk of moisture intrusion and helps preserve the roof deck and underlayment.
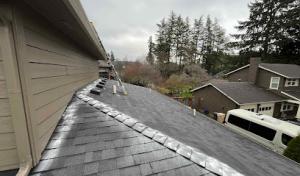
In Oregon City, roof replacement planning often includes discussing ventilation, drainage paths, and cleaning history because biological growth is a recurring local maintenance issue. Ventilation supports attic dryness, which in turn limits condensation and moisture accumulation under the roof. Assess the attic ventilation strategy during replacement-adequate intake and exhaust vents, plus potential attic baffles, can keep roof sheathing drier between wet seasons. Drainage paths matter just as much; ensure gutters and downspouts are clear and slope correctly to move rainwater away from the roof plane promptly. A history of cleaning and moss control on the current roof informs the choice of underlayment and edge detailing for the new roof, helping reduce recurring maintenance during the damp months.
Begin with a thorough inspection of all roof planes after the wet season. Look for loose or missing shingles, lifted edges, and any granule loss concentrated in mossy areas. For light moss growth, mechanical removal with a plastic or wooden tool preserves shingle integrity and avoids damaging the surface. Do not use aggressive scraping that can cut into the shingle tabs. For more established growth, consider a limited, targeted treatment that is appropriate for the roof type and local climate, followed by a rinse with clean water to minimize chemical runoff on landscaping and runoff water. Pay particular attention to the north-facing sections and areas beneath tree canopies. After cleaning, re-check drainage paths and ensure gutters are free of debris to prevent water pooling near eaves.
In shaded neighborhoods with mature trees, ongoing maintenance becomes a planning factor rather than a one-time fix. An effective plan often combines moss management, ventilated attic spaces, and a roofing system that resists moisture retention. When discussing a reroof, consider edge detailing that reduces moisture trap zones and a roof system with upgraded underlayment designed to withstand Oregon City's wet-season exposure. By coordinating cleaning history, ventilation strategy, and drainage improvements, the roof can better withstand recurring biological growth without compromising performance during the next winter load.
The most popular roofing material in the US. Find pros who install, repair, and replace asphalt shingles.
Apex Home Solutions
(503) 442-1719 apexhomespdx.com
412 Beavercreek Rd Suite 612, Oregon City, Oregon
4.9 from 102 reviews
State Construction
(503) 313-4381 stateconstructionpdx.com
Oregon City, Oregon
5.0 from 119 reviews
Your Northwest Roofing Experts – Residential and Commercial We have specialized in complete roof installation and repair since 1998. Anything from composition shingles to PVC systems, we’ve got you covered. Our number one goal is customer satisfaction, day or night. Have an emergency? Call us right away… we’re on top of it.
Elkridge Roofing
(503) 451-5755 www.elkridgeroofs.com
Oregon City, Oregon
5.0 from 55 reviews
ELKRIDGE ROOFING is a roofing contractor that offers roof replacement, new roof installation, and roof repairs to residents of Clackamas, Multnomah, and Washington Counties in Oregon. They are committed to providing quality workmanship and exceptional customer service.
H&L Roofing
12599 S Hiefield Ct, Oregon City, Oregon
4.8 from 102 reviews
Since 1997, H&L Roofing has been dedicated to providing top-quality roofing services. Starting from Oregon City, we've become a trusted roofing contractor throughout Oregon and Washington. With a legacy of excellence, we bring expertise to every residential and commercial project, ensuring beautiful and durable results. Our commitment to quality and customer satisfaction has earned us a stellar reputation, reflected in countless positive reviews.
Apex Home Solutions
(503) 442-1719 apexhomespdx.com
412 Beavercreek Rd Suite 612, Oregon City, Oregon
4.9 from 102 reviews
Welcome to Apex Home Solutions We’re passionate about helping you create a home you love. Specializing in roofing, siding, windows, and decks, our friendly team is here to make your vision a reality. Whether you’re looking for a sturdy roof to keep you safe from the elements, stylish siding to boost your home’s charm, energy-efficient windows to brighten your space, or a beautiful deck for family gatherings, we’ve got you covered. We believe in using top-notch materials and techniques, but it’s our personal touch that sets us apart. From the moment you reach out to us, you’ll experience open communication and a genuine commitment to your satisfaction. Let’s work together to enhance your home and create a space you’ll enjoy for years to c...
Urban NW Construction
(503) 358-8237 urbannwconstruction.net
20200 S Ferguson Rd, Oregon City, Oregon
5.0 from 29 reviews
We cater our roofing services to both residential and commercial customers. No project is too big or too small for our team. We approach every project the same way and that is to provide you with all the options and information needed for you to make the right the decision for your roof. We are locally owned and family run business. We only use premium roofing products that will outlast expectations. We offer free inspections, stand behind the products we use, and we care about the quality and longevity of your roof. We offer metal roofing, composite shingle roofing and a variety of flat roof options. Our teams work hard and fast to limit the inconvenience of having your roof redone and we always clean up the mess!
Woods Roofing
(503) 317-9663 www.woodsroofing.net
802 Magnolia St, Oregon City, Oregon
4.9 from 40 reviews
Based in Oregon City. Residential roofing contractor. Specializing in asphalt shingles.

Dr. Roof
Oregon City, Oregon
4.8 from 38 reviews
Dr. Roof is your locally owned and operated roofing repair and cleaning service. We provide roofing maintenance as well as gutter and roof cleaning utilizing our eco-friendly moss treatment. With over 28 years of experience, you can be assured that we not only have the qualifications but the knowledge to best care for your roof. Our aim is to make your roof last and keep the rain out! Give Dr. Roof a call today!
Sagas Roofing Company
(503) 212-6708 sagasroofing.com
617 High St, Oregon City, Oregon
5.0 from 16 reviews
Looking for a reliable roofing contractor in Oregon City, OR? Then Sagas Roofing Company Oregon City is the one you're need. We provide commercial and residential roofs and repairs to meet your unique needs. We have the best equipment and our roofers have decades of experience to be sure that your home stays safe and dry. We offer free roof inspections to ensure that your roof is sustained at optimal levels. Our main priority is to take care of our great clients. Whether you need a new roof or need help picking the right shingles, we are always here to help. We also provide gutter repairs and servicing. You will be able to rest well knowing that Sagas Roofing Company Oregon City is there for you to enjoy your house or office year round.
Tilly's Roofing Repair
(503) 638-1096 www.tillysroofing.com
20169 S May Rd, Oregon City, Oregon
4.8 from 29 reviews
At Tilly's Roofing Repair & Construction, we're a father-and-son team with over 25 years of experience keeping roofs strong and reliable. As a family-owned business, we take pride in offering top-quality roof repairs, new installations, and full maintenance services. We're fully licensed, bonded, and insured, so you can trust us to get the job done right. Your home deserves the best, and we’re here to help. Give us a call today!

Allen Exterior Remodeling
(503) 693-1948 www.allen-exterior.com
Oregon City, Oregon
4.8 from 19 reviews
Allen Exterior Remodeling serves the Portland metro area and SW Washington. We handle all types of roofing including residential, manufactured homes, and small commercial. Specializing in flat and low-sloped roofs and single-ply membrane. We offer comprehensive exterior services such as roof repairs and replacements, skylights, gutter installation, awnings, siding, windows, and dry rot. If man can build it, we can tear it apart and make it better. CCB #212076 || WA ALLENER842O3
503 Roofers
(503) 766-3377 www.503roofers.com
Oregon City, Oregon
5.0 from 2 reviews
503 ROOFERS – Portland Roofing Contractor Locally owned and trusted roofing company serving Portland, Gresham, Happy Valley, Wood Village, Troutdale, Fairview, and the entire 503 area. We specialize in roof replacement, new roof installation, roof repair, and emergency storm damage services for homes and businesses. Lifetime workmanship warranty + manufacturer-backed guarantees. Proud CertainTeed Select Shingle Master and GAF Certified. Call or text (503) ROOFERS today for a fast, free estimate – same-day response guaranteed!
Greater Purpose Construction LLC - Portland Roofing
(503) 512-9054 www.gpurpose.com
Serving
5.0 from 110 reviews
Meet a top trusted local residential and commercial roofing company, specializing in shingle roofing, metal roofing, TPO roofs, slate, and shake. We deliver a superior experience to families and communities in Oregon and Washington. With over 10 years of experience, we are a company that builds quality roofs.
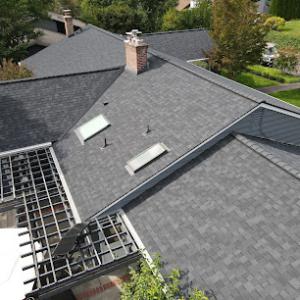
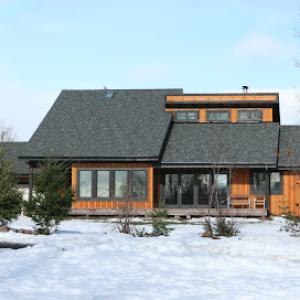
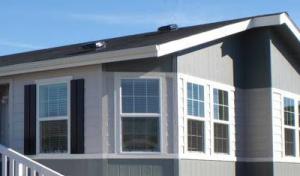
Asphalt shingles remain a dominant Oregon City choice because they fit the area's common residential reroof market and moderate upfront budgets. In neighborhoods shaded by tall maples and pines, the durability of dimensional or termite-resistant asphalt helps weather the Willamette Valley's wet-season routine. A well-sealed program with synthetic underlayment and a quality ice-and-water shield in eaves and valleys aligns with local moisture patterns. When paired with proper attic ventilation, asphalt can resist premature curl from damp winters and keep moss growth in check if the ridge cap and vents stay clear. For many homes, this combination offers a reliable balance of performance and ongoing upkeep in our wetter climate.
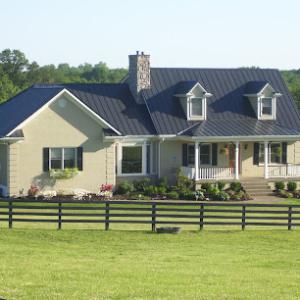
Metal roofing is locally relevant, offering excellent shedding of heavy rain and rapid snowmelt during winter. In practice, metal panels excel where the roof remains consistently dry through spring and early summer, but you should weigh summer expansion-contraction behavior alongside wet-season performance. Willamette Valley summers can exert noticeable thermal movement, so choose fasteners and sealants rated for movement and ensure panel seams are properly lapped. A metal roof with a durable coating can resist moss colonization more than plain asphalt, but the slope and overhangs still matter for moisture dive during the rainy season. If the roofline includes multiple penetrations or skylights, a meticulous installation becomes essential to prevent leaks in fall storms.
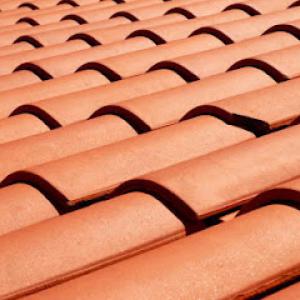
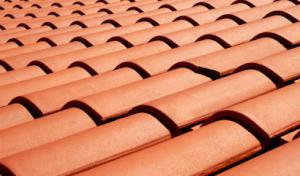
Clay and concrete tile can be used in Oregon City, yet local freeze-thaw patterns in fall and winter can stress some tile installations and make underlayment condition especially important. Tiles themselves shed moisture well, but debris and shade can trap dampness, inviting moss and algae if the substrate isn't kept in good shape. A high-quality underlayment, properly spaced battens, and a roof deck that remains dry long enough for a thorough setting phase help prevent moisture-related failures. In shaded, moss-prone streets, consider a tile profile with proven moss resistance and ensure gutters direct water away from vulnerable joints. For homes that experience overhangs and evergreen canopies, regular cleaning of the tile surface and flashings helps maintain performance through wet seasons.
Concrete tile, like clay, benefits from strong resistance to rainfall but shares the same need for a robust underlayment and moisture management strategy. Synthetic or composite shingles provide a lighter option with good impact resistance and easier installation in some reroof projects. In Oregon City, the choice between concrete and synthetic often hinges on the local roof footprint, existing structure, and how the roof behaves during a long wet season. Both options can perform well when combined with a watertight underlayment system and a shade-aware maintenance schedule that keeps debris off the roof surface.
Across all materials, moss control is a practical daily concern in our damp, shaded neighborhoods. Regular cleaning of the roof surface during dry spells, strategic moss inhibitors, and timely repairs to flashing and gutters reduce moisture retention and prolong the roof's life. Since reroofs often aim to minimize winter moisture exposure, scheduling that aligns with drier windows is a prudent approach to limit simultaneous tear-off and inspection tasks when weather can shift quickly. A roof plan that prioritizes flush drainage, uninterrupted ventilation, and prompt masonry or siding edge maintenance helps maintain a resilient barrier against the climb of moisture through fall and winter.
Provided local ranges run about $350-$700 per square for asphalt shingles, $600-$1200 for metal, $900-$1800 for clay tile, $800-$1500 for concrete tile, $400-$750 for synthetic/composite, and $1200-$2500 for slate. Those figures reflect typical setups in shaded, moss-prone neighborhoods and the Willamette Valley's wet-season exposure. When choosing a roof, you'll see big swings based on product class, warranty tier, and the complexity of the roofline. A simple, steep asphalt job tops the list for budget-conscious homeowners, while tile and slate push costs up quickly. When you're comparing bids, ask for a line-by-line breakdown so you can see drip edge, underlayment, fasteners, and moisture protection all priced out.
In Oregon City, costs can rise when crews must work around rain delays, moisture protection steps, and scheduling gaps tied to the wet season. Expect more days of crew downtime if storms roll through or if the job requires extended dry-out periods after a heavy rain. Roofs that need extra tarping, temporary moisture barriers, or careful tear-off sequencing to keep interior spaces dry will add to both material and labor. If a contractor suggests windowed tear-off and staged re-roof, the quoted price may include protected work zones, additional walk-behind coverings, and longer project timelines.
The city's moss-prone shade and damp conditions demand enhanced moisture management. That means extra underlayment or a breathable barrier, more precise attic ventilation checks, and sometimes moss-prep treatment before underlayment goes down. These steps protect the deck and extend roof life, but they also contribute to upfront costs. If you're weighing options, prioritize systems with proven moisture resistance and ensure the bid specifies moss control measures, not just cosmetic cleaning.
Beyond material choices, the final price reflects how well a crew can coordinate between weather windows and inspection-ready gaps. Longer project durations due to rain or sequence constraints translate into higher labor hours and potential scheduling premiums. If you sign a contract, lock in a timetable with milestones for tear-off, bare deck inspection, and final roofing, so moisture-sensitive steps aren't rushed when rain returns.
Push for a phased plan that aligns with forecasted dry spells and avoids retrofit steps during expected heavy-rain months. Compare bids that separately itemize moisture protection, underlayment, and moss-prep costs. For asphalt, consider a wider warranty tier for warranties that cover moss-related wear. For heavier materials, confirm that the contractor has experience with the local climate's moisture management needs and a clear plan for gutters and drainage alignment with the new roof.
Get a clear picture of your project costs upfront - no commitment required.


A full reroof in Oregon City typically requires a permit through the City of Oregon City Building Division. The process is not optional in practice, and skipping it can lead to delays, rework, or problems when you sell the home. The permit signals to neighbors and to the city that the project will follow established underlayment, flashing, ventilation, and attachment standards specific to this climate and housing stock. Expect the workflow to start before any tear-off or material delivery, since a permit review helps identify potential access or structural considerations that are easy to overlook on a sunny afternoon.
Homeowners should expect to submit project details, pay a permit fee, and schedule inspections during and after the work. In Oregon City, reviews tend to focus on roofing material type, underlayment plan, venting strategy, fascia and drip edge control, and proper flashing around chimneys and skylights. Documentation often includes a roof plan, a scope of work, and manufacturer installation guidelines for the chosen products. If the home has moss-prone areas or mature trees overhead, plan to show how moisture control and debris management will be addressed during installation. The city's review can uncover nuances tied to steep pitches or elevated sections common in local neighborhoods.
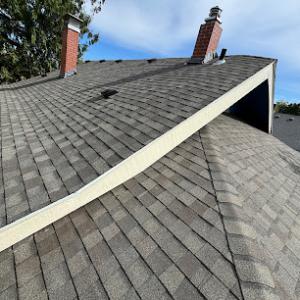
Local inspections commonly verify underlayment, flashing, ventilation, and final code compliance before approval is closed out. During tear-off, inspectors look for proper ventilation balance and a solid substrate before new materials go on. After installation, expect a sequence of inspections to confirm that flashing around perimeters and penetrations is continuous and watertight, that dry-in was achieved with appropriate underlayment and wind protection, and that eave and ridge venting align with current code requirements. In rainy seasons, inspectors may pay extra attention to temporary weather protection and proper staging to prevent accelerated moisture intrusion. If adjustments are needed-whether sealing a poorly seated flashing or correcting an improper nailing pattern-the clock starts ticking on re-inspection, which can extend timelines and affect your neighborly schedule.
The polite but firm reality is that Oregon City's wet-season exposure shapes the permit timeline. Scheduling around concrete windows-dry days for tear-off, then staged re-roofing with moisture considerations-helps keep inspections smooth. Delays can cascade if work begins without approved plans or if flashing details don't align with local expectations. Communicate with the Building Division early about any site-specific concerns, like shaded, moss-prone areas or steep roof sections, so the permit path remains clear and the project proceeds with fewer friction points.
In Oregon City, winter storms and extended rainfall are the most common weather events that turn small roof defects into active interior leaks. The wet-season pattern concentrates moisture on shaded, moss-prone roofs and can overwhelm marginal flashings or compromised underlayment. This means that a minor seam or a loose shingle in late fall can become a soaked attic and a slow drip by January. Understanding that timing matters will help you align repairs with a window when roofs are dry enough to work and still protected from prolonged moisture.
Local insurance outcomes often depend on photo documentation, roof age records, prior claim history, and contractor estimates showing code-compliant replacement scope. Gather clear before-and-after photos, especially of flashing, valleys, chimney crickets, and any moss-related damage. Keep a dated log that traces when issues were first noticed, when a contractor was brought in, and what was recommended. If an adjuster visits, provide builders' notes that show how the replacement meets current roofing standards and the specific underlayment and ventilation details used. A well-documented timeline can influence how quickly coverage decisions are made and how much of the roof replacement is approved.
Because underlayment and installation quality matter in coverage decisions, it helps to have a record of the product chosen, the fastener pattern, and the attachment method used during reroofing. In practice, that means saving every inspection sign-off, warranty card, and manufacturer's installation guide that pertains to the project. After reroofing, preserve permit records and inspection sign-offs as part of the file. These documents can anchor the claim's legitimacy if moisture issues reappear or if questions about workmanship arise later in the life of the roof. Keeping them organized reduces the chance of delays and helps ensure a smoother claim path if another storm brings leaks.
Connect with contractors who help homeowners navigate the claims process from damage assessment to final approval.
Sagas Roofing Company
(503) 212-6708 sagasroofing.com
617 High St, Oregon City, Oregon
5.0 from 16 reviews
In the long rainy season, flashing details around skylights and chimneys stay exposed to repeated moisture cycles. Shaded neighborhoods above the Willamette and Clackamas rivers can keep these areas damp longer, so a small flaw becomes a big leak over time. Expect more call-backs after winter storms than you might see in drier climates.
The local contractor market shows meaningful demand for skylight-related roof work, indicating homeowners regularly need repairs at these penetrations. Plan for extra attention to how the curb, base flashing, and shingle alignment integrate with the skylight flashing. A coordinated approach during tear-off reduces the chance of nuisance leaks after the roof goes back on.
Chimneys with masonry joints and skylights with aluminum or lead flashing are frequent leak points. In Oregon City, repeated wetting can hide decking or underlayment deterioration under the flashing. When reroofing, inspect the area thoroughly for soft spots, mineral-splashed decking, or rusted nails around the penetrations. Address any deterioration before it becomes a leak path.
During a reroof, start with a close look at the step and counter-flashing around chimneys, then move to skylight flanges. Check for silt buildup in flashing gutters and for loose or missing fasteners. If a skylight sits on a flat or low-slope section, test for improper shedding and ensure the flashing kick-out drains properly away from the base.
After installation, keep an eye on the seal between window or chimney bases and the roof surface, especially after heavy winter rains. Schedule periodic inspections for aging sealants and flashing components, and address moss or debris that can trap moisture at these penetrations.
Find contractors experienced in skylight installation, flashing, and leak repairs to bring natural light into your home.

H&L Roofing
12599 S Hiefield Ct, Oregon City, Oregon
4.8 from 102 reviews
Although steep-slope residential reroofing dominates in this area, the contractor market shows active demand for flat and low-slope roof work on additions, porches, and mixed-roof homes. In Oregon City, these sections sit at the muddy interface between old and new structures, so drainage paths and membrane transitions need careful planning. Expect more frequent guidance from installers on matching materials to existing rooflines to avoid a patchwork look.
Rain-heavy conditions make drainage and membrane detailing more critical on low-slope sections than on the main pitched roof. Start with a careful assessment of transitional areas where the low-slope adds tie into the primary roof. Ensure proper slope (even modest gains can prevent ponding), and specify a high-quality underlayment and flashing details that extend into parapets or walls. In shaded neighborhoods above the Willamette and Clackamas rivers, moss can threaten membrane edges; plan for edge metal and drip channels that keep water moving toward the gutters.
Homeowners with hybrid rooflines should evaluate low-slope sections separately because failure patterns and replacement methods differ from shingle fields. Choose membranes and flashing systems designed for vertical transitions and for compatibility with the adjacent roof surface. If the addition uses a different roofing product than the main roof, ensure a seamless transition that accommodates thermal movement and ensures a continuous drainage plane. In practice, pair a watertight membrane with proven deck reinforcement under the necessary flashing zones to prevent slow leaks.
Moss-prone conditions demand regular seasonal checks, especially after wet winters. For low-slope areas, keep an eye on membrane edges and fasteners through repeated cycles of moisture. Schedule inspections that focus on seam integrity, edge detailing, and debris buildup in valleys and parapets. A proactive approach helps catch slow leaks before they become visible rot, preserving the stability of the addition's roof line.
Find specialists in TPO, EPDM, and built-up flat roofing systems for residential and commercial properties.

Urban NW Construction
(503) 358-8237 urbannwconstruction.net
20200 S Ferguson Rd, Oregon City, Oregon
5.0 from 29 reviews
Allen Exterior Remodeling
(503) 693-1948 www.allen-exterior.com
Oregon City, Oregon
4.8 from 19 reviews
In the Willamette Valley climate that shapes Oregon City's roof life, moisture exposure tests every layer of a roof system. Workmanship quality around underlayment, flashing, and ventilation has an outsized effect on whether a new roof performs as expected once the first wet season rolls in. Pay close attention to how underlayment is installed at hips, valleys, and transitions to ensure continuous moisture protection even under heavy rainfall. Proper flashing around chimneys, vent stacks, and penetrations is not just a detail-it's the line between a long-lasting roof and recurring leaks. ventilation is not optional in a shaded, moss-prone neighborhood; adequate intake and exhaust keep attic temperatures even and reduce condensation that invites wood rot and mold.
Because insurers may review install quality and code compliance after a loss, warranty value in this market is tied closely to documented installation practices rather than product branding alone. Favor contractors who provide a clear installation checklist, step-by-step method statements, and field photos showing how each critical detail was executed. A warranty that references specific underlayment choices, flashing methods, and attic ventilation measures-and that can be supported by on-site records-tends to hold up better when a claim is evaluated after a rainy season or a tough winter. If a claim arises, having a contemporaneous record of proper nail patterns, fastener sealing, and vent alignment can make the difference between a straightforward repair and a costly dispute.
The local market includes a meaningful share of contractors advertising warranties, which matters in a city where moisture-related callbacks can surface after the rainy season begins. When evaluating bids, verify that the warranty terms explicitly cover moisture intrusion, moss-related wear around flashings, and proper ventilation performance. Look for a contractor who includes a post-installation inspection and a written note on any seasonal adjustments recommended for the first few years. A sound warranty in this climate reinforces confidence that the roof was installed with attention to the unique Oregon City moisture cycle and moss-prone conditions.