Last updated: Apr 19, 2026
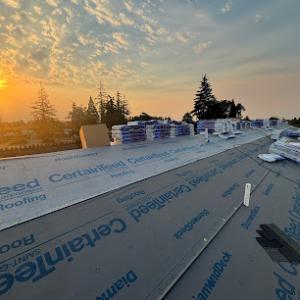
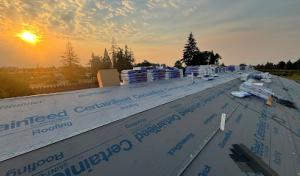
In Woodburn, homeowners typically get the best reroof scheduling window from late spring through early fall because the city's wet winters raise moisture risk during tear-off and underlayment exposure. This means planning for a dry stretch where the roof is exposed to the elements is key. The aim is to complete tear-off and installation during a period with low chance of heavy rainfall, and when the ground and surrounding areas aren't regularly soaked. If you're trying to time a reroof, target a stretch of three to six weeks of dry weather, with windows that allow for any unexpected warm spells to keep material handling predictable. Start conversations with the contractor early in late spring to lock in a calendar that has built-in cushion for late-season rain or heat waves.
Winter storms and heavy rainfall in the Woodburn area can delay decking dry-out, extend project timelines, and increase the chance that hidden moisture damage is discovered after tear-off. If a tear-off happens in late fall or winter, the underlayment and decking can stay damp longer, slowing adhesive cures and the application of certain roof systems. That damp exposure also raises the likelihood of discovering rot, cupping, or fastener corrosion once the old layers are removed. A practical approach is to schedule tear-off only when you've had a dry spell of several days to a week, with forecasts showing a continued dry pattern. If moisture is found on decking after stripping, allow extra days for drying and for potential repairs before applying underlayment or the final roof surface. Build in a contingency plan with your contractor so a shift in weather doesn't leave you mid-project with exposed decking.
Summer generally improves installation windows in Woodburn, but heat can affect how roofing materials are stored and handled on site. Heat can cause shingles or components to expand slightly, which matters for large-format panels or specialty products. On hot days, plan for early-morning material deliveries and shaded storage on the job site to minimize warping or material damage. Extra hydration for crews and a shaded staging area help keep fasteners and sealants at predictable temperatures, reducing the risk of inconsistent seals later. If a summer reroof spans into late afternoon, ensure temporary shade and steady water access for workers to prevent heat-related slowdowns. The long days can be a benefit, but only if material handling remains orderly and ventilation of attic spaces is preserved during installation.
1) Align with a local contractor on a preferred dry-season window-late spring through early fall-and lock in a start date with a built-in weather buffer.
2) Monitor extended forecasts for a solid, multi-week dry stretch; avoid initiating tear-off right before a forecasted heavy storm period.
3) Prepare the property for a clean, rapid tear-off: clear debris, protect landscaping, and arrange for daytime access, so crews can work efficiently in predictable conditions.
4) Schedule decking and underlayment inspections within the first days of tear-off to catch any moisture issues early, minimizing surprises later in the project.
5) Plan for on-site shade and heat mitigation during summer installations; ensure storage and handling practices keep materials in stable conditions.
6) Have a clear contingency plan for weather delays, including potential rescheduling blocks and agreed-upon communication timelines with the contractor so the project can resume quickly after a weather gap.
Keep proactive communication with the roofing team about the forecast and potential delays. If a mid-project rain event is forecast, understand how much time the crew needs to protect exposed decking and when a temporary cover may be required. For a Woodburn reroof, a well-timed dry-season window reduces moisture risk during tear-off and underlayment exposure while aligning with an installation that benefits from consistent temperatures and daylight. The goal is to complete the job with minimal exposure to moisture, while ensuring proper cure and seal of the chosen roofing system.
When the wet season arrives, the roof bears its heaviest load. In Woodburn, active leaks can spike quickly during winter rain, spreading moisture into insulation, ceilings, and wall cavities in a matter of hours. A small drip can become a ceiling patch, a mold risk, and a comfort problem in a room that should stay dry. Your goal is to stop the water fast, because once water sits, damage compounds and the fix gets messier and more expensive. The weather window there is a fierce teacher: wet days test seams, flashings, and plugins, and a delayed response compounds risk far beyond the obvious drip.
Emergency tarping is not optional-it's the first line of defense. You need a tarp that covers the leak path, with edges weighted or strapped down to withstand gusts and shifting rain bands. Start by locating the most active area on the interior: if you can see ceiling staining or feel moisture near a junction box, focus tarping attention there, but extend coverage to the surrounding roof area to prevent new seepage. Use a sturdy, color-matched tarp if possible, and secure with plastic sheeting fasteners or heavy-duty nails only as a temporary measure. Clean gutters and downspouts of debris before laying plastic to avoid damming water against fascia and underlayment. If you're unsure of how to position a tarp safely from the ground, do not climb on a wet, slippery roof-call for immediate help and request on-site tarping that can hold through the night.
Local contractor demand during emergencies is unusually strong, and the market moves fast to provide temporary protection and quick turnarounds. This aligns with homeowners needing reliable, short-term containment during rainy weather. When leaks appear, reaching out to a contractor who can respond within hours-ideally with a tarp crew and temporary up-and-down ridge protection-will minimize interior damage and preserve insulation and wall integrity. If a contractor offers a temporary shield and a plan for a proper corrective roof repair, prioritize that option over waiting for a perfect dry day. Quick shelter reduces the risk that rain-driven water infiltrates more deeply into attic spaces or into wall cavities, which often triggers longer repair timelines.
Delays in addressing a leak can complicate insurance documentation because insurers often want clear evidence distinguishing storm-related damage from long-term deterioration. Acting swiftly with a tarp and documented progress creates a credible record that supports coverage decisions. Take dated photos of the leak, tarping setup, and any interior damage, and keep a running log of when rain events occurred and how the tarp held up. This evidence helps protect a homeowner when turning to insurance for timely repairs and restoration after the wet season hits its peak.
When you can't wait, these contractors offer fast response times to stop leaks and prevent further damage.


Flawless Roofing & Construction
(971) 216-2311 www.flawlessroofings.com
419 Vine Ave, Woodburn, Oregon
5.0 from 76 reviews
Roof installs, repairs, and maintains roofs on homes and buildings using materials like shingles, metal, TPO, Tile. Inspect structures for damage, remove old roofing, and ensure the new roof is weatherproof and secure. Work at heights, use hand and power tools, and follow safety guidelines to complete projects efficiently and safely.

MMG Precise Roofing
(503) 559-5317 mmgpreciseroofing.com
Serving
5.0 from 34 reviews
"Protect your largest investment with our reliable roofing services. We are a family owned and operated roofing company currently serving Salem and surrounding communities. Get immediate assistance from roofing professionals. HONESTY AND QUALITY IS OUR PRIORITY
Pacific West Roofing
(503) 635-8706 pacificwestroofing.com
Serving
4.8 from 139 reviews
Looking for a reliable, energy-saving roofing solution in the Portland area? At Pacific West Roofing, we help you protect your home and lower your bills with expert roof repairs and replacements designed for lasting comfort. We specialize in affordable, eco-conscious roofing tailored to your home—from urgent repairs in Oregon City to full replacements in Lake Oswego. Serving Wilsonville, Canby, and all surrounding communities, our local team ensures durable, quality workmanship you can trust season after season. Your comfort and peace of mind come first. Let’s keep your home secure and efficient year-round. Contact us today for a trusted roofing partner. #RoofingCompany #RoofRepair #RoofReplacement #PortlandRoofer #EnergyEfficientRoofing
RGH Quality Construction
(503) 890-7671 rghqualityconstruction.com
3259 Linfield Ave, Woodburn, Oregon
3.7 from 3 reviews
RGH Quality Construction is your trusted partner for elevating and protecting your home. Specializing in roofing, siding, and gutters, they bring quality craftsmanship and attention to detail to every project. Based in Woodburn, Oregon, RGH Quality Construction transforms houses into dream homes with durable, beautiful, and expertly installed exteriors. Discover the difference that dedication and experience can make.

Dylan's Quality Roofing & Construction
(503) 800-8238 www.dylanroofing.com
Serving
4.9 from 34 reviews
Welcome to Dylan's Quality Roofing & Construction, where expertise meets excellence in every project. With over 20 years of experience, our dedicated team specializes in Roofing Repairs, Roofing Replacements, Flat Roofs, Leaky Windows, and Siding Installation. As a trusted name in the industry, we take pride in delivering top-notch craftsmanship and unmatched service to enhance the durability and aesthetic appeal of your property. From fixing leaky roofs to complete replacements, our seasoned professionals bring a wealth of experience to ensure each project is executed with precision and quality.
Roof It All
(971) 707-7663 estimate.roofitall.biz
Serving
4.6 from 56 reviews
At Roof It All, we work hard to keep you fully protected under a durable roof. We provide home restoration as well as consultation, leveraging our construction experience to find solutions for every project. We have decades of experience constructing both residential and commercial roofs all over Oregon. See what we can do for you. Our business specializes in roof repairs, replacement, new installations, recovers and repairs. We also do siding, windows and gutters. Call us today for a quote! In business for only a couple years but our customers only have great things to say about us.

Five Star Homes
(971) 451-6850 fivestarhomesnw.com
Serving
5.0 from 67 reviews
At Five Star Homes, we are a trusted roofing and painting company based in Portland, OR. Our team is dedicated to providing top-quality services to homeowners and businesses in the Portland and Beaverton areas. With our commitment to excellence and years of experience in the industry, we offer a range of roofing services, including repairs, maintenance, and installations. We also provide general home contracting services, such as indoor painting, renovations, and more. We take pride in delivering durable and aesthetically pleasing results tailored to the unique weather conditions and architectural styles of the Portland area. Rely on us as a home or property owner for exceptional service and outstanding results. Contact us for a quote!
Roof Masters
(503) 266-5848 www.roofmastersoregon.com
Serving
4.1 from 28 reviews
Roof Masters has been in business since 1986. We are a 2nd going on 3rd generation family owned and operated company. We offer new roof installations, recovers, repairs, cleanings, and skylights. Customer service and safety are our main goals. We give a 10-year workmanship warranty on new roofs. Contact us today to set up your free estimate!
United Construction & Roofing
(971) 379-7163 www.unitedconstructionroofing.com
Serving
5.0 from 78 reviews
United Construction & Roofing are trusted Beaverton roofing contractors specializing in expert residential and commercial roofing services throughout the Portland Metro area. We specialize in roof installation, repair, replacement, and maintenance for asphalt shingle, standing seam metal, and TPO roofing systems. Whether it’s a roof leak repair, storm damage restoration, or a full roof replacement, our team delivers professional service that is fast and reliable. We prioritize quality craftsmanship, exceptional customer care, and durable results for every project. That’s why so many property owners turn to us when searching for top-rated Beaverton roofing companies that truly stand apart. Contact us today to schedule your free consultation.

Royce Roofing
(503) 902-0629 www.royceroofingllc.net
Serving
5.0 from 30 reviews
We are your region's premier choice for high quality roofing contractor services. Our experts bring more than twenty five years of experience to each project. Royce Roofing in Woodburn, OR is fully licensed (CCB # 208011) as well as being bonded and insured. Our services include roofing installation, replacement and repairs. We work with a variety of roofing materials to ensure you get just what you need for your property. We also offer gutter installation and cleaning, downspout cleaning, moss removal and pressure washing. Our contractors provide siding installation and repairs. We provide emergency roofing services, temporary tarpaulin services and much more.
R&R Roofing & Exteriors
(503) 415-0442 randrwashington.com
Serving
5.0 from 4 reviews
We are the area's premier roofing contractor! Our experienced staff will be sure to get your needs taken care of! Whether you need roof repair, window installation, siding installation, to a completely new roof, you'll be delighted with our service! We handle both residential and commercial customers! Contact us today and let's get started on your home or building! We're also available for 24-hour emergency service!

Ckb Services
(971) 444-2121 www.ckbservicesllc.com
Serving
5.0 from 200 reviews
CKB SERVICES specializes in roof installation and repair. We also offer an array of roof cleaning and moss removal, but we also offer a variety of exterior and interior cleaning services. Every job is an opportunity to establish a new relationship, showcase our talents, and solidify our position in the community as a reliable roofing and cleaning company. We respond quickly to customer requests, for estimates and job starts. We have earned our great reputation for the exceptional services we provide and attention to detail. We also paint all types of projects — interior and exterior residential, commercial, public, and industrial buildings.
Spring wind and hail events are a defined seasonal risk in Woodburn and can damage shingles even outside the main winter leak season. Since Willamette Valley moisture is paired with a dry-season window, a sudden storm can crack, lift, or bounce shingles before you notice a leak. Damaged edges often show up on ridge caps, flashing, or along valleys, where moisture has a direct line to attic spaces. If a hail event sweeps through, it may leave pockmarks or bruising that weakens the shingle surface over time. The result is a slower creep of water intrusion that catches homeowners off guard during that mid-spring lull when roofs aren't top of mind.
Oregon insurers commonly process wind- and rain-related roof claims, so Woodburn homeowners should document storm dates, roof age, prior repairs, and photo evidence before temporary fixes obscure damage. Keep a dated log of when you noticed issues, and photograph any lifted granules, punctures, or granule loss on asphalt shingles, as well as exposed underlayment if visible. If hail is suspected, capture multiple angles and close-ups to show the extent of surface impact. A before-and-after photo trail helps a reviewer see changes since the storm. Avoid rushing repairs that cover damage without documenting conditions first; the insurer may still want to verify the underlying issues.
Adjusters in this region may require on-site inspections or contractor quotes before settlement, which can slow claim resolution after area-wide storm demand spikes. Expect delays if multiple roofs are in play; an on-site inspection can take longer than a standard assessment, and busy weeks can lengthen response times. Having a few solid contractor quotes ready helps, but keep in mind that some insurers request independent estimates to compare with their own. Clear, organized documentation reduces back-and-forth and keeps your file moving when the weather finally cooperates for repairs.
If shingles show damage but the interior isn't yet leaking, prioritize temporary protection that does not obscure the damage with a blanket covering or tarp that fully covers affected sections. Avoid heavy, adhesive-only fixes that hide underlying issues behind a vague sealant layer. Do not assume a claim will cover all costs automatically; read the policy details and track every contact with the insurer. When you do talk to a contractor, request a scope of work that reflects visible wind and hail damage, including flashing and vent boot replacements if needed, since these components are commonly affected in this area.
Look for a local contractor who has experience with Woodburn's spring storm patterns and a track record of documenting damage for insurance purposes. A good partner will walk through the roof with you, identify vulnerable areas near valleys and ridge lines, and explain why certain repairs are staged or prioritized around the dry season window. Ask for recent projects in similar homes, and verify that the contractor can provide on-site quotes and detailed diagrams before any work begins. The right choice helps ensure a thorough repair that stands up to the next spring wind event.
Find local contractors experienced in assessing and restoring roofs after hail, wind, and severe weather events.
Dylan's Quality Roofing & Construction
(503) 800-8238 www.dylanroofing.com
Serving
4.9 from 34 reviews
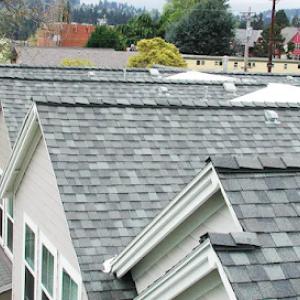
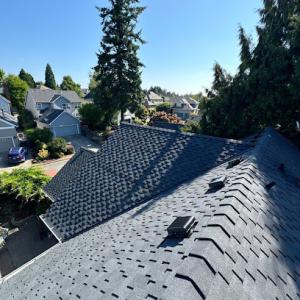
Asphalt shingles dominate the local market and fit many homes that are being re-roofed in a hurry after winter storms. They're familiar to many contractors and homeowners, which helps with quick scheduling and repairs. In the wet Willamette Valley winters, asphalt shingles face wind-driven rain and occasional hail, so choosing a durable granule composition and a proven sealant or 30-year style can improve long-term performance. If you live in a neighborhood with tall evergreens, consider talking with a roofer about impact-rated or wind-resistant shingles to reduce the chance of wind uplift during spring gusts. Regular inspections after winter storms are prudent, since minor granule loss or shingle lift can lead to hidden leaks if left unmanaged.
Metal is a practical choice in this climate for shedding winter rain and offering a clean, modern look. It can be excellent for homes with overhangs or flat sections where water drainage needs to be predictable. Installers emphasize the importance of detailing around flashing, penetrations, and roof-to-wall transitions-the valley's wet season exposes poor flashing work quickly. If you're considering metal, prioritize a contractor with strong experience in valley climates, good seam sealing, and visible maintenance-free coatings. Metal can be advantageous for longevity and wind resistance, but poor installation in flashing or panel laps can negate those benefits, especially during the wet season.
Woodburn homes show a surprisingly varied palette: clay tile, concrete tile, wood shakes, and synthetic or composite shingles all show up in the market. Clay and concrete tiles bring excellent durability in dry spells and can be visually striking, but their weight requires a solid structural assessment and careful roof framing. Wood shakes offer a traditional look and decent insulation, yet they demand frequent maintenance and vigilance against moisture-related rot and moss in shaded or damp spots. Synthetic/composite shingles blend familiarity with extended warranties and sometimes lighter weight, but performance depends on specific formulations and underlayment compatibility. When choosing among these options, align material choice with your roofing plan for the wet season: ensure proper underlayment, ventilation, and drainage, plus a roof buildup that accommodates local rainfall patterns. For homes with skylights or penetrations, synthetic options may ease installation tolerances, but always verify compatibility with flashing and sealant systems to avoid leaks during heavy winter and spring rain.
In practice, aim to complete reroof projects during the valley's dry window, ideally before the onset of the wettest months, to minimize weather-driven delays and ensure proper sealant curing. If a winter reroof is unavoidable, select materials and a crew with proven rain-ready installation practices, focusing on robust flashing details and secure fasteners. Regardless of material, prioritize a local contractor with a track record in Woodburn-style weather patterns, so the roof performs reliably through spring winds and spring hail events.
Skylight work is one of the strongest specialty signals in Woodburn, indicating that leak-prone roof penetrations are a frequent homeowner concern in this market. If a roof has multiple penetrations-skylights, vents, chimneys-the likelihood of hidden problems grows. Knowing this helps you spot trouble early and plan for solid flashing details rather than reactive fixes after a rain storm.
The wet-season exposure makes flashing details around skylights and vents especially important because small installation errors often show up first during prolonged winter rain. Expect to see valleys and rakes where flashing meets the skylight curb, plus any step flashing that negotiates through shingles or tiles. In practice, that means your contractor should verify that the skylight curb is properly flashed with continuous sealant backer, metal flashing integrated with the roof plane, and drip edges that shed water away from the opening. Don't accept a cosmetic sealant-only approach, as that can fail quickly under heavy drip and curtain-style rain.
In Woodburn, reroof projects that change skylights, venting, or drainage may trigger additional plan review beyond a straightforward reroof permit. That reality nudges you to synchronize skylight work with the reroof window if possible. If a planned skylight upgrade or relocation is on the table, coordinate with the roofing crew to detail flashing transitions before shingles go on. This reduces the chance of rework and helps ensure the new penetrations are integrated with proper drainage and ventilation.
The dry-season reroof window is the window to leverage for penetrations work. Scheduling during a stretch of dry days allows for accurate flashing installation, precise sealant curing, and fewer water-related setbacks. If a leak-prone section must be addressed in shoulder-season weather, insist on temporary measures that keep water out without compromising the final flashing quality.
Look for signs of poor counterflashing around skylights, interrupted waterproof barriers where vents pass through, and improper integration with existing drainage planes. Even small gaps can become leak paths after a long winter rain. Ask for a detailed inspection of the skylight curb, the pan, and any interior drywall near penetrations to confirm there is no moisture migration behind the roof deck.
Ask the contractor to perform a dry run check of all penetrations before final shingle installation. Confirm that the skylight flashing is installed in a continuous, shingle-over design with proper sealant backing and compatibility with the chosen roofing material. Ensure the vent flashing has a proper ice-and-water shield in zones prone to wind-driven rain, and verify that all drainage paths direct water away from the skylight and vent openings.
Find contractors experienced in skylight installation, flashing, and leak repairs to bring natural light into your home.
Flawless Roofing & Construction
(971) 216-2311 www.flawlessroofings.com
419 Vine Ave, Woodburn, Oregon
5.0 from 76 reviews
You'll see common Woodburn pricing patterns tied to the Valley's wet season and a narrow window for dry-install work. Provided cost ranges run about $350-$800 per square for asphalt shingles, $600-$1100 for metal, $900-$1800 for clay tile, $900-$1500 for concrete tile, $700-$1200 for wood shingles or shakes, and $450-$900 for synthetic/composite shingles. In practice, the material choice drives the bulk of the early budgeting, but local conditions push final numbers up or down based on the house's age and the condition of the decking once tear-off begins.
Timing around the winter doldrums matters. Costs in the region can rise when winter moisture reveals damaged decking during tear-off, especially on older homes that have gone through multiple reroof cycles. If rot or complex repairs show up mid-tear-off, expect additional days of labor and material checks that ripple into the total. A dry-season install reduces surprises, but if a reroof must occur in wetter months, you'll likely see higher moisture-related stringing costs and scheduling pressure.
Projects involving structural changes or modifications to venting, skylights, or drainage can add review complexity and increase total reroof cost in Woodburn. If you're adding or relocating vents, flashing around skylights, or reconfiguring gutters and fascia to handle heavier winter rainfall, plan for extra inspection and potential sleeve or flashing work.
Step-by-step planning helps: start with the material you prefer and a conservative square-count, then pencil in potential decking or structural tweaks. Have the contractor outline a weather contingency plan and a line item for decking repairs, so the budget reflects the true scope once tear-off begins.
Don't let upfront costs delay a critical repair - these contractors offer payment plans to fit your budget.


A full reroof in Woodburn typically requires a permit reviewed by the City of Woodburn Building Department. Before any shingles or underlayment go on, you should submit the scope of work, plans, and any structural or ventilation changes for review. The permit process helps ensure that roof work follows local codes for wind uplift, fire safety, and drainage, which are particular concerns in this valley's wet winters and dry summers. Plan to secure approvals before ordering materials or starting tear-off to avoid a stop-work order.
Reroof inspections in this area are commonly scheduled at key stages to verify safety and compliance. An inspector will typically visit after the underlayment is installed to confirm proper nailing patterns, underlayment laps, and attic ventilation setup. A second inspection is usually required after final installation to confirm that flashing, vent penetrations, skylight details, and overall workmanship meet code expectations. Because Willamette Valley climates unleash significant moisture in the winter, the timing of inspections can influence the final warranty and moisture protection underneath the new roof. Coordinating with your contractor to align inspections with vendor schedules helps keep the project moving through the wetter months.
Additional plan review may apply in Woodburn when the project includes structural work or changes to venting, skylights, or drainage. Structural alterations or new vent stacks often require calculations or revised drawings to ensure the roof can carry the load and that drainage remains effective with any new roof geometry. Skylight or vent changes should be clearly drawn for the inspector, including flashing details and curb installation if applicable. If drainage details are altered-such as new gutter configurations or downspout routing-make sure these are captured in the permit set. Your contractor should provide a complete packet with current architectural drawings, roof plan, and venting schematic to minimize back-and-forth with the Building Department. Keeping all documentation organized helps smooth the permit review and reduces delays during Woodburn's seasonal calendar.
Roofing insurance in this valley climate tends to be shaped by wind and rain rather than large catastrophe events. Claim outcomes hinge on whether the roof is aging or well-maintained, and on whether damage shows up as a sudden storm event or as a slow, creeping failure from deferred upkeep. In practice, a punctured skylight or a wind-blown shingle can become a claim when the rest of the roof is near the end of its life, while a newer roof with solid maintenance records may fare better when a storm hits.
Because the Oregon market weighs age and upkeep as much as weather triggers, the condition of the roof before a claim is filed matters every bit as much as the event that caused damage. A roof with recent debris removal, clear flashing, and documented repairs stands up to scrutiny better than one with irregular inspections. If a leak appears gradually after a wet season, insurers look for a pattern of sustained maintenance rather than a one-off fix. Your history becomes part of the file, so keep it tidy.
Wet-season leaks can worsen quickly in Woodburn, so take swift, thorough photos the moment you notice trouble. Keep records of emergency tarping, timely inspections, and prior repairs in a dedicated folder. If you can, capture the magnitude of the leak and any water intrusion into ceilings or walls. This documentation helps you and the insurer see whether the damage is sudden from a storm or the result of longer-term wear.
After damage is suspected, act fast but methodically: tarp exposure as a temporary shield, arrange a professional inspection, and log every adjustment or patch. When discussing the claim, reference the roof's age, the maintenance history, and whether the damage aligns with a storm event or grew from ongoing upkeep gaps. This clarity matters in a market where how the roof was cared for can tilt the claim outcome.
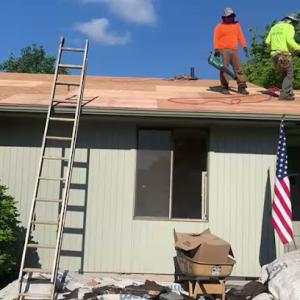
In this city, the reroofing market dominates over new construction, so you'll want a contractor with proven strength in tear-off, dry-in, and meticulous cleanup. Leaks and weather-sensitive work are common triggers for projects, making quick, reliable response and thorough cleanup top hiring priorities. Look for crews that can stage a sheet-by-sheet removal, protect interior spaces from dust and moisture, and immediately seal the roof edge after each shift to prevent during-waiting leaks.
Family-owned and long-established companies carry meaningful weight here. A contractor with a multi-decade track record in the area signals steady crews, familiar suppliers, and an understanding of how seasonal rains affect timing. When you compare bids, weigh not just price but the strength of the local reputation: references from nearby neighbors, and a portfolio of recent Woodburn or nearby projects that show clean tear-outs, dry-ins, and prompt service after adverse weather.
Timing reroofing around the wet-season moisture matters. Seek a window that aligns with a dry spell for the bulk of the installation, with a contingency plan for an early snow or rain if a winter front moves through. Ask about projected weather buffers in the schedule and how the contractor handles delays without compromising the dry-in phase or interior protection. A solid plan includes a clear sequence from tear-off through drying-in, with a daily target for waste containment and site cleanup.
Ask who will be on-site daily and how the crew coordinates with any skylight work or ventilation upgrades you might need. Request a written safety and cleanup protocol: tarping strategy for rain, dust control measures, and a staged cleanup at the end of each workday. Look for crews that treat your yard and landscaping with care, and that leave the property secure and tidy at the end of the project.
Set expectations for updates on weather impacts, material deliveries, and the sequence of work. The right contractor will provide a realistic timeline with milestone check-ins and hold to a dependable pace that minimizes exposure to winter moisture while maximizing dry-in quality.