Last updated: Apr 19, 2026
Beaverton experiences a maritime climate where a long wet season keeps roof surfaces damp far longer than drier inland Oregon markets. That extended moisture is not just a nuisance-it accelerates wear on shingle surfaces, underlayment, and flashing. The combination of persistent dampness and dense shade from mature trees in many established neighborhoods feeds a steady moss and algae growth that ages roofs prematurely. When winter rain and wind-driven downpours slam from the Portland metro west side, minor flashing or penetration defects can become active leaks overnight. This section translates those conditions into concrete, urgent actions you can take to minimize damage.
In Beaverton's damp climate, dry-season habits won't cut it. Every week during the wet months you should visually inspect the roof from the ground and, if safe, from a ladder to spot areas where moss and dark staining start to cluster, especially along north-facing slopes or heavily shaded sections. Moss isn't cosmetic; it traps moisture that accelerates shingle granule loss and accelerates deterioration of the roof deck. If you see lush green patches, schedule a professional moss removal before it roots deeply into the shingles or tiles. Use non-pressure washing methods or specialty roof-safe products that lift moss without dislodging granules; high-pressure washing can strip protective coatings and force water under shingles.
The shade garden cast by mature trees over popular Beaverton streets means moss will always reclaim sunless spots after storms. Prune or remove branches that overhang the roof to increase sunlight exposure and expedite drying between rain events. Where pruning isn't feasible, consider installing copper or zinc-based roof sprinkler strips or using zinc strips along the rake edges, which can help suppress moss growth over time. However, do not rely on these as a sole strategy-regular physical removal and sunlight access are still essential. Clean gutters and downspouts at least twice during the wet season; clogged drains keep water perched at the eaves, inviting leaks at the joints and underlayment.
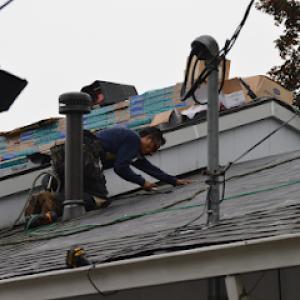
Winter rainfall and wind gusts on the west side commonly turn minor flashing or penetration defects into active leaks. Prioritize inspection of every common trouble spot: roof valleys, around vent pipes, chimney jacks, and dormer intersections. Look for lifting shingles, copper oxidation at flashings, sealant degradation, and any gaps where water could track behind the roof edge. If you notice any moisture staining on the interior ceiling, address it immediately and don't assume it's a simple gutter overflow-water can travel horizontally along the attic and appear far from the actual entry.
Develop a targeted yearly rhythm: just after the first heavy fall rain, after winter storms, and as the days lengthen into spring. Have a licensed professional confirm the integrity of underlayment, the condition of flashing, and the effectiveness of any moss-control measures you've implemented. Document any changed areas with photos and notes so you can compare year over year and catch slow deterioration before it becomes a costly repair.
If damp conditions persist, prioritize de-mossing, gentle cleaning, and a careful resealing of flashing components. Ensure attic ventilation remains robust; stagnating warm air against a damp roof invites condensation that compounds moisture-related damage. In short, treat moisture, shade, and moss as a trio that determines the roof's lifespan in this climate, and respond with a steady combination of upkeep, pruning, and timely professional assessments.
Late spring through early fall is the most favorable replacement window for a roof in this area, because roofs have more time to dry between rain events. Planning your tear-off to start as soon as the longer winter rains ease helps the new roofing system dry in properly and reduces the risk of moisture getting trapped under shingles. In Beaverton, spring and fall can still bring variable rain and wind that interrupt tear-off schedules and expose decking to moisture. Build in buffer days for weather, and target a window with several dry days back-to-back to minimize decking exposure.
Beaverton roofs sit under mature trees that cast dense shade, fostering moss growth and slower drying. When selecting materials, prioritize products with robust moisture resistance and good sealing properties for long Oregon wet seasons. Consider underlayment with higher moisture tolerance and a breathable yet water-tight membrane engineered for damp climates. Pay special attention to ridge and hip ventilation, since poor airflow can trap humidity in the attic and encourage mold behind the deck. Keep gutters clear of leaves to prevent moisture from backing up onto the roof edge during wet months.
A methodical tear-off plan matters on a moss-prone Beaverton roof. Start with sections that have the least slope exposure to rain, then move toward areas most exposed to spring showers. If a rain front arrives mid-teardown, have tarps and heavy-duty plastic ready to cover exposed decking and a temporary containment plan to keep moisture off the interior. After decking is exposed, inspect carefully for concealed moisture damage like soft spots or cupping boards; address these before the new underlayment goes down. This city's long rainy season means a cautious approach to any sign of compromised wood.
During dry-in, ensure attic soffit intake remains clear to promote continuous ventilation, which helps dry-in and reduces condensation risk once the roof is covered. Moss-prone shade requires a proactive moss-prevention strategy after installation, such as copper tabs or periodic cleanings, depending on the product chosen. For those with mature shade trees nearby, establish a maintenance plan that pairs regular debris removal with an inspection cadence after heavy rains. If a mid-project rain event forces a pause, document decking condition and re-evaluate timelines to prevent hidden moisture from becoming a leak later.
Clear Vision Construction
8110 SW Nimbus Ave, Beaverton, Oregon
4.8 from 243 reviews
Clear Vision Construction, the premier Beaverton roofing company serving the greater Beaverton and its neighbors in the greater Portland area, focuses on providing our customers with top of the line workmanship for all their roofing, siding, and gutter needs. Founded in 2011, we are fully staffed with roofing experts (we never use sub contractors so you know we can stand behind our quality of work), we offer affordable prices on your roof replacements and repairs, free roofing estimates, and financing options. We make sure our customers are provided the best customer service experience throughout their entire roofing, siding, and gutter project. When it comes to roofing, siding, and gutters, the choice is clear!
Raven Roofing Beaverton
(503) 783-8855 ravenroofingpdx.com
4145 SW Watson Ave #350, Beaverton, Oregon
4.9 from 70 reviews
At Raven Roofing Beaverton, we’re your trusted partner for re-roofing in Beaverton, Oregon. Our skilled team delivers top-quality roof replacements, using premium materials like asphalt, composite, and metal to ensure durability and energy efficiency. Whether your roof is aging, damaged, or needs an upgrade, we provide seamless installations with a focus on customer satisfaction. Serving Beaverton and nearby areas, we offer free inspections, transparent pricing, and warranties for peace of mind. Protect your home with Raven Roofing’s expert craftsmanship. Contact us today for a no-obligation estimate and experience reliable, local roofing solutions tailored to your needs!

All Surface Roofing & Roof Repair Company
(503) 486-3468 www.allsurfacepdx.com
9610 SW Sunshine Ct Suite 100 A, Beaverton, Oregon
4.8 from 300 reviews
All Surface Roofing & Roof Repair Company is a locally owned Portland roofing company that has been recognized and awarded for our outstanding service and reputation. Our motto is “Unsurpassed Value and Integrity”. We strive to give you what we want ourselves. VALUE- good workmanship and professionalism at a fair price. We treat our customers with Courtesy, Gratitude and Respect. All Surface Roofing installs, replaces and repairs composition roofs, composite tile roofs, and cedar shake roofs. We can provide new roof installation, re-covers (also called roof-overs) and tear-offs & re-installations.
Raindrop Roofing NW
(503) 526-3887 www.raindropnw.com
8305 SW Cirrus Dr, Beaverton, Oregon
4.8 from 76 reviews
Raindrop Roofing Northwest, located in Beaverton, OR, is your trusted partner for premium roofing solutions. We offer top-notch roofing installation services, catering to the needs of both residential and commercial clients. Our affordable roofing service ensures quality without compromise, while our expert team excels in roof inspections, repairs, replacements, and maintenance. With a commitment to delivering exceptional results, Raindrop Roofing NW provides reliable and efficient solutions designed to protect and enhance your property. Choose us for all your roofing needs, where excellence meets affordability.
Prodigy Roof Solutions
(503) 457-5363 www.prodigyroofsolutions.com
4145 SW Watson Ave, Beaverton, Oregon
5.0 from 29 reviews
Discover excellence with Prodigy Roof Solutions, your trusted roofing solution. Our seasoned professionals offer top-tier installation, repair, inspections, and maintenance services. Benefit from our expertise, quality materials, and competitive pricing. Services we offer for Commercial or Residential: Roof Replacement Roof Repairs Roof Inspections Roof Maintenance When you choose Prodigy Roof Solutions, you're choosing a partner committed to protecting what matters most. Contact us today to schedule a consultation and take the first step towards a secure, stylish, and enduring roofing solution.
Nw Solutions
(971) 507-2587 www.nwsolutionsllc.com
830 Liberty Bell Dr, Beaverton, Oregon
5.0 from 21 reviews
NW Solutions is a reputable company that offers comprehensive services in the areas of junk hauling and gutter cleaning. The company prides itself on providing efficient, reliable, and environmentally-conscious services to homeowners and businesses throughout the Pacific Northwest. With years of experience in the industry, NW Solutions has developed a team of skilled professionals who are equipped with the latest tools and techniques to ensure that each job is completed to the highest standards. Whether you need junk removal services for a single room or an entire property, or gutter cleaning services to prevent water damage, NW Solutions has got you covered. We prioritize customer satisfaction and offer flexible scheduling.

Prime Roofing
6795 SW Juniper Terrace, Beaverton, Oregon
5.0 from 15 reviews
Founded in 2000, Prime Roofing has spent the last two decades working hard to establish ourselves as a leading name in the roofing industry. Roofing isn’t just our job, it’s our passion – our crew is the most experienced and hardest-working professional team in the area. We take our craftsmanship seriously, and make sure we walk away from each job with a sense of pride. We manage our business with integrity, strive to provide an unparalleled customer experience, and ensure your home is being protected by the highest quality products on the market.

Quality Roof
(503) 642-9762 qualityroofinc.com
7795 SW Cirrus Dr, Beaverton, Oregon
4.8 from 22 reviews
Since 1992, Quality Roof has proudly served the greater Portland Metro and surrounding areas. We are a family-owned and operated residential roofing business, specializing in roof replacements & maintenance. Our tireless commitment to fair estimates, honest quality work, and prompt completion is why Quality Roof is a name you can trust.
Griffith Roofing
(503) 643-1596 www.griffithroofingcompany.com
6815 SW 111th Ave, Beaverton, Oregon
4.0 from 27 reviews
Griffith Roofing, Inc. Serving Beaverton, Oregon and Metropolitan Area Protect the largest investment you made in your property and raise its resale value with Griffith Roofing in Beaverton, Oregon. Founded in 1962, we are a family-owned roofing contractor handling big jobs for customers in Beaverton, Oregon and the surrounding areas. We offer installation and repairs for homeowners, as well as small and large businesses. After visiting your location to assess the situation, you receive a bid within a short turnaround time.

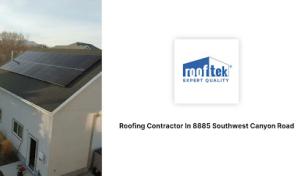
RoofTek
Serving
4.8 from 68 reviews
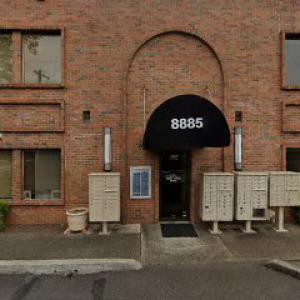
RoofTek, located at 8885 Southwest Canyon Road, is your premier Roofing Contractor specializing in comprehensive roofing solutions. With expertise in Roof Repair, Metal Roofing, and Shingle Roof Repair, our skilled professionals deliver top-notch Roofing Services tailored to meet your unique needs. As a leading Roofing Company, we offer reliable Roof Replacement and Residential Roofing services designed to withstand the test of time. Our commitment to customer satisfaction ensures exceptional results, whether you're in need of Roof Cleaning or Leaky Roof Repair. Trust RoofTek for quality and integrity in every project. Contact us today for unparalleled roofing excellence.
CedarTech Roofing
(503) 643-9303 www.cedartechroofcare.com
Serving
4.8 from 56 reviews
CedarTech Roofing, an esteemed roofing contractor serving Portland and its environs since 1991, is renowned for offering exceptional roofing solutions. The company specializes in transforming and restoring timeworn cedar roofs, ensuring their longevity and breathtaking beauty. CedarTech has a team of skilled professionals who provide unparalleled roof repairs and replacements for a wide range of materials such as asphalt, flat roofing, and cedar. Their commitment to quality and meticulous attention to detail set them apart, resulting in awe-inspiring roofs that stand the test of time.
Roof & Nail
(503) 294-5003 roofandnailco.com
Serving
4.8 from 21 reviews
Roof & Nail provides roof installations and repairs, specialized roofing services, specialty roof repairs, gutter services, and more to the Greater Portland Metro area. At Roof & Nail, we pride ourselves on not only proving the highest quality roof replacement and roof repair services, we also strive to educate our audience, to ensure that they are seeing the desired upgrade to their property! We want families to feel empowered to understand their roofing system like a pro and feel safe and secure under their roof.
In Beaverton's wet, moderate climate, asphalt shingles remain a practical default for many homeowners. They balance performance with a reasonable upfront cost and familiar installation practices. The moss-prone shade from mature trees means you'll want shingles with good granule retention and a reliable underlayment. Look for products with algae-resistant features and a solid warranty, since moisture and humidity can accelerate granule loss on older shingles. A key detail is ensuring proper installation over vented attic spaces and a continuous drip edge, which helps manage the relentless rainy season and reduces the chance of water wicking into the decking. Regular cleaning of debris and moss-friendly shade areas remains essential to keep shingles framed moisture-free, since accumulated organic matter can trap moisture against the surface and shorten the roof's life.
Metal roofing is increasingly relevant in this area for shedding rain efficiently, and it can be a smart choice when the roof line is exposed to frequent downpours. The high wind-driven rain conditions that can occur with Pacific Northwest weather patterns mean attention to detailing around penetrations and edges matters greatly. A metal roof with well-sealed fasteners, a properly scarfed seam, and a robust snow/ice shield in shaded spots will perform well during the wet season. Take care with flashing and vent terminations where old roofs often show failure points; ensure sealants and gaskets are compatible with the local humidity and that overhangs direct water away from the fascia. In Beaverton's trees, moss prevention remains a consideration even with metal, so the color and coating choice should favor resisting moss growth and facilitating easy cleaning in shade-heavy yards.
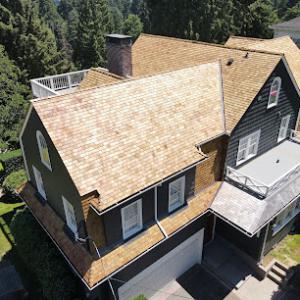
Wood shakes and shingles bring a natural look that many Beaverton homes carry well, but moisture management is a bigger concern here than heat resistance. The damp climate supports rapid moss and lichen growth on organic surfaces, especially where shade is persistent. For shakes, consider Eastern white cedar or spruce-pine-fine blends with a tight grain that resist cupping; applied correctly, they shed raindrops awkwardly enough to slow rot but still require careful maintenance. Regular inspection for any soft spots after heavy rains is prudent, because moisture can penetrate slower than with synthetic surfaces. For shingles, proper underlayment and an even, ventilated deck are crucial to prevent moisture from lingering in the grain. If you choose wood, plan for periodic moss management and possible cleaning treatments to keep a healthy, durable surface rather than letting organic matter trap water against the wood.
Clay tile and concrete tile offer distinct looks and long lifespans but demand structural consideration. Beaverton's climate and tree canopy can increase moss retention on tile surfaces; that retention can add weight and shift drainage paths if not addressed during installation. Clay tiles tend to be heavier and can crack under ice or heavy hail, while concrete tiles provide extra mass but can be prone to moss if drainage is poor or shading remains across the roof plane. Both options require a solid substrate and careful alignment to maintain clean runoff and to minimize areas where moisture can linger in crevices. Regular moss management and cleaning, especially in shaded sections, helps preserve the tiles' integrity and ensures the roof continues to shed water effectively through the wet season.
Synthetic or composite shingles bring a modern balance of durability and maintenance ease, often with better resistance to moss than traditional organic options. They can mimic the look of slate or wood while offering easier cleaning and quicker shedding of moisture. In shaded, moss-prone zones, a composite with a dense granule surface and built-in algaecide or UV inhibitors can help keep moisture at bay and reduce staining over time. When selecting, check for compatibility with Beaverton's winter humidity and the ability to maintain good ventilation under the roof deck. Proper installation remains essential to prevent moisture stagnation in valleys and at flashing junctions.
Beaverton material pricing tends to follow the city's mix of weather, shade, and housing stock. Asphalt shingles generally run about $350-$550 per square, metal around $500-$800, clay tile $900-$1800, concrete tile $800-$1400, wood shingles or shakes $450-$1000, and synthetic or composite shingles $600-$1000 per square. Those ranges reflect both local suppliers and the realities of a rainy season where delays can ripple through pricing.
Costs in Beaverton often rise when prolonged wet weather slows production, requires extra dry-in protection, or reveals moisture-damaged sheathing during tear-off. In practice, that can mean additional days of labor, more protective tarping, and potential structural prep if decking shows mold or rot. Your project timeline matters: a slower pace under rain can push prices up slightly through extended labor costs and temporary contingencies. Expect the same dynamics whether you're re-roofing with asphalt or upgrading to a heavier tile.
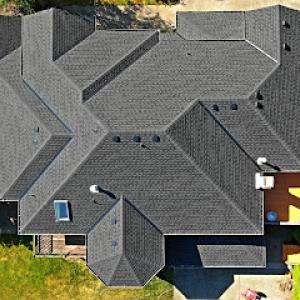
Homes with mature tree cover, moss buildup, skylights, chimneys, and complex rooflines common in established Portland-metro subdivisions usually cost more to re-roof and clean up. The shade-friendly conditions foster moss growth that requires extra cleaning, pruning, or treatment before and during installation. Complex roof geometry adds transitions, penetrations, and potential leak points, all of which drive up labor time and material waste management. If your roof carries a heavy moss load or you're integrating new underlayment and drainage details, expect a modest premium.
When budgeting, plan for a comfort cushion if moss and moisture issues surface during tear-off. If moisture-damaged sheathing is found, pricing shifts from a straightforward re-roof to a more involved restore-and-install path. In mature neighborhoods with multiple skylights or chimney stacks, coordinate with the contractor on access, tarp protection, and debris removal to keep costs predictable. For a typical home with standard slopes and a mix of shade and sun, use the local material ranges as your starting point, then add a contingency for weather-driven delays or additional underlayment and moisture barriers.
Don't let upfront costs delay a critical repair - these contractors offer payment plans to fit your budget.
Clear Vision Construction
8110 SW Nimbus Ave, Beaverton, Oregon
4.8 from 243 reviews
Raindrop Roofing NW
(503) 526-3887 www.raindropnw.com
8305 SW Cirrus Dr, Beaverton, Oregon
4.8 from 76 reviews

Beaverton generally requires a building permit for most full roof replacements through the Beaverton Building Division. This isn't something to roll the dice on, because a permit isn't just paperwork-it's a safeguard that helps ensure the job meets local wind, fire, and drainage requirements. If your plan includes more than a like-for-like change, expect that a plan review may be required. That review can catch structural changes, eave alterations, or vent rework before a single shingle is pulled. Your contractor should be prepared to submit plans, elevations, and any framing details when needed, and you should anticipate a bit of back-and-forth if the scope touches joints, headers, or skylights.
In practice, the need for a plan review often hinges on the project scope. A straightforward replacement with the same dimensions may glide through as a simple permit, but even that path can stall if existing drawings are vague or if the attic ventilation strategy changes. If a plan review is required, it's not a delay to be feared-it's a checkpoint that helps prevent later leaks or mismatches with Beaverton's rain-driven climate. If you're coordinating with a contractor, confirm who will manage the plan submittal, what drawings will accompany it, and how any revisions will be handled without leaving the roof open to moisture.
Inspections are scheduled during and after the work. The early visits typically verify that the structural elements, decking, underlayment, and fasteners conform to code, while later inspections check roofing material installation and ventilation details. In Beaverton, moisture management is a critical focus, so inspectors will look closely at flashing, valleys, and drip edges in the context of frequent rainfall. If something doesn't meet code at an inspection, the delay can affect project timing, so schedule the inspection windows with a cushion and coordinate access with the contractor.
The final inspection serves as the official confirmation that the work meets all applicable codes and standards, and it is the gatekeeper before the job is closed out. Expect the inspector to verify that moisture barriers are intact, flashings are sealed, and penetrations around chimneys, vents, and skylights are properly flashed. If the final pass isn't clean, you'll need to address the deficiencies before the permit can be closed, which can prolong exposure to weather and complicate warranty coverage. Choosing a contractor who prioritizes early permit readiness and responsive inspection coordination helps minimize the risk of blown timelines and unresolved issues as Beaverton's rainy season looms.
In Beaverton and the broader Pacific Northwest, wind-driven rain and winter storm activity generate roof claim activity even without the hail patterns seen in other regions. The long wet season keeps shingles and underlayment under constant moisture pressure, especially where shade from mature trees slows drying and moss forms. That combination increases the chance of slow leaks, lifted edges, and compromised flashing after storms. Homeowners should recognize that roof health affects interior comfort as much as exterior appearance, and the timing of storms can create multiple small issues that insurers scrutinize closely.
Oregon coverage remains generally available, but carriers may adjust pricing or apply exclusions based on roof age, condition, and prior claims history. A history of unresolved leaks or repeated seasonal damage can shift how an underwriter views risk, even if a current storm claim seems straightforward. Beaverton homes with aging composites, moss-prone surfaces, or mixed roofing materials may see more conservative handling of claims. The goal for you is to present a clear, documented picture of the roof's condition before and after the event, so the adjuster can differentiate new damage from preexisting wear.
Beaverton homeowners should document leaks, lifted shingles, fallen branches, interior staining, and temporary tarping promptly because insurers commonly require adjuster review and supporting records. Take dated photos of exterior damage, note the location and extent of any moisture intrusion, and preserve torn or displaced flashing and missing granules. Keep copies of any temporary repairs and weatherproofing efforts, along with receipts for materials or contractor visits. A simple, consistent record helps a claim move through the inspection queue without unnecessary delays.
When a storm hits, report damage promptly to your insurer and your local roofing professional. Ask for an adjuster to visit with a clear plan: where leaks originate, what areas are affected, and how long the issue has been present. If an interior stain appears after a rainfall, document it with dates and photos as evidence of progression. Prompt reporting and thorough documentation reduce the risk of coverage questions later and support a smoother recovery process.
Connect with contractors who help homeowners navigate the claims process from damage assessment to final approval.

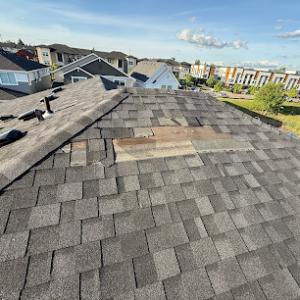
Moss-prone shade from mature trees is common on aging roofs in Beaverton, and moss-related edge lift is a recurring failure pattern. Moss holds moisture against shingles and tiles, which speeds up deterioration and keeps the edge of the roof damp longer than surrounding areas. Over time, this moisture retention can loosen fasteners and pry shingles upward at the eaves or along overhangs. Regular moss removal and careful edge flashing inspection help prevent slow, creeping leaks that start at the margins.
Even without severe continental cold, winter in this area brings enough freeze-thaw action to stress fasteners and vulnerable roof details. Water that penetrates small gaps can freeze, expand, and push at nails, sealant joints, and valley linings. Repeated cycles loosen fasteners and widen seams, creating openings that become pathways for moisture during the next rain event. After wet seasons, a quick check of fasteners around vents, edge metal, and any newly sealed transitions can catch early signs of movement before leaks develop deeper into the roof system.
Skylights, chimneys, valleys, and other flashing-heavy transitions are frequent leak points once repeated wetting and debris buildup take hold. In Beaverton's damp climate, debris from deciduous trees-leaves, needles, and dirt-collects in valleys and around flashing, blocking proper drainage and trapping moisture. Over time, flashing becomes corroded or pulled away from its seams, allowing water to seep into the roof deck where it travels to insulated cavities. Regular inspection of transitions and careful resealing where flashing meets roofing material are key preventative steps.
Find contractors experienced in skylight installation, flashing, and leak repairs to bring natural light into your home.
Clear Vision Construction
8110 SW Nimbus Ave, Beaverton, Oregon
4.8 from 243 reviews

All Surface Roofing & Roof Repair Company
(503) 486-3468 www.allsurfacepdx.com
9610 SW Sunshine Ct Suite 100 A, Beaverton, Oregon
4.8 from 300 reviews
Raindrop Roofing NW
(503) 526-3887 www.raindropnw.com
8305 SW Cirrus Dr, Beaverton, Oregon
4.8 from 76 reviews
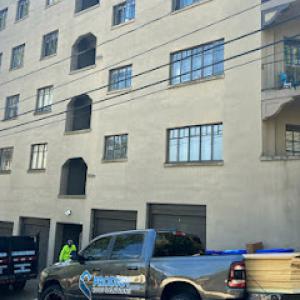
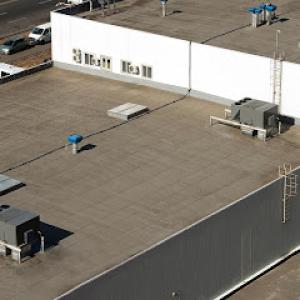
Low-slope sections on additions, porches, and some attached housing are more vulnerable to slow drainage during the long wet season. In Beaverton, persistent drizzle and extended damp spells require attention to how water moves across flat or near-flat deck and porch membranes. If a seam or edge channel slows water, you'll see edge dampness, slight blooming on the surface, or tiny puddles that don't evaporate quickly. Plan for a generous slope toward the established drainage path, and ensure that scuppers and gutters are free of debris so water has a clear path to exit.
Extended damp periods make seam integrity more critical than in drier Oregon climates. On low-slope roofs, every seam, flashing joint, and penetration becomes a potential leak point if ponding forms or drainage backs up. Look for signs of hairline gaps, lifted sealant, or dark staining along seams after heavy rains. A practical check is to spray the roof with a hose at low pressure, focusing on seams and around penetrations, to observe how water travels and where it sits. If ponding lasts more than 48 hours after a rain, that requires attention before the next wet spell.
Regular, proactive maintenance is essential. Keep vegetation away from the roof edge to minimize moss spread into low-slope zones, and trim overhanging branches to reduce shade that fosters moisture retention. Clean drains and ensure downspouts discharge away from the wall plane to prevent water sheeting back toward the membrane. Inspect for any drain obstructions after heavy rains, and reseal any suspect joints promptly to maintain a continuous, watertight surface.
Flat and low-slope work is a meaningful local specialty in the contractor market. When selecting a contractor, prioritize those with documented experience on low-slope assemblies, including attention to drainage path routing and moss control strategies. Ask for recent Beaverton-area projects with similar shading and moisture exposure to gauge how well they manage the unique seasonal challenges.
Find specialists in TPO, EPDM, and built-up flat roofing systems for residential and commercial properties.
Raindrop Roofing NW
(503) 526-3887 www.raindropnw.com
8305 SW Cirrus Dr, Beaverton, Oregon
4.8 from 76 reviews

Quality Roof
(503) 642-9762 qualityroofinc.com
7795 SW Cirrus Dr, Beaverton, Oregon
4.8 from 22 reviews

Griffith Roofing
(503) 643-1596 www.griffithroofingcompany.com
6815 SW 111th Ave, Beaverton, Oregon
4.0 from 27 reviews
In Beaverton's wet season, you want a crew that treats a small leak as an urgent risk rather than a distant worry. With a large pool of re-roofing contractors, you can compare how quickly crews respond, how clearly they communicate timing, and how they handle moisture-damaged tear-offs. Look for teams that can describe their process for rapid tarping, weather-conscious scheduling, and interim repairs to keep your home dry if rain interrupts the work. A quick, transparent point of contact during a stormy spell is worth noting when an unexpected shower threatens an exposed deck or attic.
Moss and shade from mature trees are common in this market, and crews should protect existing landscaping, driveways, and gutters while they work. Ask about ground protection, containment measures for debris, and cleanup timelines after each workday. Beaverton homes often have steep or narrow lots, so confirm that the crew uses appropriate safety gear, covers vulnerable surfaces, and leaves a tidy job site daily. A responsible crew will dedicate attention to preventing moss fragments from spreading to nearby shingles and clearing all waste before final inspection.
Long-established and family-owned firms appear prominently here, reflecting homeowner preference for crews that can manage permits, cleanup, and warranty questions. Prioritize firms with local references who can verify reliable communication, on-time completion, and a straightforward warranty process. These companies tend to offer predictable follow-up after installation to address any moisture issues that emerge as the roof settles and the trees shed their annual moss load.