Last updated: Apr 19, 2026
Corvallis has wet winters and dry summers, so rainfall regularly slows tear-off, drying time, and shingle installation scheduling. The wet season can stretch into late spring and early fall, narrowing the window for a clean, fast tear-off and re-roof. Projects that kick off right at the start of a dry spell in late spring tend to wrap up before the heaviest rains return, while those that wait for the heat of summer risk stalled work during unexpected squalls or extended warm spells. Understanding this rhythm keeps expectations aligned with what the weather will actually permit.
Local freeze-thaw cycles can worsen small moisture intrusions around flashing and fastener penetrations before interior leaks become obvious. Look for signs of uneven shingles, waviness around skylights, or dried-out sealant around flashing where water could seep in during a winter cold snap. If interior staining or musty smells appear after a wet period, investigate roof penetrations and fascia edges promptly. In Corvallis, small issues that go unchecked through a wet winter can become larger, more disruptive problems once the thaw comes and temperatures swing back and forth. Addressing these issues early gives a clearer picture of what a full replacement would require, rather than chasing intermittent leaks mid-project.
Before the cold rains arrive in earnest, do a targeted roof check focused on drainage, gutters, and drip edges. Ensure downspouts discharge away from the home and that gutter seams are sealed. In Corvallis, clogged or sagging gutters can trap water against fascia and any compromised flashing, accelerating moisture ingress. If a tear-off is on the calendar, plan for a dry spell with several consecutive days of favorable forecast to begin the work. A realistic plan accounts for potential weather delays and prioritizes a mid-season start only when a solid stretch of dry days is forecast.
Wet-winter conditions expose vulnerabilities around roof penetrations, such as vent stacks, chimneys, and skylight flashings. Winter moisture can hide small gaps that become obvious only after the roof is exposed to freezing and thawing cycles. When timing a replacement, verify that flashing materials match the roof system and that penetrations are reinforced with compatible sealants or tapes designed for wet climates. In Corvallis, where the interaction between rain-soaked sheathing and metal or alkali-resistant fasteners matters, a careful inspection of these components is essential before committing to a tear-off window. Expect to perform flashing checks again once the roof is exposed and the deck is dry.
Hot summer periods in the southern Willamette Valley can accelerate asphalt shingle aging, making late-summer condition checks especially relevant after the wet season. If a replacement is scheduled to occur as temperatures climb, be mindful of shingle brittleness and bonding challenges. High heat can also affect the installers' ability to manage moisture barriers and underlayment correctly, so plan with a buffer for cooler morning work if possible. Use this time to confirm that the chosen shingle profile and underlayment layer perform well under prolonged sun exposure and mid-summer humidity, reducing the risk of accelerated aging once the new roof is in place.
Set expectations around a practical tear-off window that minimizes exposure to heavy rain, but also avoids setting up a project mid-winter when rain is predictable. In Corvallis, the best window often runs from late spring through early fall, with flexibility built in for unseasonal downpours. Align your contractor's schedule with a forecast-informed plan: a few dry days for removal, followed by careful drying time for the deck, then continuous progress through to completion. If delays occur, reassess whether to push the project into the late spring dry period or to pause until a reliable stretch of warmth and dryness returns. The goal is a steady, well-ventilated, moisture-conscious process that preserves interior spaces and protects the roof investment across Corvallis's distinctive climate.
In Corvallis, repeated winter moisture exposure pushes roof systems toward failure in ways that tests of appearance miss. The underlayment beneath the shingles bears the brunt of soaking, and its condition often dictates the roof's remaining life more than any visible granule loss or color fade. When the rainy season repeats year after year, flashing around chimneys, vent stacks, and roof-to-wall transitions starts to lose its seal, allowing slow seepage that you won't spot from the ground. You'll notice its telltale signs not as a dramatic leak, but as damp spots in attics, higher humidity in upper rooms, or peeling interior paint near ceilings junctions. If a roof is aging in this climate, the durability of the underlayment and the integrity of flashing become the practical measuring sticks for replacement timing, even if shingles still look serviceable.
Spring storms in the Willamette Valley occasionally deliver hail and gusts strong enough to create localized shingle bruising and loose tabs that aren't obvious from the street. Those bruises can act as stress concentrators, accelerating deterioration once freeze-thaw cycles resume. More challenging is that some of these damages ride under the radar until a warm, wet spell reveals a slow drip or damp attic rafter, long after the event. Flashing, too, bears the brunt of those wind-driven shifts; a displaced edge or a poorly sealed corner can become a focused channel for water ingress with minimal outward signal. In practice, this means a careful post-storm inspection by someone who climbs safely onto the roof, not just a quick exterior check from the ground. Small, well-timed repairs to lift, sealant joints, and flashing interfaces can avert larger failures once the next wet season arrives.
Older homes undergoing full re-roofing bring additional risk to decking and edge details when moisture meets freezing conditions. Moisture-laden decks expand and contract, and if the plywood or oriented strand board has aged exposure, the cycles can create micro-cracks that propagate at the edges where boards butt and where the substrate meets the fascia. Edge details, including drip edges and rake boards, are particularly vulnerable; a single compromised edge can invite moisture to creep under the new layers. The combination of wet winter, rapid drying spells in spring, and a heavy, weathered roof deck can complicate create-and-seal strategies during a full reroof. The practical consequence is that careful attention to decking condition, edge fasteners, and proper flashing integration becomes as critical as selecting material color or profile. In everyday terms, durable performance hinges on those structural interfaces, not just the outer surface.
Find local contractors experienced in assessing and restoring roofs after hail, wind, and severe weather events.


IronHead Roofing
(541) 203-0974 ironheadroofing.com
4515 NE Elliott Cir, Corvallis, Oregon
4.8 from 183 reviews
IronHead Roofing is a veteran-owned and Oregon-grown company dedicated to protecting homes, businesses, and communities with lasting roofing and solar solutions. Since 2017, we’ve built our reputation on integrity, craftsmanship, and relentless innovation, earning recognition as the 2024 Innovator of the Year by Roofing Technology Think Tank (RT3). With a team of skilled in-house crews and trusted partners, we deliver roofing, solar, and maintenance services that combine safety, quality, and efficiency. Guided by our mission to build lasting protection and trust, we’re proud to serve over 2,000 customers across the Pacific Northwest, while giving back to the communities we call home.
Alamo Roofing
(541) 929-9565 alamoroofingllc.com
1840 SW 69th St, Corvallis, Oregon
4.8 from 55 reviews
At Alamo Roofing, we provide reliable, high-quality roofing services throughout Benton County. Whether you need a repair, replacement or inspection, our team shows up on time, communicates clearly and gets the job done right. Homeowners and property managers trust us for fair pricing, honest recommendations and solid workmanship with no shortcuts or upsells. Call today to schedule your free estimate.

Eagle Point Roofing
(541) 908-5956 eaglepointroofing.com
1507 NW 9th St, Corvallis, Oregon
4.8 from 39 reviews
Eagle Point Roofing was founded on a simple principle. Roof it right. We are Licensed, Bonded, and Insured and never cut corners. We specialize in residential roofing. Give us a call for a free consultation today! With so many contractors out their it's hard to know who to trust, let us earn it.
G&A Quality Roofing
(541) 745-8025 gandaqualityroofingllc.com
33934 NE Owl Pl, Corvallis, Oregon
5.0 from 6 reviews
G&A Quality Roofing provides a wide range of expert roofing solutions for residents of Corvallis and the surrounding communities. We are dedicated to delivering exceptional craftsmanship and using only high-quality materials to ensure your home is protected with a durable, long-lasting roof. From new installations to essential repairs and comprehensive inspections, our skilled team is committed to maintaining the integrity and value of your home. Trust G&A Quality Roofing for all your roofing needs, and experience the difference that quality and attention to detail can make.
Renaissance Roofing
(541) 791-4886 www.renaissanceroofing.net
Serving
4.8 from 146 reviews
Since 1993, owners Greg and Laura Evans have committed their time and talents to providing local residents with customer-focused services and quality craftsmanship. They pride themselves on maintaining an upfront, honest line of communication with their clients. At Renaissance Roofing, Inc, we work hard to understand what you hope to achieve in hiring us as your roofing contractor. Our professional team is here to work with you through all phases of your next new roof.
Efficient Roofing
(458) 233-9499 efficientroofing.org
Serving
5.0 from 31 reviews
Efficient Roofing Roofing service, siding service, and gutter services in Albany, Tangent, Corvallis, Millers burg , Jefferson, Lebanon, and all the Willamette Valley. We provide exceptional service, affordable rates, and the very best in customer service so please call us now for a free estimate. When you hire an Efficient Roofing is top-tier roofing service, you aren't just paying for shingles and labor; you are adding several layers of tangible and "invisible" value to your home. In 2026, a professionally installed roof remains one of the most reliable ways to protect a property's market price. Here is a breakdown of the specific value professional roofing services add:
Monroy's Roofing
(541) 740-3735 www.monroysroofing.com
Serving
4.8 from 98 reviews
Monroy's Roofing provides roofing, siding, moss removal, skylights and gutter services to the Albany, OR area.
Orezona Building & Roofing
(541) 981-2190 orezonabuildingcompany.com
Serving
4.3 from 41 reviews
Looking for a reliable roofing business you can count on? With 20 years of experience, Orezona Building & Roofing Inc. specializes in roof repair, full roof installations, and maintenance for both residential and commercial properties in Corvallis, OR. Our skilled roofing contractors deliver high-quality workmanship and exceptional service to keep your property safe and secure. Need fast, reliable help? Whether you’re searching for “roofing repair near me” or require 24-hour roofers for an emergency, our team is ready to respond anytime. Trust Orezona to protect your home or business with durable, long-lasting roofing solutions. Contact us today and experience expert roofing service you can depend on!

Vaughan Construction
Serving
4.7 from 14 reviews
Founded in 2018 after more than 3 decades in the roofing trade, Vaughan Construction, Inc. was built on a commitment to craftsmanship, integrity, and dependable service. Homeowners in Linn, Benton, Lane, Marion, Polk, Lincoln Hwy. 101 cities and surrounding areas—trust us for roof repairs, leak prevention, dry rot restoration, and full roof replacements that stand up to the elements. We understand that your home protects what matters most. That’s why every project receives the same care and attention we’d give our own family’s home—ensuring safety, durability, and peace of mind. Fully licensed, bonded, and insured (CCB #223297) Read our reviews and see why local families count on us when it matters most.
Stutzman & Kropf Contractors
(541) 928-6535 www.stutzmanandkropf.com
Serving
4.6 from 72 reviews
Roofing & Siding Specialists for exterior construction needs. We have been in business since 1968, and believe that customers needs come first. We focus on both Residential and Commercial exterior assemblies. No job is too big or too small.
Palmar Roofing & Siding
(541) 829-3435 www.palmarroofingandsiding.com
Serving
4.9 from 9 reviews
At Palmar Roofing & Siding, we are a licensed, bonded, and insured company with over 25 years of experience offering top-notch solutions for your property. Whether you are in need of shingle roofing work, siding services, or a door and window installation, we have you covered. Our team of professional and qualified experts is dedicated to providing outstanding results that exceed all expectations.

CBGC Construction & Plumbing
(541) 220-3934 cbgcconstruction.com
Serving
4.5 from 8 reviews
Our services include roofing, roofing installation, and roofing repair. We can help you breathe new life into your home or business, from small changes, to complete remodels and additions. We have extensive construction experience and complete every project in time without compromising quality. We’re knowledgeable and professional and provide high quality designs. We’re polite and courteous and make sure to keep all promises we make to our customers. We assure every client that we devote our full attention and skills to their construction needs. Likewise, we pay attention to the client’s concerns and budget. So the client receives designs that are as elegant as they look.
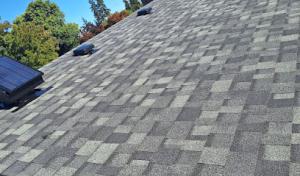
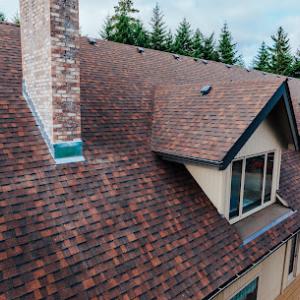
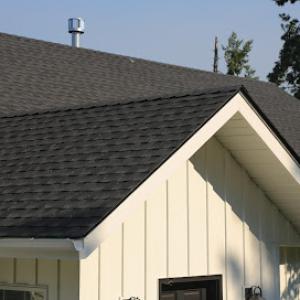
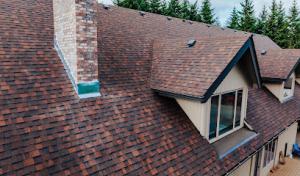
Asphalt shingles are a dominant local choice, and they fit the practical realities of Corvallis's housing stock. In a climate with a long wet season and dry summers, ventilation and the quality of underlayment become central to lifespan. Shingle roofs perform well when the attic is properly vented, allowing moisture to vent and winter condensation to dry out. Look for a high-quality underlayment and a careful installation that ensures drip edges and valley treatments are precisely sealed. In homes with moderate slopes, asphalt remains a flexible, affordable option that can be refreshed with new shingles without a full structural overhaul. Pay close attention to ceiling ventilation in the attic, since poor airflow accelerates moisture-related wear at the roof deck and around penetrations like vent stacks. A well-sealed edge detail and proper flashing at chimneys and skylights reduce winter leaks when the valley snow melt cycles into spring wetness.
Metal roofing has a meaningful specialist presence in this market and is often considered by homeowners looking for stronger wet-weather performance and lower maintenance. In Corvallis, metal panels handle freeze-thaw cycles and humidity well when installed with solid fasteners and a continuous underlayment. A metal roof can shed雨 more efficiently in the wet season, which helps minimize ice dam risk on steeper sections and reduces long-term staining from moisture exposure. The key is to pair metal with a breathable, moisture-mopping attic space and a roof deck protected from trapped moisture. For homes with complex shapes or multiple penetrations, a meticulous installation process matters even more to prevent leaks around ridges, eaves, and skylight transitions. If you anticipate heavy moss or algae exposure on shaded roofs, consider coatings or finishes that resist biological growth while maintaining reflective properties to curb heat gain in dry summers.
Clay tile, concrete tile, wood shakes, and slate are all present in the local material mix, but their suitability depends heavily on structure, slope, and moisture management in the Willamette Valley climate. Tiles and shakes can tolerate humidity when the roof structure is correctly reinforced to handle weight and when flashing details are robust at penetrations and transitions. In homes with steeper pitches, these materials can be long-lived if the repetitive freeze-thaw stress is addressed through proper installation and continuous attic ventilation. Clay and concrete tiles demand precise alignment and a solid substrate to prevent debonding during wet winters. Wood shakes bring a natural look and strong insulation potential but require diligent maintenance to stave off moisture intrusion and decay in damp seasons. Slate offers exceptional durability, but the weight requires structural verification and careful waterproofing around hips and valleys to keep the interface with moisture resilient over decades. For all these options, the overarching message is moisture management: the roof must dry out between storms, and the installation must channel water away efficiently to extend service life.
In Corvallis, full re-roofing with asphalt shingles sits around $400 to $750 per square, depending on the chosen shingle quality and roof complexity. Local pricing reflects the prevalence of full replacements as the signal service. Because the Willamette Valley's wet season can extend tear-off and dry-in windows, plan for additional labor time if your roof deck has lingering moisture. Costs can spike if decking or flashing shows moisture damage, not just cosmetic wear. For budget-conscious homes, asphalt remains the most common full-replacement choice, with a practical balance of durability and timing when storms cooperate.
Metal roofs run roughly $600 to $1,200 per square for full re-roofing. In Corvallis, metal can handle the wet-winter climate well, but the full replacement process may require careful staging during rain windows. If moisture exposure has affected underlayment or flashing, expect higher costs due to dry-in coordination and potential flashing revisions. Metal typically pays off over time with longevity, though it's more sensitive to roof geometry and fascia details, which helps explain variability in bids after a full tear-off.
Clay tile full re-roofing commonly falls in the $1,000 to $1,800 per square range. The local market treats tile as a long-term investment, often chosen where climate expectations favor durability. Wet-season scheduling can limit on-site access, increasing labor time during tear-off and dry-in. If the underlying decking or supports show moisture damage, costs rise quickly as structure repairs become part of the project.
Concrete tile for a full roof replacement runs about $900 to $1,600 per square. Corvallis climates with moisture exposure mean that decking and flashing inspections are routine, and damaged framing can shift a project from cosmetic to structural repairs. Expect similar rain-window delays in wet months, plus additional staging if roof geometry requires extra metering of materials.
Wood shingles or shakes typically range from $700 to $1,200 per square for full re-roofing. Local homes often feature heavier moisture cycles, so full replacements commonly uncover degraded decking or missing flashing. Scheduling during the wet season can extend installation time, and careful handling is needed to prevent moisture-related warping or mold concerns.
Slate full re-roofing sits at roughly $1,500 to $3,200 per square. In Corvallis, slate projects emphasize meticulous tear-off and dry-in planning due to moisture and freeze-thaw stress. Expect the highest sensitivity to decking condition and flashing integrity, which can push costs beyond the base material price if repairs are required after inspection. Wet-season delays are typical, but slate's durability often justifies the longer schedule when properly staged.
Get a clear picture of your project costs upfront - no commitment required.
Alamo Roofing
(541) 929-9565 alamoroofingllc.com
1840 SW 69th St, Corvallis, Oregon
4.8 from 55 reviews

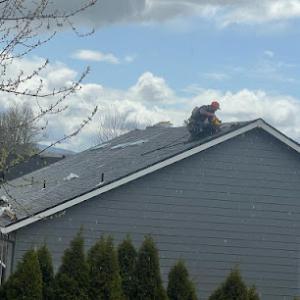
Before pulling shingles, you need to know that a full re-roof typically requires a building permit issued through the City of Corvallis Building Division. This process helps ensure that deck connections, attic ventilation, underlayment choices, and venting align with local codes and climate realities. The permit is not a mere formality; it establishes a trackable plan for the project and sets the stage for the inspections that keep your roof resilient through Corvallis's wet winters. Having the plan in hand during the initial contact with a contractor can save delays and clarify what materials and methods will be approved.
Local inspections usually occur at important milestones: after tear-off or underlayment installation, and again at final completion. The tear-off stage confirms that the roof deck is sound, free of rot, and ready for weatherproofing. The underlayment milestone ensures that the correct layer thickness, flashing detail, and roof-to-wall transitions are in place before shingles go on. A final inspection verifies that penetrations, vents, ice-damming protections, and any required ventilation are correctly installed and compliant. Because Corvallis experiences a longer and wetter season, inspectors pay close attention to how the roof will perform when the first real rains hit and how well the dry-in is protected.
Weather in this region can interrupt roofing work more often than in drier climates. Dry-in coordination matters as much as the actual shingle application. Plan for possible pauses due to rain, and build buffer time into the project schedule to avoid rushed dry-in work when windows of dry weather appear. If a delay pushes the project into late fall or early winter, discuss with the inspector how to maintain continuous protection for the exposed deck and underlayment material. A well-communicated sequence reduces the risk of wind-driven damage or moisture intrusion during weather gaps.
Coordinate with the contractor to align tear-off, underlayment, and shingle installation with the anticipated weather window. Confirm the permit status and expected inspection dates, and keep a clear line of communication with the Building Division if plans shift. Prepare for a potential re-inspection if weather or scheduling caused a gap between milestones. With proper timing and accurate documentation, the inspection process supports a durable, rain-ready re-roof that stands up to Corvallis's wet-season demands.
Insurance in this area tends to be stable, but robust documentation is essential when re-roofing or handling storm-related claims. The typical claim path relies on clear photos, a professional estimate, and a detailed scope that names materials and installation methods for the adjuster to review. When a spring hail event or a windy episode touches the neighborhood, prompt photo documentation matters, especially before wet weather compounds damage or hides problems. This is particularly true for aging roofs that have absorbed moisture year after year.
Begin with wide exterior shots that show roof exposure, along with any visible damage near transitions, vents, skylights, and chimneys. Close-ups should capture asphalt granule loss, lifted shingles, dented metal, curling edges, and signs of moisture intrusion on interior ceilings or attic insulation. Photograph the surrounding property for context-trees brushing the roof, overhanging branches, and any recent debris. Create a simple, dated photo log and note the exact location of any damage spots (e.g., rear slope near dormers). Keep all receipts for emergency tarping, temporary repairs, or diagnostic inspections.
Collect a thorough, itemized estimate from a licensed roofer, plus a detailed scope that identifies materials, underlayment, ice and water shield usage, and installation methods if applicable. The estimate should align with typical Corvallis exposure to moisture and freeze-thaw cycles, highlighting how the chosen system addresses moisture management and long-term aging. Present the packet in a logical order: photos, interior indicators, exterior damage summary, then the scope and estimate. Store digital copies in multiple places and keep a paper backup. If questions arise, your roofer can provide a professional diagnostic letter to accompany the claim.
Find local contractors experienced in assessing and restoring roofs after hail, wind, and severe weather events.
A skylight can be a welcome source of light in homes with long rainy seasons, but the leak risk climbs in the Willamette Valley climate. Local skylight work has a meaningful presence among Corvallis contractors, which aligns with leak concerns during the city's long rainy season. When installed or repaired, the flashing, curb, and sealant choices matter as much as the skylight itself. Improper flashing can funnel winter moisture right into the interior, turning a simple skylight into a persistent nuisance. If a skylight is original to a mid-century home, expect aging gaskets, glazing, and frame timbers to degrade faster in this damp environment. You should plan for a careful assessment of the flashing terminations around the skylight curb, the condition of the sealant joints, and the compatibility of any new flashings with existing roofing materials. Don't assume a skylight is fine because it appears dry on a sunny day; the real test comes with the first heavy winter shower.
Low-slope and flat-roof expertise is present but not dominant locally, suggesting these roof areas need more selective contractor screening rather than assuming every roofer handles them well. In practice, that means verifying a contractor's experience with the exact detailing your roof requires: proper membrane type, edge termination, and the way penetrations are flashed. Transitions where the roof meets walls, curbs, and penetrations are common trouble spots after multiple wet seasons, so pay close attention to how these details are sealed and maintained. A shallow fall across a flat area can conceal ponding that accelerates wear, so insist on a tested water test during installation and periodic rechecks as seasons change.
In December through March, persistent winter moisture makes transitions, curbs, and penetrations more likely trouble spots than broad field areas alone. Schedule targeted inspections after heavy storms, focusing on skylight seals, curb joints, flashing, and any penetrations through the roof plane. Early signs-tiny weeps, staining, or soft spots around a skylight or along a flat-roof edge-mean action before interior damage appears. Treat these areas as ongoing maintenance priorities rather than one-off repairs to avoid escalated leak risk when the next wet season arrives.
Find contractors experienced in skylight installation, flashing, and leak repairs to bring natural light into your home.
IronHead Roofing
(541) 203-0974 ironheadroofing.com
4515 NE Elliott Cir, Corvallis, Oregon
4.8 from 183 reviews
Alamo Roofing
(541) 929-9565 alamoroofingllc.com
1840 SW 69th St, Corvallis, Oregon
4.8 from 55 reviews
Corvallis faces long wet seasons and quick turnarounds when leaks appear during extended rain. Start by narrowing to local roofers who regularly service residential homes in neighborhoods similar to yours. Look for crews that list recent projects in nearby streets and can point to nearby homeowners as references. The goal is to identify teams familiar with moisture-driven aging and the added stress of freeze-thaw cycles on common local materials.
Cleanup is a highly prevalent market expectation in Corvallis, so homeowners should confirm debris handling and site protection as part of the written scope. Ask for a documented plan that specifies drop cloths, tarps, and debris containment, plus where waste is staged and when the area is left broom-swept. Ensure the scope includes protection for landscaping, driveways, and adjacent structures, given the valley's frequent winter mud and spring melt.
Quick response is a strong local hiring signal, which matters in Corvallis when active leaks develop during extended rainy periods. During conversations, gauge how the contractor prioritizes emergency calls, estimated arrival windows, and contact methods after hours. A responsive crew often reflects better on-site coordination and reduced interior water intrusion during storms.
Because licensed and insured signals appear regularly but not universally in this market, homeowners should verify both rather than assume them. Request current license details and insurance certificates, and verify coverage for workers' compensation and general liability. Do not accept verbal confirmation; obtain copies and verify with the issuing agencies.
Ask for recent local references with projects similar in size and roof type. When possible, arrange a brief on-site evaluation with the roofer to discuss material-specific aging, moisture exposure, and anticipated replacement timing. A trusted team will walk the roof line, note visible wear, and outline a clear, written plan for addressing moisture-driven aging.