Last updated: Apr 19, 2026
Conway homeowners face a coastal South Carolina insurance environment where wind, hail, and tropical-storm claims are common enough that roof replacement decisions are often tied to storm documentation rather than age alone. When a major weather event rolls through, the market shifts quickly: insurers scrutinize what happened, when it happened, and how fast the roof was dried in and sealed after the event. In this climate, contractors who can document rapid, dry-in progress and code-compliant decking and underlayment gain credibility with both homeowners and adjusters. The combination of inland humidity, floodplain exposure from the Waccamaw corridor, and summer storm patterns makes proactive planning essential. If a roof sustains damage during or soon after a major storm, waiting for the next change in market sentiment can leave you exposed to more leaks and higher risk of wind-driven rain entering under lifted shingles or flashing during active roofing work.
The first hours after a storm are critical for evidence. Take clear, date-stamped photos of all affected areas, focusing on lifted shingles, damaged flashing, and interior signs of moisture intrusion. In Conway, adjusters expect to see a documented narrative of what failed, when it failed, and how the roof was addressed in the immediate aftermath. Pre-loss photos of the entire roof help establish baseline condition, but after a storm, emphasize newly visible damage and any intrusions from wind-driven rain. If possible, capture videos that show wind-related movement under shingles or flashing during windy conditions. Keep a simple chronology of repairs and temporary protections, because claim reviewers in this region often correlate the sequence of events with the storm timeline. This approach speeds up claim processing and reduces back-and-forth with the insurer.
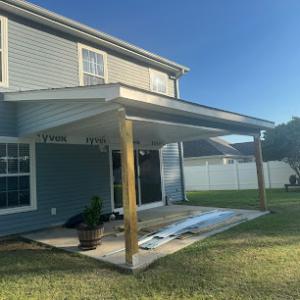
Summer hurricane season raises the risk of wind-driven rain entering under lifted shingles or flashing during active roofing work, so scheduling and dry-in speed matter more here than in less storm-exposed inland markets. Coordinate with the chosen contractor to establish a firm dry-in target and contingency plans for wet spells. If a storm is forecast, consider delaying non-urgent work until the window for drying is more favorable, and ensure temporary weatherproofing is applied to critical seams and penetrations. In practice, locking in a replacement timeline that minimizes exposure to back-to-back storms can reduce the chance of new damage during the project. Quality workmanship matters even more when time pressure is high: a secure, weather-tight temporary cover that resists wind uplift and water intrusion is essential.
Adjuster activity typically increases after major regional storms affecting Horry County, making pre-loss photos, date-stamped damage images, and proof of code-compliant decking and underlayment especially important in Conway claims. Be prepared to provide contractor quotes, a clear history of repairs or temporary protections, and a concise damage causal link to the storm. Stay proactive: deliver documentation promptly, confirm the adjuster's preferred format for photos, and keep your contractor involved so that all documentation aligns with the claimed scope. Clear, organized records reduce friction and help secure the most accurate, timely settlement possible after a severe weather event.

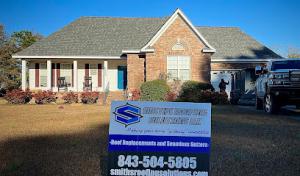
Smith's Roofing Solutions
(843) 504-5805 smithsroofingsolutions.com
4924 Price Rd, Conway, South Carolina
5.0 from 93 reviews
When you choose Smith's Roofing Solutions, we are confident you will be satisfied with our services. We have over 10 years of experience in the roofing industry, and we bring our expert knowledge and skills to every project we do, whether you need roof inspection, installation, repair, maintenance, or replacement. Equipped with high-quality materials and the best tools, we will address your roofing needs quickly and thoroughly. You won’t find better craftsmanship or customer service in the Conway, South Carolina area. We are an honest company that offers fair pricing, excellent warranties, and exceptional results every time. Contact us today for a free estimate.
Horizon Roofing Exteriors
(843) 653-0035 www.horizonroofing.us
Conway, SC
5.0 from 36 reviews
Horizon Roofing is your trusted local roofing expert, specializing in roof replacements, repairs, storm damage restoration, and insurance claims. With a customer-first approach and years of hands-on experience, we’re committed to delivering quality craftsmanship and stress-free service from inspection to completion. Whether you’re dealing with a leaking roof, storm damage, or need a full replacement, our knowledgeable team is here to guide you every step of the way. We work directly with insurance companies to ensure a smooth claims process and peace of mind for every homeowner.

Collins Roofing & Repair
(843) 536-5951 www.collinsroofandrepair.com
216 Labonte St unit AA, Conway, South Carolina
4.9 from 52 reviews
Collins Roofing and Repair offers unmatched expertise built over three decades. Serving Florence County, our specialists deliver durable roofing solutions tailored to the local climate. Every project, from minor repairs to full replacements and waterproofing, reflects a commitment to protecting property from the elements. Clients benefit from a customer-centric approach that prioritizes transparent communication and timely completion. Personalized plans align with specific budgets and preferences, ensuring high-quality results. Reliability remains the foundation of our business, providing peace of mind through expert craftsmanship. Trust Collins Roofing and Repair to safeguard your home with integrity and professional care.
Spann Roofing & Sheet Metal
(843) 347-2220 spannroofing.com
459 Allied Dr, Conway, South Carolina
4.8 from 118 reviews
Spann Roofing & Sheet Metal, Inc. was formed in 1957 to serve Horry, Georgetown, Florence, and Brunswick County. Spann Roofing can take care of your roofing needs. Over the course of more than 64 years, Spann Roofing has roofed over 15,000 commercial and residential buildings and repaired 3 times the roofs. Our services are not limited to commercial roofing. Spann Roofing is also equipped for the installation or roof repair, of residential homes

Homewood Metalworks
(843) 365-9111 www.homewoodmetalworks.com
421 Commerce Pk Dr, Conway, South Carolina
4.8 from 81 reviews
With over 35 years of experience in the construction business, and as an Unlimited Licensed General Contractor, Homewood Metalworks locally manufactures custom metal roofing and wall panels, as well as all accessories out of our 68,000 square foot warehouse in Conway, SC. We provide an extremely experienced crew, our own fleet of construction vehicles and heavy equipment – all of which are ready for utility installation and construction projects. Homewood Metalworks has sales offices in Conway, Florence, Moncks Corner SC, and Laurinburg, NC. We can handle any metal roofing, trim, or metal building needs. Stop by and meet with one of our sales consultants or receive a free quote by phone or website. We're open to the public!
Maranatha Roofing
(843) 957-4040 maranatharoofs.com
1520 Ned Ln, Conway, South Carolina
4.8 from 19 reviews
When it comes to something as important as your roof, you want to make sure it's handled correctly. We take pride in our craftsmanship and attention to detail, so you can rest assured you'll get a flawless installation or long-lasting repair. Our family owned and operated roofing company employs a small, trusted team and our owner is on every job site to ensure everything goes smoothly. Our business consist in offering quality labor on our customers roof, we offered a variety of roofing options to our customers from Asphalt Shingles, metal or tin roof , and rubber for flats roofs. We also offered emergency roof repairs. We are a trusted roofing company in the city of Myrtle beach and Conway, SC area.
Professional Roofing
(843) 369-7663 e1f41197-1cf5-45e5-964f-4391f3cffd24.godaddysites.com
3647 US-501, Conway, South Carolina
4.6 from 21 reviews
Professional Roofing, LLC, an established roofing contractor and skilled metal fabricator in Conway, SC, has been providing exemplary roofing solutions and customized metal fabrications since 2006. This elite roofing company takes pride in their superior craftsmanship, dedication to customer satisfaction, and unparalleled ability to bring vision to life through innovative metal creations. From intricate designs to functional roof repairs, Professional Roofing aims to serve as your trusted roofing ally, ensuring your property's beauty and protection.
Morales Roofing & Construction
2570 N Main St, Conway, South Carolina
4.7 from 13 reviews
Roofing and exterior repair. Metal, tpo, PVC, epdm, shingles, build up modified roofing vinyl siding gutters metal fascia
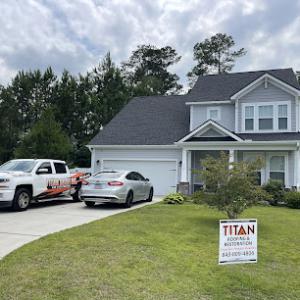
Titan Roofing & Restoration
1848 Riverport Dr, Conway, South Carolina
5.0 from 6 reviews
Residential, commercial, insurance claims specialist to get your roof paid by your insurance provider. Retail roof replacement.

Revolution Roofing
(843) 796-1026 www.revolutionroofingllc.net
3035 Barnfield Rd, Conway, South Carolina
5.0 from 3 reviews
Our goal here at Revolution Roofing is to provide every homeowner, business, or HOA with a personal and hands on experience, coupled with an honest inspection, quality craftsmanship, and integrity. Revolution Roofing is a local & woman owned business, dedicated to exceptional business practices, superb workmanship, and providing the best roofing services possible. By building relationships with the best local suppliers, as well as training and certification from the largest roofing manufacturers in the Country (GAF and CertainTeed), Revolution Roofing can offer better warranties, and superior expertise to ensure every customer better peace of mind. Revolution Roofing handles everything from repairs and general maintenance to full roof repl
Derrick French Remodeling
1300 Hemingway Chapel Rd, Conway, South Carolina
3.8 from 13 reviews
Strictly Residential Remodeling Specialist Roofing Carpentry Painting Decks Make Your Dream Home a Dream Come True From Georgetown and Horry Counties in South Carolina, Derrick French remodeling guarantees, Whether a small scale renovation or complete home renovation you will love your new living space. Come experience our high-quality construction for yourself. Schedule a FREE, no-obligation consultation in which we will work together to talk about your vision and evaluate your needs for your home. Call (843)-655-9030 today! we stay small, to better serve ya"ll !! We carry a wide range of products to suit a variety of budgets and tastes. Our most popular products are shown below. Please call or e-mail us for more information on products...
Above the Rest Roofing
(843) 504-2421 abovetherestroofingsc.com
1664 State Hwy 548, Conway, South Carolina
4.3 from 8 reviews
Don’t let a pesky leak turn into a bigger, more expensive issue. If left untreated, roof problems can cost thousands of dollars in damages, so call a professional roofing contractor like Above the Rest Roofing when you need help. Based in Conway, SC, this company serves home and business owners throughout Horry, Marion, and Florence counties. The next time you’re looking for a roofing contractor or home remodeler, get in touch with Above the Rest Roofing. Their attention to detail, exceptional craftsmanship, and dedication to customer service truly set them apart from others in the industry. Call them today at (843) 504-2421 for a free estimate or visit them online to learn more about their services.
The Waccamaw River floodplain drapes over this area with a steady whisper of moisture that never fully goes away. A roof here is under a near-constant backdrop of damp air, which matters as soon as a storm passes. After a tropical or strong summer shower, the lingering moisture can keep decking and underlayment damp longer than you'd expect. That dampness accelerates aging in components that weren't designed to stay moist for days on end, even if temperatures aren't freezing. The result is a roof system that looks fine to the eye but is aging from the inside out, right where it counts: the layers that keep water out.
In this climate, the telltale signs of trouble aren't only the obvious drips during a downpour. Decking deterioration can show up sooner than most homeowners expect, especially if a storm leaves the surface wet for extended periods. Underlayment breakdown becomes a common culprit when rains come in quick succession, and algae staining can emerge on shaded or north-facing slopes from the constant humidity. Ventilation-adjacent attic moisture is another frequent theme, since moisture tends to linger in attic spaces when intake vents aren't paired with robust exhaust or when insulation isn't holding back condensation. These problems-decking softness, weakened underlayment, algae films, and attic moisture-often point to a longer-term pattern rather than a single weather event. Understanding this helps in prioritizing repairs that protect the roof's core structure.
Spring thunderstorms and year-round humidity make material storage on site more sensitive. Any tear-off that leaves decking exposed between rain events becomes a risk, because new underlayment or fresh roof decking can start to absorb moisture before installation is complete. If a contractor schedules a tear-off during a stretch of wet weather, expect delays and plan for longer exposure of exposed framing. Even small delays can allow moisture to migrate into the roof deck, compromising fastener longevity and the seal around flashings. On the other hand, a dry, extended window can help the new layers cure properly and reduce the chance of board swelling after installation.
When light rain becomes a daily companion for days on end, a roof system benefits from a prudent approach to moisture management. Prioritize a thorough inspection of decking for any soft spots or visible water staining. Ensure underlayment choices align with humidity and rain exposure patterns, and verify attic ventilation supports efficient moisture removal year-round. If algae appears, address it promptly with appropriate cleaners that won't damage fibers or leak paths, then re-evaluate the shading and ventilation balance in the attic. By acknowledging the local moisture rhythm and its real consequences, homeowners can steer maintenance and replacements toward roofs that hold up longer under the floodplain's persistent dampness.
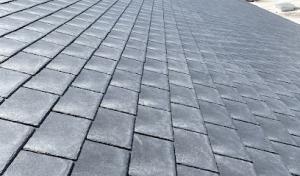
Asphalt shingles remain a dominant choice in Conway because they fit the area's large re-roofing market. They are familiar to local crews, widely stocked, and relatively quick to install, which matters when storm damage or rapid leaks drive a roof project. However, these shingles are vulnerable to wind uplift, granule loss, and accelerated aging under hot, humid summers. When choosing asphalt, look for higher wind resistance ratings and a thicker overall shingle profile to improve durability during tropical storm events. Pay attention to adhesive tabs and nail patterns recommended by the manufacturer, and plan for a robust underlayment and proper attic ventilation to mitigate humidity-driven issues.
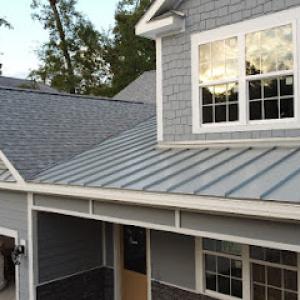
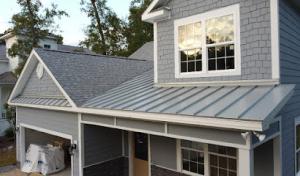
Metal roofing has strong local relevance in Conway because it handles heavy rain well and is widely offered by area contractors, making it a practical upgrade path for homeowners prioritizing storm resilience and lower maintenance. Metal panels or laminated options can deliver superior wind resistance and faster water shedding after a downpour. In this market, installers emphasize precise flashing around chimneys, vents, and dormers, plus careful ridge cap detailing to avoid water intrusion. If choosing metal, ensure the roof deck and fasteners are rated for humid coastal conditions and that coatings are chosen for longevity in heat and salt exposure.
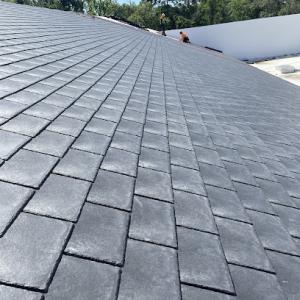
Clay tile, concrete tile, wood shakes, and synthetic/composite products appear in the market but require closer attention to structural load, fastening, moisture management, and replacement-part matching in a humid coastal South Carolina setting. Clay and concrete tiles demand a stiffer roof structure and careful spacing to prevent bulk failures during wind-driven rain. Wood shakes bring aesthetic appeal but can suffer from moisture-related splitting or rot unless properly treated and ventilated, and they demand regular maintenance. Synthetic or composite options often aim to blend appearance with resilience, yet faster aging under humidity is possible if sun exposure and heat cycles are not mitigated. In all cases, verify that fastener schemes and sealants account for the local humidity, and confirm that repairs or matches align with existing profiles and shingle molds used on the home. For any non-asphalt choice, coordinate with a contractor who can assess load, moisture pathways, and seal integrity against recurring tropical weather. In short, the best non-asphalt path balances wind resistance, moisture management, and compatibility with the home's structure and the surrounding climate. In Conway, trusted local crews routinely tailor these details to the specific wind zones and floodplain-driven exposure that shape every roofing decision.
In Conway, storm season and tropical systems push demand for roof work across Horry County, tightening labor and squeezing scheduling windows. That means when a heavy rain event or wind-driven damage occurs, you'll see not just higher material costs but faster-moving crews and tighter timelines for completion. Costs can drift upward after tropical systems as contractors balance backlogged jobs with new calls, so planning ahead helps avoid peak-price windows.
Typical Conway pricing follows these ranges per square: asphalt shingles 350 to 600, metal 700 to 1300, clay tile 1100 to 2000, concrete tile 900 to 1600, wood shingles or shakes 500 to 1000, and synthetic or composite shingles 600 to 1000. Use these figures to scope bids and check installers' math on the line items. When a tear-off is required due to moisture-damaged decking or ventilation corrections flagged during inspection, expect the price to nudge higher because labor and disposal time increase. The size of the roof, slope, and access also influence the square-footage math and scheduling flexibility.
Local swings are driven by tear-off complexity from moisture-damaged decking and the need to correct ventilation or attic venting during the replacement. Re-roofing an existing home often costs more than a simple new-construction install because crews must match with existing structures, deal with rotted sheathing, and remove weathered underlayment. If a roof has multiple layers, pricing can jump further due to disposal and safety requirements. Materials selected in the wake of a storm may also be in high demand, shortening lead times or increasing supplier costs.
Start with a professional inspection to distinguish between cosmetic damage and structural failure. If replacement is needed, compare bids that itemize tear-off, decking repairs, and ventilation work separately from the material choice. Prioritize options that offer durable weather resistance suited to inland humidity and heavy rain, while balancing your upfront cost with long-term maintenance. Plan for potential scheduling gaps after tropical events by building in a buffer for start dates and allow for longer lead times on premium materials.
If time and budget allow, asphalt shingles deliver the lowest entry price, while metal or tile options offer longer life under the local humidity and storm exposure. Remember the cost ranges per square noted above, and align material selection with the expected wind-driven rain patterns and insurance-driven replacement timelines that characterize this market. When storms loom, secure a trusted contractor early to lock in availability and stabilize the project window.
Get a clear picture of your project costs upfront - no commitment required.
Smith's Roofing Solutions
(843) 504-5805 smithsroofingsolutions.com
4924 Price Rd, Conway, South Carolina
5.0 from 93 reviews

Homewood Metalworks
(843) 365-9111 www.homewoodmetalworks.com
421 Commerce Pk Dr, Conway, South Carolina
4.8 from 81 reviews

Above the Rest Roofing
(843) 504-2421 abovetherestroofingsc.com
1664 State Hwy 548, Conway, South Carolina
4.3 from 8 reviews
In Conway, a full roof replacement typically requires a building permit, so homeowners should confirm permit responsibility before work starts rather than assuming a re-roof is exempt. The county and city inspectors expect a complete scope of work, including the removal of old decking if needed, and any changes to structural elements. Before scheduling the crew, verify who will pull the permit, who will be the licensed contractor of record, and what the permit covers. If a subcontractor handles the work, ensure the lead contractor coordinates the permit and aligns with the local code department's timelines to avoid delays during the project.
Local inspections commonly occur at rough-in and final, with attention to decking condition, underlayment, nailing patterns, and ventilation details rather than just the finished shingle surface. During rough-in, inspectors will check that the roof deck is sound, clean, dry, and properly fastened, and that the underlayment and flashing details are in place according to code. In the final inspection, they'll confirm that the attic ventilation strategy meets requirements and that nailing patterns align with the chosen material, ensuring wind resistance and leak protection. Expect a close look at venting, soffit lines, and any attic baffles to prevent condensation and mold.
Because Conway sits in a storm-claim-heavy region, inspection-ready documentation of decking repairs and dry-in details can matter both for approval and for later insurance support. Keep a meticulous record: photos of the deck before and after repairs, notes on any decking replacements, dry-in coverage, and every phase of the weatherproofing sequence. When an inspection is anticipated after a tropical event or heavy rain, having scanned drawings, product specifications, and contractor statements ready can facilitate smoother approvals and faster insurance processing if needed.
Coordinate with the contractor to schedule permit pulls and inspections promptly, so there are minimal gaps between work phases. Ask the inspector for a pre-inspection walkthrough to address potential issues before they become punch-list items. Maintain a tidy site with clear access to the roof, ventilation intakes, and attic spaces. If decking repairs were required, keep the replacement materials on site and document the exact locations and methods used. Finally, communicate any changes in the project scope to the permit holder promptly, so the final inspection proceeds without delays and aligns with local expectations.
Before a new roof goes on, you should expect insurers to want a clear, dated trail of the old roof and the proposed replacement. In this market, photos taken from ground, attic, and deck angles matter because adjusters look for what's hidden behind decking and underlayment. A neighbor who treated pre-work scenes like a job-site audit saved hassles later when a storm claim came through. Take wide shots of the entire roof, then tight captures of any damaged areas, flashing, and the edges where water first tests the barrier.
After installation, the documentation burden intensifies, especially if wind, hail, or tropical-storm damage triggered the replacement. Insurers expect thorough post-install photos that corroborate the finished work against the original scope. Focus on deck condition, nail patterns, and the alignment of underlayment and flashing. If anything was replaced due to hidden damage, show close-ups of the deck, joists, and any new drip edges. Store these images in a dated, organized folder so an adjuster can locate them quickly.
Evidence that decking and underlayment meet current code is not decorative; it's a line item insurers scrutinize. Hidden components-like fasteners, seals, and matting under shingles-will be weighed for evidence of proper replacement after a storm loss. Keep receipts or supplier notes for decking boards, underlayment type, and fastener specs, and pair them with corresponding photos. If a claim turns on whether a component was updated or treated to current standards, the documentation you gathered in advance can make the difference in claim resolution.
Statewide caution on coastal risks translates into underwriting shifts and possible renewal challenges. The practical effect is that roof condition matters beyond a single claim cycle. Maintain a living record: annual check-ins with updated photos of the roof's surface, flashing, and eaves. When a storm season looms, your prepared dossier not only supports claims but also helps preserve insurability across policy renewals, reducing the chance of stalled or denied coverage when you need it most.
Connect with contractors who help homeowners navigate the claims process from damage assessment to final approval.
Smith's Roofing Solutions
(843) 504-5805 smithsroofingsolutions.com
4924 Price Rd, Conway, South Carolina
5.0 from 93 reviews

Spann Roofing & Sheet Metal
(843) 347-2220 spannroofing.com
459 Allied Dr, Conway, South Carolina
4.8 from 118 reviews
Conway's frequent heavy rain makes low-slope transitions, porch tie-ins, and drainage details more failure-prone than they appear during dry weather, especially on older re-roof projects. When inspecting a roof with a low-slope section, prioritize the transitions where the porch roof meets the main field, as those seams tend to pool water and push it toward fasteners and underlayment gaps. Look for soft spots or damp boards in attic access zones that align with poor drainage notes on the ceiling inside.
Skylights need extra scrutiny in this market because repeated wind-driven rain can expose flashing weaknesses that may not show up in lighter climates. Check the skylight curb for corrosion, dried-out sealant, and degraded flange seals after every heavy rain event. Pay attention to the drip edge and counter-flashing where the skylight meets the roof deck, and run a careful water test around the periphery. In older roofs, consider upgrading to reinforced flashing or a skylight with a taller curb to reduce the risk of leaks in storm season.
Homes with mixed roof geometries often need leak diagnosis beyond the field shingles, including penetrations, wall intersections, and any area where humid conditions keep assemblies wet longer. Inspect intersections where walls meet eaves, vent stacks, and exhausts; those junctions commonly trap moisture and push it into decking over time. In Conway, extended humidity can mask slow leaks, so look for staining along rafter tails and at joint lines between roof planes.
When you see multiple materials or a change in slope within a single roof assembly, treat the detail as a potential leak hotspot. Ensure that drainage paths are continuous and unobstructed, with correctly installed underlayment under any transitions. If the roof ties into a porch, double-check the waterproofing at the ledger and the gutter lines to prevent water from backing up into the deck-to-roof interface.
Find specialists in TPO, EPDM, and built-up flat roofing systems for residential and commercial properties.

Collins Roofing & Repair
(843) 536-5951 www.collinsroofandrepair.com
216 Labonte St unit AA, Conway, South Carolina
4.9 from 52 reviews
Spann Roofing & Sheet Metal
(843) 347-2220 spannroofing.com
459 Allied Dr, Conway, South Carolina
4.8 from 118 reviews
Maranatha Roofing
(843) 957-4040 maranatharoofs.com
1520 Ned Ln, Conway, South Carolina
4.8 from 19 reviews
Spring and fall drive Conway's roofing pace because homeowners want to dodge peak summer hurricane disruption and the damp, slower conditions of late fall and winter. If a leak shows up in spring, expect crews to fill gaps quickly but plan for possible weather-driven delays as afternoon thunderstorms roll through. Fall brings a rush of replacements before holiday weather sets in, so scheduling early is key. Use the shoulder months to line up materials, confirm roofer availability, and avoid the week-to-week scramble that follows a tropical event.
Spring thunderstorms in Conway can interrupt tear-offs and deliveries with little notice, so staging and same-day dry-in planning are more important than in drier regions. If a crew suspects a worsening storm window, be prepared for short-notice pauses and a compressed schedule once the weather clears. Dry-in readiness-tarps, secure ventilation, and fast-dry substrates-matters more here, where sudden rain can catch a project mid-progress. The goal is to keep the project moving without sacrificing warranty-compatible installation standards.
Late fall and winter are mild but can still be damp enough to slow progress and affect installation timing for some materials even without severe cold. Expect shorter crews or shifted timelines after rain events, with potential indoor staging for underlayment and starter strips when days drift toward dampness. If the forecast shows several back-to-back wet days, a well-coordinated plan with dry-in contingency helps prevent fencing and debris from creating safety or access issues on the job site.
Coordinate communication with the roofing crew at least a couple of weeks in advance during peak seasons. Ask for a provisional start window that accounts for potential weather pauses, then confirm a backup dry-in day. Have a clear plan for material delivery alignment with tear-off progress, so a storm won't stall the entire project. In peak times, consider staggered milestones-tear-off, underlayment, and final install-so if rain interrupts one phase, another can proceed without losing momentum.
In Conway, the market is driven by after-storm leaks and rapid re-roofing needs, so start by identifying contractors who routinely handle decking replacement thresholds, ventilation fixes, and thorough cleanup on occupied homes. Ask for a clear explanation of when decking must be replaced versus repaired, how attic ventilation will be corrected to prevent future moisture buildup, and what the crew does to protect personal belongings during the job. A contractor who can walk through these specifics without hesitation tends to be a better fit for the inland humidity and heavy rain patterns seen here.
Quick response and cleanups are standard expectations in this area because many projects begin soon after leaks or storm damage. Look for a contractor who can commit to a timely arrival window, a defined daily work plan, and a post-work cleanup routine that leaves the yard and landscaping free of nails, debris, and stray tools. On occupied homes, confirm that the crew has a practical plan to protect interior spaces, relocate or shield outdoor furnishings, and minimize disruption to daily routines.
Long-established residential roofers are a visible part of the local landscape, so comparison should extend beyond price. Prioritize contractors who document storm exposure and damage, share a transparent scope of work, and present a concrete post-job punch list with sign-off checkpoints. Verify that the contractor can provide clear warranty terms, a detailed material and labor timeline, and a plan for handling any post-installation issues that could arise after a storm season or heavy rain.
Finally, ensure the contractor communicates in plain terms about what to expect during the re-roof process, how weather-related delays will be managed, and how updates will be provided if a second pass or adjustments are needed after initial installation. In a market where reliability, clear documentation, and careful post-job follow-through matter, the right partner will translate Conway's storm-driven realities into a straightforward, accountable project plan.