Last updated: Apr 19, 2026
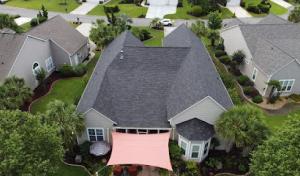
Murrells Inlet sits on South Carolina's exposed Grand Strand coast, so Atlantic hurricane season from June through November directly affects reroof scheduling and emergency repair demand. The combination of salt air, high humidity, and frequent wind-driven rain means roofs face relentless assault when storms roll in. In this setting, even surfaces that look intact can suffer hidden damage at ridge lines, valleys, flashing, and underlayment, where wind-driven spray penetrates and moisture migrates. A roof that seems sound after a lull can reveal accelerated deterioration after a single strong event. The consequence is not just costly repairs, but unsafe indoor conditions during storm surge and heavy rain.
Coastal storms push water past vulnerable details long before shingles are ripped from their nails. In Murrells Inlet, the most common failure modes are along the ridge cap, at step flashings where walls meet the roof, and around chimneys and vent pipes where sealants break down under salt-tinged spray. The underlayment can soak through if attic ventilation is poor, and algae-prone shading near marsh and inlet areas accelerates moisture retention on the roof deck. A single rain-driven event can cause interior staining, mold growth, and cascading damage to ceilings and insulation, even if the outer surface remains largely intact.
Dry, lower-wind periods are preferred locally for full replacements because coastal weather shifts can interrupt tear-offs and leave homes exposed longer than inland projects. If a reroof is needed, plan for the lull between late spring and early summer or late fall when tropic activity tapers. Rely on a contractor who tracks tropical activity and can forecast several weeks ahead, not just a weather window of the immediate day. Short-notice storms can force crews to abandon a teardown mid-progress, leaving vulnerable decking exposed to rain. Prioritize a project that establishes tarping, deck protection, and temporary weather barriers early in the process.
During hurricane landfall or severe tropical storms, the primary goal is to prevent water intrusion. Temporary coverings and rapid-secure measures should be in place at the first sign of a major event. A locally reliable crew will stage materials and crew shifts to respond within 24 hours if a storm hits and debris blocks access. After the storm, inspect for macroscopic damage first-loss of cap shingles, lifted flashing, or punctured underlayment-and then zoom in on attic ventilation and deck integrity. Document everything with photos, then contact a trusted roofer promptly to assess whether quick repairs can stop ongoing leakage or if a full replacement is now urgent due to compromised decking or insulation.
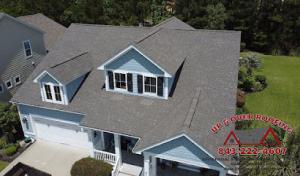
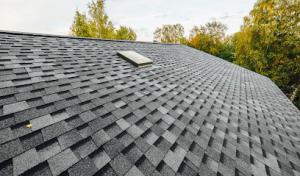
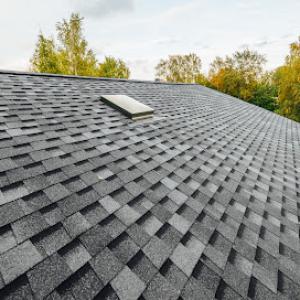
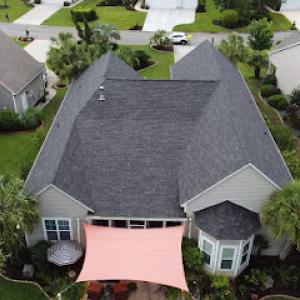
Asphalt shingles and metal roofing are the dominant choices in Murrells Inlet, reflecting the area's mix of coastal subdivisions, raised homes, and practical storm-conscious reroofing decisions. Asphalt shingles deliver familiar aesthetics and straightforward replacement cycles, while metal roofs provide the wind resistance and rapid drainage that coastal storms demand. In many neighborhoods, metal is favored for its long life and the clean, low-maintenance profile it keeps after a hurricane hits. The balance between visual match with neighboring homes and performance under salt spray often points to the most common shingle profiles and lighter metal panels that resist the corrosive air without drawing extra attention to color or texture.
Salt-laden coastal air can be harder on exposed metal components and fasteners, making finish quality and corrosion resistance more important here than in inland South Carolina markets. When evaluating a metal roof, look for coatings that stand up to salt exposure and panels with hidden or sealed fasteners to minimize corrosion risk. For asphalt, pay attention to the sealant integrity around ridge cap and penetrations, since salt fog can accelerate subtle degradation. In both cases, confirm that hardware, flashings, and underlayment materials are rated for coastal use and that any exposed metal is galvanized or coated to resist panning and pitting from humidity and salt spray.
Clay tile, wood shakes, composites, and EPDM appear in smaller pockets tied to custom homes, low-slope sections, and architectural variety common along the inlet and nearby beach communities. If your design leans toward those textures or you're maintaining a distinctive curb appeal, choose options that pair well with the local palette and still hold up under humid summers and hurricane gusts. Clay and tile are durable if properly installed on suitable deck and fastening systems, but they demand careful flashing and wind-rated fastening to withstand high wind events. Wood shakes and composites offer warmth and texture but require regular maintenance to prevent moisture uptake and mold in shaded, marsh-adjacent corners. EPDM is practical on low-slope sections, but ensure the seam integrity remains intact after strong storms and seasonal temperature swings.
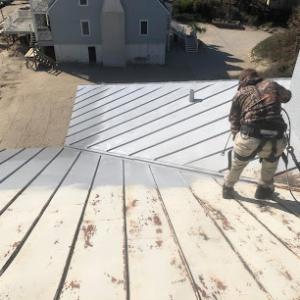
In this market, the installation method matters as much as the material. Ensure roofers pay special attention to the edge and rafter connections where wind uplift pressures peak. Coastal homes with raised foundations benefit from underlayment choices that resist moisture tracking before shingles or metal are installed. When selecting a contractor, prioritize crews with documented coastal experience, proper corrosion-resistant fasteners, and proven wind-rated assemblies. The goal is a roof that sheds salt air and storm rain efficiently, without compromising the structure below or the visual harmony with neighboring roofs.
A practical plan keeps the roof performing through repeated hurricane seasons and foggy, humid months. For asphalt, inspections after severe storms should focus on shingle lift, granule loss, and flashing seals. For metal, look for any loose fasteners, panel movement, or seam gaps, especially near roof penetrations and vents. In all cases, routine cleaning to prevent algae growth and gutter checks to prevent backwash damage around the eaves help maintain longevity in shade-prone, marsh-adjacent zones. A thoughtful combination of material choice, coastal-rated components, and proactive upkeep yields the most dependable roof for homes along the inlet.
Coastal South Carolina drains wind and hail stress into every roof, and the wind-prone days along the Waccamaw Neck mean claims activity stays higher than inland areas. In this market, insurers keep a closer eye on how old the roof is and what materials sit on top. A roof that has aged beyond its expected life or uses certain materials can trigger stricter review, higher scrutiny, or tighter coverage parameters after a storm. When a hurricane sneaks in, the combination of salt air, humidity, and fluctuating temperatures amplifies the wear on shingles, flashing, and underlayment, making proactive upkeep more than a courtesy-it's a practical safeguard against claim friction.
As a policy nears renewal, the insurer may request recent roof photos, the installation date, and evidence of wind-mitigation features. Photos should clearly show the condition of shingles, hip and ridge lines, chimney flashings, skylights, and gutters, plus any visible penetrations or penetrations around vents. Wind-mitigation features-where present-can influence underwriting decisions, so having records of hip roof geometry, impact-resistant products, and proper nailing patterns documented by a qualified contractor helps. Because coastal markets tend to re-evaluate risk based on storm history, keeping a tidy, up-to-date file now can ease renewal pain later and reduce the chance of a denial or endorsement during a hurricane season.
Older roofs, and certain materials, often carry tighter endorsement restrictions or more intense claim reviews in this coastal market. Asphalt shingles that are weathered, metal roofs with corrosion-prone flashings, or wood shingles with visible wear invite closer scrutiny after a storm event. If a roof has prior wind damage, a lender or insurer may require additional mitigation credits or documentation before coverage continues smoothly. Planning ahead means knowing where weaknesses lie-loose flashing around chimneys or vent pipes, deteriorated ridge caps, or missing sealant around bulkheads-and addressing those areas before they become the focal point of a claim review.
Speak with a trusted local roofer to document roof age, current condition, and vulnerable details that commonly attract scrutiny in this environment. Establish a simple, photo-backed maintenance log that records inspections after storms, noting loose fasteners, lifted shingles, or compromised flashing. If upgrades are considered, focus on concrete wind-mitigation improvements that a reputable contractor can certify, since these documents travel with your policy during renewal or claim. In the event of wind-driven damage, photograph the scene promptly, secure temporary protections, and keep receipts for any emergency repairs. Being methodical about records and proactive with upgrades reduces the chances of a dispute when a storm surge is fresh in everyone's memory.
Connect with contractors who help homeowners navigate the claims process from damage assessment to final approval.
Leverage Roofing
(843) 284-6444 leverageroofing.com
3401 US-17 BUS, Murrells Inlet, South Carolina
4.9 from 404 reviews
Klaus Roofing Systems by Carolina Energy Conservation
(843) 748-0295 www.klausroofingbycarolinaec.com
Serving
5.0 from 275 reviews
Leverage Roofing
(843) 284-6444 leverageroofing.com
3401 US-17 BUS, Murrells Inlet, South Carolina
4.9 from 404 reviews
3401 HWY 17 Business Murrells Inlet. FINANCING AVAILABLE. With over 30 years of construction experience, we are a locally owned & operated family business. We provide professional Roofing Services, Replacement / Repair, Seamless Gutters, and Siding .
Roof Maxx of Myrtle Beach, SC
9751 Moose Rd, Murrells Inlet, South Carolina
5.0 from 23 reviews
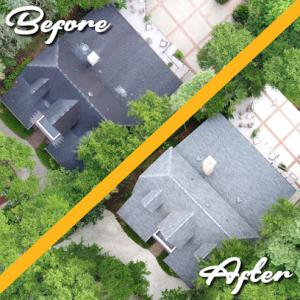
Roof Maxx of Myrtle Beach, SC is a roofing company that offers a unique solution for homeowners looking to extend the life and beauty of their roofs. Their scientifically formulated, plant-based roof rejuvenating treatment restores roofs to like-new condition using a 100% safe, non-toxic formula that protects and preserves for years to come. Developed by renowned scientists, this innovative treatment provides an eco-friendly and sustainable alternative to traditional methods and ensures a healthier, safer environment inside and out. Get your free roof inspection and assessment today.
Roofing Pros
(843) 417-9120 www.roofingprossc.com
Murrells Inlet, South Carolina
5.0 from 5 reviews
Welcome to Roofing Pros your premier destination for top-tier roofing solutions. With 20 years of expertise, we specialize in residential and commercial roofing services, including installations, repairs, inspections, and maintenance. Our skilled team ensures quality craftsmanship, using premium materials and industry-leading practices. At Roofing Pros customer satisfaction is our priority, and we pride ourselves on transparent communication and reliability. Trust us to elevate your roofing experience. Contact us today for all your roofing needs!
Tabor Homes & Exteriors
1626 Wachesaw Rd, Murrells Inlet, South Carolina
3.4 from 15 reviews
At Tabor Homes & Exteriors, we can’t wait to help you get started on your next project. Veteran owned and with over 30 years of experience in construction, we are your local experts in the Murrells Inlet area. Whether you’re looking to install a new roof, repair some siding, or add an entirely new room to your home, we’re just a phone call away.
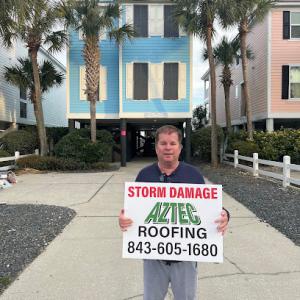
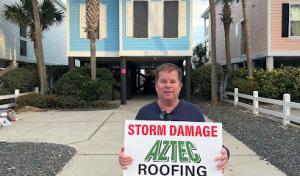
Aztec Construction Roofing
(843) 457-8100 www.aztecconstructionroofing.com
Serving
5.0 from 31 reviews
Aztec Construction LLC is here to provide you with roofing and construction services, such as roof replacements, roof repairs, chimney repairs, framing, masonry, and much more! Aztec Construction LLC provides their customers with their preferred payment options, such as by check, through financing, or by credit card payments.
Pinnacle Contracting Services
889 Gator Ln, Murrells Inlet, South Carolina
4.0 from 3 reviews
We specialize in roofing and spray foam insulation.
Klaus Roofing Systems by Carolina Energy Conservation
(843) 748-0295 www.klausroofingbycarolinaec.com
Serving
5.0 from 275 reviews
Klaus Roofing Systems by Carolina Energy Conservation provides expert attic and roofing services in Little River, Conway, Myrtle Beach, and nearby. We create safer, more efficient homes with roof replacements, roof repairs, air sealing, insulation services, and more. KRS by CEC is a sister company to Carolina Energy Conservation, a team of energy contractors who have loyally served the community of Eastern South Carolina since 2009. Call or contact us online to get started with a no-cost, no-obligation quote.
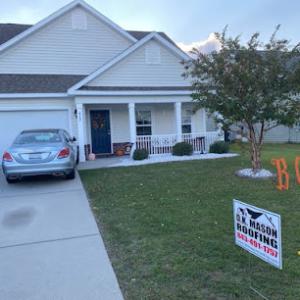
DK Mason Roofing
(843) 491-1757 www.dkmasonroofing.com
Serving
5.0 from 30 reviews
Your home is your largest investment, and you need the ultimate protection for it with the quality roofing services at DK Mason Roofing. Since 2011, we've served as your number one roofing contractor in Myrtle Beach, SC, for residential, commercial, and industrial settings. Our dedication to customer satisfaction and attention to detail has earned us the reputation as the upstate’s preferred roofing contractor. We're licensed, bonded, and insured, and we pride ourselves on superior craftsmanship that is second to none. Your satisfaction is guaranteed as we offer a five-year workmanship warranty on all roofs. We're pleased to offer a 10 percent discount for the military and first responders. Contact us today for a free estimate.
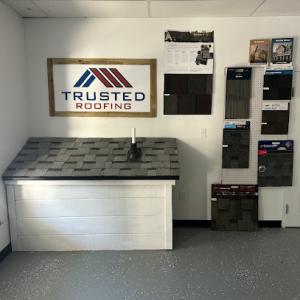
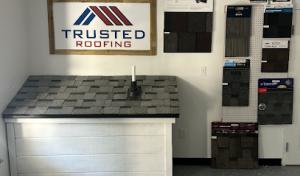
Trusted Roofing
(843) 446-9681 www.trustedroofingsc.com
Serving
5.0 from 16 reviews
Trusted Roofing! The name speaks for itself. We truly are here for our community & with over 4 Generations of construction experience, we pledge to give you the best quality work & the most affordable prices guaranteed! We offer a wide verity of services, such as all residential roofing, exterior siding, shutters & seamless gutter system. Give us a call or visit our show room for more info. We are here for you!
Salty Dog Roofing & Siding
(843) 428-2998 www.saltydogroofing.com
Serving
4.9 from 342 reviews
Salty Dog Roofing & Siding is Myrtle Beach’s trusted full-service roofing company, specializing in residential and HOA roofing services. As the leading local contractor, we’re proud to deliver top-tier craftsmanship and reliable service to homeowners across the Lowcountry. From Myrtle Beach to Pawleys Island, North Myrtle Beach, and beyond, our expert team covers communities in Horry, Georgetown, Berkeley, Charleston, Florence, and Dorchester counties. Got storm or hail damage? No worries! With extensive experience in the insurance and storm damage industry, we’re here to guide you through the claims process from start to finish, making it as smooth and stress-free as possible. At Salty Dog Roofing, we take pride in going above & beyond
Aztec Roofing
(843) 605-1680 www.aztecroofingsc.com
Serving
4.9 from 59 reviews
Aztec Roofing and Renovations is your trusted partner for top-quality roofing and home improvement solutions in Myrtle Beach, SC. Specializing in roof repairs, replacements, custom designs, and renovations, we combine expertise and craftsmanship to protect and enhance your property. As a GAF Certified™ Contractor, we are committed to excellence and customer satisfaction. Whether you need a quick fix, a full renovation, or guidance with insurance claims, our experienced team is here to deliver dependable service you can count on. Contact us today for a free estimate!
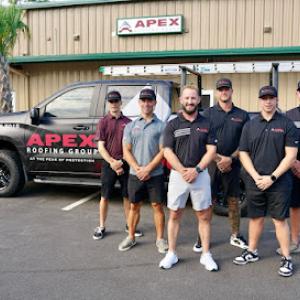
Apex Roofing Group
(843) 315-5015 apexroofinggroup.net
Serving
5.0 from 155 reviews
Operating from Myrtle Beach, Apex Roofing Group brings more than a decade of coastal-roof expertise to Horry County. Our OSHA-certified crews begin with a complimentary drone, attic, and roof inspection, then recommend leak roof repairs, hurricane-rated roof replacements, or energy-efficient metal retrofits that meet South Carolina’s Class H / Class F 110-mph wind code. Homeowners and condo boards receive clear photo reports, insurance-ready Xactimate estimates, and same-day emergency tarping during tropical storms that dump 52 inches of rain on the Grand Strand each year. We install Owens Corning, GAF, and Drexel metals with up to 50-year warranties and back every nail with a lifetime workmanship guarantee plus annual maintenance plans.
Hot, humid summers and tree-shaded lots near marsh and inlet areas create a steady cycle of moisture and shade that favors algae, moss, and mold growth on roofs. In these conditions, you'll often see dark streaks and greenish patches on asphalt shingles, and in more exposed spots where shade is less persistent, algae can ride along the edges after long stretches of heat. The salt-air coastal setting also contributes to quicker aging of roofing components, especially on roofs that already have signs of wear or minor gaps.
Humidity accelerates the aging of asphalt shingles and underlayment, particularly on darker roof colors that soak up heat during long summer heat waves. Poor attic ventilation compounds the problem, trapping moisture and inviting curling, granule loss, and premature deterioration. Wood shingles and shakes are notably less forgiving in this climate; persistent moisture and biological growth can cause warping, splitting, and accelerated rot. If a wooden roof already shows widespread staining or soft spots, expect more rapid decline than in drier inland areas.
Keep the roof clear of overhanging branches that shade large sections of the surface and trap moisture. Regular inspection after heavy humidity events or tropical-influenced storms helps catch early signs of algae or rot. Clean algae off with a gentle, non-bleach solution and a soft brush, avoiding high-pressure washing that can lift granules or damage shingles. Ensure attic ventilation is robust: balanced intake and exhaust, with vents positioned to promote air movement across the roof deck during peak heat. Seal minor penetrations and ensure flashing around chimneys, vents, and eaves remains watertight to prevent moisture intrusion.
When it's time to replace or retrofit, consider roofing products that resist algae growth and tolerate high humidity, paired with reflective or lighter color options to reduce heat buildup. Proper underlayment choices, combined with a well-sealed attic and continuous ventilation, help limit moisture-related aging. For wood options, apply protective finishes and schedule more frequent evaluations to catch early moisture-related issues before they progress. A proactive stance on gutter flow and downspout clearance also reduces standing water near the eaves, diminishing splash and moisture transfer to the roof edge.
In this jurisdiction, a full roof replacement is handled as a building project rather than simple maintenance. That means you'll need to secure a building permit before any new shingles, metal, tile, or other system goes on the rafters. This isn't a gray area decision-treat it as a proper permit job from the start to avoid delays during the spring storm season or after a contractor's hurried timing.
The local building department takes an active role in plan review and project oversight. After you or your contractor submit the application, expect a plan review to confirm the proposed roof system, fasteners, underlayment, and attic ventilation align with current code and the county's wind-resistance expectations. The department typically conducts inspections at key milestones: an underlayment or rough-in stage to verify substrate and weatherproofing details, and a final inspection to close out the permit once the roof is completed. Scheduling these inspections promptly helps prevent hold-ups if an inspector needs to see hardware, synthetic underlayment, or nail patterns up close.
Coastal exposure adds extra scrutiny in some cases. Depending on the roofing system chosen, the department may request wind-mitigation details or other documentation that demonstrates wind resistance, roof sheathing attachment, and nailing schedules. If a wind-rated system or advanced underlayment is selected, have manufacturer specifications and installation instructions available. A reputable contractor will prepare the paperwork to show compliance with Florida- or South Carolina-aligned wind standards and the local code addenda used by the county.
Begin by confirming with the contractor that the project is moving through the building permit track, not treated as a cosmetic update. Ask for a copy of the permit plan and the inspector's anticipated schedule, so you know when to expect the rough-in and final inspections. Keep access clear to the roof and any attic spaces an inspector might need to review. If the project involves multiple roof components-such as a switch from shingles to metal or clay tile-double-check that the chosen system's documentation includes any wind-resistance certifications your insurer or lender may require. In case of delays during hurricane-season readiness windows, have a contact line ready with the building department and the contractor to coordinate the inspection timetable.
In this market, local pricing can spike after tropical storms when emergency tarping, labor demand, and material lead times tighten across the Grand Strand coastal market. You'll often see quick jumps on both materials and labor once crews shift from routine replacement to storm-response mode. Planning a replacement with a built-in contingency for weather delays helps keep the project on track and reduces sudden sticker shock when crews are scarce and suppliers run low.
Metal roofing is a strong local contender despite higher upfront cost because many homeowners here weigh storm durability and coastal longevity against asphalt's lower entry price. Metal tends to perform well under salt spray, high winds, and rapid temperature changes common along the inlet marshes, which can translate to fewer intermediate repairs. If the budget allows, metal's long-term durability can offset its initial premium, especially on homes with exposure to regular storm-driven debris or where future reassessment of roof life is needed.
Coastal custom homes with complex rooflines, low-slope add-ons, and features like skylights tend to push Murrells Inlet projects toward the upper end of the provided ranges. Roofs with multiple valleys, dormers, or curved sections require more labor, extended material runs, and careful flashing to resist salt air and humidity. When planning, consider that complex configurations also raise the likelihood of weather-related delays, which can widen the timeline and affect overall cost.
Asphalt shingles and synthetic options sit closer to the lower end of the range, but premium configurations-such as enhanced underlayment, coastal-grade fasteners, and larger-than-average square footage-move the price upward. For homes with signature coastal features, budget toward the higher end of the spectrum to avoid stepping into mid-project adjustments. A clear scope that accounts for wind-era enhancements and salt-air considerations helps anchor a realistic final cost.
Get a clear picture of your project costs upfront - no commitment required.
Klaus Roofing Systems by Carolina Energy Conservation
(843) 748-0295 www.klausroofingbycarolinaec.com
Serving
5.0 from 275 reviews
Skylights show up often enough in the local contractor market to be a meaningful leak-repair category, especially where coastal rain is driven sideways during storms. The failure often comes from wind-driven water that bypasses ordinary seals and finds its way around framing gaps. If a skylight is set high on a roof deck or sits near a dormer, that moisture can travel along rafter spaces and into ceilings before anyone notices a stain. In this climate, regular inspection after hurricane season is crucial, even if no interior leaks are visible. Sealants, flashing, and the skylight's curb should be checked for wind uplift and aging seals; replacements on older installations are common when leaks persist.
EPDM and other low-slope systems matter in Murrells Inlet because porches, additions, and mixed-roofline homes can include flat or nearly flat sections even when the main roof is pitched. Those nearly-flat surfaces trap storm-driven rain and can shed water more slowly than a steep slope, increasing the likelihood of leaks around edges, penetrations, and field seams. Pay particular attention to edge detailing where the membrane meets flashing at walls, fresh air intakes, and skylight bases. A small puncture or seam deterioration on a low-slope area can create a puddle that spreadingly leaks into the attic or living space.
Transitions between steep-slope roofing and low-slope membranes are a local weak point during heavy coastal rain if flashing and drainage details are not handled correctly. Improperly integrated transitions can funnel water into concealed spaces behind fascia, under soffits, or around gutter systems. During storms, gravity and wind work together to push moisture toward these junctions. A thorough check of all transition zones-especially where a deck or porch roof overhang meets the main roof-can prevent sudden interior dampness after the next squall. Consider a detailed inspection after major storms to verify flashing integrity, proper slope, and clear drainage.
Find contractors experienced in skylight installation, flashing, and leak repairs to bring natural light into your home.