Last updated: Apr 19, 2026
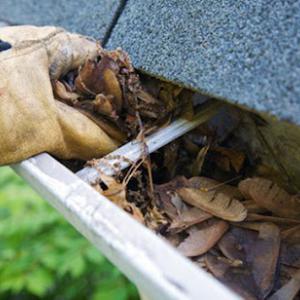
Atlantic hurricane season dominates the roof threat profile here, not inland hail. When the weather turns, a mild wind-driven rain can become a fast-moving leak risk in hours. Homes near Charleston Harbor, Shem Creek, and marsh-exposed neighborhoods sit at the boundary where salt-air corrodes flashing, seals, and asphalt granules. A small tear in shingles or a loose vent boot can unleash a cascade of interior damage after a gusty squall. If you notice roof edges lifting, granules washing into gutters, or a musty odor inside, treat it as an active leak scenario and respond immediately to limit interior mold and structural exposure.
In these coastal findings, the priority is to seal the problem area while arranging professional help. Start by locating the highest point of water entry and placing a temporary, non-penetrating cover if you can do so without jeopardizing safety. Do not walk on a wet, damaged roof if shingles are loose or the ridge line shows movement. Photograph the damage from multiple angles, focusing on flashing details around chimneys, skylights, vents, and dormers. Keep a dated record of the storm event, observed damage, and any urgent interior leaks-this becomes useful when coordinating with a contractor or filing insurance documentation soon after the weather event.
The coastal insurance landscape in this market is built around rapid storms and high claim volumes. When a claim becomes necessary, you need a clear before-and-after narrative, timestamped photos, and notes on any temporary repairs you managed (even if done yourself) along with material details if possible. Make a simple sketch of the roof area showing the leak path and identify vulnerable components such as flashing seams, chimney counters, and vent collars. Communication with the insurer should be precise: identify the storm date, the observed conditions, and the exact locations of leaks. Keeping a running contact log with adjusters and contractors helps prevent delays during the claim review and repair scheduling.
Contractors in this market often emphasize emergency repair, storm damage remediation, and insurance-document-ready work. Expect a triage approach: temporary protection, moisture mitigation, and a plan for permanent repair. Trust crews that can deliver rapid tarping, secure temporary patches, and a structured estimate package that aligns with the insurer's documentation needs. For homes near marsh edges or harbor-facing exposures, wind-driven rain exploits any small flaw-so prioritize sealing penetrations around vents and chimneys first, then address shingle laps and edge flashing. A well-documented claim, coupled with a fast, on-site mitigation plan, minimizes further interior damage as coastal weather looms.
Find local contractors experienced in assessing and restoring roofs after hail, wind, and severe weather events.

Restoration Roofing SC
(843) 306-2939 www.restorationroofingsc.com
Mount Pleasant, South Carolina
5.0 from 124 reviews

Restoration Roofing SC
(843) 306-2939 www.restorationroofingsc.com
Mount Pleasant, South Carolina
5.0 from 124 reviews
We are a family-owned business! Restoration Roofing has a team of talented roofing professionals. We offer same-day, emergency service and our team is on call 24 hours a day, 7 days a week. We serve both English and Spanish-speaking property owners.
Zeigler Metal Roofing & Shingles
(843) 212-7013 www.zeiglermetalroofingandshingles.com
Serving
5.0 from 44 reviews
Zeigler Metal Roofing and Shingles is a locally owned and family-operated business dedicated to delivering top-quality craftsmanship throughout the South. With over 20 years of hands-on construction experience, our founder, Dave Zeigler, leads a team committed to excellence in every project. We specialize in durable and aesthetically pleasing metal roofing, seamless gutter installations, and long-lasting siding solutions. Whether you’re looking to protect your home with a new roof, upgrade your gutters, or enhance your home’s exterior with siding, Zeigler Metal Roofing and Shingles is your trusted partner for superior service and results.

Chucktown Roofing
Serving
5.0 from 113 reviews
Welcome to Chucktown Roofing! We provide top-quality, affordable roofing services with exceptional customer service. We specialize in storm restoration and full roof replacements. Contact us today to schedule a consultation and experience the Chucktown Roofing difference.
Willow Ash Roofing
(843) 326-0081 willowashroofing.com
Serving
4.9 from 202 reviews
Willow Ash Roofing is your trusted roofer near you in Mt Pleasant, SC, providing expert residential and commercial roofing solutions. As a premier local roofing company, we specialize in roof replacement, roof installation, and repairs using high-quality materials. Whether you’re looking for metal roofing built to last or classic shingle roofing to enhance curb appeal, our skilled team ensures reliable craftsmanship and exceptional roofing service. Choose Willow Ash Roofing for peace of mind and a roof that stands the test of time. We proudly serve Mt Pleasant, Isle of Palms, Charleston, and the surrounding nearby areas. From leaks to full roof replacements our expert roofing team has you covered!
Fitzsimmons Gutter
(843) 471-7142 fitzsimmonsgutter.com
Serving
5.0 from 88 reviews
Residential & Commercial Gutters For the Charleston, SC Area Gutters protect your biggest investments. From homes to commercial buildings, having a working gutter system is important. Fitzsimmons Gutter is the gutter company to rely on in Charleston, SC. From commercial gutters to residential gutters, we are the gutter experts in the area. We repair gutters, install new gutters, clean out gutter downspouts, and complete regular maintenance. Whatever your gutter needs are, we are here to help.

Landmark Roofing
(843) 471-0470 www.landmarkroofingllc.com
Serving
5.0 from 17 reviews
Our services include. Comprehensive roof inspections to assess the condition of the roof. Identification of existing or potential issues. Patching up leaks and fixing damaged areas. Replacing or repairing shingles, tiles, or other roofing materials. Installing new roofs for residential or commercial buildings. Working with various roofing materials like asphalt, metal, tile, or wood. Complete removal and replacement of an old or damaged roof. Upgrading to more durable or energy-efficient roofing materials. Providing immediate assistance for storm damage or other emergencies. Tarping or temporary fixes to prevent further damage. Installing new gutters or repairing existing ones. Ensuring proper drainage to prevent water damage.
Alternative Roofing Solutions
(843) 984-5031 www.ars-roofing.com
Serving
5.0 from 17 reviews
Alternative Roofing Solutions is committed to helping customers with their commercial and residential roofing needs. We strive to ensure every project - whether working with an architect, roof consultant, specifier, building owner or contractor - goes as smoothly as possible. We’re a one-stop roofing shop, meaning that we can handle all aspects of your roof. Whether you have a simple leak or you need a full roof replacement, we can take on any size of the job. No matter which service you request, you can expect quality workmanship, high standards, and competitive prices.
Southline Roofing & Exteriors
(843) 471-2625 www.southlineroofing.com
Serving
4.9 from 595 reviews
Your Weatherproof Line of Coverage Starts Here! We are a Full-Service Roofing Company in Mt Pleasant, SC, serving the entire area from Charleston to Summerville. Our friendly and professional team can assist you with: - Roof Repairs - New Roof Installations - Metal Roofs - Roof Inspections - Gutter Repairs - New Gutters - Siding Repairs Call us today and discover why our customers rave about us!
RoofServ
Serving
5.0 from 53 reviews
RoofServ is Charleston's trusted coastal roofing company, specializing in roof replacement, repairs, and storm restoration for homeowners in Charleston, Mount Pleasant, West Ashley, Daniel Island, Sullivans Island, Isle of Palms and nearby areas. With multiple top-level manufacturer certifications, RoofServ delivers superior workmanship, extended warranties, and attentive service on every project. Our experienced team provides detailed roof inspections and handles the process from start to finish, ensuring you get the service you deserve. Fully insured and background-checked, RoofServ is dedicated to protecting Charleston homes with honesty, professionalism, and a proven reputation for excellence.
Ketchum Roofing & Windows
(843) 817-3846 ketchumroofingwindows.com
Serving
5.0 from 233 reviews
With over 35 years of experience, Ketchum Roofing is here to provide Charleston’s most personalized Roof Replacement Service. That means we will be right there with you throughout the entire insurance claims process. Schedule a free inspection!
Roofing USA
Serving
4.7 from 263 reviews
Roofing USA is a veteran-owned commercial roofing contractor serving building owners, property managers, and facility directors across the Southeast. We specialize in leak response, flat roof repairs, reroofing, and roof asset management. Our expert team works with TPO, EPDM, Modbit, and metal systems. Known for professionalism, safety, and communication, Roofing USA delivers high-performance roofing solutions designed to extend roof life, reduce costs, and protect commercial assets.
Southern Premier Roofing
(854) 800-3305 southernpremierroofing.com
Serving
5.0 from 21 reviews
Leading provider of professional commercial and residential roofing solutions in the Southeast United States, with locations South Carolina and North Carolina
This section speaks to the realities of dealing with wind-driven roof damage in a high-claim coastal market. Coastal storms and hurricane activity drive repeated wind and water-loss events, and the local conditions create a pattern of claims that insurers see year after year. When a storm hits, the goal is to protect the home, capture the damage accurately, and move through the claim process without delays.
After a storm, safety first. If you notice active water intrusion, reach a temporary fix that stops the worst of the leaking before a professional visits. Use tarps or roofing plastic to cover exposed areas, but avoid stepping on damaged sections during high winds. Document the condition before any temporary work, capturing wide shots of the roof, gutters, and any interior staining or puddling. This is a high roof-claim environment, so insurers will look closely at how quickly temporary measures were applied and whether moisture exposure was contained.
Time is of the essence for documentation. Take timestamped photos from multiple angles-drip lines inside, attic ventilation, flashing around chimneys, and any visible shingle or tile damage. Keep the images organized by date and weather event, and store them in a cloud folder you can share with your adjuster. In coastal South Carolina, photo documentation is routinely scrutinized, especially if the roof is older or made from material types prone to wind-related damage.
Your file should include a clear record of what happened and when. Collect storm advisories that match the damage date, such as local weather alerts or radar shots showing wind bursts. Preserve purchase receipts and any pre-storm maintenance notes that indicate the roof's condition before the event. If a contractor provided a temporary repair, save the estimate, the work order, and any photographs of the temporary fix. The goal is to build a concise narrative: what failed, when it failed, and how the roof was protected immediately afterward.
Keep a dated log of all communications with the insurer and with contractors. Note who you spoke to, the topic discussed, and the promised timeline for inspections or repairs. Written estimates from licensed roofers should be included, with itemized scopes of work and reasoned notes about material compatibility with your existing roof. In an area with frequent storms, adjusters often request detailed storm documentation to verify that the damage aligns with the reported event.
When you select a contractor, confirm credentials and prior experience with coastal exposure. Ask for a written scope that addresses wind resistance, moisture tolerance, and the specific vulnerabilities seen on your roof type. For a roof in a marsh-adjacent or elevated neighborhood, flashing, underlayment, and attic ventilation are critical components to document in the claim. Request a formal appraisal-style report from the contractor that outlines observed damage, recommended remediation, and a cautious timeline that accounts for weather windows in Mount Pleasant's climate. Provide this to the adjuster as part of the claim package.
Insurers in this market closely compare roof age, material type, and photo sets. Present your documentation in a clean, chronological order: storm date, interior impact, exterior roof condition, temporary repairs, professional estimates, and then the proposed repair plan. If the roof is older, be prepared to discuss mitigation steps taken since the storm and any prior roof work that could influence evaluation. Clear, organized records reduce back-and-forth and help secure a timely settlement that reflects the storm's true impact on your roof.
Connect with contractors who help homeowners navigate the claims process from damage assessment to final approval.
Restoration Roofing SC
(843) 306-2939 www.restorationroofingsc.com
Mount Pleasant, South Carolina
5.0 from 124 reviews

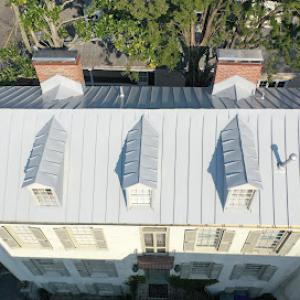
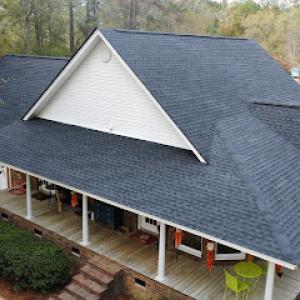
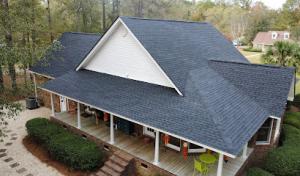
In this coastal Lowcountry environment, asphalt shingles and metal roofing stand out as the workhorse choices that balance performance with practicality. Asphalt shingles match the look of many existing homes and install quickly, making them a reliable, weather-ready option for most Mount Pleasant properties. Metal roofs bring superior wind resistance, radiant heat reflection, and long-term durability, which matters when salt-saturated air and heavy rain are routine. For the homeowner on a tighter budget or seeking a traditional residential silhouette, these two options cover the majority of needs without sacrificing function in a hurricane-prone climate.
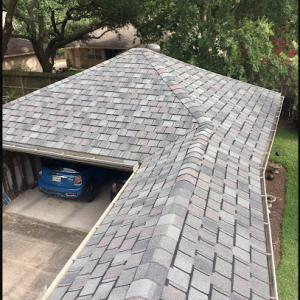
Clay tile, concrete tile, wood shakes, and slate appear on the blocks where architectural statement matters as much as weather resilience. Coastal South Carolina architecture often blends these materials with the region's historic and elevated-marshside aesthetics. Clay and concrete tiles offer a distinctive texture and a long service life, but they come with increased weight and installation considerations. Wood shakes convey a timeless charm and a tactile, warm appearance, yet they demand vigilant moisture management and treated fasteners to withstand humidity. Slate delivers high-end elegance and exceptional longevity, but its weight and cost push it into premium projects. For the standout homes that prioritize curb appeal, these materials align with the coastal character when paired with an appropriately reinforced structure and meticulous storm-securement planning.
Salt-heavy air and persistent humidity heighten the importance of corrosion resistance across all materials. Look for fasteners, brackets, and connectors rated for coastal use, with coatings designed to resist salt spray and oxidation. Underlayment quality matters more here than inland markets; a robust synthetic or polymer-modified roofing underlayment helps manage moisture intrusion and provides a stable, watertight base during heavy rains and storm events. In addition, consider continuous ventilation and proper attic sealing to reduce condensation and thermal cycling, which can accelerate wear on any roof system exposed to Mount Pleasant's humidity.
Heavy tile and slate systems can suit upscale Lowcountry aesthetics, but require attention to structural loading. A roof that looks great in calm weather can face serious stress when hurricane-force winds batter the coast. Ensure the decking, framing, and attachment methods are evaluated for the added weight and wind uplift potential. For the heaviest installations, coordinated design with an experienced roofer who understands local wind loads, hurricane tie systems, and batten configurations will help keep the roof secure through severe storms. In all cases, plan for a thorough sealant strategy around penetrations and roof-to-wall transitions to minimize potential leak paths after a storm.
Explore specialists in steel, aluminum, and standing seam metal roofs built to last 50 years or more.
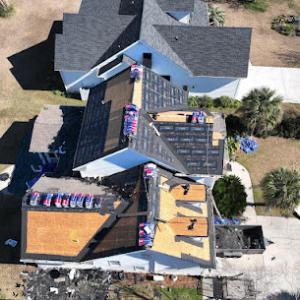
Peak hurricane season from summer into early fall can interrupt tear-offs and leave projects exposed, so scheduling before or after the most active storm window matters more here than in many inland cities. If a roof shows telltale signs of age or repeated leaks, plan ahead for dry stretches, not the height of the storm season. A replacement started in late spring or late fall benefits from calmer weather and shorter wait times between project stages. When summer heat arrives, the work pace slows and materials react to the coastal humidity, so timing around the hottest weeks can help keep seals sound and crews steady.
Frequent spring rainfall in the Charleston area can delay replacement starts and extend dry-in timelines for homeowners. Expect temporary holds if back-to-back rain events soak the roof deck or soak surrounding work zones. Dry-in progress hinges on a dry, wind-free stretch, so being flexible with start dates can reduce the risk of moisture infiltrating under installed underlayment or in vents. If a project overlaps with a soggy spell, the crew will shift tasks to interior or underlayment preparation until exterior conditions improve.
High summer heat and humidity affect crew productivity and can influence how materials expand, seal, and dry during installation in this coastal climate. Asphalt shingles and metal panels behave differently in extreme heat, so installation may pause during the hottest afternoon hours to protect seal integrity. Humidity can slow drying times for sealants and underlayment tapes, leading to longer dry-in periods. Expect crew handoffs and material acclimation to be part of the plan on hotter days, with more emphasis on shade, hydration, and staged work hours to maintain quality.
In a hurricane-prone area, rapid leak response after a storm is essential. A roof that has experienced wind-driven damage or hail should be evaluated promptly, focusing on securing the most vulnerable zones first-valleys, edges, and around exhausts. If a storm is forecast, consider pre-storm protective measures and post-storm inspection routines to catch leaks early before interior damage accelerates. The goal is to replace failing sections with a fully sealed system, rather than patching ad hoc, to resist the next season's wind and salt exposure.
Local pricing is shaped by coastal storm demand surges, especially after named storms when emergency work and re-roofing volume rise quickly in Mount Pleasant and the greater Charleston market. When a hurricane watch or warning hits, crews prioritize damaged homes, and supply lines tighten. That means the same roof replacement can carry a noticeable premium in the weeks following a storm. Planning ahead during calm periods helps you lock in materials and labor before the next surge.
Houses with steeper architectural rooflines, coastal-style details, and premium materials common in this area push labor and accessory costs above basic inland re-roof jobs. Your material choice will be a major driver of total cost, with asphalt shingles offering the most budget-friendly option and slate at the high end. In this market, material costs typically fall within these ranges: asphalt shingles 300 to 700 USD per square, metal 450 to 1100, clay tile 800 to 1500, concrete tile 600 to 1200, wood shingles or shakes 500 to 900, and slate 900 to 2000 per square. Remember that "per square" here refers to a 10 by 10 foot area, and installation complexity can add to the price.
Premium coastal details-hip roofs, dormers, and clay or concrete tile on higher-pitch structures-often require enhanced underlayment, metal flashings, and fasteners designed to resist salt-laden humidity and higher wind loads. In Mount Pleasant, these accessories routinely push the overall cost beyond the base material price by a noticeable margin. If you expect high wind exposure, consider upgraded underlayment and wind-rated shingles or tiles to reduce the chance of rapid leaks during the next system stress event.
Hurricane-driven damage can turn a quick patch into a full replacement decision. If a leak is detected during a nor'easter or after a heavy summer squall, prioritize a fast-deneed response: temporary tarping, rapid assessment, and documented damage photos for the insurer. In this market, insurers often respond more favorably to timely, well-documented claims, so having a clear before-and-after photo set, a weather-driven damage timeline, and a direct line to your contractor's emergency crew helps secure faster approvals and fewer delays.
Get a clear picture of your project costs upfront - no commitment required.
Full roof replacements in a coastal community with marsh-edge exposure require a formal permit through the Town of Mount Pleasant Building Department rather than handling the project informally. The process is designed to document wind-resistance standards, moisture management, and flashing details that stand up to salt spray and heavy rain. Before work starts, your contractor should file the plan, elevations, and wind-load calculations that reflect the actual roof assembly you plan to install. You will want to verify that the chosen product and underlayment meet the town's prescriptive or engineered requirements, and that any skylights, vents, or solar components are accounted for in the permit package. Keep in mind that the permit is not just a document; it is a warranty of compliance with local wind and moisture criteria that matter when the insurance questions arise after a storm.
Local inspections typically occur during rough-in and final stages of the project. Rough-in inspections verify deck anchorage, underlayment continuity, and primary fastener patterns, ensuring the installation will resist coastal winds. The final inspection confirms that all components-ridge venting, flashing around chimneys and vent stacks, and roof-to-wall transitions-meet code and the town's standards for moisture control. Expect the project schedule to include municipal signoffs before closeout, which means a completed permit path with the town's inspector reviewing records and field conditions. Scheduling ahead is wise, because delays in signoffs can push back occupancy or allow a project to extend into seasons with more severe weather.
This is a coastal code environment, so permit and inspection compliance matters not just for workmanship but also for wind-resistance documentation and future insurance questions. Documentation should include wind-rated assemblies, strapping or clips where required, and confirmation of how the roof performs under potential hurricane conditions. If your insurer asks for proof of compliance after a claim, having the permit record and final signoff can expedite settlement. Work closely with a licensed contractor who understands local expectations for deck-to-rafter connections, moisture barriers, and sustainable ventilation practices that reduce the chance of mold in humid months.
In this coastal region, tropical storms and Atlantic winds push at the edges of shingles, especially along eaves and rakes. When edges lift, water can sneak underneath and travel to decking, fascia, and underlayment. Shingle failure often starts as a small curl or loose tab, but in a storm-prone neighborhood it becomes a pathway for leaks that show up after the next heavy rain or during a lull when wind shifts. You'll notice a ripple in the roofline or a fluttering edge after a gusty afternoon. The practical fix is to keep fasteners and sealants in good condition and to reinspect after tropical systems, not just at yearly intervals.
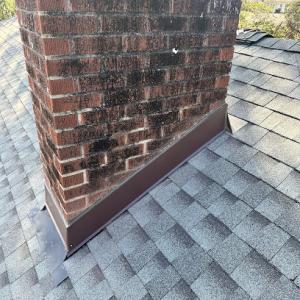
Flashing around chimneys, vent stacks, skylights, and transitions between roof planes takes a direct hit from salt-laden air and driving rain. Salt-curing can corrode metal pieces and loosen sealants, turning a small crevice into a full-on leak during a squall. You may see staining along ceiling lines or hear dripping during steady rain. The warning here is subtle: flashing that seems solid after a routine inspection can fail when moisture sits on the backside of decks or around penetrations for weeks. Regular, targeted checks of flashing integrity and sealant condition around every penetration are essential, especially after severe weather.
Persistent humidity in the Lowcountry is a quiet factor that compounds other failures. Small leaks, if left unresolved, invite mold, warped decking, and fascia rot. Wet lumber expands and contracts, stressing flashing and joints and accelerating deterioration in attic insulation or ventilation. If attic condensation is evident or if there's a musty odor after rain, treat it as a signal to investigate beyond the visible leak path. Early action prevents more costly repairs later and helps preserve the roof's sheathing and ventilation balance.
Salt-air exposure near the coast accelerates the deterioration of metal components, including flashings, fasteners, and accessories. The field material may survive, but corroded fasteners can loosen or back out, undermining the entire waterproofing system. Watch for white oxide, rust streaks, or squeaky nails during minor maintenance checks. The long-term concern is that corrosion weakens the connections that keep the roof system watertight, not just the metal itself. Regular inspection and timely replacement of compromised metal parts help maintain overall roof resilience in this environment.
Find contractors experienced in skylight installation, flashing, and leak repairs to bring natural light into your home.
Restoration Roofing SC
(843) 306-2939 www.restorationroofingsc.com
Mount Pleasant, South Carolina
5.0 from 124 reviews
Charleston Roofs + Windows
(843) 350-6250 charlestonroofsandwindows.com
Serving
4.9 from 605 reviews
The local market is dominated by re-roofing rather than niche new-construction specialization, so homeowners should evaluate contractors on replacement process, storm response, and cleanup discipline. In this town, a practical roofer understands the rhythm of a coastal season: frequent storms, salt-laden humidity, and the way shingles bow to Atlantic winds. Look for a company that treats guidance on attic ventilation, underlayment choices, and wind-rated upgrades as part of every project, not as optional add-ons.
Established, residential-focused contractors are a meaningful part of this market, which matters in a town where insurance paperwork, permit handling, and post-storm follow-up are common homeowner concerns. Seek a team with a track record of straightforward communication, clear scope definitions, and documented storm-response plans. A solid contractor will walk you through leak-prone areas, show you before-and-after photos, and provide a written timeline that accounts for weather delays and interior protection measures.
Quick response and cleanup are especially important because sudden coastal storms can turn a delayed repair into interior water damage quickly. Prioritize contractors who offer 24/7 rain-response, on-site tarping, and daily cleanup during active work phases. Ensure the agreement includes daily debris removal, protection of landscaping, and a defined method for securing HVAC intakes, attic access, and interior doors during storm shifts.
In this market, documentation handling matters. The right roofer provides detailed project logs, SOS notes for insurance review, and a post-completion summary that confirms system integrity after the last rain. Ask how they handle photos, repair maps, and warranty transfers so that follow-up, if needed, stays streamlined and clear for years to come.