Last updated: Apr 19, 2026
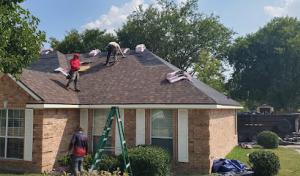
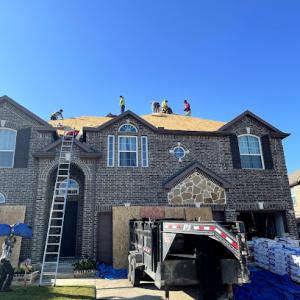
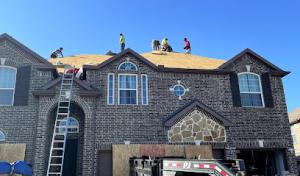
Sherman sits in a North Texas hail and wind claim environment where spring severe weather regularly drives sudden demand spikes for inspections, tarping, and reroof scheduling. After a big storm, the streets fill with crews, cameras, and contractors all chasing the same calendars, and that rush creates real risk: missing hidden damage, rushed shingle matches, and delays that push a minor leak into a full-blown emergency before you know it. If your roof has a weathered edge or a few granule loss patches, a delayed response can tilt the odds toward more interior damage from rising humidity and compromised ventilation. In this climate, a quick, proactive plan beats waiting for the next wind gust that could unveil additional soft spots.
Local insurance activity is shaped by repeated hail and wind losses, so carriers commonly ask for roof age, material type, and photo documentation before or during claim review. Photos from multiple angles-upslope, hips, peaks, and eaves-help the adjuster see the full scope without stepping on-site in a crowded post-storm period. If the roof has visible impact marks on shingles or dented metal components, document those details immediately, because timing can matter for coverage decisions. Be prepared to share recent replacement history and any known maintenance work. In practice, carriers will compare what exists on the roof to what existed before the storm, so a clear, dated record helps prevent later disputes during the adjustment process.
Because claim volume can surge after spring storms in Sherman, homeowners often face longer wait times for inspections, adjuster visits, and contractor calendars than during calmer periods. This reality hurts when a small leak becomes a larger concern, and it helps when there's a plan anchored by a clear proof trail. If the calendar is tight, acting fast on damage documentation can shorten the time to an initial inspection and reduce the chance of second-guessing by the adjuster. The best approach is to line up a reputable local roofer who can meet the adjuster on-site, provide a detailed scope, and help translate roof condition into an adjustment outcome. Don't assume the first available date is sufficiently soon-ask for a firm window and express the urgency of addressing wind-driven or hail-driven damage before it compounds.
Start with a storm-dated photo log: damaged shingles, granule loss in gutters, dented flashing, and any interior signs of water entry. Have your roof's age and material type documented, and gather any maintenance records you have kept. When an insurer assigns an adjuster, request a copy of the adjuster's report and the scope of work as soon as possible, then compare that scope to a local roofer's assessment to catch gaps early. If weather is closing in and a contractor backlog lingers, consider scheduling a temporary tarping and storm-resolution plan to prevent additional water intrusion while awaiting the final roofing decision. In this cycle, speed and documentation are the two levers that keep your roofing project from stalling when the sky sends its next round of hail and wind.
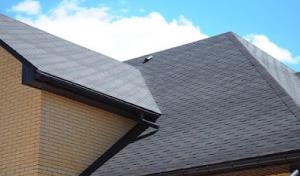
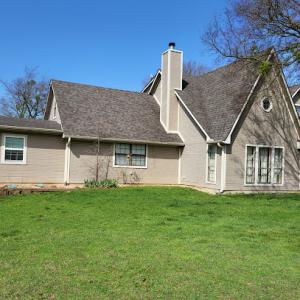
In this climate, hail and wind are the big drivers of roof life. Asphalt shingles are a dominant choice, but the hot, humid summers here accelerate granule loss, brittleness, and aging faster than milder climates. That means you'll want to scrutinize warranty terms and impact resistance ratings more carefully, especially after a severe storm. A roof that keeps granules in place longer reduces the chance of exposed underlayment, which matters for keeping attic temperatures and indoor comfort more stable. This is not a generic evaluation; these conditions-the heat, humidity, and North Texas hail exposure-shape what performs best for your home.
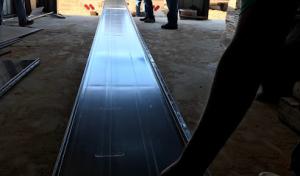
Metal roofing has a meaningful local specialty presence and is often considered by homeowners looking for better performance against hail, wind, and summer heat exposure. With metal, you get improved impact resistance in many common configurations, and the reflective surface can help limit heat absorption, which may lessen cooling loads on hot afternoons. Installers in this market emphasize proper attic ventilation and panel edge-to-edge fastening to resist wind uplift, especially on taller or projecting roof sections. If a roof change is on the table, metal can be a straightforward upgrade that translates into longer service life under the North Texas weather regime, provided the system is chosen and installed with attention to local gusts and roof geometry.
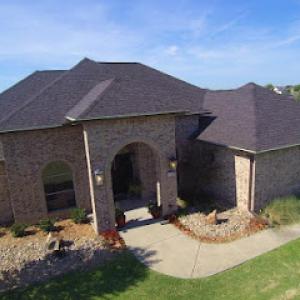
Clay tile, concrete tile, wood shakes, and synthetic shingles are all present in the Sherman market, but hail risk makes impact resistance, replacement matching, and breakage logistics especially important in North Texas. Clay and concrete tiles offer longevity and a distinct aesthetic, but they can suffer greater breakage during hail and severe storms. Replacements require careful matching to the existing profile and color, which isn't always possible after a storm event. Wood shakes bring natural texture and good performance in certain climates, yet they demand diligent maintenance and can be more susceptible to weather-driven wear in heat and humidity. Synthetic shingles provide a flexible, often lighter-weight option with a broader palette and potential impact resistance improvements, but ensure the chosen product handles the heat and UV exposure well. In all cases, verify that the underlayment and flashing can accommodate the tile or shake profile you select, since improper integration can undermine even a strong outer layer.
When planning a roof replacement or upgrade, pay close attention to how the chosen system handles wind resistance and hail loading. For any non-asphalt option, discuss fastening patterns, nail spacing, and edge details with the installer to ensure adequate resilience against the frequent North Texas wind events. If hail repair becomes necessary, strive for material compatibility and a clear plan for matching or blending existing material after retrofits. In Sherman, the combination of extreme heat, humidity, and hail odds means that an upgrade often hinges on choosing a material that not only looks right but also behaves well under direct sun and strong storms, with a sensible approach to replacement speed and warranty support.
In this climate, hail and wind storms can strike with little warning, and their aftermath often leads to insurance-driven replacement decisions. Replacement timing should account for the typical storm patterns: you want to start soon after the storm damage is assessed, but not so late that summer heat accelerates granule loss or compromises adhesive seals. Spring and fall are favored windows because they avoid the worst heat while reducing exposure to peak storm disruption. If a major hail event hits, a prompt, documented inspection helps move the process along without forcing a rushed job in extreme heat.
Spring and fall offer the most reliable conditions for replacement work. In spring, dry days tend to dominate before the summer humidity spikes, and crews can complete installation before the summer heat intensifies. Fall brings cooler temperatures that help sealants and underlayment set properly, while giving a buffer before winter weather arrives. Summer work should be planned with extra attention to heat management: shorter work periods, hydration strategies, and sturdy daytime schedules help maintain crew safety and roofing quality. Winter can slow progress due to cold snaps, so timing should anticipate occasional freezes and consider how some materials perform when temperatures dip near or below freezing.
Asphalt-based systems respond visibly to heat: excessive heat can speed wear on shingles and complicate sealant performance during installation. When a replacement is driven by hail or wind, ensure the crew adheres to best practices for venting, attic ventilation checks, and proper nailing patterns to counter wind uplift. Metal roofing, clay, and concrete tile each have unique curing or setting behaviors that benefit from milder temperatures. If a winter window is the only feasible option, confirm that fasteners and seals are rated for cold-weather installation and that temporary protectants are used to shield underlayment from rapid cooling.
Start with a documented damage assessment after a storm, focusing on visible impact and hidden weaknesses such as compromised underlayment. Coordinate with the insurer to align the replacement window with practical weather considerations, ensuring the chosen installation window minimizes exposure to peak heat and peak storm disruption. Schedule inspections and permit-ready planning during the spring or fall lull to avoid overlapping with high-wind periods. Confirm with the contractor that crew practices account for Sherman's summer heat, including shade breaks and heat-avoidance strategies, and that winter plans include contingency for cold-weather sealing and material handling.
Get a clear picture of your project costs upfront - no commitment required.
Lankford Roofing & Construction
(903) 465-7677 www.lankfordroofing.com
23994 US-82, Sherman, Texas
4.9 from 308 reviews
A Plus Gutters, Roofing & Sheet Metal
(903) 421-1712 www.apgutters.com
1029 S Sam Rayburn Fwy, Sherman, Texas
4.7 from 59 reviews
Texoma Roofing & Construction
(903) 771-0738 www.texomaroofing.com
2408 N Travis St, Sherman, Texas
4.3 from 102 reviews
T Rock Roofing & Contracting
(903) 271-3104 www.dallasroofer.com
108 E Houston St, Sherman, Texas
5.0 from 72 reviews
Serving North Texas with residential, commercial, and industrial roofing excellence for over 60 years.
Lankford Roofing & Construction
(903) 465-7677 www.lankfordroofing.com
23994 US-82, Sherman, Texas
4.9 from 308 reviews
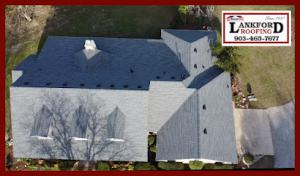
Since 1937, Lankford Roofing has been providing worry-free roofing solutions to Texoma Area. From gutter services to new shingle roofs, metal roofs, flat roofs, and emergency repairs, our honest and hardworking team takes a great deal of pride in the quality of their work. Customer satisfaction is our number one priority, and we are always happy to provide you with a free estimate for shingle roof damage repairs. To find out more information, give us a call today!
Square Construction
1604 S Sam Rayburn Fwy, Sherman, Texas
5.0 from 52 reviews
SQUARE is your hometown construction company specializing in storm restoration focusing on residential roofing, gutters, windows, fence and interior. Service areas include ALL of DFW and Greater Austin. We offer NO COST inspections and pre claim assistance. SQUARE is fully insured, locally owned/operated and not chasing storms around the country.
Gbt Roofing
(903) 818-6513 www.gbtroofing.com
4615 N Travis St Suite 160, Sherman, Texas
4.9 from 75 reviews
GBT Roofing is a local roofing company that takes pride in our honesty and integrity.
Top Repair Roofing
(903) 819-0452 www.toprepairroofing.com
5209 Playa Dr, Sherman, Texas
5.0 from 42 reviews
Roofing Repair Done Right!
Premiere Roofing
(888) 766-3669 premiereroofing.net
6320 Texoma Pkwy, Sherman, Texas
4.8 from 86 reviews
Premiere Roofing is one of the most trusted commercial roofing companies in the Dallas-Fort Worth, Sherman-Denison, Tulsa & Oklahoma City regions. With more than 25 years of experience, we are the consumers’ first choice for roofing needs. We are a full-service contractor specializing in commercial and residential roofing installation, repairs, roof coating, and emergency fixes. Premiere Roofing is A+ rated by the Better Business Bureau and GAF Master Elite Certified.
CRF Roofing Company
(903) 821-5579 crfroofingcompany.com
No wtf, N Loy Lake Rd, Sherman, Texas
4.8 from 26 reviews
Our team has more than 25 years of roofing experience and will make sure the roof protecting you and your family is secure. We take pride in our superior craftsmanship and in providing the best service for our clients. We'll start your appointment with an inspection of your roof to determine if there's any damage that needs to be repaired
Texoma Roofing & Construction
(903) 771-0738 www.texomaroofing.com
2408 N Travis St, Sherman, Texas
4.3 from 102 reviews
We are the premier Texoma Roofing company that is locally owned, operated, licensed, and a fully-insured roofing and construction company. If you should ever need it, our customers are easily covered locally by our industry leading, guaranteed warranty coverage! We provide free inspections and free estimates. We are ready to help you with your home or business. Texoma Roofing and Construction has a large service area covering North Texas, Southern Oklahoma and Louisiana.
Trail Head Roofing & Construction
2009 Independence Dr #105, Sherman, Texas
4.5 from 15 reviews
Located in Sherman, Texas, Trail Head Roofing and Construction is your trusted partner for all your roofing and construction needs. With services ranging from residential to industrial roofing, emergency storm damage repair to home renovations, we ensure top-notch workmanship. Additionally, our expertise extends to solar installations and innovative remodeling solutions. Partner with us and elevate the quality and safety of your structures. Reach out today and let us bring your vision to life!
ProFamily Roofing
Sherman, Texas
5.0 from 6 reviews
ProFamily Roofing is a roofing company in Sherman, TX and surrounding areas. We specialize in residential roofing services, including shingle, metal and flat roof installation. We also offer emergency repair services for storm damage and hail damage. Our experienced team of professionals will ensure quality workmanship at a fair price.

Izzy's Roofing & Construction
(903) 821-5246 izzysroofing.com
Sherman, Texas
4.8 from 4 reviews
Izzy Aleman Jr. has been in the roofing business in North Texas for more than 30 years. He is dedicated to providing customer service that is second to none. He offers roofing repair and replacement services. He will strive to save you both time and money by combining his use of roofing knowledge and dedication to delivering exceptional service. With over 30 years experience in the roofing business, he will not leave the job until it is finished and you are satisfied.

Big Bobs Roof Pros
(903) 647-6243 www.bigbobsroofpros.com
Sherman, Texas
5.0 from 3 reviews
Big Bob Roof Pros (Formerly BP General Contracting) is a Roofing company based in Sherman, Texas. We serve surrounding communities in all roof repair & replacement. We also install and servie metal roofs. Dont Settle for less than the best!
Reroof projects in this area are typically treated as permit-required work rather than maintenance-free tasks. That means you should expect the building department to be involved from the start, and your contractor should pull the appropriate permit before lifting the first shingle. If your project starts without a permit, you risk delays, fines, and future issues with insurance claims or resale. Know that the permit process in Sherman is not a formality; it shapes how your roof will be designed, installed, and documented for the next decade or more.
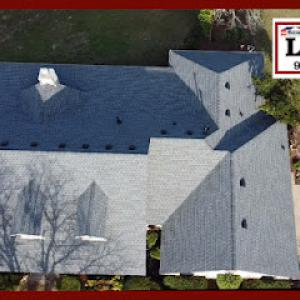
Sherman's building department commonly schedules inspections at key milestones to verify code compliance and wind-resistance requirements. You'll likely encounter checks after deck framing, once the underlayment is in place, and a final inspection when everything is completed. The deck inspection confirms the roof's structural readiness and attachment methods, while the underlayment inspection ensures a weather-resistant layer is properly installed and continuous. The final inspection is your sign-off that the project meets local codes and that the new roof is safely secured against North Texas wind patterns and hail exposure. Plan around these inspections so your contractor can coordinate weather, materials, and access to the attic or roof line without delay.
Turnaround for permits can vary, so it's wise to build in a contingency for approvals and potential rechecks. Communication with the building department matters: your contractor should provide clear timelines, permit numbers, and notification of inspection dates. Once the work is finished, the permit must be properly closed out. A missing or incomplete closure can cause future complications when applying for a mortgage refinance, a resale, or an insurance review. Make sure the contractor retains the final inspection report and any certificate of occupancy or completion documents, and file them with your home records.
Before scheduling, verify that the contractor has filed the permit and that the plan reflects the chosen roofing system and its wind-resistance features. Be available for inspections, especially the underlayment check, as inspectors will look for properly installed fasteners, nailing patterns, and edge detailing. If an inspection fails, address the cited issues promptly and reschedule to avoid delaying your overall project. In this climate, ensuring a compliant permitting path and timely inspections helps protect your investment against hail damage and wind-driven wear over time.
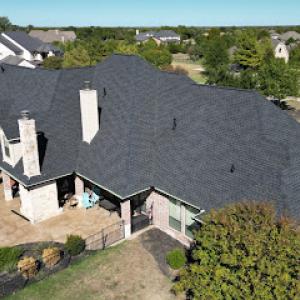
In Sherman, pricing per square commonly falls within these local ranges: asphalt shingles 350 to 650, metal 700 to 1100, clay tile 900 to 1500, concrete tile 800 to 1300, wood shingles or shakes 700 to 1100, and synthetic or composite shingles 500 to 900. These figures reflect typical material choices for houses in the area, taking into account local climate, exposure, and the mix of older and newer homes. When lining up bids, it helps to map the roof's square count to these per-square ranges and then compare installed totals that include underlayment, fasteners, ventilation, and any minor repairs that arise during the project.
Sherman experiences North Texas hail and wind, and that pattern drives when homeowners think about reroofing. After a hail event, demand for crews and materials can spike, squeezing scheduling windows and pushing labor availability tighter than in quiet periods. That pressure can translate into lead times that stretch beyond the typical two-to-three week window seen during calm months, and it can also nudge labor costs higher for a short spell. If a claim or anticipated replacement is on the horizon, it's practical to build a buffer for faster material turnaround or a tighter window to avoid weather-related delays. For many homes, choosing a material with better impact resistance-such as certain metal or higher-rated synthetic shingles-can balance upfront cost with longer-term durability in storm-prone seasons.
When choosing materials, consider how each option handles hail impact and wind uplift. Asphalt shingles stay cost-effective and familiar, but higher-end asphalt or synthetic shingles often offer better impact resistance without a dramatic jump in price. Metal roofing, while more expensive per square, provides outstanding wind resistance and hail performance, which can be a smart investment in a high-exposure year. Clay and concrete tiles bring a distinctive look and excellent durability but carry higher installation costs and a heavier weight, which may impact structural considerations and the overall project timeline. Wood shingles or shakes carry a classic appearance and moderate cost but can be more susceptible to hail damage unless upgraded to a more impact-focused variant. Synthetic or composite shingles connect durability with flexible design and can strike a balance between performance and price.
For a homeowner facing a hail-driven season, it pays to obtain multiple bids that itemize material type, underlayment, ventilation, and installation labor. Compare not just the per-square price but the projected total installed cost, since the choice between asphalt versus a more impact-conscious option can shift the total by a noticeable amount. In planning, set aside a contingency for potential cost fluctuations during storm recovery periods, and align expectations with the contractor about lead times for materials that may be in higher demand after a hail event. Keeping an eye on the roof's wind exposure and the home's tile or shingle compatibility helps ensure the chosen material will perform well under Sherman's typical storm profile.
In a North Texas storm corridor, hail and wind losses hit homes more often than in milder markets. Your roof is directly exposed to seasonal hail events and quick wind shifts, so keeping thorough records isn't cosmetic-it's practical protection. Date-stamped photos of shingles, attic and crawlspace observations after a storm, and notes from a trusted inspector create a credible trail if a claim needs to move beyond first notice. This is especially true for homes with clay, concrete, or composite shingles, where damage can appear later or under intermittent wind gusts. Build the habit of documenting every storm's aftermath and save images that show both surface changes and interior signs of moisture.
Carriers serving this area may adjust deductibles or coverage terms after claims, and repeated storm activity compounds that risk. Without solid documentation, a later evaluation can feel arbitrary and leave a homeowner facing higher out-of-pocket costs or tougher approval for mitigation work. Insurance conversations will go smoother if you can point to a consistent record of pre- and post-storm conditions, plus notes from licensed professionals who inspected the roof, attic, and flashings. Understand that a single event can set a precedent for how future storms are evaluated.
Documentation becomes a technical asset when settlements are negotiated after Sherman storms. Dated photos, material records, and inspection notes provide a tangible basis for your case, especially when hail patterns or wind-driven damage are not obvious to a casual eye. Keep copies of contractor reports and any written recommendations, and store them in a weatherproof, accessible location. When storms roll through, you'll thank yourself for the organized files that support a fair settlement. That diligence can also speed approvals for necessary roof work right after a major hail event here.
Connect with contractors who help homeowners navigate the claims process from damage assessment to final approval.
T Rock Roofing & Contracting
(903) 271-3104 www.dallasroofer.com
108 E Houston St, Sherman, Texas
5.0 from 72 reviews
Lankford Roofing & Construction
(903) 465-7677 www.lankfordroofing.com
23994 US-82, Sherman, Texas
4.9 from 308 reviews
Square Construction
1604 S Sam Rayburn Fwy, Sherman, Texas
5.0 from 52 reviews
When hail and strong winds roll through, the first spots to show trouble are penetrations and edge details, not just the big field damage you see from a distance. In this market, flashing around vent pipes, chimney bases, dormers, and the transition between roof and wall are the usual culprits. Over time, hail impact can micro-crack sealant and bend metal, while wind can pry flashing loose at attachment points. A careful leak search starts there, with targeted checks for staining around stacks, and a careful shake-out of any fasteners that look corroded or loose. In Sherman, these details tend to fail quietly, so a proactive owner-initiated inspection after storms saves bigger headaches.
The local contractor signal mix shows active demand for skylight repair and low-slope roofing help, indicating recurring homeowner pain points in the market. Skylights sit at the intersection of economy and exposure: their seals are stressed by heat, hail, and rapid temperature swings, and the surrounding flashing can deteriorate faster than the adjacent shingles. Low-slope portions, common where porches or sunrooms meet the main roof, are especially vulnerable to ice damming and wind-driven debris infiltration. When you notice condensation, soft drywall near a skylight, or intermittent drips during rain, treat it as a sign to verify the skylight curb and surrounding flashing are sound.
Fall winds and debris in Sherman increase edge wear and cleanup needs, which can expose weak flashing transitions and drainage trouble spots. Leaf buildup, gutter overflow, and shingle overhangs that catch blowing grit all concentrate wear where roof meets eave, rake, and corner details. Regular fall inspections should prioritize the eaves, gutter line, fascia, and drip edges. If you see lifted shingles at the edge after a wind gust, or notice granule loss near valleys and gutters, address the flashing transitions and drainage path promptly to prevent interior leaks.
Find contractors experienced in skylight installation, flashing, and leak repairs to bring natural light into your home.
T Rock Roofing & Contracting
(903) 271-3104 www.dallasroofer.com
108 E Houston St, Sherman, Texas
5.0 from 72 reviews
Top Repair Roofing
(903) 819-0452 www.toprepairroofing.com
5209 Playa Dr, Sherman, Texas
5.0 from 42 reviews