Last updated: Apr 19, 2026
In this climate, spring hail and severe thunderstorms are the primary triggers for roof replacements rather than aging out. When a regional storm rolls through, you should treat your roof as a potential insurance claim first and a home upgrade second. Start with a quick, careful walk around the house the day after the storm to spot obvious bruising, pockmark dents on aluminum vents, and missing or lifted shingles. If you see granule loss on the driveway or gutters, note it, but understand that insurers will evaluate functional damage beyond cosmetic wear. This is how the local pattern plays out: a fast, clear signal from the roof deck often trumps cosmetic-only concerns in the eyes of adjusters.
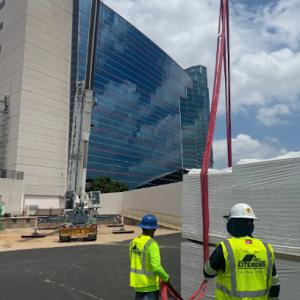
High claim activity in the area means adjuster visits, photo documentation, and insurer estimate reviews can create a tight cadence after a storm event. You must prepare to coordinate quickly. Gather recent utility bills, mortgage or ownership documents, and any prior roof work receipts. Take high-resolution photos from multiple angles: elevated shots that capture ridge lines, valleys, flashing, gutters, and any soft-metal components. Document interior signs of water intrusion if present-stains, warped ceiling drywall, or attic condensation. When the insurer appointment is scheduled, plan for a precise access route to the roof and an unobstructed attic space for the adjuster to review potential deck damage.
Richardson roofs frequently get replaced after hail rather than simply aging out. This makes it critical to distinguish cosmetic granule loss from functional issues. Insurers will evaluate shingle performance, flashing integrity around chimneys and vents, and any soft-metal damage to edges or gutters differently than surface granule wear. If the debris field shows asphalt shingle fractures, cupping, or granule fill in gutters after a storm, treat these as potential indicators of deeper deck or underlayment concerns. Prepare a concise log of hail dates, storm intensity, and any temporary measures you've used to protect the home, such as tarping or water intrusion mitigation.
After the adjuster's visit, you will receive an estimate that may require verification or revision. Schedule time to review the estimate in detail, panel by panel. Bring the photos, the storm date, and notes about any areas the adjuster might have overlooked, such as attic venting or step-flashing along the chimney line. If an item is disputed, provide supplemental photos or third-party assessments focused on the specific component-shingles, flashing, or vent hardware. The goal is to move toward a complete replacement plan that addresses both visible damage and any hidden risks, without unnecessary delay caused by back-and-forth on minor items that don't impact roof integrity.
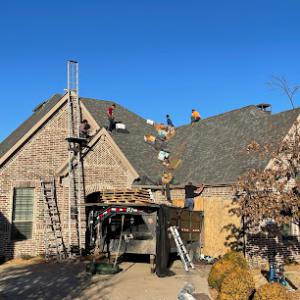
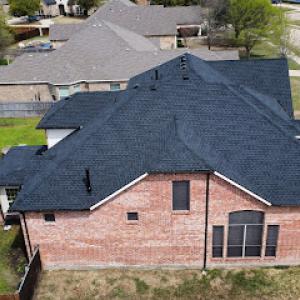
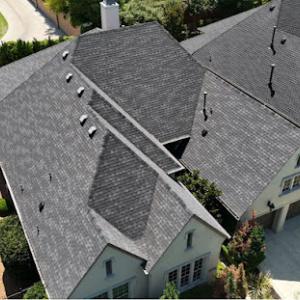
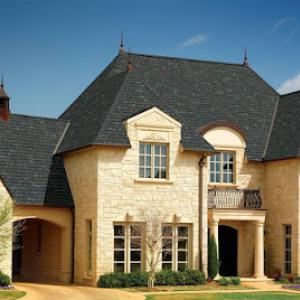
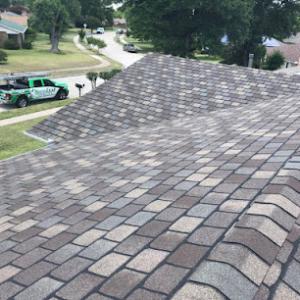
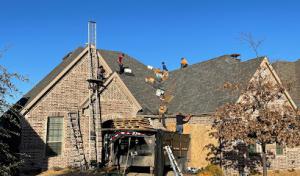
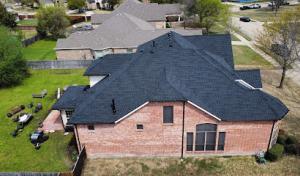
Asphalt shingles dominate many neighborhoods because they fit common suburban roof forms and are widely used for hail-related replacement cycles in North Texas. They install quickly, respond well to varying roof pitches found across the area, and offer a straightforward path for inspecting and documenting hail damage after a storm. For homeowners facing repeated hail events, asphalt shingles provide predictable performance with a broad selection of impact-resistant options and a familiar installation process that crews can execute with minimal disruption to surrounding landscaping and outdoor living spaces.
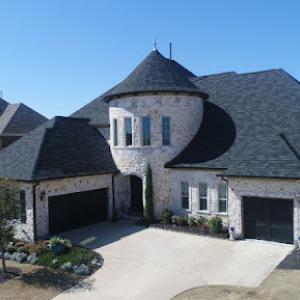
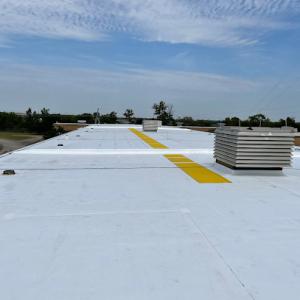
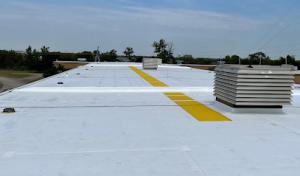
Clay tile, concrete tile, synthetic/composite, metal, and slate all appear in the Richardson market, but hail exposure and summer heat make impact resistance, fastening details, and underlayment choice especially important here. Clay and concrete tiles are visually appealing and carry long lifespans, but their weight requires structural assessment and careful edge detailing to resist wind uplift during severe gusts. Synthetic or composite shingles can offer improved impact resistance with more flexible underlayment and foundation compatibility, though you should verify colorfastness under prolonged sun exposure. Metal roofing delivers outstanding hail resistance and durability, but flashing details and fastener patterns must be precisely engineered to accommodate thermal expansion. Slate brings a premium, long-lasting option, yet its brittleness requires meticulous installation and robust underlayment to avoid crack propagation from hail impacts and thermal cycling. In practice, many homeowners pair these materials with reinforced fasteners and upgraded underlayment to address Richardson's harsher summers and storm cycles.
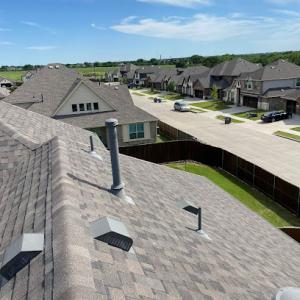
Richardson's hot summers and repeated storm seasons make attic ventilation, flashing durability, and resistance to thermal cycling more important than in milder regions. Proper attic ventilation helps manage heat buildup that can degrade roofing components and accelerate aging of underlayment and sealants. Flashing at valleys, chimneys, and transitions must be designed to withstand both intense summer heat and sudden hail impacts, with corrosion-resistant materials and secure fastening to prevent leaks. Thermal cycling-the repeated heating and cooling of attic and roof assemblies-demands materials with compatible expansion rates and reliable sealants to preserve long-term waterproofing. When selecting any roofing type, pay close attention to the compatibility of the chosen underlayment with local shingles or panels, and confirm that fasteners are rated for North Texas temperature ranges and wind exposure.
In this climate, fastening details matter as much as the material choice. Wind resistance ratings, nail patterns, and style-specific installation instructions should be followed to the letter, especially on steeper pitches or complex rooflines common in older subdivisions. For asphalt, look for impact-resistant shingle options and a wind-rated installation method that suits the local wind exposure on exposed ridgelines. For metal, ensure the paneling integrates with venting and drainage, and that edge and seam details are sealed against both hail impacts and thermal movement. If choosing tile or slate, insist on experienced installers who honor careful weight considerations, sound underlayment choices, and reinforced flashing around penetrations. A durable roof in this market is as much about the installation's attention to detail as about the material itself.
Start with evaluating roof form and framing capability, then match your material choice to how you'll handle hail exposure and summer heat. For many homeowners, a high-quality asphalt system offers reliable protection with manageable maintenance, while those seeking long-term prestige may opt for tile or slate with a robust support and installation plan. Regardless of material, insist on an underlayment system designed for North Texas cycles, confirm that fasteners and flashing are appropriate for heat and wind, and coordinate with a trusted local contractor who understands the specific storm and hail patterns that shape roofing life in this area. In practice, the best roof type balances immediate hail resilience, enduring performance through heat-driven cycles, and a proven installation approach that minimizes risk during the next storm season.
In Richardson, storm seasons push scheduling backlogs across the Dallas area, and local pricing reflects both the material ranges and the surge in demand after hail events. When a hailstorm hits, you may see a tight window for available crews and materials, which can nudge installation timelines and overall costs upward. This isn't just about the roof itself; the backlog can affect timing of inspections, insurance-driven decisions, and the pace at which crews can start and finish a full reroof.
Material choice matters sharply in this market. Asphalt shingles remain the lower-cost mainstream option, with typical installed costs at the lower end of the spectrum. Metal, clay tile, concrete tile, synthetic/composite shingles, and slate carry higher installed costs and can be harder to justify in a hail-prone replacement scenario. If the hail damage is extensive, however, the longer-term durability and reflectivity of metal or synthetic options may still be a consideration. In practice, a homeowner should compare the upfront cost delta against expected longevity, maintenance, and hail resistance in the local climate.
Costs can rise when damaged decking, ventilation corrections, flashing replacement, or code-related scope items are discovered during full reroof projects submitted through Richardson's process. Hail can crack or bruise decking beneath the shingles, and addressing these sublayers adds labor and materials beyond a simple shingle replacement. Ventilation and flashing upgrades may become necessary to restore proper function and airflow, which adds to both material and labor expenses. If a roof replacement uncovers framing repairs or insulation needs, budget for those as part of the overall project.
Start with a realistic estimate range based on the material you prefer, then add a contingency for possible decking work or flashing upgrades. Asphalt shingles typically offer the most predictable pricing path in this market, but even they can see cost bumps when storm demand tightens schedules. If hail contributes to a decision to upgrade to metal or synthetic options, frame the plan with expected long-term benefit against the higher installed cost. Finally, anticipate a multi-stage timeline because storm response, inspections, and crew availability can create staged progress windows rather than a single continuous install.
Pro Exteriors
(469) 535-1708 www.proexteriorsus.com
1850 N Greenville Ave #170, Richardson, Texas
5.0 from 83 reviews
Pro Exteriors, LLC is a company that is built on a foundation of trust, honor, and integrity. We take pride in our customer service, and go above and beyond to make sure that we deliver exceptional service to all of our customers and clients.
B&R General Contracting
(972) 836-8455 www.brgeneralcontracting.com
651 N Plano Rd Suite 421, Richardson, Texas
5.0 from 145 reviews
We are experts in all types of concrete projects. From new construction to routine concrete repairs, our team assesses your needs and builds projects to ensure long lasting results. Concrete parking lot repairs, including sidewalks, curbs, and trip hazard mitigation are designed to be in ADA compliance. By implementing best practices in construction, our dedicated concrete team will enhance your curb appeal. Commercial and residential storm restoration experts serving the greater Dallas-Fort Worth area.
Rushing Roofing & Contracting
(469) 925-7076 rushingroofingllc.com
2100 N Greenville Ave Suite 507, Richardson, Texas
4.9 from 133 reviews
General contracting company specializing in the roofing and remodeling trade.
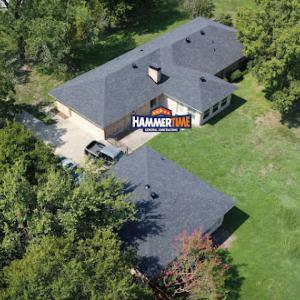
HammerTime General Contracting
(866) 261-8980 www.hammertime.co
207 W Main St, Richardson, Texas
4.9 from 91 reviews
Hail/Wind, Fire, Water, Mold Experts! We're a dedicated team committed to delivering outstanding construction services. Our focus is on exceeding expectations with our quality, efficiency, and customer-centered approach. We take pride in our meticulous attention to detail, unwavering integrity, and strict safety standards. Whether it's managing projects within budget and on schedule or adapting to challenging requests, we strive for excellence. Our communication lines are always open, ensuring a smooth and worry-free experience for our clients. As we continuously improve and adapt, our goal remains the same: to be your first choice for reliable, professional, and exceptional construction solutions. Connect with us for your next project!
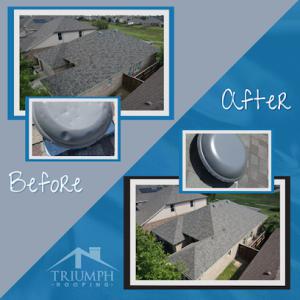
Triumph Roofing
(972) 332-1766 www.triumphroofing.net
Serving
4.9 from 173 reviews
Triumph Roofing, a proud Owens Corning PLATINUM installer, holds a distinguished place among home construction and roofing companies in Dallas, Texas. In addition to specializing in installing all types of new roofing systems, we also provide a comprehensive spectrum of services for all your roof repair and maintenance needs. Our team of professional roofers is committed to build a successful relationship with our clients and agrees that the effort is just as important as knowing how to construct a quality roof.
Frog Roofing
(945) 227-8333 frogroofing.com
Serving
4.9 from 220 reviews
Frog Roofing provides superior roofing services in Plano, TX. Whether you need roofing installation services in Texas or are searching for roofing replacement companies in your local area, we are your trusted roofing contractor. Our team, with over 15 years of experience and licensed roofers, specializes in commercial and residential roofing, including maintenance, repair, installation, and replacement. At Frog Roofing, we not only believe in providing quality roofing services, but we also have a track record of meeting the expectations and requirements of our customers. Our team of experienced roofers, 1670+ satisfied clients and 100% satisfaction rate position us as the best roofing services provider. Call us to schedule a FREE inspection
Concord Roofing & Construction
(214) 299-6110 concordroofingtx.com
Serving
4.9 from 93 reviews
Concord Roofing & Construction is here to assist with all your roofing and construction needs. Our roofing contractors in Plano ensure quick and efficient service delivery within the city. Make a note of our location and reach out to us for reliable and professional roofing and construction services.
RCSA Roofing & Construction
(972) 360-7891 www.rcsausa.com
Serving
5.0 from 135 reviews
RCSA Roofing & Construction is a full-service general contracting firm based in Plano, Texas. We specialize in residential and commercial roofing, storm restoration, insurance claim assistance, and all phases of construction throughout the DFW metroplex.
Restoration Builders of Texas
(214) 823-7663 restorbuilders.com
Serving
4.7 from 125 reviews
Welcome To Restoration Builders of Texas. We’re incredibly proud of our Better Business Bureau A+ rating and GAF Master Elite Contractor certification. Restoration Builders of Texas is a residential & commercial contractor operating in the United States. Our Roof, Windows, Siding, and Gutter repair and restoration experts assist with everything from roof inspections and minor repairs to comprehensive storm damage rebuilds and just about everything in between. Our mission is to protect, restore and build properties, strengthen families and support our communities. We are a national company committed locally and ready to serve a wide-scale disaster response. Contact us for a free inspection: info@restorbuildersTX.com.
Redbird Roofing
(972) 596-5328 www.redbirdroofingtx.com
Serving
4.9 from 55 reviews
Redbird Roofing, based in Plano, Texas, is a fully insured, bondable roofing company serving residential and commercial properties across Texas and the U.S. We specialize in roof repairs, replacements, storm damage assessments, and yearly maintenance. Our commitment to quality and customer care has earned us a reputation for excellence. Whether you need a roof inspection, re-roofing, or repairs, Redbird Roofing delivers reliable service and exceptional craftsmanship. Trust us to exceed your expectations with every project, big or small. Call us today for your free estimate!
Brothers Roofing
(214) 310-0337 www.brothersroofs.com
Serving
4.9 from 147 reviews
Commercial and residential general contractor specializing in roofing and roof systems
Greenleaf Roofing
(972) 379-9109 www.greenleaf-roofing.com
Serving
5.0 from 156 reviews
Local DFW Roofing company with an eye for excellence. We perform all kinds of roofing services, from mild to wild! Metal and flat work to shingles on your own home. Give us a call today for a free property inspection report.
In this market, securing a permit is not an afterthought. The city requires permits for full roof replacements, and the application is handled through the Building Department. Either the contractor or the property owner can file, but the process benefits from having the contractor manage the submission to ensure all technical details line up with code. Richardson uses an online permit system, meaning documentation, plan review notes, and scheduling are integrated into the reroof process rather than left as an informal, contractor-only step. Accessing the system ahead of work helps you understand what attachments are expected and what inspections will be requested. Prepare to provide project scope, material specifications, and a rough schedule, so the city can track progress from underlayment through final.
Inspections in Richardson are typically staged around key milestones. The first major check commonly occurs after underlayment or roof deck work is in place. This allows the inspector to verify decking condition, fastener patterns, and underlayment alignment before shingles or metal are installed. The second major inspection happens at final completion, confirming that flashing details, venting, attic ventilation, and roof-to-wall transitions meet code and local practice. Being proactive about ventilation-confirming that attic spaces are adequately vented and that ridge or soffit openings are visible and unobstructed-helps prevent callback visits and potential rework. If the contractor or you have any questions about what the inspector will expect, reach out before work advances past the underlayment stage.
The city may request documentation related to venting, attic ventilation, and flashing details. This means you should keep close records of material choices (types of underlayment, flashing materials, vent caps), installation notes, and any deviations from standard practice. Take clear photos of roof penetrations around plumbing, chimneys, vents, and skylights, as well as flashing at valleys, drip edges, and eaves. Retain manufacturer installation guides for roof vents and flashing, and be ready to present these during the permit review or at an inspection. If a storm repair scenario arises, organized documentation can expedite the permit review and help align replacement decisions with insurance requirements.
Plan around the online permit timeline by coordinating with the contractor to submit the application early and request inspection appointments soon after work milestones. Confirm who will host required documentation and whether the city needs digital copies of drawings or product specs. Given the climate and storm exposure in the area, you'll benefit from pre-storm scheduling checks and a clear line of communication with the Building Department to avoid delays during permit review or after-hurricane-style weather events. Keep a dedicated folder for all permit numbers, inspection reports, and approved plan notes so the reroof remains traceable from permit issue to final sign-off.
Spring in Richardson brings milder temperatures compared to summer, which helps keep crews comfortable and materials handling manageable. The window from late March to early June often offers the most favorable temperatures for roof work. However, spring is also the city's highest-risk hail period, and severe storms can interrupt schedules or cause temporary bottlenecks as crews pause for hail assessments and insurance documentation. If spring is chosen, plan for contingency days and flexible timing around anticipated storms, with a mindset that your project may slow down during peak hail activity.
Hot North Texas summer conditions can slow installation pace and make crew timing, material handling, and afternoon storm planning more important on Richardson jobs. By July and August, crews often face back-to-back afternoon storms and heat-driven fatigue, which can shorten daily windows. For homeowners, the practical approach is to target early-start days, schedule smaller work shifts in the afternoon, and secure shaded staging areas for materials. A steady, staged pace tends to yield fewer on-site delays, compared with trying to push through extreme heat bursts.
Fall wind events are a real consideration in this area. The milder temperatures of September through November are appealing for securing a reroof before winter, but gusty fronts can disrupt work windows or cause temporary shutdowns. Fall also coincides with the tail end of storm season, so inspections and phased progress plans should account for potential weather interruptions. A practical approach is to front-load critical tasks-sheathing checks, underlayment alignment, and flashing fitments-early in the fall calm spells, then maintain flexible scheduling as fronts move through.
Winter in Richardson is typically shorter and less limiting than in colder climates, yet occasional cold fronts and brief thaws can still affect timing. Work during milder winter days can be productive, but occasional cold snaps or brief freezes after rain can compromise overhangs and sealant work. The strategy is to target stable days with clear forecasts for higher-risk tasks and to keep an adaptable crew plan for sudden temperature swings. In practice, this translates to booking the most predictable weather blocks available and using lean, weather-resilient sequences.
Overall, the best months blend manageable temperatures with the least disruption from hail or wind. In practice, align reroof planning with a flexible calendar, prioritize early-in-the-season start when storms are statistically less frequent, and build buffers for weather-driven interruptions. For homeowners facing storm-driven timelines, documenting hail exposure and insurance-responsive milestones helps keep the project on track when schedules compress or shift due to Richardson's dynamic spring and fall weather patterns.
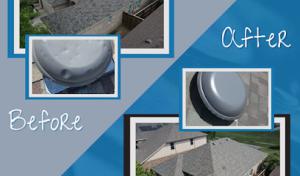
In Richardson, repeated hail and wind exposure commonly put stress on shingles, ridge components, flashing, vents, and other roof penetrations before the roof reaches its theoretical age limit. That means the first signs of trouble often show up at seams and transitions rather than across a pristine field of material. A roof can look fine from the ground while undermining damage bleeds into deck weakness, dry rot, or compromised sealant around critical joints. Pay attention to unusually soft spots, loose granules, or small dark patches that appear after a storm cycle.
Skylights and flashing transitions deserve extra scrutiny because storm-driven water intrusion often shows up first at penetrations and edge details rather than across the whole field of the roof. In practice, that means flashing around vents, chimneys, and skylights can fail prematurely if hail dented metal, bent underlayment, or shifted fasteners create micro-leaks. Inspect the eave edges after heavy downpours, since wind-driven spray tends to exploit the most exposed seams. If you notice peeling sealant, rusting metal, or damp insulation near those points, plan a targeted inspection rather than waiting for widespread shingle damage to appear.
Tile and higher-end systems in Richardson can present a different problem set than asphalt roofs, including impact-related breakage and the need to inspect underlayment and accessory details after storms. Clay and concrete tiles may crack or shatter with hail, and fasteners can loosen under wind gusts, allowing tiles to misalign and lift. Underneath, the underlayment and battens can suffer from punctures or abrasion that compromise roof deck protection. For metal, pay attention to edge trims and ridge caps, which can suffer denting or seam separation that invites moisture ingress around fasteners.
After a severe hail event, walk the roof only if safe; otherwise, arrange a professional inspection focused on penetrations, flashing joints, and ridge lines. Look for micro-leaks around vents, staining on ceilings, or musty smells in attic spaces-these are often harbingers of trouble at the perimeter more than across the broad expanse of shingles. A proactive, targeted assessment helps catch failure points before they escalate into widespread interior damage.
Find contractors experienced in skylight installation, flashing, and leak repairs to bring natural light into your home.

North Texas is a high-claim roofing market, so you should expect insurers to require detailed photos, a thorough estimate, and often an on-site adjuster inspection. In this climate, fast-moving storms mean damage can appear subtle at first glance, but insurers look for a clear trail of evidence. A careful record helps you avoid back-and-forth delays and ensures your claim reflects the true scope of the roof's condition after a hail event.
Recent Texas insurance tightening means some Richardson homeowners may face higher deductibles or narrower storm-related coverage terms than in prior years. To navigate that reality, assemble a dated photo log from multiple angles, including exterior shingles, gutters, vents, and any metal flashing. Keep copies of all correspondence, signed estimates, and any expert notes you obtain. The goal is to present a cohesive, easy-to-follow story for the adjuster to verify.
Because claim volume is high after regional hail events, you benefit from documenting exterior damage, interior leaks, dates of loss, and temporary protection measures as early as possible. Take photos of dented decking, water stains, and any sagging areas inside the attic or ceiling. Note when you first noticed issues and when temporary repairs were performed to stop further damage. This upfront effort reduces friction during the adjuster's on-site review and speeds restoration decisions.
Expect an on-site adjuster to visit, often within a narrow window after a claim is filed. Be ready to walk the property with them, point out all damaged areas, and share your organized photo timeline and estimates. If you encounter confusing terminology or conflicting recommendations, request a written explanation and, if needed, a second opinion from a contractor you trust. The aim is to protect your home while keeping expectations realistic through the process.
Connect with contractors who help homeowners navigate the claims process from damage assessment to final approval.
Pro Exteriors
(469) 535-1708 www.proexteriorsus.com
1850 N Greenville Ave #170, Richardson, Texas
5.0 from 83 reviews
B&R General Contracting
(972) 836-8455 www.brgeneralcontracting.com
651 N Plano Rd Suite 421, Richardson, Texas
5.0 from 145 reviews
Rushing Roofing & Contracting
(469) 925-7076 rushingroofingllc.com
2100 N Greenville Ave Suite 507, Richardson, Texas
4.9 from 133 reviews