Last updated: Apr 19, 2026
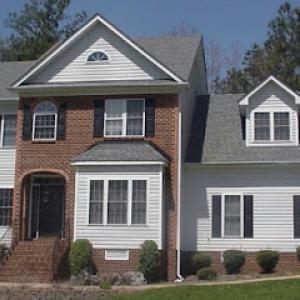
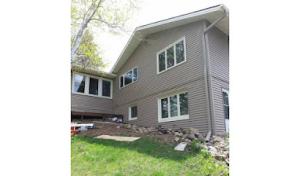
In Onalaska, spring hail and wind storms are a major trigger for roof inspections, claim filings, and contractor scheduling backlogs. The bluff-and-river exposure of the La Crosse area subjects roofs to concentrated wind gusts and hail strikes that pry at shingles, flashings, and vents even when the rest of the neighborhood seems untouched. That means a storm can push a routine roof concern into an urgent claim overnight, and the rush to repair cascades into a flush of contractor bids and scheduling conflicts. Homeowners who wait for sunshine to decide on a repair will often find the first available crew booked for weeks, sometimes months, once the spring weather turns brutal.
Wisconsin insurers in this market weigh hail and wind exposure heavily, and roof age and material can affect premiums and claim outcomes for Onalaska homeowners. A roof that has endured several winters of freeze-thaw cycles, plus a recent hail event, signals higher risk to both your insurer and a local adjuster. Asphalt shingles may show granule loss and curling after a big hail year, while metal roofs can dent and panels can loosen at the seams. The age and condition of the underlayment and flashings matter just as much as the visible damage. When the claim factors lean toward exposure, insurers may scrutinize the condition of surrounding structures, the attic, and even the decking to determine replacement eligibility. This means a straightforward shingle replacement in a good year can become a more involved process in a storm season.
Homeowners here should expect insurers to request pre-loss or prior-condition photos and to send adjusters, which can slow approval timing during active storm periods. A typical trip to a storm-damaged roof can unfold in stages: initial assessment by the insurer, a request for documentation, a scheduled adjuster visit, and then a contractor-approved scope. In peak season, backlog pressures push these steps closer together and can extend the time from first notice to written approval. If you already have clear before-and-after photos, a dated record of wind or hail impacts, and a log of any interior leaks, you reduce the chance of back-and-forth delays. It is crucial to photograph the entire roof from multiple angles, focusing on granule loss, lifted shingles, cracked seals around chimneys and vents, and any interior evidence of roof leaks in the attic.
Start with proactive documentation. Before any hail season, take a comprehensive photo set of your roof, attic, and any exterior features that could be affected by wind-chimneys, vents, skylights, and edge flashing. After a hail event, photograph immediately but avoid stepping on damaged areas to prevent further damage. If you notice leaks in the attic or water marks in ceilings after a storm, document these signs promptly. When a claim is filed, respond quickly to insurer requests for documentation and schedule an adjuster visit as soon as possible. Align with a local contractor who understands the likely weather window for replacement and can respond quickly when the claim settles. In the deep backlog months, a coordinated timing plan-document, adjuster, contractor-helps ensure you're not left exposed to another storm with an incomplete or delayed repair. If you have multiple risks on the same roof, consider a proactive plan to address flashing and vent work during the same replacement cycle to reduce future interruptions. This season, readiness and rapid communication with your insurer and contractor are the most powerful tools to protect your home and your time.
First American Roofing & Siding
(608) 783-3101 www.firstamericanroofing.com
1472 WI-35, Onalaska, Wisconsin
4.7 from 229 reviews
First American Roofing and Siding is a trusted name in exterior home improvement, proudly serving Onalaska, WI, and surrounding communities. Known for our commitment to craftsmanship and 5-star customer service, we offer a full range of solutions including roof repair, roof replacement, gutter replacement, siding installation, and insulation installation. As a reliable commercial roofer, we also deliver durable, efficient roofing systems tailored to local businesses. Every project is handled with care, precision, and a focus on long-term value. Our team is locally rooted, professionally trained, and dedicated to protecting and enhancing your home or property.
Riverview Builders
(608) 780-2254 riverviewbuilders.net
N5554 Abbey Rd, Onalaska, Wisconsin
5.0 from 20 reviews
Riverview Builders, a trusted La Crosse roofing contractor, is the leading choice for superior residential construction services. Established in 2016, with a team of skilled professionals specializing in roofing services, they strive to deliver exceptional craftsmanship, using high-quality materials and offering personalized solutions for every project, no matter how big or small. With an unwavering commitment to unparalleled customer satisfaction, they endeavor to not only beautify your home but also provide exceptional protection, making Riverview Builders the go-to choice for all your roofing needs.
Borchert Exteriors
Onalaska, Wisconsin
5.0 from 6 reviews
When it comes to your home’s exterior, you need to have trusted professional roofing contractors working on it. Borchert Exteriors in Onalaska, WI, will work their magic by effortlessly transforming your home’s appearance and curb appeal with a full range of services. This family-owned and -operated company is fully licensed and insured, allowing you to rest easy while their roofing contractor team tends to your home. Work with Borchert Exteriors to update the look and functionality of your home’s exterior without breaking the bank. They’ll provide you with a free estimate before getting to work to ensure they meet your needs and so you know exactly what to expect. Call this roofing contractor company at (608) 386-6247
Interstate Roofing & Waterproofing
(608) 783-2106 www.interstate-roofing.com
N5544 Commerce Rd, Onalaska, Wisconsin
4.2 from 31 reviews
For residents and business owners in Wisconsin, Minnesota, and Iowa, Interstate Roofing & Waterproofing located in Onalaska, WI, is available for commercial or industrial roofing services, including historical restorations. These roofers specialize in commercial properties and provide a range of options for customers including standing seam roofing, single-ply, built-up roofing, and steep slope. They have completed projects for elementary schools, retail stores, churches, office buildings, and much more.
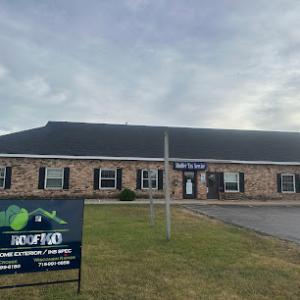
RoofKO JAM Consulting & Restorations
(608) 399-6180 www.roofko-lax.com
Serving
4.7 from 12 reviews
Roofing, Siding, Gutter, Gutter Guard, Insurance Specialist

Kendhammer A-1 Roofing & Construction
(608) 790-9111 kendhammerroofing.com
Serving
4.9 from 75 reviews
Kendhammer Roofing, LLC in La Crosse, WI provides professional roofing, new construction, remodeling, window installation, deck building, garage building, and siding services. Call to hear more about our services. Roofing Services Roofing Installation Services Roofing Repair Services New Construction Services Remodeling Services Siding Services Window Installation Services
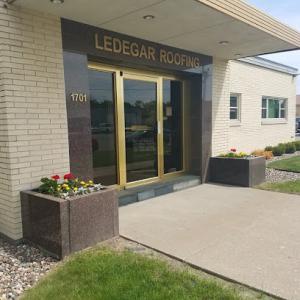
Ledegar Roofing Company
(608) 785-0901 ledegarroofing.com
Serving
4.9 from 104 reviews
Ledegar Roofing Company specializes in all roofing systems for both commercial and residential properties. We also provide emergency roof leak repairs, chimney cleaning, siding, gutters, soffit & fascia, and preventative maintenance.
Culpitt Roofing
(800) 944-0662 craft.culpittroofing.com
Serving
4.9 from 129 reviews
Culpitt Roofing has over 60 years in the double lock standing seam metal roofing industry. Our roofs can be found on the tops of residential, agricultural, and commercial buildings spread across the upper Midwest. Licensed to operate in Wisconsin, Minnesota, Iowa, Illinois, and North Dakota, Culpitt Roofing travels far and wide ensuring your investment in protected.
Apex Xteriors
(608) 397-8382 www.apexxteriors.com
Serving
5.0 from 39 reviews
Apex Xteriors is a locally trusted roofing and siding contractor serving Holmen, Onalaska, La Crosse, and communities within 100 miles across Western Wisconsin. We specialize in storm restoration and exterior remodeling for homes and businesses. Our roofing team installs premium Malarkey Vista Class 4 impact-resistant shingles backed by the Emerald Pro 50-Year Warranty. For siding, we offer expert installation in vinyl, LP SmartSide, and steel, using only top-rated products. From hail damage repairs to full exterior upgrades, Apex Xteriors delivers craftsmanship, reliability, and long-lasting results. Call today for your free roof or siding inspection.
A-1 Roofing & Construction
(608) 790-4156 a-1roofingandconstruction.com
Serving
4.7 from 14 reviews
A-1 Roofing And Construction is the coulee region leader in quality roofing installations. We feature the very best products and the most innovative techniches paired with the profesional service you expect.

La Crosse Quality Roof Repair
(608) 394-3940 roofrepairlacrosse.com
Serving
5.0 from 2 reviews
La Crosse Quality Roof Repair aims to be the first call for anyone in the La Crosse area and Coulee Region that needs fast, affordable, and quality roof repair services.
ProPoint Roofing & Construction
(608) 386-7338 www.propointwi.com
Serving
4.4 from 8 reviews
ProPoint Roofing & Construction has been a top roofing contractor in La Crosse, WI and surrounding areas for over a decade. We specialize in residential roofing, commercial roofing, roof repair, roof installation, and emergency roof repair. We have a commitment to excellence and a reputation for top quality craftsmanship that have made ProPoint Roofing, a top rated roofing company in La Crosse, WI.
In Onalaska, the pattern of cold winters followed by rapid thaws creates repeated movement in roofing joints, flashings, and vulnerable transition points. That cycle stresses materials differently than in milder climates, and it shows up as hairline leaks, loose vent caps, and cracked underlayment when the next freeze hits. Understanding where stress concentrates helps you spot problems before they become big repairs.
As temperatures swing above and below freezing, moisture trapped in shingles, underlayment, or between sheets of metal can expand and contract. In the attic, insulation can act like a sponge, pulling moisture through nail penetrations and around flashing seams. Over time, that cycling wears away at sealants, mortar bed areas on tile roofs, and the edges of shingles where wind-driven rain tends to pool. In regions with bluff-and-river exposure, wind can force water under edges you might otherwise overlook, so soft spots often start at eaves, valleys, and around chimneys or skylights. The result is small but persistent leaks that worsen with each freeze-thaw cycle.
Moisture cycling in western Wisconsin can shorten roof life when small leaks or underlayment weaknesses are exposed to repeated freezing. That means a seemingly minor breach-a torn shingle tab, a damaged step flashing, or a compressed underlayment seam-can become a long-term problem if left unaddressed. On a roof with a subtle pitch or with multiple roof planes joining at vulnerable corners, moisture finds the path of least resistance and travels along fasteners. Over multiple winters, that adds up to staining, wood rot in the eaves, and the potential for interior condensation issues in poorly ventilated attic spaces.
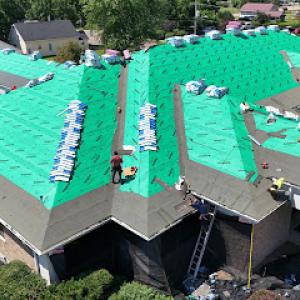
Late spring through early fall is the preferred replacement window in Onalaska because winter conditions and late-season rain make installation quality harder to control. The temperate months give crews better access, allow sealants and underlayment to cure properly, and reduce the risk of ice dam formation during installation. If hail or wind damage occurs, coordinating a replacement during that window helps ensure a more durable, long-lasting result rather than rushing to finish in less-than-ideal weather. Having an on-site plan with a clear start date helps minimize exposure of vulnerable roof edges to late-spring storms.
Key areas to inspect after storms include flashing at the chimney and vent stacks, roof-to-wall transitions, and any places where previous repairs show signs of cracking or movement. Valleys deserve extra attention because debris can accumulate steering water toward seams. Look for granule loss on shingles, curling edges, or white efflorescence on metal components, all of which can indicate moisture has penetrated under layers. If a ridge vent or pipe boot shows cracking, replace it promptly to prevent water ingress during spring rain.
Start with a winter-to-spring check: safely inspect accessible areas from the ground or with a ladder, looking for lifted shingles, damaged flashing, and loose fasteners. Clean gutters and downspouts to ensure proper drainage away from the eaves. In sensitive spots like valleys and around penetrations, consider resealing or re-flashing with materials designed for freeze-thaw cycles. If you notice recurring damp patches on ceilings or persistent attic condensation, arrange a professional inspection to assess underlayment integrity and ventilation. A proactive approach reduces the chance of a small issue becoming a larger, more costly repair after the next freeze-thaw cycle.
When you can't wait, these contractors offer fast response times to stop leaks and prevent further damage.
First American Roofing & Siding
(608) 783-3101 www.firstamericanroofing.com
1472 WI-35, Onalaska, Wisconsin
4.7 from 229 reviews

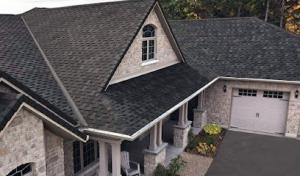
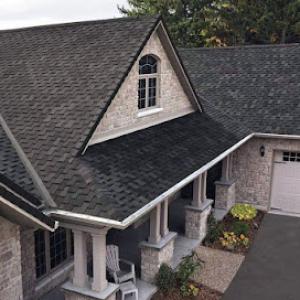
Asphalt shingles stand as the dominant choice for the area's typical residential re-roofing projects. They align with the mainstream market and enjoy broad insurance acceptance, which can simplify claim related decisions after spring hail or wind events. For most Onalaska homes, asphalt provides solid performance in a freeze-thaw climate, with a familiar installation process and compatibility with a wide range of underlayments and ventilation setups. When you select asphalt, pay attention to the shingle profile and granule density, since better surface protection translates into longer life under fluctuating winter temperatures and spring moisture.
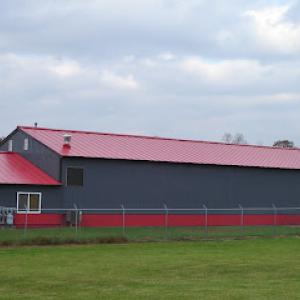
Metal roofs have a meaningful specialty presence in this market, reflecting homeowner interest in durability under snow, moisture, and seasonal temperature swings. A metal roof can shed accumulating snow more predictably and resist wind damage that may accompany spring storms. In practice, metal often benefits homes with attic spaces prone to rapid temperature shifts or with roof pitches that handle metal's fastening requirements well. If considering metal, you'll want to verify panel profiles, fasteners, and flashing details tailored to a bluff-and-river exposure, since effective sealants and ridge ventilation are crucial in winter-to-spring transitions.
Clay tile and concrete tile exist in this market, but their performance must be weighed against Onalaska's freeze-thaw cycles and moisture exposure. Clay offers durability in dry seasons but can be heavy and susceptible to cracking if movement is substantial or if substrate support isn't robust enough for cold weather. Concrete tile shares similar considerations, with excellent longevity when properly installed, yet potential weight and maintenance realities come into play in areas with heavy snowfall. Wood shakes bring a distinctive look and strong insulation potential, but moisture susceptibility and higher maintenance needs make them a less common fit for homes facing aggressive spring moisture. Synthetic or composite shingles present a flexible alternative that mimics traditional looks while aiming to resist moisture and temperature swings more consistently; however, behavior under repeated freeze-thaw cycles should be checked against manufacturer guidance and local climate expectations.
Choosing a material in this region should factor in how spring hail, wind, and the insurance landscape influence replacement timing. In Onalaska, a material with proven impact resistance and solid wind performance often pairs well with the typical insurance expectations after storm activity. Consider the roof's exposure to the bluff-and-river winds, the likelihood of rapid temperature changes, and the existing attic ventilation when deciding among these options. A local contractor can help match a material's weight, underlayment compatibility, and installation method to the specific site conditions of your home, ensuring long-term performance through Onalaska's distinctive seasonal rhythm.
Typical Onalaska material pricing runs about $350 to $700 per square for asphalt shingles, $800 to $1400 for metal, $1600 to $2400 for clay tile, $1400 to $2200 for concrete tile, $800 to $1600 for wood shingles or shakes, and $550 to $1100 for synthetic or composite shingles. Those figures reflect common residential roofs in the bluff-and-river setting, where snow loads, freeze-thaw cycles, and spring hail shape both pricing and product choice. If a contractor quotes outside these ranges, run a careful check on what's included-underlayment, fasteners, and any required reinforcement for heavier systems.
Costs in this market can rise after spring storm events when claim volume spikes and local crews are booked out. The preferred replacement window-late spring through early fall-often fills quickly after a damaging season, and prices can climb as materials and labor tighten up. If you're weighing a replacement during this season, expect a tighter schedule and tighter margins on premium products. Planning ahead for a spring hail year or a wind-heavy cycle can help avoid premium surcharges and allow time to review insurance timelines before work begins.
Material choice matters more than elsewhere because heavier systems like clay and concrete tile must be weighed against local weather stress and the practical realities of a market focused on re-roofing rather than niche premium installs. In areas with strong wind gusts and freeze-thaw cycles, a heavier tile may demand structural inspection or reinforcement, which adds to the project scope and price. If the structure isn't designed for such loads, a more moderate solution-such as metal or synthetic options-might deliver better long-term performance with fewer surprises in the attic and rafters.
Spring hail and wind damage are common triggers for insurance-driven replacements. When a claim is active, you'll often see shorter decision timelines and a need to align an approved scope with an insurer's expectations. In practice, you'll want a clearly defined path from assessment to agreement on scope, with documentation of hail impact and wind-related wear. This helps keep the project moving through the late-spring-to-fall window without last-minute price shifts or scheduling bottlenecks.
If budget is a primary concern, asphalt remains the most economical and quickest option to restore protection, especially when paired with reliable underlayment and venting. For longevity and performance in storm-prone seasons, metal or synthetic shingles deliver strong value per square and often install with fewer complications in tight weather windows. Always verify warranty coverage and confirm that the chosen system aligns with the house's exposure to wind, hail, and freeze-thaw stress in this bluff-and-river climate.
Get a clear picture of your project costs upfront - no commitment required.
A full roof replacement in Onalaska typically requires a building permit through the City of Onalaska Building Inspection Department. That means submitting plans, detailing underlayment and ventilation strategies, and aligning timelines with the city's review process. The permit isn't simply a formality; it establishes a traceable record that can matter when insurance claims are involved after spring hail or wind events. Keep in mind that time spent in this stage can ripple through the project schedule, especially when weather windows compress the work into a few dry days.
Unlike some places where a single final inspection suffices, Onalaska inspections are commonly scheduled during the project to check underlayment, ventilation, and final completion rather than only at the end. That means your roofing crew should be prepared for a few targeted inspections as the work progresses: one while the underlayment and starter/ventilation are in place, another as the roof reaches completion, and a final wrap-up after all finishing touches are complete. If the project stalls, those inspections don't disappear; they hold steady until the next active phase resumes. This staged approach helps catch issues early-before a long stretch of frozen weather or spring storms makes corrections harder and more expensive.
Because inspections are tied to active project stages, homeowners should confirm scheduling early so weather delays do not create inspection bottlenecks. In Onalaska's bluff-and-river setting, winter freeze-thaw cycles and spring hail can push crews into narrow windows to meet permit deadlines and insurer timelines. Proactive communication with the building department and the contractor helps ensure that the permit is active and that inspection slots aren't left waiting while rain or wind slows progress. If a weather delay arises, ask the contractor to coordinate with the inspector to reschedule promptly, rather than banking on a last-minute reschedule that could stall the whole project.
Before work begins, verify the exact permit scope with the City and confirm any required approvals for venting, attic insulation, and roof ventilation products. Onalaska projects often hinge on a precise sequence: strapping or decking checks, underlayment installation, then ventilation planning, followed by the roofing material installation and final inspection. Have your contractor keep the permit board current by noting each inspection date and the outcomes, so you can address any deficiencies quickly and avoid a halt in the replacement window.
Hail and wind events in the La Crosse area create a distinctive insurance environment. The combination of bluff-and-river exposures and Wisconsin's winter freeze-thaw cycles means roof age can influence premiums and underwriting decisions. In practice, this means that the decision to replace a roof often aligns with recent storm history and the roof's remaining life, rather than a simple calendar schedule.
Homeowners should capture all elevations and close-up damage while the scene is fresh. Take wide shots to show where the damage sits on the roof, then close-ups of hail hits, lifted shingles, and wind-stripped edges. Track prior roof condition by locating any visible wear or deferred-maintenance indicators, and note when those conditions were first seen. Keep dated photos organized by date and event, and save any previous inspection notes that show the roof's baseline state.
Adjuster site visits are a normal part of the process in this market, so keeping permit records, inspection notes, and dated photos can help support claim consistency. Maintain a simple file that stacks storm-related photos next to earlier roof assessments, and reference any contractor or insurer communications you've had about the roof's age and warranty. When you can, assemble a short, factual timeline that ties the damage to the most recent events and to existing wear, so the claim reviewer can corroborate the sequence without ambiguity. This approach helps protect you through the typical insurance review process that follows a spring hail or wind event.
In this area, flat and low-slope sections show up more often than you'd expect on typical homes, and some local contractors actively advertise work in that niche. The combination of freeze-thaw stress, from harsh Wisconsin winters, and spring wind blasts means water can sit and re-freeze at joints and transitions. That makes edge details and field seams prime failure points. If your roof plan has even a modest slope, those flat pockets collect moisture longer than you realize, then punch through during a spring storm or a rapid warm-up. Expect to pay close attention to the edge flashing, drain connections, and the intersection where roof and wall meet. It's not enough to seal once; you often need to re-seal vulnerable spots after the worst winter cycles.
Skylights sit on a pathway for moisture through multiple seasons, and this market has enough skylight-related leak repair to matter. In a climate with freeze-thaw movement, flashing details around skylights must accommodate movement without cracking. The surrounding deck transitions and curb flashings are common leak culprits when spring precipitation resumes after winter. If a skylight is aging or poorly flashed, you'll notice not just damp ceilings but staining that creeps along rafter lines. Even small deviations in flashing alignment or sealant integrity can become costly if ignored.
In a short late-spring to early-fall window, close inspection matters more than you might expect. Look at low-slope transitions where moisture can pool, and at all penetrations through the roof deck, especially around skylights. The goal is to catch hairline leaks before they widen into visible staining or structural deterioration. When inspecting, be mindful of wind-driven rain patterns that can exploit minor gaps. If you're unsure, a careful assessment by a contractor who understands local storm patterns can save you from bigger trouble down the line. In Onalaska, you'll want to keep a wary eye on these spots as seasons shift.
Find specialists in TPO, EPDM, and built-up flat roofing systems for residential and commercial properties.
Interstate Roofing & Waterproofing
(608) 783-2106 www.interstate-roofing.com
N5544 Commerce Rd, Onalaska, Wisconsin
4.2 from 31 reviews
In Onalaska, the window from spring hail to wind-driven damage can create urgent need. Homeowners expect crews to show up fast after a storm, assess leaks or roof shingle displacement, and stabilize the situation before further water intrusion or interior damage develops. A practical approach is to have a plan in place: know which local crew can be reached after hours, have a basic material and tear-off strategy in mind, and confirm how the crew will prioritize safety for your property when wind gusts or hail advisories are active.
Cleanup is a major local hiring priority. Homeowners here want crews that protect landscaping, prevent debris from blowing onto neighboring properties, and leave the yard tidy after tear-off. Ask for a written tear-off and cleanup checklist, and request photos or a walk-through of the worksite before and after. A good contractor should lay out how mulch beds, shrubbery, and fragile landscaping will be shielded, and how fallen debris will be contained during the job. Clear communication about daily cleanup expectations helps prevent post-work confrontations with neighbors or insurance adjusters.
Long-established local companies have a visible presence in Onalaska, but the market also includes both residential and commercial operators. When selecting a contractor, verify their portfolio aligns with your project type-repair, full roof replacement, or hail-damage mitigation. Ask for references from nearby homes with similar rooves, and confirm the crew's experience with your preferred material. If the project involves complex features like skylights or vented sections, ensure the crew has specialized experience rather than generic roofing teams.
Insurance-driven timing is a constant factor here. Be prepared to work with adjusters who understand local weather patterns and the realities of temporary weather windows. Have a clear plan for staging material deliveries, coordinating with your insurer, and aligning on a realistic schedule that minimizes exposure to spring runoff or early-fall storms. A well-communicating contractor will coordinate with you and the insurer to lock in dates that protect the home while meeting warranty and warranty-transfer expectations.