Last updated: Apr 19, 2026
La Crosse homeowners face both winter snow and freeze-thaw cycling and spring hail and wind events, creating a two-season damage pattern rather than a single peak risk. Freeze-thaw cycles loosen fasteners and fracture shingles as moisture infiltrates joints, then refreezes, pushing edges upward and widening gaps. When spring storms arrive with hail and gusts, already-weakened roofs are primed for accelerated wear. This means roof maintenance and inspection must stay on your calendar well before the thaw ends and again after the first hot, dry stretch of summer. A delayed response in either season can turn minor issues into costly leaks and interior damage.
The city's location in the Mississippi River valley below steep bluffs can produce highly variable exposure by neighborhood, with some roofs taking stronger wind-driven weather than others. A home perched on a bluff edge or facing open river valleys may see higher wind loading, while a sheltered hillside home might accumulate more ice damming from differing sun exposure. The takeaway is simple: treat each roof as unique. Have a trusted local roofer perform a targeted walk-around after severe wind or hail events, paying particular attention to ridge lines, vent flashings, brick/soffit junctions, and any shingles that show lifted edges or granule loss. Small gaps in a sheltered area can still funnel water into attic spaces if not addressed promptly.
Late spring through early fall is the preferred replacement window locally because winter conditions and transitional autumn temperatures can interfere with installation and sealing. If a storm has damaged your roof beyond quick repairs, plan for a window that avoids the harshest winter days and the shoulder seasons where service crews face limited daylight and freezing nighttime temperatures. Scheduling during this stretch also aligns with longer daylight hours and more predictable interior insulation behavior, which reduces the risk of attic condensation and interior moisture during installation. For homes with visible hail impact or wind-stripped shingles, coordinate an assessment immediately after the event, then lock in a replacement window that minimizes exposure to sudden cold snaps that could compromise new underlayment sealing.
In the bluff-and-river valley climate, keeping precise records matters. After any hail or high-wind event, photograph roof surfaces, vents, and flashing from multiple angles. Note dates, wind speeds if available, and observed roof changes such as curled edges, dark streaks, or powdery granules in gutters. If a leak develops, map its path inside the attic and through ceilings, including which rooms are affected and the time of day. This documentation supports quick, accurate claims with insurers by illustrating the extent of storm-related damage and its progression across seasons. It also helps distinguish wear from isolated weather incidents versus systemic aging that affects the entire roof system.
Begin with a proactive inspection after major weather events, especially those that produce hail or strong winds. Clear debris from valleys and gutters to prevent water backing up during thaw cycles. Inspect flashings around chimneys, dormers, and skylights, as these are common failure points under freeze-thaw stress. Address any lifted shingles or darkened bands that indicate accelerated granule loss. If damage is found, avoid delaying temporary patches that keep water out of the attic while arranging for a formal repair plan. A timely response preserves attic insulation, reduces heat loss, and minimizes the likelihood of interior secondary damage during the next thaw.
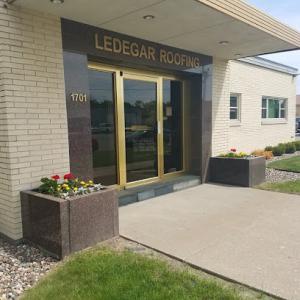
Ledegar Roofing Company
(608) 785-0901 ledegarroofing.com
1701 Miller St, La Crosse, Wisconsin
4.9 from 104 reviews
Ledegar Roofing Company specializes in all roofing systems for both commercial and residential properties. We also provide emergency roof leak repairs, chimney cleaning, siding, gutters, soffit & fascia, and preventative maintenance.

Kendhammer A-1 Roofing & Construction
(608) 790-9111 kendhammerroofing.com
1309 Norplex Dr #3, La Crosse, Wisconsin
4.9 from 75 reviews
Kendhammer Roofing, LLC in La Crosse, WI provides professional roofing, new construction, remodeling, window installation, deck building, garage building, and siding services. Call to hear more about our services. Roofing Services Roofing Installation Services Roofing Repair Services New Construction Services Remodeling Services Siding Services Window Installation Services
A-1 Roofing & Construction
(608) 790-4156 a-1roofingandconstruction.com
317 4th St S #310, La Crosse, Wisconsin
4.7 from 14 reviews
A-1 Roofing And Construction is the coulee region leader in quality roofing installations. We feature the very best products and the most innovative techniches paired with the profesional service you expect.
RoofKO JAM Consulting & Restorations
(608) 399-6180 www.roofko-lax.com
1523 Rose St # 5, La Crosse, Wisconsin
4.7 from 12 reviews
Roofing, Siding, Gutter, Gutter Guard, Insurance Specialist
ProPoint Roofing & Construction
(608) 386-7338 www.propointwi.com
W5585 County Rd MM #410, La Crosse, Wisconsin
4.4 from 8 reviews
ProPoint Roofing & Construction has been a top roofing contractor in La Crosse, WI and surrounding areas for over a decade. We specialize in residential roofing, commercial roofing, roof repair, roof installation, and emergency roof repair. We have a commitment to excellence and a reputation for top quality craftsmanship that have made ProPoint Roofing, a top rated roofing company in La Crosse, WI.

La Crosse Quality Roof Repair
(608) 394-3940 roofrepairlacrosse.com
2007 Kane St, La Crosse, Wisconsin
5.0 from 2 reviews
La Crosse Quality Roof Repair aims to be the first call for anyone in the La Crosse area and Coulee Region that needs fast, affordable, and quality roof repair services.
First American Roofing & Siding
(608) 783-3101 www.firstamericanroofing.com
Serving
4.7 from 229 reviews
First American Roofing and Siding is a trusted name in exterior home improvement, proudly serving Onalaska, WI, and surrounding communities. Known for our commitment to craftsmanship and 5-star customer service, we offer a full range of solutions including roof repair, roof replacement, gutter replacement, siding installation, and insulation installation. As a reliable commercial roofer, we also deliver durable, efficient roofing systems tailored to local businesses. Every project is handled with care, precision, and a focus on long-term value. Our team is locally rooted, professionally trained, and dedicated to protecting and enhancing your home or property.
Riverview Builders
(608) 780-2254 riverviewbuilders.net
Serving
5.0 from 20 reviews
Riverview Builders, a trusted La Crosse roofing contractor, is the leading choice for superior residential construction services. Established in 2016, with a team of skilled professionals specializing in roofing services, they strive to deliver exceptional craftsmanship, using high-quality materials and offering personalized solutions for every project, no matter how big or small. With an unwavering commitment to unparalleled customer satisfaction, they endeavor to not only beautify your home but also provide exceptional protection, making Riverview Builders the go-to choice for all your roofing needs.
Borchert Exteriors
Serving
5.0 from 6 reviews
When it comes to your home’s exterior, you need to have trusted professional roofing contractors working on it. Borchert Exteriors in Onalaska, WI, will work their magic by effortlessly transforming your home’s appearance and curb appeal with a full range of services. This family-owned and -operated company is fully licensed and insured, allowing you to rest easy while their roofing contractor team tends to your home. Work with Borchert Exteriors to update the look and functionality of your home’s exterior without breaking the bank. They’ll provide you with a free estimate before getting to work to ensure they meet your needs and so you know exactly what to expect. Call this roofing contractor company at (608) 386-6247
Culpitt Roofing
(800) 944-0662 craft.culpittroofing.com
Serving
4.9 from 129 reviews
Culpitt Roofing has over 60 years in the double lock standing seam metal roofing industry. Our roofs can be found on the tops of residential, agricultural, and commercial buildings spread across the upper Midwest. Licensed to operate in Wisconsin, Minnesota, Iowa, Illinois, and North Dakota, Culpitt Roofing travels far and wide ensuring your investment in protected.
Apex Xteriors
(608) 397-8382 www.apexxteriors.com
Serving
5.0 from 39 reviews
Apex Xteriors is a locally trusted roofing and siding contractor serving Holmen, Onalaska, La Crosse, and communities within 100 miles across Western Wisconsin. We specialize in storm restoration and exterior remodeling for homes and businesses. Our roofing team installs premium Malarkey Vista Class 4 impact-resistant shingles backed by the Emerald Pro 50-Year Warranty. For siding, we offer expert installation in vinyl, LP SmartSide, and steel, using only top-rated products. From hail damage repairs to full exterior upgrades, Apex Xteriors delivers craftsmanship, reliability, and long-lasting results. Call today for your free roof or siding inspection.
Interstate Roofing & Waterproofing
(608) 783-2106 www.interstate-roofing.com
Serving
4.2 from 31 reviews
For residents and business owners in Wisconsin, Minnesota, and Iowa, Interstate Roofing & Waterproofing located in Onalaska, WI, is available for commercial or industrial roofing services, including historical restorations. These roofers specialize in commercial properties and provide a range of options for customers including standing seam roofing, single-ply, built-up roofing, and steep slope. They have completed projects for elementary schools, retail stores, churches, office buildings, and much more.
La Crosse sits in a bluff-and-river valley where heavy winter freeze-thaw cycles and spring hail events are part of life. The combination of wind gusts and moisture can take a toll on roofs that already show wear from harsh seasons. When a storm hits, the timing of damage matters just as much as the damage itself. Insurers in Wisconsin often require a clear narrative of what the roof looked like before the storm and what changed after, making detailed documentation essential.
Older roofs in this market may face coverage limitations or higher deductibles, so the condition of the roof before any hail or wind event is a critical piece of the claim puzzle. If a roof has visible granule loss, curling shingles, or prior repairs, those factors can influence how an adjuster views new damage. Gather a concise history of maintenance-what was fixed, when, and by whom-and pair it with recent photos. This helps establish a baseline and reduces disputes about whether what's reported post-storm is truly storm-related or part of ongoing wear.
In La Crosse, claims commonly involve adjusters and roof condition reports after hail or wind events. The window between a storm and filing can affect the claim outcome. Start photo documentation as soon as you can after a hail or wind event: date-stamped shots of shingles, flashing, vents, and any visible interior signs of roof issues. If shingles are lifted, granules are missing, or there are leaks inside the attic, capture those specifics with clear angles and notes. Insurance research and contractor findings should be aligned, so obtain a professional assessment early and have it dated. The goal is a cohesive story: what existed before, what changed after, and how those changes align with meteorological and wind-event timing.
Expect an on-site review where the adjuster assesses both storm-driven damage and the roof's overall condition. Provide the adjuster with copies of your pre-storm photos, maintenance logs, and a list of areas most affected by the latest event. When contractor findings come in, ensure they document date stamps and tie their observations to the same storm window the insurer cites. If discrepancies arise, request a second opinion promptly. A well-documented claim reduces back-and-forth and supports a smoother resolution, especially when the roof's age or material type complicates the assessment.
Build a simple timeline: note the storm date, the first day you noticed potential damage, and when you consulted a roofing professional. Keep a file of all correspondence with the insurer and contractors, with clear, dated notes. If a claim is denied or coverage seems limited, inquire about the exact rationale and seek a second opinion. In this bluff-and-river valley climate, a proactive approach to documentation and early professional input can prevent a misalignment between wind-driven events and pre-existing conditions.
Connect with contractors who help homeowners navigate the claims process from damage assessment to final approval.
Ledegar Roofing Company
(608) 785-0901 ledegarroofing.com
1701 Miller St, La Crosse, Wisconsin
4.9 from 104 reviews

Kendhammer A-1 Roofing & Construction
(608) 790-9111 kendhammerroofing.com
1309 Norplex Dr #3, La Crosse, Wisconsin
4.9 from 75 reviews

A-1 Roofing & Construction
(608) 790-4156 a-1roofingandconstruction.com
317 4th St S #310, La Crosse, Wisconsin
4.7 from 14 reviews
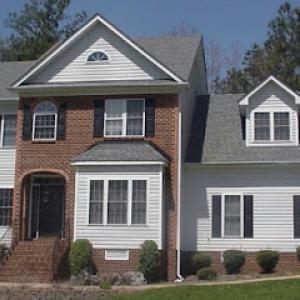
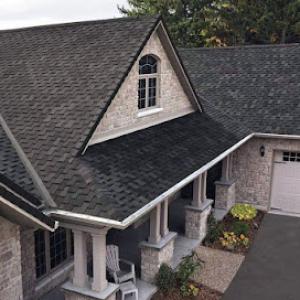
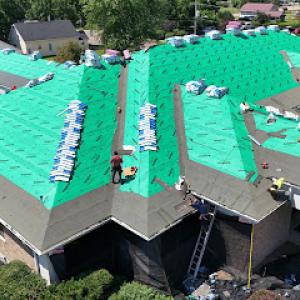
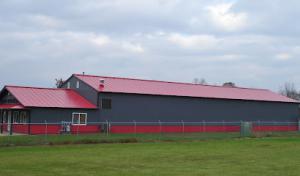
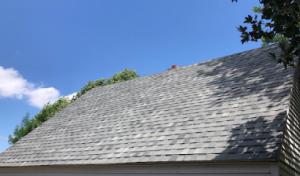
Asphalt shingles remain a dominant local choice because they fit the area's large re-roofing market. In this bluff-and-river valley climate, freeze-thaw stress and hail exposure can shorten service life compared with milder climates. When you're weighing shingles, focus on a heavier, impact-resistant bundle and a shaded, well-ventilated attic to slow ice dam formation. Choose a durable underlayment and verify that the nail pattern is appropriate for high-wire winds along the bluff edges. If a hailstorm hits, you'll want a shingle line with good repairability and a straightforward patch method for smaller spots without a full roof tear-off.
Metal roofing has a meaningful local specialty presence and is relevant for shedding snow and handling repeated winter weather cycles. The smooth surface helps snow slides rather than builds up in stubborn drifts, which reduces ice dam risk on steep sections. Look for panels with reinforced edges and a proper ventilation-compatible deck to prevent condensation beneath the metal. In areas with strong spring winds, ensure the fasteners and flashing are corrosion-resistant and that the roof system integrates well with gutters to control meltwater runoff. A well-sealed seam and quality coating matter for longevity in frequent freeze-thaw cycles.
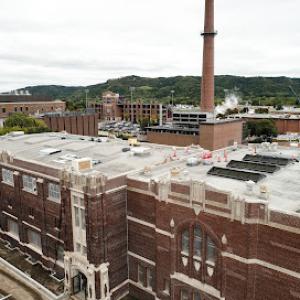
EPDM rubber roofing appears in the local material mix for low-slope sections and commercial-style roofs, which matters on mixed-form buildings and additions found in the city. For flat or nearly flat areas, this material offers dependable waterproofing under repeated freeze-thaw stress, provided that edge detailing, flashing, and penetrations are well-sealed. In mixed-use structures with old and new sections, ensuring compatibility between EPDM and adjacent roofing types helps prevent leaks at transitions. Regular inspections after winter and before spring storms keep small blisters or seam separations from becoming bigger problems.
Laid-out neighborhoods often feature homes with varied rooflines, dormers, and chimney stacks that complicate drainage and repair access. When choosing between these options, consider how each roof handles snow transport, hail exposure, and seasonal expansion. For properties with multiple roof faces, a unified plan-balancing weight, maintenance access, and insulation-reduces surprises after a harsh winter. In practice, a local pro will tailor fastener choices, underlayment, and edge details to the bluff-and-river valley climate you live with.
In this area, pricing shifts with seasonal demand, especially after spring hail and wind events when crews are scarce and prices climb. You'll notice labor competition can extend timelines as crews juggle multiple projects, which matters for scheduling and project fullness. Costs in La Crosse span a broad range depending on material choice-from asphalt shingles at roughly 300 to 550 USD per square up to slate at 1300 to 3200 USD per square, with EPDM rubber roofing running 2 to 5 USD per square foot. This spread reflects the region's heavy freeze-thaw cycles and storm exposure, which influence both material performance and installation details.
Asphalt shingles remain the most common option for local homes, balancing cost with decent storm resistance. If you're weighing metal, you'll see a higher per-square cost but improved hail resistance and longer life, which can be appealing in the Upper Mississippi valley climate. For truly long-term durability and a distinctive look, slate or clay tile push costs well above asphalt, and clay's weight requires additional structural consideration. Synthetic or composite shingles offer a middle ground, often delivering better impact resistance than basic asphalt while keeping price moderate. EPDM rubber is a practical option for flat or low-slope sections and can be cost-efficient on the right project, though its appearance differs from traditional shingle homes.
Project timing matters locally; the most workable season is late spring through early fall. Weather delays outside that window can add labor inefficiency and complicate inspection coordination. If a hail event disrupts the market, expect shorter available windows and potential backlogs. Plan for a realistic start-to-completion timeline that buffers for inspections, material delivery, and possible weather-induced pauses. Knowing these patterns helps you lock in crews sooner and minimize peak-season price inflation.
When budgeting, compare the full installed cost per square for your chosen material, plus any upgrades for underlayment, ventilation, and add-ons that support freeze-thaw cycles. Consider not only the sticker price but the expected lifespan and maintenance needs, which influence long-term value in this bluff-and-river valley climate. Keep a contingency for weather-related delays and seasonal scheduling pressures that can push timelines and costs slightly higher than the mid-year targets.
Get a clear picture of your project costs upfront - no commitment required.
In this city, a building permit is typically required for a full roof replacement, and not every project can slip through on a handshake. The permitting process is handled through the Planning & Development Department, rather than being managed informally by contractors alone. That means you'll want to start with the city, not assume a permit will be granted by the contractor's paperwork alone. Understanding this early helps avoid delays when the project is near a critical weather window.
Inspections are scheduled through the city and are not optional add-ons. Expect at least one inspection during work progress and a final inspection after completion. Weather can delay scheduling, and response times vary by season, so plan for potential holds caused by heavy winter conditions, spring storms, or rapid summer humidity. If a delay pushes a key inspection into a different season, coordinating with the inspector becomes essential to keep the project on track. Contractors can help with the initial scheduling, but the city's clock governs the final approvals.
To apply for a permit, gather typical project details: the scope of replacement, roof type, surface area, and any changes to structure or ventilation. You'll likely need property information, contractor credentials, and a site plan showing access points and debris containment. Contact the Planning & Development Department well before hammering in the first shingle so your schedule aligns with city reviews. If a contractor is handling the submission, confirm who will respond to any city requests and how additional documentation will be delivered.
During the project, keep the city's inspector informed of progress and any weather-driven pauses. Have temporary safety measures in place for access points and materials, since inspections can be time-sensitive and weather can alter site conditions. After completion, ensure the final inspection confirmation is obtained in writing and that any city-issued notes or required corrections are addressed promptly. Coordinating closely with both your contractor and the Planning & Development Department is the best way to minimize friction when a bluff-driven storm or freeze-thaw cycle threatens scheduling.
Late spring to early fall is the optimal local work window because winters bring snow and freezes that slow tear-off, dry-in, and inspection timing. In practice, plan for solid stretches from late April through September where temperatures are generally stable enough to keep shingles sealing properly and crews moving without ice or slush interruptions. This window helps reduce the risk of wind-driven debris or hail disrupting progress and minimizes delays caused by ground moisture on steep slopes.
Spring can be productive but also risky because hail and wind events may interrupt schedules or turn planned replacements into urgent repairs. If a storm hits during late March through May, expect temporary patchwork to give way to a full replacement once the weather settles. Coordination with your contractor should include a conservative sequence: staging materials after the threat passes, then a focused tear-off when forecasts show clear days, and a dry-in plan that accelerates once higher humidity and afternoon storms become more frequent.
Autumn temperature swings in La Crosse can affect shingle sealing, making late-season installs more timing-sensitive than midsummer work. Cool mornings followed by warmer afternoons can hinder early adhesive set, so crews may push for faster completes or require extra dry days between steps. If autumn delays occur, prioritize safer, non-peak times for roof work to avoid rain intrusion and to ensure proper sealing before winter sets in. A practical approach is to target mid-September through early November windows, recognizing that leaf debris, wind, and late-season temperature shifts can influence schedule stability.
When planning, align the project with a few key benchmarks: anticipate a longer teardown and dry-in period in shoulder months, build buffer days for potential hail events, and communicate contingency plans for rescheduling without compromising material warranties. Coordinate with the contractor to identify the longest stretch of stable weather expected and anchor most of the work there. Keep gutters and landscaping protected, and prepare for occasional short, weather-based pauses that can still keep the project on track without sacrificing quality.
In this bluff-and-river valley, many homes are facing aging roofs as the mix of local contractors shows strong re-roofing demand. That means you're more likely to encounter multiple layers, patchwork fixes, and chimney or vent penetrations that were never perfectly sealed. When you start a project, plan for a thorough inspection of the entire roof line, not just the obvious leak area. Look for missing granules on asphalt shingles, cupped edges, and any soft spots that signal deck rot. The goal is to catch wear before a winter freeze-thaw cycle drives it deeper. Have a trusted local inspector check flashings around chimneys, skylights, and vent pipes; those are frequent trouble spots after a decade or more of service.
Low-slope and flat-roof sections matter in this market because EPDM and flat-roof specialization are present locally. Porches, rear additions, and commercial-style structures often hide hidden leaks that only show up after heavy spring rain or rapid temperature swings. EPDM can perform well here, but seams, edge details, and terminations at parapets must be sealed and reinforced. Regular edge flashing and good drainage become critical, especially where gutters are undersized or where ice damming is likely to form along the eave. If you notice pooled water or damp ceiling patches inside, inspect the interior perimeter for damp insulation or buckling membranes.
Skylight-related repair experience appears in the local market, suggesting leak-prone roof penetrations are a recurring homeowner concern. Check skylight flashings for signs of aging or sealant failure after winter resurfacing. If a skylight leaks, it's usually not the glass but the flashing and contractor seals around the curb. For any retrofit, consider upgrading to a more robust curb flashing and ensure thermal breaks around any penetrations are intact to reduce freeze-thaw stress. When storm season looms, inspect skylight seals and surrounding shingles or membrane edges to prevent wind-driven leaks.
Find contractors experienced in skylight installation, flashing, and leak repairs to bring natural light into your home.
First American Roofing & Siding
(608) 783-3101 www.firstamericanroofing.com
Serving
4.7 from 229 reviews

In this bluff-and-river valley, storm events arrive with urgency. Quick contractor response is the strongest market signal you can rely on after a hail or high-wind event, because short seasonal work windows tighten scheduling fast. Look for local crews that acknowledge the reality of winter freeze-thaw cycles and spring storm peaks, and that can mobilize within 24 to 72 hours after a severe event. A timely assessment minimizes additional damage from wind-driven leaks and helps lock in a workable timeline before spring thaws narrow available daylight for roof repairs.
Cleanup included is a frequent priority among La Crosse contractors. Residents value debris containment, prompt haul-off, and careful protection of landscaping and driveway surfaces in established neighborhoods. When evaluating bids, ask how debris will be managed during and after the project-whether tarps and containment nets are used, and how hammering, shingle scraps, and nails are collected to avoid puncturing car tires or garden beds. A contractor that coordinates drop-off and removal on the same day helps keep neighborhoods tidy and reduces the risk of regrowth or overlooked debris after major storms.
Long-established firms carry visible presence in the city, and that matters for re-roofing projects where callbacks and warranty follow-through are critical. In La Crosse, homeowners often prefer contractors with a steady local roster, known crews, and demonstrated reliability across multiple neighborhoods. This continuity supports smoother insurance documentation flows and coordinated follow-up if repairs reveal underlying structural concerns after a harsh winter or a heavy hail season. When meeting candidates, inquire about previous La Crosse projects, recurring service teams, and how warranties are honored if a storm reoccurs on a later date.
Storm timing in this region can compress schedules quickly. Expect contractors to prioritize transparent updates: upfront scheduling windows, anticipated wait times after a storm, and clear milestones from inspection to final cleanup. Favor firms that assign a dedicated point of contact who can relay changes promptly, answer insurance-related questions, and document weather-related contingencies so the process remains smooth despite seasonal pressures.