Last updated: Apr 19, 2026
Cold, snowy winters followed by regular spring rainfall create a perfect setup for ice dams and moisture intrusion. Freeze-thaw cycles push and pull on roofing systems, loosening shingles, lifting flashing, and driving meltwater under edges where it can refreeze and form new dams. In this climate, even a small ice buildup on eaves can funnel water toward fascia boards and attic spaces, threatening insulation, ceiling finishes, and unseen structural rot. Homeowners should treat ice dam risk as an active, ongoing issue from late winter into early spring, not as a single event to address after a storm.
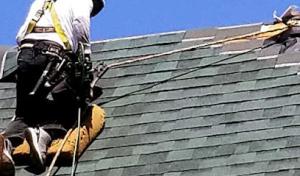
The typical main reroofing window runs May through September, so winter damage often has to be stabilized first and permanently repaired once conditions improve. If a thaw exposes signs of leakage or soft spots, take immediate temporary steps to reduce further intrusion: move stored items off affected attic floors, place buckets or tarps under active leaks, and carefully clear visible ice where safe to do so without climbing onto wet, slick roofs. Do not attempt risky removals during heavy ice or snowfall. Stabilization buys time and prevents minor issues from escalating into major restorations when crews can safely access the roof.
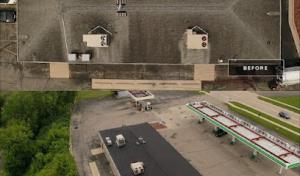
Spring and summer hail and wind events commonly drive local claim activity, making storm-related roof assessments especially time-sensitive in Watertown. A fast assessment after a storm can prevent water from migrating through unseen channels and verify whether granules, flashing, or vent stacks have failed. In a neighborhood with many older homes, a timely inspection can distinguish between cosmetic hail marks and structural compromise. If hailstones have pelted your area, plan for an expert evaluation within days of the event-not weeks-to capture accurate moisture and shingle integrity data before temperatures change again.
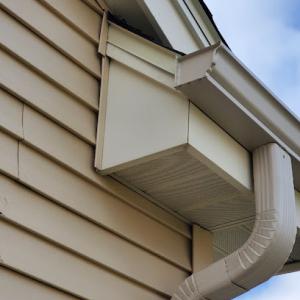
In the weeks when temperatures swing above and below freezing, perform a cautious exterior check from the ground after storms, focusing on visible edge areas, gutters, and downspouts. Look for lifted shingles, loose flashing around chimneys and vent stacks, and any sagging or loose fascia boards. Inside the attic, inspect for damp patches, new stains, or signs of condensation that isn't explained by HVAC use. If you notice unusual warmth in the attic during cold snaps, that can indicate air leakage or insufficient insulation projects that feed ice dam risk. When in doubt, call a local roof observer who understands Watertown's typical wind patterns and how they interact with spring moisture.
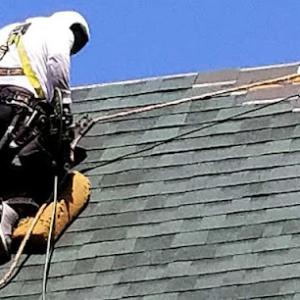
If a storm hits and you suspect damage, document it quickly with photos, then contact a local roofing professional who can provide a rapid assessment. Prioritize safety: avoid climbing on a roof that's slick from rain or hail in windy conditions. Request a two-phase plan: first, a temporary stabilization to prevent further water intrusion, followed by a permanent repair once conditions are suitable for safe, effective work. Reputable local roofers will stage the process to minimize disruption during Watertown's tight spring-to-summer window and will coordinate with you on scheduling around weather.
Save My Roof
(920) 542-3070 www.savemyroof.com
518 Grey Fox Run, Watertown, Wisconsin
4.9 from 58 reviews
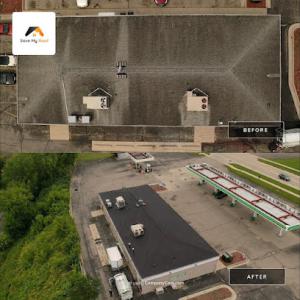
Save My Roof, headquartered in Watertown, WI 53094, understands the importance of a sturdy and long-lasting roof. We care about our customers and strive to educate them about their roofs and options to prolong their lives. We believe in repairing and maintaining roofs before considering a premature replacement. Unlike other roofing companies that may only push for a new roof, we prioritize our customer's needs and offer tailored solutions for their unique situations. We offer a comprehensive range of roofing services for both residential and commercial properties. We specialize in roof rejuvenation, maintenance, restoration, and replacement. We cover all of southeastern Wisconsin!!
J&B Quality Roofing
(920) 253-1181 jbqualityroofingllc.com
216 S 3rd St, Watertown, Wisconsin
5.0 from 22 reviews
With customer satisfaction always being their top priority, J&B Quality Roofing has become a top choice for residential and commercial roofing services in Watertown, Wisconsin. Their experienced and expert team always aim to exceed expectations, guaranteeing high-quality work that's both punctual and affordable, providing peace of mind to their customers.
Complete Roofing
(920) 285-5249 www.completeroofingwi.com
702 Welsh Rd, Watertown, Wisconsin
4.7 from 23 reviews
Looking for professional roofing services in Watertown? Look no further than Complete Roofing WI, your experts in all things roofing. With our dedicated team and extensive experience, we guarantee exceptional results that will leave you satisfied. From seamless gutters to residential roofing, we handle it all with precision and care. Our efficient and hardworking crew ensures a seamless process from start to finish, completing your project on time and within budget. Don't just take our word for it – our happy customers rave about their experience with us. Contact us today for a free estimate and let us show you why we're the top choice for roofing in Watertown and surrounding areas. Expert Roofing, Complete Roofing WI.
US Roofing Commercial & Industrial Contractors
(920) 261-7023 www.usroofinginc.com
1400 Clark St, Watertown, Wisconsin
5.0 from 2 reviews
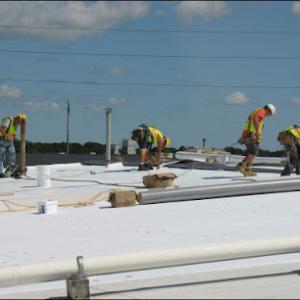
We install & repair better commercial roofing systems for better prices - often 10% to 30% less than our competitors. All we do is build, fix, replace & maintain industrial & commercial flat roofs, keeping up with advances in industry technology so our overhead (and prices) are as low as possible. Satisfied past customers and those they’ve referred to us make up the majority of our business. Our salespeople have all worked on roofs themselves and know the Wisconsin industrial & commercial roofing industry backwards and forwards. When you meet with us you get a real consultation, not a sales pitch from some guy who was selling used cars two months ago. We recommend TPO & will work with any materials you choose for your roofing system.
AAA Roofing & Exteriors
(920) 248-8741 www.aaaroofingandexteriorswi.com
1105 Louisa St, Watertown, Wisconsin
5.0 from 2 reviews
We’ll work with you to find the perfect solution for your exterior needs, whether that’s repairing a leak or finally replacing a 20-year-old roof that needs an overhaul. Our BBB-accredited roofing company has two decades of experience fixing and installing roofs throughout Southern Wisconsin and the Watertown area, and we’re here to help whenever you need our service.

Kevin Sterwald Roofing
(920) 988-1072 kevinsterwaldroofing.com
Serving
4.9 from 77 reviews
At Kevin Sterwald Roofing, we've been in business since 2001 - that's 20 years of roofing experience! We have a team of roofing and attic specialists that have literally seen it and repaired it all. Customers call us to repair their roofing and attic issues because they know we pride ourselves in diagnosing the problem accurately and completing the job the right way. We don't believe in quick, temporary fixes that will end up causing more issues in the long run. If it's not done right the first time. Our customers are never left with an unfinished project. We guarantee it.
4 Brothers Contracting
(262) 244-5002 4brotherscontractingllc.com
Serving
5.0 from 180 reviews
4 Brothers Contracting is an Oconomowoc, WI roofing company serving southeastern Wisconsin, providing certified roofing and siding solutions throughout the lake county community and surrounding areas including Delafield, Waukesha, Sussex and our hometown of Oconomowoc. We strive to support our local community appearance with superior quality, affordable prices and premier product to protect our clients largest investments. Our goal is to create a relationship with each client and show them we care about our craftsmanship and pride ourselves on a job done right.

Approved LLC Everything Rooftop
(262) 560-0829 everythingrooftop.com
Serving
5.0 from 75 reviews
Experience the satisfaction of professionally installed roofing, siding and gutters from a locally owned and operated contractor serving the Oconomowoc area. Since 1998, Approved, LLC has a proven track record of excellence in workmanship and support after the job is done. Your satisfaction is our ultimate goal – we’ll take the time to answer all your questions, then get your job done on time and within budget.
Tip Top Roofing & Gutters
(262) 269-9400 tiptoproofwi.com
Serving
5.0 from 85 reviews
Tip Top Roofing & Construction is a leading roofing and gutter contractor based in Okauchee, WI. We are a team of professionals who can tackle everything from difficult, large projects to smaller scale jobs. Fueled by our commitment to excellence, we’ve taken a comprehensive approach to project management while providing our clients with a wide range of services to cover their needs.

Resistance Exteriors
(262) 951-0875 www.resistanceexteriors.com
Serving
4.9 from 201 reviews
Resistance Exteriors is the leading Roofing contractor near Milwaukee, WI & the surrounding areas. We proudly offer Siding and Exterior Contractors in Milwaukee! Get in touch with us if you require Roofing Contractors. Your home is valuable to you in many ways, and it isn't easy to decide because there is so much information, and you want to be sure it is taken care of properly. Choose Resistance Exteriors Contractors to work on your roof, siding, or gutters. Our certifications mean you get the best warranties and the best service available. Our commitment to customer service and quality craftsmanship guarantees you will be happy with our services for siding & gutters. Contact Resistance Exteriors to learn more about our services Today.
LeFever Roofing
(262) 256-3445 www.lefeverroofing.com
Serving
4.8 from 66 reviews
LeFever Roofing is Wisconsin's No. 1 professional installer of quality roofs, serving Waukesha, Brookfield, Mequon, River Hills, Ozaukee, and neighboring counties. Our team is highly trained and certified by our select manufacturers to ensure that the jobs we do match the highest industry standards. We specialize in cedar shake roofing and offer a variety of composite cedar shakes as well as a whole host of other products and services. We provide multiple luxury roofing styles that come in a variety of materials such as copper, DaVinci Synthetic Roofscapes, and CertainTeed Presidential Shake TL products.

Big Fish Contracting
(262) 470-1114 www.bigfishcontracting.com
Serving
4.8 from 177 reviews
Big Fish Contracting is a locally owned, community-driven company that has a broad scope of expertise in the residential construction and remodeling field. We combine years of experience both in the interior and exterior of homes. We are trained and certified contractors from the industry's leading manufacturers and have strong ties to local businesses and suppliers. Whether you need a new roof, siding, windows, gutters or an addition or interior remodel, we have the knowledge and expertise to serve you well.
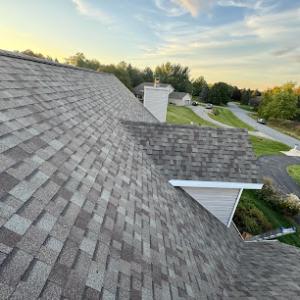
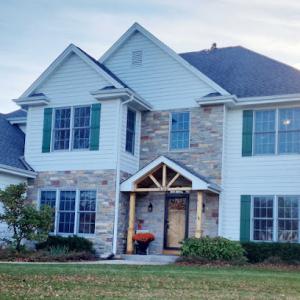
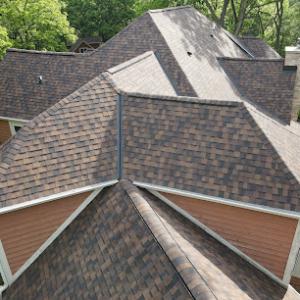
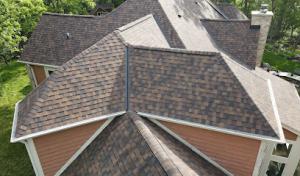
Asphalt shingles dominate the roofscape in this corridor, and they're a practical choice for most Watertown homes. In the freeze-thaw cycles that define winters, plus spring hail and rain, the system relies on solid ventilation and a dependable underlayment to keep ice dams at bay. If the attic isStuffed with warm, moist air or if the venting is undersized, heat can soften the roof deck and feed ice dam formation once the snowpack refreezes in the eaves. The best setup uses a continuous ridge vent paired with evenly spaced soffit vents, plus a water-resistant underlayment that extends over the deck seams. In summer, the sun's UV exposure can degrade shingles if the shingles are already stressed by poor attic cooling, so ensure the attic stays cool enough to minimize expansion and contraction. For longevity in Watertown's climate, select architectural or heavy-duty 30-year shingle lines and ensure proper nail placement and sealant coverage near the edges to resist blow-off from spring storms.
Metal roofs align well with Watertown's need for snow shedding and durability. A properly installed metal system sheds snow more reliably, which reduces the risk of ice dams forming on lower pitches. However, the installation details matter a lot in the city's cold winters and warm summers. Pay close attention to flashing where the roof meets walls, chimneys, and vents; improper flashing can invite leaks behind the metal's seams during heavy spring rains. Condensation control is another key point: a well-sealed attic and a careful vapor barrier help prevent moisture from migrating into the metal panel cavities, which can cause corrosion or paint failure over time. In regions with strong sun, choose a finish with UV resistance and a paint warranty that can handle Watertown's high-sun days in late spring and summer. Structural evaluation is important too-some homes may need reinforcement to carry the weight of a metal system, especially if there are older trusses or if the roof deck has any softness from past leaks. A properly vented attic plus an integrated condensation strategy will help you keep the interior dry and the metal flashing in good condition through the seasons.
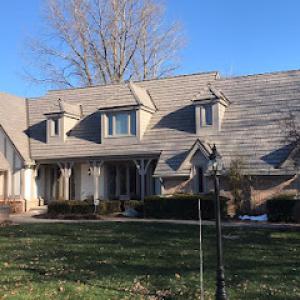
Clay tile and concrete tile offer distinctive aesthetics and excellent longevity, but their weight can challenge older Watertown homes. Seasonal swings and freeze-thaw cycles demand a thorough structural assessment to confirm that the deck and support framing can bear the extra load. Moisture management becomes critical, since heavier systems sit longer on the deck and can trap moisture if ventilation is insufficient. Wood shakes and synthetic/composite products provide a different feel and performance profile. Wood can be susceptible to rot and insect pressure if ventilation and drying paths are blocked, and synthetic options vary in expansion behavior under temperature swings. In Watertown, where a short May-to-September reroofing window exists, plan for a system that accommodates seasonal moisture load during the installation itself. If selecting heavy tile or shake options, verify that the roof substrate is entirely dry before application and that flashing is detailed to handle the seasonal wind-driven rain and snow loads. Regardless of material, a well-sealed attic, a robust underlayment, and proper flashing around chimneys, vent stacks, and skylights are essential to prevent moisture migration through the cold months.
In a city with snow and hail exposure, prioritize materials that tolerate fast temperature changes and resist moisture intrusion. Asphalt shingles give a balanced combination of cost, ease of installation, and repairability, provided ventilation and underlayment are not compromised. Metal roofing offers excellent snow shedding and durability, but installation detail-especially flashing and condensation control-will determine performance across winter and summer. Heavier options like clay or concrete tile demand structural confidence and meticulous moisture planning, while wood and synthetic options require attention to drying potential and flexibility under heat. For a typical Watertown home, matching the roof system to the attic ventilation, underlayment quality, and flashing detail will yield the best outcome across the region's seasonal swings.
The short warm-weather window for reroofing creates a tight market in this area. In late spring through early fall, demand concentrates as homeowners rush to finish before winter. That compression can push scheduling timelines and lift project costs, especially after a spring hail or summer wind event that drives a flood of repair work. In practice, you'll see prices firm up when the weather cooperates and workers are most available, which means planning ahead matters here more than in milder markets. When a storm hits, crews may be booked weeks out, and prices can spike as crews juggle storm-driven repair and replacement jobs.
Across common asphalt, metal, and tile options, Watertown pricing tracks with the regional mix of homes. Asphalt shingles run roughly from 350 to 700 per square, a range that reflects tear-off complexity and attic ventilation needs on older houses. Metal roofing tends to cost 800 to 1,500 per square, with premium panels or more intricate profiles edging higher. Clay tile and concrete tile sit higher, typically 1,800 to 3,800 per square and 1,600 to 3,200 per square respectively, driven by weight, installation details, and chimney flashing work. Wood shingles or shakes, and synthetic/composite shingles land in the middle to upper end, about 600 to 1,200 and 500 to 1,100 per square. If you're replacing on an older home with steep pitches or multi-level sections, expect the lower end to climb quickly as tear-off and waste removal become labor-intensive.
Storm-driven surges in repair demand not only tighten schedules but can push up material and labor costs in the short term. After hail or high-wind events, you may see accelerated pricing, especially for immediate protection measures, leak mitigation, and temporary tarping. If the project involves extensive tear-off, anticipate more labor hours and disposal charges, which increases overall cost versus a simple re-cover or patch.
Older homes commonly present extra cost drivers in this market. Tear-off complexity is higher when multiple layers exist, or when the attic ventilation needs updating to meet current performance standards. Chimney flashing work often becomes necessary to ensure a watertight transition between roof surfaces and masonry, and post-job cleanup expectations are realistic given debris and nail retrieval in mixed-surface neighborhoods. Budget for a bit more time and a contingency for these added steps, especially if a spring storm has already caused previous damage to the roof deck or attic space.
Get a clear picture of your project costs upfront - no commitment required.
Complete Roofing
(920) 285-5249 www.completeroofingwi.com
702 Welsh Rd, Watertown, Wisconsin
4.7 from 23 reviews
Community Roofing & Restoration
(414) 786-8978 www.communityroofingandrestoration.com
Serving
5.0 from 33 reviews
A permit is typically required for a full reroof through the City of Watertown building department. This ensures the work conforms to local codes and safety standards, including proper weatherproofing and structural considerations that are important in this area's snowy winters and spring storm cycles. If the project is a straightforward replacement with no structural alterations, you still should verify permit needs before starting, since even seemingly simple reroofs can trigger city review depending on the specifics of the roof and attic space.
For standard reroofs, plan review is usually not required, which can simplify straightforward replacement projects compared with more complex structural work. That said, the scope still matters. If the roof deck, framing, or eaves require modification, or if any venting or attic insulation components are changing, the review process may be triggered. Don't assume "no review" until you've checked with the building department. Having a clear project outline and any existing permits from related repairs will speed the process and reduce back-and-forth.
Watertown typically conducts an inspection after completion to verify underlayment, flashing, and venting. The goal is to ensure a watertight seal and proper ventilation, which are critical for battling ice dams and moisture intrusion during spring thaws. Documentation of flashing around chimneys, skylights, and roof penetrations should be prepared ahead of time, and materials should be installed cleanly to satisfy sign-off requirements.
With a shorter May-to-September reroofing window, aligning permit timing with weather is essential. In practice, it helps to plan around expected snowfall and spring rain events that can complicate installation and extend the time before inspection. Coordinate with the contractor to ensure the underlayment and ventilation details are completed in a way that allows a smooth inspection pass. If an inspection is missed or a retake is required, weather delays can quickly push a project into the next season, so have contingency plans for scheduling wind- and rain-friendly windows.
Prepare a concise pre-inspection binder that includes the roof plan, vent locations, underlayment type, and flashing details. Include the manufacturer specifications for any venting products and ice-dam resistant features chosen for the project. Clear, visible installation of attic vents and roof vents helps the inspector verify that ventilation is adequate to minimize condensation and heat buildup, which is particularly relevant for older homes common in the area.
Understanding permit timing and inspection expectations reduces the stress of a Watertown reroof. By ensuring the permit is in place, keeping plan changes minimal unless necessary, and presenting a thorough post-installation packet, the process moves more predictably from start to sign-off while supporting long-term performance against ice dams and spring storm impacts.
In this area, spring and summer storms can turn a quiet block into a rapid cluster of claims, and the resulting wave of inspections often comes within days of a hail or high-wind event. Neighbors notice the same telltale bruises on shingles and lifted tabs that signal hidden damage, and the pattern of neighborhood-wide inspections is a familiar rhythm you'll recognize after a strong storm. The timing matters: a narrow window to document issues and coordinate an adjuster visit can influence how smoothly a settlement moves forward, so recognizing that surge helps you stay ahead.
Insurers here commonly expect a clear record of what happened before any adjustments are finalized. The process typically centers on detailed photo documentation, a record of roof age, and precise material specifications for the exact shingles or panels installed on the home. Because Watertown homes range from older mid-century builds to newer midtown renovations, consistency in notes about the roof's construction helps avoid disputes later. When you can, gather photos that show the overall roof, close-ups of bruised or lifted shingles, flashing around chimneys and vents, and any signs of interior moisture-spots on ceilings or damp attic insulation. If the system has a visible leak, note the location and how it correlates with the storm path. This level of detail is what local adjusters expect to see when they review a claim and compare it to the policy's coverage.
On-site adjuster visits are a common local practice, so preserving evidence before any temporary repairs are made is crucial. Temporary fixes can hide the underlying cause, making it harder to prove the scope of damage once the adjuster is on site. Take immediate steps to document and protect the roof's vulnerable zones: bruising on shingles, lifted tabs, damaged flashing, and signs of interior moisture. If a mitigation crew is called, request a photograph log of any work done, including the temporary fixes, so nothing about the damage is obscured by a bandage over the real problem. When the claim moves forward, this careful record helps ensure the settlement reflects the true condition of the roof rather than a patched appearance after the storm.
Connect with contractors who help homeowners navigate the claims process from damage assessment to final approval.

AAA Roofing & Exteriors
(920) 248-8741 www.aaaroofingandexteriorswi.com
1105 Louisa St, Watertown, Wisconsin
5.0 from 2 reviews

In this area, freeze-thaw cycles and spring rains stress flashing where chimneys meet the roof and where skylights sit. Older homes common along the Rock River corridor often show worn step-flashing and misaligned counter-flashing at masonry joints. A small failure here can become a big drip during a rapid thaw or after a heavy shower. Local contractor signals show repeated demand for chimney-related roofing work, aligning with these patterns in established Wisconsin communities like Watertown. Expect a higher risk if a roof has multiple layers or if vent stacks share close margins with masonry.
Because inspections verify flashing and venting on reroofs, penetrations such as skylights and masonry intersections deserve extra scrutiny before project closeout. Look for clean, continuous sealant around skylight flanges and a ventilated, properly counter-flashed chimney chase. Check for hairline gaps where the chimney meets the roof deck, and confirm that step-flashing extends well up the side of the chimney. If a skylight sits near a valley or ridge, confirm that its flashing intersects cleanly with surrounding roof flashing without stubborn gaps.
During the handover, require a note on each penetration: skylights, chimney, and vent intersections should show visible daubing of roofing sealant and secure fasteners. On a mid-season reroof, ask for a temporary, no-leak cover if a storm is forecast before final closeout. If a leak is detected post-install, address it promptly with targeted flashing adjustments and resealing rather than a full teardown. This focused approach reduces recurrence during Watertown's narrow reroofing season.
Find contractors experienced in skylight installation, flashing, and leak repairs to bring natural light into your home.
Save My Roof
(920) 542-3070 www.savemyroof.com
518 Grey Fox Run, Watertown, Wisconsin
4.9 from 58 reviews
J&B Quality Roofing
(920) 253-1181 jbqualityroofingllc.com
216 S 3rd St, Watertown, Wisconsin
5.0 from 22 reviews
Complete Roofing
(920) 285-5249 www.completeroofingwi.com
702 Welsh Rd, Watertown, Wisconsin
4.7 from 23 reviews
Watertown's contractor mix leans heavily toward reroofing rather than niche new-construction specialization, so homeowners are often choosing among crews focused on replacement speed and cleanup. When a storm rolls through and exposes decking or leaks during the short build window, a crew that prioritizes rapid deployment, thorough tarp duties, and efficient waste removal can mean the difference between a temporary fix and a durable repair. Look for teams that advertise staged crews, on-site foremen, and a defined plan for protecting surrounding landscaping and siding during tear-off and installation. In practice, that means you should expect a well-coordinated sequence: roof stripping, decking inspection, discrete material staging, and clean daily job-site containment.
A smaller but meaningful share of local contractors advertise warranties, making workmanship and manufacturer-backed coverage a useful differentiator in a market driven by repeat storm exposure. Ask for a written workmanship warranty that specifies duration, what is covered, and how service calls are handled if a problem arises after installation. Clarify whether the warranty transfers if a future owner acquires the home. Manufacturer-backed coverage should connect to the exact shingle or metal product installed, with clear terms on what qualifies as a defect and the procedure for filing a claim. In Watertown, where spring storms can test the roof year after year, a reliable warranty is a practical hedge against recurring damage.
Because the local roofers must work within a narrow window, you'll notice crews that stock common shingles and underlayment locally, pre-fabricate details, and preplan debris containment. Ask about contingency plans for weather delays, and verify that the crew can safely complete a full replacement in a single pass when possible. A responsive crew will provide a concrete schedule, regular updates, and a clear process for addressing interior moisture concerns if exposure occurs mid-project.