Last updated: Apr 19, 2026
Beaver Dam homeowners face cold winters with substantial snowfall and repeated thaw cycles that stress the roof system from every angle. Ice damming is more than a nuisance here; it quietly undermines shingles, underlayment, and attic space when not anticipated and addressed promptly. Each heavy snow event followed by a quick thaw creates a window where meltwater can back up at the eaves, refreeze, and push upward under shingles. If attic ventilation and insulation aren't balanced, the meltwater is more likely to migrate toward the inner roof line, freezing and expanding in place. That cycle weakens the roof assembly and sets the stage for leaks, mold in upper walls, and costly repairs once spring arrives.
Late-winter melt followed by refreezing is a key local failure pattern. When the sun returns and temperatures swing above and below freezing, moisture moves into the roof system and then locks in as ice behind a dammed edge. If the attic is too warm or insufficiently ventilated, warm air melts more deeply into the attic plane, creating more moisture that can condense on cold sheathing and refreeze near the eaves. This back-and-forth is a persistent stressor for shingles and flashing. Don't assume a single heavy snow event is the whole story-it's the repeated thaw cycles that slowly lift and separate shingles, loosen nails, and compromise waterproofing. Be vigilant after each thaw, especially if your attic space feels unusually warm or humid.
A practical, no-nonsense check is to test attic balance before the next snow season peaks. Confirm insulation extends to the eave line and that soffit and roof vents aren't blocked by insulation or debris. If you feel warm air rising into the attic during a melt cycle, it's a signal to improve ventilation and seal gaps between the attic and living space. Consider a simple weatherization pass: seal obvious penetrations, install baffles for proper venting above the insulation, and ensure attic baffles maintain airflow from soffit to ridge. These steps aren't cosmetic; they determine whether a future thaw locks in damage or drains safely away.
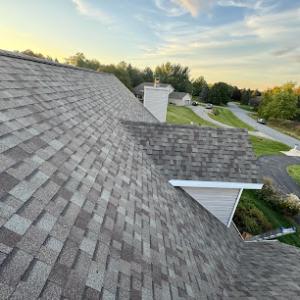
When ice damming shows up consistently along the eaves, or you notice staining, peeling paint, or damp spots in upper walls after thaw periods, take them seriously. Water that travels behind shingles often travels further than visible staining suggests. A proactive approach is to inspect the roof line for lifted shingles, damaged flashing at chimneys and skylights, and any signs of sump-like pooling or granular loss along the roof surface. If the attic feels damp or visibly humid after a thaw, that's a signal to engage a professional sooner rather than later. Early-stage moisture intrusion is far cheaper to cure than late-stage roof replacement.
Replacement timing in Beaver Dam often shifts toward late spring or early summer because crews need winter damage to fully reveal itself after thaw, and installation conditions are more reliable then. Plan for a window where snow has melted, temperatures are consistently above freezing, and outside moisture is minimized. Waiting too long after a thaw can let hidden issues advance, especially if ice dam damage has been stressing the roof structure for weeks. If you're evaluating your roof now, use the melt-and-freeze cycle as a diagnostic window: look for new ice dams after the next thaw and schedule a detailed inspection ASAP to map out necessary repairs before next winter's load.
Hail and wind events knock hard in this part of the state, and Dodge County's weather pattern brings a steady rhythm of storm activity that lands on roofs across the area. In this climate, roofs endure more freeze-thaw cycles than they might in gentler regions, which compounds the consequences of surface damage. When a storm slams through, a homeowner can wake to bruised shingles, granule loss, or lifted edges that aren't always obvious from the ground. That subtle damage can become a bigger problem as moisture works its way into hidden layers and ice dams form during the inevitable Wisconsin winter.
Beaver Dam homeowners should treat the minutes after a storm as a brief window of opportunity for accurate record-keeping. Surface bruising and granule loss may be visible right away, but the real risk often shows up after a freeze. Take dated photos from multiple angles, including close-ups of any lifted edges, torn flashing, missing granules, or obvious hail hits along the ridge line. A simple photo log that charts when conditions were observed versus when temporary repairs were made helps create a clear timeline for any adjuster. Keep a running note of weather since the event and avoid relying on memory weeks later. If possible, photograph the attic space and visible ventilation under the eaves to catch signs of moisture that aren't apparent on the exterior.
Adjusters in this market routinely want a tight, dated record of damage and a sequence of events from the storm onward. A quick, organized set of photos dated to the storm, followed by images of how conditions progressed after any temporary fixes, can streamline the review. If you notice staining, moisture streaks, or damp spots in the attic after a thaw, document them promptly. Do not delay reporting, because the adjuster will want to see the progression of the damage in relation to weather patterns and any storm-driven debris. Having a clear, factual narrative-and corroborating photos-reduces back-and-forth and helps ensure the claim reflects real impact rather than perceived issues.
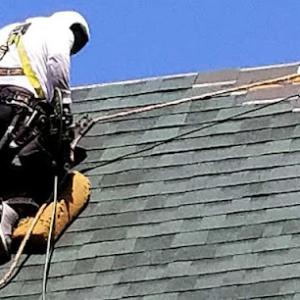
If you observe lifting shingles, exposed nail heads, or damaged flashing after a summer storm, proceed with caution. Do not attempt aggressive repairs that could be flagged as preexisting or improper by an insurer. Instead, implement temporary measures only to protect interior spaces: cover vulnerable areas with a water-resistant tarp where safe, and limit foot traffic on the roof to avoid further injury until a professional can assess. Document these temporary steps with photos and dates, then contact a roofing professional experienced in local storm response to evaluate both surface and flashing integrity. In this environment, the difference between a surface bruise and a hidden leak often hinges on the integrity of the flashing and the connection points around chimneys and skylights, so pay attention to any signs of water entry near these features.
Snow load and freeze-thaw cycles amplify the consequences of wind and hail damage over time. Even seemingly minor hits can undermine insulation, vent seals, and the underlayment, creating paths for water to intrude during snowmelt or spring rains. A careful homeowner maintains a running eye for early indicators: granule wear along eave lines, micro-cracks at shingle tabs, or loose edges that move with the wind. When such cues appear after a storm, don't wait for a leak to reveal itself. Prompt, precise documentation paired with an experienced inspection can prevent small problems from evolving into costly, hidden failures once winter tightens its grip.
Heimerl Corporation
(920) 887-3881 www.heimerlcorp.com
1401 N Center St, Beaver Dam, Wisconsin
5.0 from 28 reviews
Total home and building improvements. Commercial, Residential and Industrial. Licensed and fully Insured. References available.
Loyal Exteriors
(920) 382-4409 www.loyalexteriors.com
300 N Center St, Beaver Dam, Wisconsin
4.6 from 51 reviews
Loyal Exteriors, LLC is a trusted roofing and exterior contractor serving Beaver Dam and surrounding Wisconsin communities. We specialize in roofing, siding, and storm damage restoration, with a strong focus on insurance claim support and accurate damage assessments. Our team combines hands-on experience with clear communication to ensure homeowners understand their options and feel confident throughout the process. From inspections to final installation, we work closely with homeowners and insurance carriers to deliver quality workmanship, proper documentation, and long-lasting results. At Loyal Exteriors, we believe in doing the job right, standing behind our work, and treating every home with care and integrity.
Kingdom Roofing
(920) 404-5760 www.kingdomroofingwi.com
Serving
5.0 from 6 reviews
Kingdom Roofing specializes in shingle replacement for residential and commercial properties. We understand the importance of a sturdy and reliable roof, and we are dedicated to providing top-quality services to our customers. Our team of experienced professionals is committed to ensuring customer satisfaction by listening to their needs, providing clear communication, and delivering timely and efficient services. We believe in transparent pricing, so our customers can trust that they are getting a fair deal. At Kingdom Roofing, we don't just care about roofs; we care about the people under them.
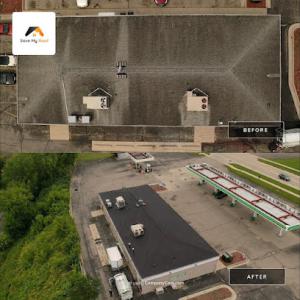
Save My Roof
(920) 542-3070 www.savemyroof.com
Serving
4.9 from 58 reviews
Save My Roof, headquartered in Watertown, WI 53094, understands the importance of a sturdy and long-lasting roof. We care about our customers and strive to educate them about their roofs and options to prolong their lives. We believe in repairing and maintaining roofs before considering a premature replacement. Unlike other roofing companies that may only push for a new roof, we prioritize our customer's needs and offer tailored solutions for their unique situations. We offer a comprehensive range of roofing services for both residential and commercial properties. We specialize in roof rejuvenation, maintenance, restoration, and replacement. We cover all of southeastern Wisconsin!!
J&B Quality Roofing
(920) 253-1181 jbqualityroofingllc.com
Serving
5.0 from 22 reviews
With customer satisfaction always being their top priority, J&B Quality Roofing has become a top choice for residential and commercial roofing services in Watertown, Wisconsin. Their experienced and expert team always aim to exceed expectations, guaranteeing high-quality work that's both punctual and affordable, providing peace of mind to their customers.
Kevin Sterwald Roofing
(920) 988-1072 kevinsterwaldroofing.com
Serving
4.9 from 77 reviews
At Kevin Sterwald Roofing, we've been in business since 2001 - that's 20 years of roofing experience! We have a team of roofing and attic specialists that have literally seen it and repaired it all. Customers call us to repair their roofing and attic issues because they know we pride ourselves in diagnosing the problem accurately and completing the job the right way. We don't believe in quick, temporary fixes that will end up causing more issues in the long run. If it's not done right the first time. Our customers are never left with an unfinished project. We guarantee it.
Complete Roofing
(920) 285-5249 www.completeroofingwi.com
Serving
4.7 from 23 reviews
Looking for professional roofing services in Watertown? Look no further than Complete Roofing WI, your experts in all things roofing. With our dedicated team and extensive experience, we guarantee exceptional results that will leave you satisfied. From seamless gutters to residential roofing, we handle it all with precision and care. Our efficient and hardworking crew ensures a seamless process from start to finish, completing your project on time and within budget. Don't just take our word for it – our happy customers rave about their experience with us. Contact us today for a free estimate and let us show you why we're the top choice for roofing in Watertown and surrounding areas. Expert Roofing, Complete Roofing WI.
Morry DeVries Roofing
Serving
5.0 from 2 reviews
Since 1984 Morry DeVries Roofing has been owned and operated. We do new and existing construction jobs. Our roofing contractor is CertainTeed credentialed. We work with all styles of residential roofing. Also, extended warranties are available. Please call today if you have any questions!
Accurate Roof Management
(262) 457-3350 accurateroofmanagement.com
Serving
4.6 from 14 reviews
Accurate Roof Management provides residential roofing replacements, repairs, and maintenance services to the Hartford, WI area.

Gutter Rite Seamless Gutters
(920) 979-3483 www.gutterritewi.com
Serving
5.0 from 6 reviews
Gutter Rite Seamless Gutters provides gutter guards, seamless gutters, gutter cleaning, and siding installation services to the Brownsville, WI area.
AM Exteriors
(262) 353-0408 www.am-exteriors.com
Serving
5.0 from 5 reviews
Experienced, local, family owned home exterior company serving Dodge County, WI and the surrounding areas. Your first call for all of your roofing, siding, window, and gutter needs. Serving Lomira, Brownsville, Juneau, Mayville, Waupun, West Bend, Fond du Lac, North Fond du Lac, Oshkosh, Campbellsport, Slinger, Allenton, Beaver Dam, Oakfield, Cedarburg, Mequon, Port Washington
AAA Roofing & Exteriors
(920) 248-8741 www.aaaroofingandexteriorswi.com
Serving
5.0 from 2 reviews
We’ll work with you to find the perfect solution for your exterior needs, whether that’s repairing a leak or finally replacing a 20-year-old roof that needs an overhaul. Our BBB-accredited roofing company has two decades of experience fixing and installing roofs throughout Southern Wisconsin and the Watertown area, and we’re here to help whenever you need our service.
In this climate, your roof faces freeze-thaw cycling, heavy snow, and ice dam pressure. The local housing stock leans toward practical, stackable options that handle winter wear without frequent early replacements. Ice dam prevention and proper ventilation become priorities in the design and material choice, especially since reroofs are more carefully checked for nailing, ventilation, and waterproofing details in the permit process. The goal is to balance weather resilience with install practicality and long-term performance in a community where snowfall and fluctuating temperatures are the norm.
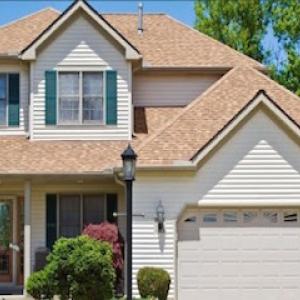
Asphalt shingles remain a dominant local choice because they fit the region's mainstream housing stock and offer a lower entry point for homeowners facing winter wear. They install quickly, and modern multi-tab or architectural styles provide a solid, weather-tight roof at a practical price point. For Beaver Dam, the key to performance is upgrading to ice-dam resistant underlayment, ensuring adequate attic ventilation, and using proper nailing patterns that meet local inspection expectations. Asphalt shingles work well with existing roof pitches and framing, making retrofits more straightforward when winter damage or storm impacts occur. In snowy stretches, look for shingles with good granule adhesion and wind resistance to minimize shingle lift during gusts.
Metal roofing is especially relevant in this area because snow shedding and resistance to repeated freeze-thaw exposure appeal to owners trying to reduce winter buildup issues. A metal layer reduces ice dam risk by allowing snow to slide more predictably and by delivering a robust, wind-friendly performance. Choose panels or shingles with an appropriate profile for shedding ice and water, and pair with a well-sealed, insulated attic and an effective eave detailing to control ice dam formation. Metal roofs can be heavier than some alternatives, so ensure structural compatibility and verify deck support if the existing structure is older or has limited spring-load capacity. The long-term durability and maintenance simplicity make metal a strong fit for harsh winters, provided installation meets proper nailing and waterproofing standards.
Clay tile is available locally, offering a classic look and excellent longevity when properly installed. However, its weight is a major consideration. In Beaver Dam's climate, heavy tiles demand careful structural assessment to avoid flexing or squeaking in freeze-thaw cycles. Orientation and underlayment must be designed to shed snow effectively, and it's essential to verify that roof framing can handle the load without compromising ventilation or waterproofing. If choosing clay tile, plan for a meticulous installation that honors drainage, sealing at penetrations, and any potential weight-bearing limits observed by local inspectors.
Concrete tile shares many advantages with clay in aesthetics and longevity but can be slightly heavier and more prone to cracking under extreme freeze-thaw if not properly installed. Like clay, it requires a structural check in regions with stricter reroof review for unusual configurations. When used, ensure the system uses appropriate underlayment, adequate venting, and a design that promotes reliable snow and ice shedding while protecting against water intrusion at hips, valleys, and penetrations.
Synthetic or composite shingles emulate the look of natural materials with improved impact resistance and often lighter weight. They can provide good performance in freeze-thaw cycles when paired with proper attic ventilation and a careful installation that addresses nail lines and waterproofing details. In a market with varied local options, pick products with proven weathering in snow and ice conditions and confirm compatibility with existing deck and eave details to avoid cold-weather cracking or moisture issues.
Slate offers durability and a high-end appearance, with long life in harsh winters. Weight considerations are substantial, and structural compatibility is essential. Slate's rigidity can resist ice-damming pressure, but improper installation matters just as much as material choice. If slate is contemplated, ensure the roof structure is designed to carry the load, and partner with an installer who specializes in accurate nailing, flashing, and ventilation integration to meet the city's expectations for waterproofing and overall performance.
When you price a reroof in this area, asphalt shingles come in around 320 to 520 USD per square, and metal roofing generally runs 550 to 900 per square. If clay tile is on the home, expect 1000 to 1900 per square, while concrete tile typically falls 900 to 1500 per square. Synthetic or composite shingles are usually 420 to 750 per square, and slate is the highest, about 1300 to 2600 per square. These figures reflect common Beaver Dam homes with standard decking and basic ventilation, not premium underlayment or specialty flashing.
Costs in this area can rise after hail or wind events because Dodge County claim activity can create short-term demand spikes for labor and scheduling. If a storm hits, you may see crews booking out weeks or months, which pushes material and labor prices higher temporarily. That dynamic matters more with reroofs than small repairs, and it's not unusual to encounter a higher初 price envelope after severe events.
Local winter damage patterns can increase scope beyond the field shingles alone because ice-dam exposure often forces more attention to ventilation corrections, waterproofing details, and flashing work that inspectors in Beaver Dam commonly review. In practice, that means a straight shingle replacement may become a broader project: ensuring proper attic ventilation, addressing ice dams before they form, and reworking step and starter flashing around eaves. Expect these additional items to show up in the bid as separate line items or bundled waterproofing work, especially on older homes with limited existing ventilation.
For homes prone to freeze-thaw cycles, durability and proper installation are key. Metal can resist snow load well and sheds snow more readily, but requires precise flashing. Clay or concrete tile adds weight and may require structural checks. Synthetic shingles offer mid-range cost with decent weather resistance. The right choice balances initial cost with long-term performance in Dodge County's seasonal swings. Beaver Dam homes often benefit from reinforced ventilation and careful sealing to reduce ice dam risk over time.
A building permit is required for reroofing projects through the City of Beaver Dam building department. This process helps ensure that nailing patterns, ventilation, and waterproofing meet local standards that address the freeze-thaw cycles and heavy snow loads typical in the area. Even if the roof itself seems straightforward, the permit serves as an official checkpoint for critical details that affect long-term performance, especially in homes that feature attic access, complex eaves, or previously altered roof lines.
For standard reroofs, plan review is usually not required. However, if the project involves structural changes or unusual roof configurations-such as a kit-style dormer, reconfigured venting paths, reinforced rafters, or a change to live loads-the review process may be triggered. In these cases, expect additional documentation and potential adjustments before work can proceed. Having a clear, accurate scope and photos or sketches of the existing roof can help the building department move through review more smoothly.
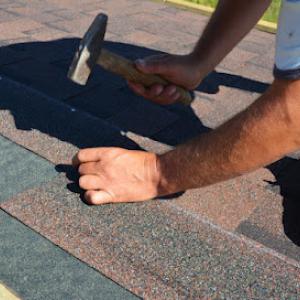
Inspections are typically performed during and after installation. The emphasis in Beaver Dam rests on proper nailing patterns, ventilation alignment, and waterproofing details to mitigate ice dam development and to withstand recurring freeze-thaw stress. A close look at fastener schedules, the sequence of shingle installation, and the integrity of underlayment helps ensure that the roof will shed snow effectively and resist water intrusion through ice buildup. Be prepared for the inspector to check attic ventilation openings, baffles, and any changes to vapor retarders if applicable. If labor or materials deviate from the approved plan, an approved change order may be required before the project can continue.
Coordinate with the contractor to submit the permit package early, including basic roof layout, attic venting plan, and a simple nailing schematic. Schedule inspections in a timely manner and ensure access to the attic and rooftop areas for the inspector. In winter and early spring, when snow and ice dam pressure peak, having the permit and inspection plan settled reduces delays and helps keep the project on schedule. Remember that the goal of the permit process is to guarantee that waterproofing and ventilation work together to resist the unique Wisconsin freeze-thaw cycle seen locally.
Late spring and early summer are windows when winter damage becomes visible and crews can work before peak summer storm interruptions. Look for granular loss, unusual wear on edges, and ice dam evidence along eaves. If attic ventilation remains insufficient, moisture lodges and underlayment deteriorates even after snow melts. A replacement decision should consider whether those signs extend across multiple sections of the roof rather than isolated spots.
Spring thaw and heavy rains pressure roofs that already have weak ventilation or compromised underlayment. Freeze-thaw cycles can push leaks into living spaces before a contractor has a chance to diagnose. If moisture shows in ceilings or attic rafters after a rain, plan the project promptly. Delaying until summer heat makes insulation and ventilation adjustments harder and can amplify hidden damage.
Autumn in this area brings leaf accumulation and temperature swings that expose flashing and sealant weaknesses before the next snow season. Ridges and valleys collect debris that holds moisture, while colder nights contract materials and highlight sealant gaps. If flashing shows rust, loosens, or seals peel, address those areas during a scheduled replacement so coping with fall weather doesn't add temporary fixes.
Before replacing, stage a careful evaluation: confirm roof decking integrity, ensure attic ventilation is balanced with intake and exhaust, and verify underlayment continuity across critical sections. If multiple problem indicators align-wet spots, missing granules, warped decking-replacement becomes the prudent choice. In Beaver Dam, size up the roof in terms of square coverage and the likelihood of heavy snows reaccumulating next season.
You should frame a decision matrix for Beaver Dam: if structural boards show widespread sagging, or multiple leaks persist after a thorough repair, replacement reduces risk of mid-winter failure when access is limited. Consider the impact of upcoming winters and expected snow loads. The more bearings, hips, and slopes your roof has, the more critical it becomes to align replacement timing with a calm spring or early summer schedule before storm season.
In Beaver Dam, there is no broad statewide insurer pullback to fear, so roofing decisions are driven more by actual local weather losses than by a blanket coverage retreat. The freeze-thaw winters, heavy snows, and recurring ice-dam pressure shape what gets insured and how claims are settled once damage appears on a roof. That means your risk profile is tied to winter severity and spring thaw patterns rather than a statewide insurance mood.
Depreciation and policy-specific settlement terms can affect timing and payout on roof claims, especially after hail and wind events. Some policies apply depreciation to the payout for new roofing materials or limit replacement to actual cash value until repairs are completed. In practice, that can delay full restoration if you rely on insurance funds for financing and you are facing a rapid thaw cycle, shifting how you prioritize repair work and scheduling. The result is not a dramatic reversal of coverage, but a need to understand how your policy handles wear, materials, and the aging of components typical to the climate's cycles.
Homeowners in Beaver Dam should keep photo records, dates of storms, and contractor findings because adjusters in this market often request documentation tied to a specific event timeline. A well-documented sequence-before-and-after photos, storm dates, hail marks, wind damage notes, and a concise note from a trusted roofer about observed ice dam patterns-can smooth the path from claim filing to settlement. This is particularly relevant for roofs with a long winter exposure, where subtle ice dam damage can evolve into leak paths that only become obvious after a thaw or a new snowfall. Clarity about when damage occurred helps avoid arguments over causation and supports a more predictable recovery timeline.
Beaver Dam experiences cold, snowy winters with frequent thaw cycles that push moisture up against the underside of shingles and underlayment. Those freeze-thaw cycles create micro-cracks and sealant failures that accelerate aging, especially on lower-slope sections or where ventilation is suboptimal. Warm summers add a secondary stress, encouraging repetitive expansion and contraction of roofing materials. This combination means shingles, underlayment, and flashing endure more aggressive cycling than in milder climates.
Snow accumulation and rapid melt can lead to ice dam formation or roof edge leaks if attic temperatures are uneven. When heat vents through attic space, the resulting warm roof area can cause snow to melt unevenly and refreeze at the eaves, pushing moisture under shingles and into fascia or soffits. Over time, repeated damming and re-freezing degrade the sealing ability of fasteners and the integrity of edge metal. In Beaver Dam, this pattern is a common trigger for early aging and costly repairs if not addressed with proper ventilation and waterproofing details during reroofing or retrofit.
The region's roofing profile leans on asphalt shingles and metal, with viable premium options like tile, composite, and slate for steeper pitches. Asphalt and metal respond differently to freeze-thaw stress: asphalt may suffer granule loss and micro-cracking, while metal can warp or loosen fasteners if nailed or ventilated poorly. Premium options resist certain weathering but demand meticulous installation and attic ventilation to realize their long-term potential in this climate.
Winter leakage risk is a recurring homeowner concern. Storm damage documentation helps establish a baseline for repairs and future reroofs. When evaluating a reroof, homeowners consider whether the chosen assembly will pass city inspection without ventilation or waterproofing corrections, since improper detailing can shorten the roof's life and invite repeated call-backs after heavy snows. Aligning material choice with flashing, underlayment, and venting specifics is essential for lasting performance in this environment.