Last updated: Apr 19, 2026
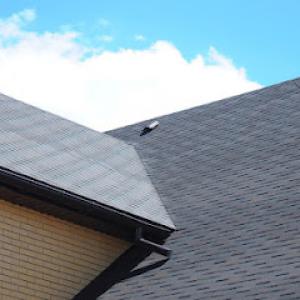
Green Bay roofs are routinely stressed by long periods of snow cover followed by freeze-thaw cycling, which can force water back under shingles at eaves and valleys. The pattern isn't just about heavy storms; it's the rhythm of the season-the days when the sun weakly melts snow during a warm spell, followed by nights that plunge back to freezing. That back-and-forth pries apart flashing, loosens shingle edges, and pushes moisture into the roof deck. When this happens, you end up with hidden ice dam damage that isn't obvious from ground level, and small breaches can become bigger leaks fast once a winter storm hits again.
The city's cold-season roofing risk isn't only snowfall but repeated thaw-refreeze events that reopen small flashing and shingle weaknesses over the course of winter. If your flashing around chimneys, skylights, and valleys isn't properly integrated with the roof plane, these tiny gaps become water highways. Ice and meltwater can pool behind the dam and then surge forward as temperatures swing. The result is often damp insulation, warped decking, and a lingering, creeping leak that surfaces only after a few weeks of subfreezing nights followed by bright sun during a thaw. It's not dramatic catastrophes so much as a slow, cumulative failure that undermines long-term roof health.
In practice, the real warning signs appear during steady cold snaps when the attic feels unusually warm or when you notice frost on the underside of the roof sheathing. Small shingle edges that lift, buckling near eaves, or moisture trails along interior walls near ceilings can all point to water sneaking in from the top. If you see dark stains near eaves or in valleys after a thaw, that's a cue to act before a peak storm hits. Proactive steps you can take now include cleaning gutters so meltwater doesn't back up behind ice blocks, ensuring attic vents are functioning to equalize temperatures, and inspecting the roof edge detail where shingles meet the flashing-these zones are the most vulnerable during freeze-thaw cycles.
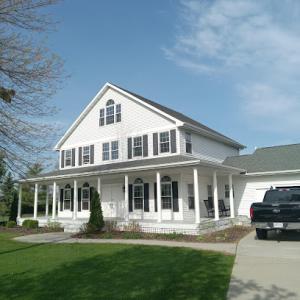
Homes in this part of northeast Wisconsin often need roof decisions timed around a short practical replacement season that usually runs from late spring through early fall. Delayed work in winter isn't practical when you're fighting repeated cycles of melt and freeze, and contractors in these months tend to be slower, with higher risk of cold-weather workmanship errors. Plan ahead for a repair or full replacement during that window to maximize shingle performance and flashing longevity. When scheduling, prioritize immediate fixes for active leaks and obvious water intrusion, then coordinate a longer-term plan for a full re-seal or re-roof if the structure shows widespread shingle failure or flashing degradation.
Ask for a thorough moisture survey that includes attic venting, insulation effectiveness, and a close look at eaves, valleys, and chimney flashing. Request a detailed plan that addresses ice dam control, not just cosmetic shingle replacement. Verify the roof ventilation strategy-gaps in the soffit, ridge vent efficiency, and any soffit-blocking concerns-since proper airflow dramatically reduces freeze-thaw stress. Insist on a seamless integration between flashing and roofing materials, with properly sealed edge metal and a continuous line of defense at transitions. When wind, snow, and freezing temperatures collide, the roof's resilience depends on every component working in concert, not on a quick patch job that offers only a temporary halt to leaks.
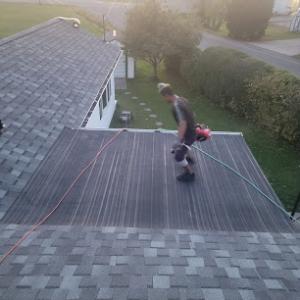
Spring hail storms can turn a simple shingle repair into a larger project when moisture reaches decking before conditions dry out. In Green Bay, that means a quick-hit leak can become a full decking and interior issue if immediate attention isn't paid. After a storm, you may notice granule loss, crushed tabs, or golf-ball sized dents along with a soft feel to the roof surface. If moisture sits on exposed decking, the risk of rot and mold climbs fast, especially with the rapid freeze-thaw swings that follow. Your priority is to act before the dry-out window closes. Start with a thorough exterior inspection for visible damage, then check attic spaces for ceiling stains, musty smells, or damp insulation. Photograph all affected areas from multiple angles, noting any sagging or curling edges. When you call a contractor, share those photos and describe any interior dampness you've observed. Do not delay on scheduling a professional inspection, because once moisture penetrates decking, even a minor repair can turn into a full roof replacement in short order.
Fall wind storms and heavy rains are a major local accelerant for aging-roof failure, especially where shingle tabs, ridge caps, and flashing are already brittle from winter exposure. That brittleness isn't obvious until a strong gust tests the integrity of sealant and edgework. Look for loose tabs, lifted shingles, gaps along vent pipes, and worn ridge caps after a windy day. Wind-driven rain can work under edges and accelerate deterioration. If flashing shows any lifting or corrosion, treat it as a priority repair-even if the rest of the roof seems intact. Expect fast-moving conditions to push repairs toward emergency scope if water intrusion begins in the attic or ceiling. In Green Bay, synthetic weather barriers and underlayment can help, but only when properly sealed at penetrations and transitions. Have a trusted roofer re-seal flashing with compatible materials, replace brittle caps, and reinforce edges that show signs of wear. Acting quickly saves larger sections of roof from accelerated failure during the typical late-season storms.
Because storm-related roofing demand spikes locally, homeowners in Green Bay can face scheduling pressure after severe weather events. That pressure can tempt rushed decisions or choosing the first available contractor rather than the best fit. The risk is pairing a quick fix with a long-term leak or a poor seal around chimneys and vents. Prepare to document the storm impact thoroughly and reach out to at least two reputable local crews within 24 to 48 hours of a weather event. Ask for detailed scope and timeline estimates, and insist on weatherproof temporary measures such as tarps or boards to minimize interior damage while awaiting full repairs. If a contractor recommends a full-replacement approach due to extensive, storm-related damage, seek a second opinion to confirm the assessment and to verify that the claim scope matches the actual condition of decking, underlayment, and flashing. In short, act decisively, document meticulously, and choose a contractor who can balance rapid response with durable, weather-appropriate repairs.
Connect with contractors who help homeowners navigate the claims process from damage assessment to final approval.
All Star Roofing
(920) 928-9004 www.allstarroofingwi.com
1161 S Taylor St, Green Bay, Wisconsin
4.9 from 132 reviews
Pierce Roofing
(920) 623-8142 greenbayroofers.com
491 Welland Ave, Green Bay, Wisconsin
4.8 from 82 reviews
Alaskan Contractors
(920) 819-0766 alaskancontractors.com
3446 Pine Forest Dr, Green Bay, Wisconsin
5.0 from 10 reviews
Security-Luebke Roofing
(920) 766-3464 securityluebkeroofing.com
1138 Main St, Green Bay, Wisconsin
4.9 from 149 reviews
Learn about our over 90-year history of the best craftsmanship and safety. Homeowners, businesses and organizations from Green Bay, Appleton, Manitowoc, Oshkosh and the surrounding areas can expect us to provide unmatched roofing excellence. With outstanding quality and 90+ years of experience, we are able to provide you with only the best in new roofs, roof repair, gutters, gutter guards, siding and blown in insulation.
All Star Roofing
(920) 928-9004 www.allstarroofingwi.com
1161 S Taylor St, Green Bay, Wisconsin
4.9 from 132 reviews
All Star Roofing provides complete roof replacement and roof repairs to the Green Bay, WI area.
Pierce Roofing
(920) 623-8142 greenbayroofers.com
491 Welland Ave, Green Bay, Wisconsin
4.8 from 82 reviews
Pierce Roofing provides roofing services to the Northeast Wisconsin area.
Armor Shield Metal Roofing
(920) 367-3107 www.armorshieldmetalroofing.com
1381 North Rd, Green Bay, Wisconsin
4.8 from 58 reviews
Specializing in Life Time Stone Coated Metal Roofing
Gutter Tune Up - Green Bay
(920) 247-2824 guttertuneup.com
2943 Flowering Peach Dr, Green Bay, Wisconsin
4.8 from 71 reviews
Gutter Tune Up - Green Bay is your trusted local partner for protecting your home from the elements. Serving Green Bay, De Pere, Ashwaubenon, Howard and surrounding areas, we specialize in seamless gutters, gutter cleaning and durable roofing solutions. We offer high-performance gutter systems and energy-efficient roofing designed to withstand Wisconsin's challenging weather, ensuring lasting protection and peace of mind. Let Gutter Tune Up deliver professional results and keep your home safe, season after season.
Top Tier Roofing & Siding
(920) 777-8254 toptierroofingandsiding.com
4115 VanLaanen Rd, Green Bay, Wisconsin
4.7 from 42 reviews
Top Tier Roofing & Siding, located in Green Bay, Wisconsin, provides high-quality roofing services to homeowners and businesses in Green Bay, Appleton, Luxemburg, De Pere, Ashwaubenon, and surrounding areas. Since 2014, we’ve specialized in roof replacements, roof repairs, and siding work. Our experienced team is dedicated to delivering durable, reliable roofing solutions tailored to each customer’s unique needs. Trust Top Tier Roofing & Siding for exceptional craftsmanship and outstanding customer service. With a strong reputation for professionalism, attention to detail, and trustworthiness, our satisfied clients leave glowing reviews. Book your consultation today and experience top-tier roofing services designed specifically for you.
Culbertson Construction
(920) 362-4204 www.roofingandsidinggb.com
615 12th Ave, Green Bay, Wisconsin
4.6 from 47 reviews
Established in 1999, Culbertson Construction has been serving Northeast Wisconsin communities for over two decades. Their expertise spans all aspects of a home's exterior envelope, including roof installation and repair, siding replacement, and window upgrades.
Roof Maxx of De Pere, WI
Green Bay, Wisconsin
5.0 from 13 reviews
Roof Maxx® is a scientifically formulated and 100% safe, plant-based roof rejuvenating spray treatment that was developed by renowned scientists from the world’s largest private research and development company.
Alaskan Contractors
(920) 819-0766 alaskancontractors.com
3446 Pine Forest Dr, Green Bay, Wisconsin
5.0 from 10 reviews
Alaskan Contractors offers roofing and storm restoration to the Green Bay, Wisconsin and surrounding areas.
Fantastic Services
(920) 265-6546 fantasticservicesllc.com
801 Hoffman Rd #112, Green Bay, Wisconsin
4.5 from 27 reviews
Fantastic Services provides reliable roofing services in Green Bay, WI and the surrounding areas. Don't hesitate to contact us now!
Vigil Construction
(920) 883-8996 vigil-construction.com
1221 Bellevue St #109, Green Bay, Wisconsin
5.0 from 7 reviews
We do roofing & siding. We do any job big or small. Have great references! Available 24/7 for emergency services.
Torney Roofing Solutions
(920) 241-9524 topusabrowse.top
2371 Cathedral Forest Dr, Green Bay, Wisconsin
5.0 from 7 reviews
A family owned and operated business specializing in all your roofing needs!
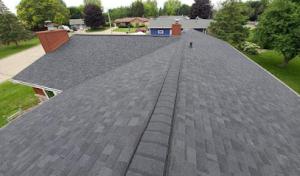
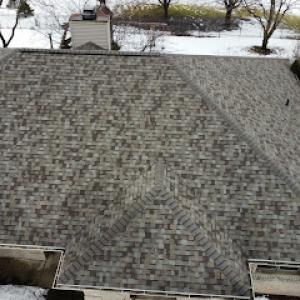
Asphalt shingles are the dominant practical choice in Green Bay because they fit the local re-roof market and the city's large stock of residential pitched roofs. They handle the freeze-thaw cycles and occasional heavy snows without demanding specialized installation crews. In most neighborhoods, a standard asphalt shingle reroof comes in a predictable range, helping homeowners plan around typical winter storage and spring repair windows. Expect pricing in the neighborhood of 350 to 650 USD per square, depending on shingle quality, underlayment, and attic ventilation details. When a storm hits and crews are in high demand, prices can rise quickly as contractors allocate limited local labor. A mid-range, well-sealed installation with proper ice-and-water shield at eaves tends to offer the best balance of durability and cost for Green Bay winters.
Metal roofing has a strong local presence in Green Bay, reflecting homeowner interest in durability under snow, ice, and wind exposure. Metal panels or standing-seam profiles perform well with heavy snow loads, reduce ice dam risk, and often provide longer service life than asphalt in severe winters. The upfront cost is higher, but the long-term value can be worth it if you expect multiple decades of performance and minimal maintenance. Pricing sits roughly between 700 and 1200 USD per square, and the actual figure depends on panel profile, fastener system, and insulation. In storm-recovery periods, metal installations can experience tender scheduling squeezes, but the payoff is notably quicker snow-shedding and fewer post-storm leaks if the roof is well-sealed.
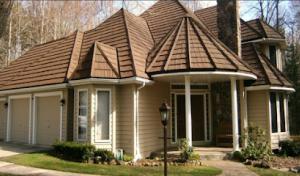
Clay tile brings a distinctive look but is less common for traditional Green Bay roofs due to weight and breakage risk in freeze-thaw cycles. For homes with retrofit-ready structural support, clay can be an option, though it typically requires careful detailing around water shed and flashing to guard against freeze damage. Costs run from about 980 to 1900 USD per square, reflecting material heaviness, rafter utilization, and the need for precise underlayment and installation. During storm-recovery windows, availability for specialty crews tightens, and tile installations may be scheduled later in the season. A careful assessment of roof slope and attic temperature control is essential to prevent cracking from cold snaps.
Concrete tile offers a robust look and solid durability, with performance aligned to Green Bay's winter stress if installed properly. Like clay, it demands adequate structural support and meticulous flashing to handle ice formation at eaves and penetrations. Expect pricing in the vicinity of 900 to 1700 USD per square, driven by tile weight, substrate preparation, and lath/underlayment choices. Storm periods can push project timelines, and efficient scheduling is valuable to minimize exposure to late-season cold snaps that stress sealants and fasteners.
Wood shingles or shakes are traditional and visually appealing on many Green Bay homes, but they require higher maintenance to resist moisture, moss, and freeze-thaw damage. They perform well with proper ventilation and a durable underlayment, yet they remain more susceptible to long-term weather exposure than metal or asphalt. Costs typically range from 520 to 900 USD per square, influenced by wood species, thickness, and finished protection. In high-wloodthaw periods following brutal winters, scheduling can be tight as crews balance storm-related work with established wood-roof installations.
Synthetic or composite shingles offer weather-resistance advantages and can mimic other materials while maintaining lower weight. They can be a practical compromise in storm-year Green Bay markets, delivering decent durability against freeze-thaw cycles with easier maintenance than natural products. Pricing generally falls between 650 and 1100 USD per square, depending on the exact blend, warranty, and installation details. If a storm or rapid-response project is involved, composites may enjoy quicker availability and predictable performance, aiding in reliable winter protection.
A full re-roof in Green Bay typically requires a building permit issued by the City of Green Bay Building Department. Before any shingle bundles or metal sheets appear on your roof, you or your contractor should confirm that the project is properly permitted. The Building Department will want to see project details, including roof type, square footage, and any structural work involved. Scheduling the permit review early helps prevent delays when weather windows are short or storm season hits. Expect the permit to cover safety requirements, material acceptance, and inspection milestones.
Green Bay's roofing process usually includes city inspection activity and a final inspection after completion. An initial inspection often occurs after roofing underlayment, flashing, and ventilation are in place, but before the final coverings are installed. This check ensures that the roof deck is solid, that ice and water shield placement meets code expectations, and that ventilation meets local standards for attic temperatures and moisture control. A subsequent mid-project or punch-list inspection can occur if substitutions or adjustments are needed, especially after a heavy snow event or unexpected freeze-thaw stress. The final inspection confirms the roof is fully installed, properly fastened, and that penetrations and edges are sealed to withstand winter conditions.
Permit timing in Green Bay can be affected by both weather conditions and Building Department workload, which matters during peak storm and summer roofing periods. Cold snaps, heavy snowfall, and rapid temperature fluctuations can slow access for inspectors or push projects into narrower daylight windows. Plan for potential rescheduling if a storm delays material delivery or roof installation. Communicate openly with the contractor about expected inspection dates and be prepared to adjust plans when the calendar tightens around winter and spring thaw cycles. Having a clear line of contact with the Building Department and a documented project schedule helps keep the process moving during busy periods.
Keep all permits, inspection notices, and confirmation emails in a single file accessible to both homeowner and contractor. Before the final inspection, do a careful walkthrough to verify that all penetrations, decking, underlayment, and flashing are consistent with the permit and the inspector's notes. If a weather event interrupts work, request a written reschedule and confirm any weather-related waivers or extensions with the Building Department to avoid a delay that could impact your storm readiness for the coming season.
Wisconsin is not experiencing a broad insurer pullback in the same way as some catastrophe-heavy states, but Green Bay homeowners still see claim activity tied to wind and hail events. That pattern means preparedness with documentation matters more than ever when you navigate a storm-related roof issue. Understanding how your carrier handles wind and hail claims helps you gather the right items quickly.
For Green Bay storm claims, carriers commonly want photo documentation, pre- and post-damage estimates, and an adjuster report. Start by photographing the entire roof from ground level with a wide shot and close-ups of any known damage, including shingles, flashing, vents, and gutters. Maintain a timestamped record that shows the roof condition before and after the event, if possible. Keep copies of any written estimates you received from contractors.
Create a simple file for each incident: a dated summary of the storm and its impact, the contractor estimates (even rough ones), photos labeled by location and date, and notes about any leaks or interior damage. If a contractor has already performed an assessment, obtain a formal written report and ensure it references visible damage, measurements, and recommended repairs. Store everything digitally and keep paper copies in a folder accessible to the insurance agent.
An adjuster will want to verify wind or hail damage and correlate it with the cause of loss. Provide clear images that show the damage pattern, such as randomly distributed granule loss on asphalt shingles or dented metal components. If you have related interior damage (ceiling stains, warped boards), document with dated photos and note the vicinity of the affected area. Ask the adjuster to explain what is and isn't covered under your specific policy, recognizing that coverage handling can vary noticeably by carrier and policy.
Coordinate communication through one point of contact, preferably the agent who handled your policy previously. Have your contractor's written assessment ready, including scope of work and expected timelines, so the adjuster's review can proceed without unnecessary delays. In storms with multiple damage points or types, expect questions about secondary effects like ice dam risk, attic insulation, or ventilation, and respond promptly with supporting documentation.
Connect with contractors who help homeowners navigate the claims process from damage assessment to final approval.
All Star Roofing
(920) 928-9004 www.allstarroofingwi.com
1161 S Taylor St, Green Bay, Wisconsin
4.9 from 132 reviews
Pierce Roofing
(920) 623-8142 greenbayroofers.com
491 Welland Ave, Green Bay, Wisconsin
4.8 from 82 reviews
Alaskan Contractors
(920) 819-0766 alaskancontractors.com
3446 Pine Forest Dr, Green Bay, Wisconsin
5.0 from 10 reviews
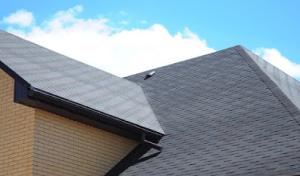
Green Bay's residential roofing landscape is largely built on asphalt shingles and metal, with smaller but real use of wood, synthetic/composite, clay, and concrete tile. For most homes facing ice dams, heavy snow, and frequent freeze-thaw cycles, those two materials offer the most balanced mix of weather performance, installation practicality, and long-term reliability. Asphalt handles rapid temperature swings well when installed with quality underlayment and proper nail spacing, while metal sheds snow smoothly and can reduce ice dam growth when paired with an appropriate attic ventilation strategy.
Clay and concrete tile show up in some neighborhoods, but they're far less typical locally. They can be attractive and very durable, yet their weight and installation demands make them specialized choices here. If a project involves clay or concrete, expect a specialty approach: structural checks for load, precise underlayment details, and careful fastening to resist freeze-thaw movement. In most Green Bay homes, these heavier options are chosen for specific architectural looks or long-range durability, not as a standard replacement in standard attics.
Summer humidity and heat in Green Bay can affect underlayment performance and material handling, which makes installation quality especially important across material types. A high-quality underlayment with proper ventilation becomes critical to preventing moisture buildup and leafing on the underside of shingles or panels. For metal roofs, ensure panels are installed with adequate sealant and correct fastener patterns to combat thermal movement. For asphalt, proper nailing and shingle alignment prevent wind lift and premature failure during thaw cycles.
Wood shingles or shakes offer a traditional look but require careful maintenance to resist decay and surface wear under heavy snow. If choosing wood, prioritize treated products and a robust sealant system, with attention to attic temperature control to minimize warping. Synthetic or composite shingles provide a middle ground-less maintenance than wood, similar aesthetics to organic materials, and generally good performance in cold snaps when installed correctly with appropriate underlayment and ventilation. In Green Bay, these are practical only when the architectural style calls for them or when a homeowner aims for a longer-lifespan alternative to traditional asphalt.
If clay or concrete tile is selected, plan for a structural review, premium fasteners, and meticulous sealing around penetrations. These choices can satisfy enduring curb appeal while still requiring a careful winter-focused installation plan to weather Green Bay's freeze-thaw cycles.
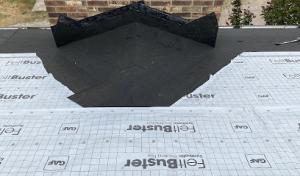
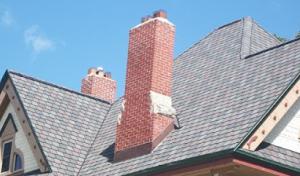
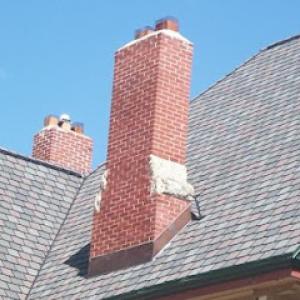
In a climate defined by freeze-thaw cycles and heavy snows, skylights and chimney flashing are common leak points. Expansion and contraction repeatedly stress seals, and that stress compounds when ice builds up around the edges. A small failure here can become a slow drip that invites higher interior moisture, warped wood, and attic temperatures that swing with every thaw.
These penetrations become higher-risk in winter when ice backup and snow retention keep water around flashing details longer. Snow piles around a chimney, or a thick ice dam near a skylight curb, create lateral pressure that pushes against seals rather than letting water shed freely. The result is more frequent leaks, quicker deterioration of flashing materials, and a need for more urgent repairs after storms.
Local contractor signals show meaningful demand for both skylight work and chimney-related roofing details in the Green Bay market. That translates to a steady stream of calls after notable snow events and during mid-winter thaws. If a contractor mentions recurring flashing issues around skylights or chimney lines, treat it as a warning that preventive maintenance can save costly fixes later.
Schedule proactive inspection of every roof penetration before the deepest snows arrive, focusing on skylights and chimney flashing. Look for loose adapters, cracked enamel, and any gap widening at sealant joints. In winter, clear around vents and chimneys of loose snow, but avoid chipping ice that can damage flashing. When signs of aging appear, address them early with reinforced flashing details and targeted sealant refreshment, not after a leak starts.
Find contractors experienced in skylight installation, flashing, and leak repairs to bring natural light into your home.
Armor Shield Metal Roofing
(920) 367-3107 www.armorshieldmetalroofing.com
1381 North Rd, Green Bay, Wisconsin
4.8 from 58 reviews
Top Tier Roofing & Siding
(920) 777-8254 toptierroofingandsiding.com
4115 VanLaanen Rd, Green Bay, Wisconsin
4.7 from 42 reviews
Low-slope roofing is a smaller niche in being more common for home additions, porches, and mixed-use structures. In Green Bay, the pitched roof dominates, but the practical need for flat or low-slope sections exists, especially where additions meet the existing structure or a breezeway shields a door. Drainage and membrane condition matter more here due to freeze-thaw cycles and winter storms.
On low-slope sections, standing water combined with freeze-thaw exposure stresses membranes quickly. Ensure drainage plan directs water to scuppers or downspouts; avoid low spots that hold meltwater. Choose membranes with proven adaptability to cold weather, UV exposure, and wind-driven snow. Inspect edges and detail joints after heavy snows melt. In Green Bay, contractors emphasize seam integrity and compatible flashings around penetrations and transitions to steeper roofs.
Single-ply membranes and torch-down options are common for low-slope work, but a careful choice matches the climate and intended use. Look for reinforced sheets that resist punctures from ice buildup and resist shrinkage in cold temperatures. For porches and additions, consider a surface texture that sheds snow more evenly to reduce ice dam risk at the intersection with a main roof. A qualified installer should verify substrate conditioning and insulation alignment to prevent thermal bridging.
Roof coating appears in the Green Bay contractor market as a limited specialty rather than a mainstream residential solution. Coatings can offer temporary protection or extended service in mild seasons, but they require precise surface prep and ongoing maintenance to stay reliable through multiple freeze-thaw cycles. In mixed-use projects, coatings are worth evaluating for localized sections with low-slope drainage challenges. For a Green Bay home, discuss whether a targeted, serviceable membrane detail can bridge seasons, avoiding costly full rework when storms hit. Seasonal checks and timely resealing protect investments during harsh winters each season.
Find specialists in TPO, EPDM, and built-up flat roofing systems for residential and commercial properties.