Last updated: Apr 19, 2026
Kenosha's position on the lake brings onshore winds that can whip across shingles with little warning. Those gusts turn small, almost invisible shingle damage into active leaks in a heartbeat, especially along the eaves and near roof edges where wind pressure is highest. In a few minutes of a storm, a loose valley seal or a lifted shingle seam can become a direct rain conduit. You'll notice water marks that appear suddenly in the attic or along interior ceiling lines after strong lake winds. The key move is proactive vigilance: after every windy spell, walk the attic access and inspect for moisture, damp insulation, or odor of mold before it shows up as a stain inside the living space. If you detect any suspicious edge lift or wind-driven debris on the roof surface, arrange a quick professional assessment before a heavy rain amplifies the leak path.
Kenosha winters are brutal for flashing and roof penetrations. Repeated freeze-thaw cycles stress sealants and joints, widening gaps at vents, chimneys, and where flashing laps a chimney crown or skylight curb. Those tiny gaps, which you might overlook when the snow is heavy, become active leaks during spring thaws or sudden warm-ups that melt freezing precipitation. The pattern is predictable: a cold snap followed by a mid-wreeze rain, and suddenly a damp ceiling line or a damp spot along the eave. Pay special attention to flashing around roof-to-wall transitions and along the rake edges. For homeowners with historic or aging roofs, a proactive flashing inspection after every major cold spell can prevent cascading water intrusion. If you see metal flashing corroded, lifted, or separated, treat it as an urgent repair requirement before the next melt cycle.
Spring in this lake-influenced climate tends to deliver hail and gusty days that test the integrity of shingles and ridge caps. Hail marks may not immediately leak, but they create micro-damage that erodes granule protection and weakens sealing, making leaks more likely during the next rainfall. Wind events in fall can lift aging shingles before winter snow arrives, creating irregularities that trap ice dams later in the season. The critical pattern to watch for is a cluster of small, localized damage that compounds with rain exposure and temperature swings. After any notable spring storm, you should perform a targeted roof check: look for loose or cracked shingles, lifted edges, exposed nail heads, and deteriorated sealant around roof penetrations. If you find issues, address them promptly with a trained roofer who can reseal flashing, replace compromised shingles, and re-secure ridge caps. Early intervention helps prevent ice dam formation later in the winter.
When leaks appear, they rarely come from a single compromised shingle. They often indicate a broader pattern: compromised eave detail, failed fascia or soffit systems, and insufficient drip edge or underlayment protection. Because lake-driven winds and rapid temperature shifts intensify these weaknesses, an after-storm inspection should extend to the attic ventilation and insulation checks. Ensure soffits vent properly and that attic baffles aren't blocked, as poor ventilation compounds ice dam risk. If you're unsure about the scope of damage after a storm, schedule an immediate assessment focusing not just on surface shingles but on the interconnected roof assemblies that control moisture pathways. Acting quickly preserves the roof's integrity and reduces the chance of prolonged interior water intrusion.
Roberts Restorations, Inc.- Kenosha, WI
(262) 612-0763 robertsrestorations.com
1403 52nd St, Kenosha, Wisconsin
5.0 from 47 reviews
The leader in home exterior improvement and restoration in Kenosha and Racine Counties, the team at Roberts Restorations has been providing exceptional service to clients for more than 25 years. We offer both residential and commercial roofing, gutter and siding installation, and free roof inspections. We offer free estimates and convenient financing is available. We pride ourselves on client communication, making things as easy as possible during the insurance claim process, and providing premier services from design to installation.
Nick's Roofing
(262) 857-4240 nicksroofingkenosha.com
5665 Green Bay Rd, Kenosha, Wisconsin
4.2 from 32 reviews
Nick’s Roofing of Kenosha is your full service roofing contractor. Our services include new roof installation, restoration, maintenance, repairs and everything in between. We also provide innovative maintenance programs and extended warranties to ensure customer satisfaction even after the project is complete.
Dobrunz Construction
6542 43rd Ave, Kenosha, Wisconsin
3.4 from 28 reviews
Dobrunz Construction is a full service general contractor that can meet whatever your project needs are. We collectively have over 50 years of experience are fully insured and are licensed in the state of Wisconsin. For a free estimate please visit our contact page on our website, fill in the form and someone will contact you within 48 hours to schedule a time to meet with you. A full list of services we offer is available on our website 24 hour emergency roof repair, flat roof repair and install, asphalt shingle roof repair, tear off and install, skylight repair and install, chimney repairs, deck repair and install, windows, doors, siding, gutters, home renovation projects. Discounts for Military, veterans, police and fire.

Burns Construction & Repairs
(262) 694-3811 www.burnsconstructionandrepairs.com
13721 91st St, Kenosha, Wisconsin
4.1 from 7 reviews
Burns Construction is a full-service residential, commercial, and industrial family-owned and operated business that specializes in roofing, windows, siding, and doors. We have been serving Southeastern Wisconsin including Bristol, Salem, Paddock Lake, Somers, Kenosha, Kansasville, Mount Pleasant, and Racine for over 12 years and would love to hear more about your project and provide you with a free estimate.

Martin's Roofing Dog
(262) 694-4321 www.martinsroofingdoginc.com
7506 22nd Ave, Kenosha, Wisconsin
3.0 from 21 reviews
Martin's Roofing Dog, in Kenosha, WI, is dedicated to providing excellent roofing services to our clients. We specialize in installations, repairs, soffit, fascia, and gutter services. Our team of experts is highly skilled, experienced, and committed to ensuring that your roofing needs are met. Your roof is integral to your home, and it's vital that it receives the best care. Whether you need a new roof installed or your existing one repaired, Martin’s Roofing Dog is here to ensure your roof is in excellent condition.
First Choice Home Specialties
4623 75th St Suite 188, Kenosha, Wisconsin
5.0 from 1 review
First Choice Home Specialties, Inc. provides roofing, siding, windows, chimneys, soffit, fascia, and gutter services to the Kenosha, WI, area.
BNW Installations
(262) 859-3566 www.bnwinstallations.com
Serving
4.8 from 41 reviews
BNW Installations is the only name you need to know for all your residential roofing and exterior home remodeling needs in Sturtevant, WI.
Rexx Roofing
(262) 326-0620 rexxroofing.com
Serving
5.0 from 27 reviews
REXX ROOFING is a company that people trust to fix their roofs. They are located in Mt Pleasant, WI. They also work in the areas around it. They do all sorts of things like check roofs to see if they need to be fixed. They fix roofs. They even put in brand roofs. The people who work for REXX ROOFING are based at 5605 Washington Ave, Mt Pleasant, WI. They go to places near Mt Pleasant to help people who need a good roofing company. If you are looking for a roofing company near Mt Pleasant, WI or a reliable roofing company, in Mt Pleasant they can help you with your roof. If you need a roofing contractor near you now, REXX ROOFING is committed to quality work and long-term roof protection.
Stauffer Enterprises
(262) 672-8836 www.staufferenterprises.com
Serving
5.0 from 49 reviews
Roofing & Siding
Racine Roofing Contractors
Serving
4.7 from 36 reviews
Looking for a roofer near me ? Racine Roofing Contractors is a roof repairs service company based in Racine, Wisconsin. We are a family run business that had served Racine & nearby WI cities for over 20 years! We are fully licensed. We will work with your insurance or can provide finance for major roofing jobs. We offer the following services: * 24/7 Emergency Roof Repair - flat roof, roofing shingles, roof tiles, royal cedar shingle, asphalt replacement, metal roof installation, hail damage, wind damage, residential roofs, commercial roofs, wood shingle. * Siding - aluminium, board & batten, cedar, cement board, fiber cement, lp, metal, steel, vinyl. * Ice Dam & Snow Removal. * Window Replacement. * Storm Damage Repair

Standard Roofing & Restoration
(262) 212-5853 standardroofingandrestoration.com
Serving
4.8 from 21 reviews
Standard Roofing and Restoration specializes in residential and commercial roofing services in Southeastern Wisconsin. Unlike other roofing companies, we’re roofers – not salesmen – first. So, when you partner with us, you won’t just get a new roof for your home or business – you’ll also get an expert in the field or roofing, who has extensive knowledge of and experience working on roofs.
M&L Siding & Services
(262) 425-5919 mlsidingandservices.com
Serving
4.7 from 24 reviews
M&L Siding & Services, Inc. is a family-owned and operated roofing and exterior home improvement company based in beautiful Mt. Pleasant, Wisconsin. We specialize in expert residential roofing installation, roofing in Mt. Pleasant, roof insurance claims, professional gutter installation, window installation, and expert siding installation. Enhance your home's appearance and performance with our high-quality services, and take advantage of our roofing financing options. Our company was born out of a deep-rooted passion for delivering top-notch craftsmanship and exceptional service to our community. With decades of combined experience in the industry, we are committed to enhancing the beauty, durability, and value of your home.
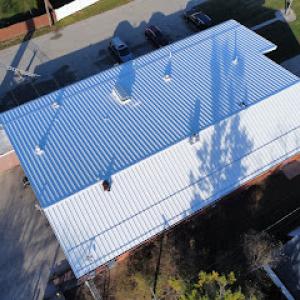
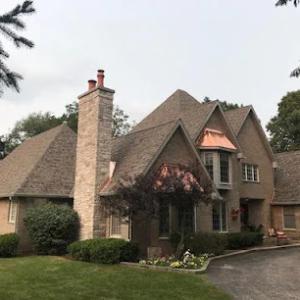
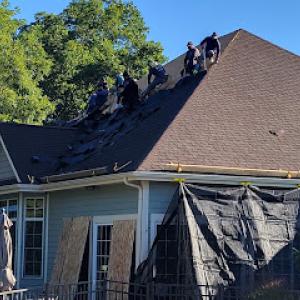
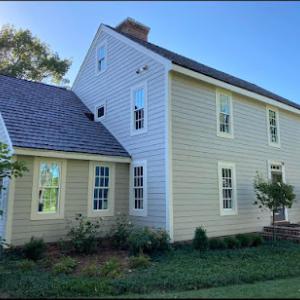
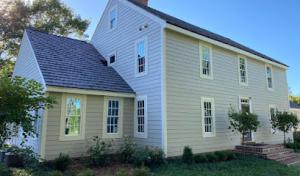
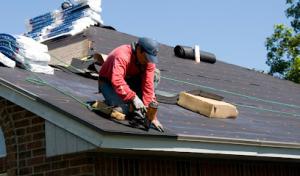
Asphalt shingles remain the practical mainstream choice for most Kenosha homes. The city's abundant stock of newer and older wood-framed roofs means a lot of re-roofs rely on this material, which is easier to replace after localized wind or hail events. Asphalt brings straightforward installation, predictable maintenance, and wide compatibility with existing flashing and venting details typical on local houses. When choosing this option, pay attention to impact resistance ratings and sealant compatibility with common spring freeze-thaw cycles. In storms, you will find asphalt shingles more forgiving to repair on an isolated basis-often a single area around a damaged vent or ridge line-without a full roof replacement. This makes it a sensible, time-tested choice for a neighborhood mix of brick and wood siding, where crews can work efficiently and minimize disruption to the home's exterior during repair.
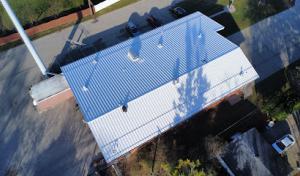
Metal roofing is present but less common locally, and it is often selected where homeowners prioritize better snow shedding and longer-term resilience to repeated freeze-thaw exposure. Metal performs well under lake-influenced winds and can help reduce ice buildup along eaves when paired with proper ice and water shield detail at the eaves and rake edges. If you're upgrading a roof that already has substantial attic insulation and a modern ventilation strategy, metal can translate into fewer hail-related dents and a longer service life with fewer frequent overlay repairs. The trade-off is weight, anchoring requirements, and the need for careful integration with existing gutters and downspouts. For homes with limited attic space or older roof lines, a metal retrofit should be planned with attention to how the panels will align with existing penetrations and pipe boots to avoid leaks after the first winter thaw.
Tile, slate, and composite options require careful structural and flashing planning in a city where snow load, winter moisture, and older housing stock can complicate heavier roof systems. Clay tile or concrete tile brings excellent longevity and a distinct curb appeal, but their weight means an engineered assessment is essential before installation. The added mass can stress older rafters, so a professional must verify support and foundation conditions, especially on homes with aging sheathing or limited attic space. Slate offers enduring performance but demands even more substantial structural considerations and precise flashing transitions to surrounding walls and chimneys. Composite shingles provide a lighter alternative that imitates the look of tile or slate while maintaining easier installation and repair logistics; they often strike a balance between aesthetic preference and practical maintenance. When choosing these heavier options, plan for reinforced decking, upgraded underlayment, and flashing details that can handle seasonal moisture shifts and wind-driven rain.
In a climate where lake winds, ice damming, and spring hail alternate with thaw cycles, the best roof type for a given home hinges on how well the system handles moisture management and temperature fluctuations. Asphalt delivers dependable performance for a broad housing stock with straightforward repairs after storms. Metal offers resilience and weather resistance where the design aligns with structural suitability. Heavier tile and slate demand a structural review but can provide superior longevity if the home is prepared for the load. Composite options offer a middle path that can suit older houses with limited reinforcement while delivering modern weather resistance. Each choice benefits from a thoughtful integration of flashing, underlayment, and ventilation to accommodate Kenosha's seasonal swings.
In Kenosha, pricing can rise sharply after spring hail or major wind events when demand spikes for re-roofing, tarping, and insurance-related inspections across Kenosha County. That surge isn't just the material cost; labor availability, quick-on-site scheduling, and emergency tarping can push numbers higher for a few weeks. If a storm hits and your neighborhood fills up with crews, you'll likely see tighter windows and earlier morning starts to keep projects moving, which can influence overall cost and timeline.
Provided local material ranges are Asphalt Shingles 320 to 700 USD per square, Metal Roofing 600 to 1200, Clay Tile 1000 to 1900, Concrete Tile 800 to 1600, Synthetic/Composite Shingles 800 to 1400, and Slate 1200 to 2500. These ranges reflect Kenosha's mix of older homes and newer builds, where the roof deck and ancillary work shape the final price. Materials are just one part of the equation-tear-off complexity, decking repairs, chimney flashing, and ventilation corrections can add to base pricing.
Older homes common to the area often come with decking that has seen weathered years of freeze-thaw cycles. When a contractor needs to remove old shingles, there may be hidden rot or damaged boards that require replacement, which adds both material and labor costs. Chimney flashing is another frequent source of extra expense because improper flashing in a wind-heavy, lake-influenced climate can lead to leaks if not properly integrated with new material. Ventilation upgrades, like additional attic vents or turbine vents, can be necessary to ensure the roof performs well after a re-cover or full replacement. All told, these factors push per-square prices higher than simple material quotes.
Start by confirming the square footage in "squares" (one square equals 100 square feet) your project will cover, then apply the material ranges to get a baseline. If the home is older with a complex roofline, budget a premium for tear-off, deck repairs, and flashing work. Have a trusted local roofer inspect the attic and roof deck to identify any hidden damage before committing to a replacement, not after materials are already on site. When possible, request an itemized estimate that separates materials, tear-off and disposal, decking repair, flashing, ventilation, and labor. This makes it easier to compare bids and catch surprises in the contract.
If a hail or wind event has just occurred, expect the schedule to shift quickly. Local crews will often prioritize storm-damaged homes, which can create longer waits for non-emergency replacements. In such times, you'll want to secure a firm start date and a written plan for tarping, temporary protection, and a clear scope of work to avoid price creep. Having the roof protected promptly after a storm minimizes additional weather-related damage and helps keep the overall project on track.
Don't let upfront costs delay a critical repair - these contractors offer payment plans to fit your budget.
Roberts Restorations, Inc.- Kenosha, WI
(262) 612-0763 robertsrestorations.com
1403 52nd St, Kenosha, Wisconsin
5.0 from 47 reviews
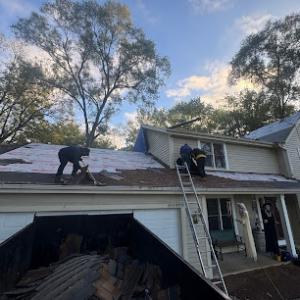
A full re-roof in the City of Kenosha typically requires a building permit reviewed by the city building department before work proceeds. That review is not a formality; it ensures the chosen roofing system and installation methods meet local codes and address the town's unique weather patterns-ice damming, freeze-thaw cycles, and spring hail. The contractor is generally expected to pull the permit and submit any required drawings or roofing details as part of the city review process. If the permit is not actively tracked, the project can stall or later fail inspection, leaving the homeowner on the hook for delays or rework. Before any tear-off, you should confirm the permit is active and that the contractor has submitted the necessary documents, including roof deck condition notes and ice dam mitigation details if relevant to your house type.
Kenosha requires inspections at key milestones, so homeowners should confirm permit status and inspection scheduling before tear-off and before final payment. Inspections typically occur after tear-off, once the roof deck and underlayment are in place, and again after installation to verify fasteners, flashing, ventilation, and drainage meet code. If a roof is tied to existing gutters, skylights, or chimneys, expect additional checks around these penetrations. Failing an inspection can trigger corrective work and another round of reviews, which may delay occupancy or allow weather windows to pass, risking ice damming or water intrusion in a sensitive shoulder season.
Coordinate closely with the contractor to obtain the permit number and a written inspection schedule, and keep the documentation easily accessible on the job site or in your home file. Plan around typical weather swings, ensuring that tear-off windows align with a stretch of dry days and not mid-winter conditions. If any dispute arises about what drawings or details are required, request a quick pre-application review with the city to avoid last-minute changes. In all cases, do not sign off on final payments until the city approves the completed work and the project passes the final inspection. A timely sequence reduces the risk of weather-related damage and keeps the project moving smoothly.
Wisconsin insurers commonly process hail and wind roof claims in this market after spring storm clusters and fall wind events. In Kenosha, that means a predictable spike cycle that can stress local adjusters and contractor availability. The process often hinges on rapid acknowledgment, especially when a weekend hail event or a strong autumn gust arrives just as homeowners are finishing seasonal chores. Expect adjusters to compare visible damage against typical wear patterns for midlife roofs, rather than treating every dent or curling shingle as new damage. Understanding this cadence helps set realistic expectations for how quickly a claim moves from initial contact to a determination.
Local adjusters are used to Wisconsin seasonal claim spikes, so dated photos and documentation of pre-existing wear can materially affect how damage is separated from age-related deterioration. Before filing, gather clear images from multiple angles, including distant shots of the roof and close-ups of damaged areas. Note any granule loss, curling, or displaced flashings that appear after a hail event or high-wlex wind period. Keep a simple notepad entry with dates of notable weather, prior repairs, and any visible leaks inside the attic or ceiling, since this helps the adjuster distinguish new impact from long-standing wear. In a neighborhood with similar homes, the ability to show consistent, dated records can tilt outcomes toward a clearer assessment of storm-caused damage.
Some carriers in this market may require a licensed contractor assessment before payout, making prompt local inspection especially important after visible wind or hail damage. If an insurer requests a contractor's evaluation, arrange access for an independent, licensed roofer who can provide a detailed, itemized scope that includes shingle condition, underlayment, and flashing integrity. A credible third-party report can streamline the claim and reduce back-and-forth over technical specifics. In practical terms, coordinating a timely inspection protects the homeowner from prolonged uncertainty and helps establish a solid baseline for the loss calculation.
After a spring hail cluster or fall wind event, contact the insurer and request an open claim number as soon as possible. Schedule a local inspection promptly, and ensure the contractor you hire is licensed, bonded, and familiar with Kenosha's climate realities. During the claim, provide the dated documentation, including weather notes and repair records, and request a written scope of losses that outlines both the immediate repair needs and any required structural assessments. If an adjuster questions age-related damage, refer back to the dated photos and attic evidence collected soon after the event to support the claim's focus on storm impact rather than pre-existing conditions.
Connect with contractors who help homeowners navigate the claims process from damage assessment to final approval.
Roberts Restorations, Inc.- Kenosha, WI
(262) 612-0763 robertsrestorations.com
1403 52nd St, Kenosha, Wisconsin
5.0 from 47 reviews
Racine Roofing & Remodeling
(262) 930-6677 www.racineroofingandremodeling.com
Serving
4.7 from 50 reviews
Kenosha's warm, humid summers are workable for roofing but can accelerate shingle aging, making late-summer inspections useful even when leaks are not yet visible. You'll want to plan a thorough check after the hottest stretch and before any fall winds. Look for curled or weathered edges, exposed nails, and any fasteners that have started to back out. A quick brush of debris and moss in late summer can help you catch edge wear before it invites leaks during the next thaw.
Winter replacement is harder because snow, ice, and freeze-thaw conditions complicate tear-off, sealing, and inspection timing in the city. If a roof needs full replacement, aim for a window when surface conditions are dry and the ground is clear enough to move heavy materials without tracking snow and slush onto siding or windows. Ice dam risk is a constant reminder to address shingle or flashing vulnerabilities promptly, but the cold season demands patience to avoid frost-related delays. Avoid working in active snow zones or periods of rising ice buildup; missing that window can push work into harsher conditions later.
Fall is a critical local decision point because wind-damaged roofs that are left in place can enter snow season with vulnerable edges and flashing. Edges, cap flashing, and chimney transitions are common trouble spots after summer storms or high-wind days. Schedule an early-fall inspection to identify loose components, lift at the rake edges, or flashing that's begun to separate. If repairs are needed, completing them before the first major snow lowers the chance of shingle displacement or water intrusion when wind gusts become more frequent and temperatures drop.
Coordinate with local weather windows that offer several dry days in a row, ideally with moderate temperatures. Prioritize roof sections most exposed to lake winds and storm tracks, especially along the eaves and near vents. Have a trusted local contractor assess edge detailing and flashing first; these areas often determine whether a roof survives the season with minimal interior disruption.
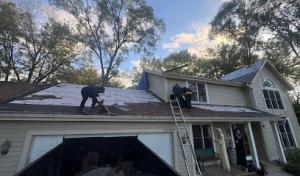
Kenosha's established housing stock means many projects involve full re-roofing rather than first-time installation, increasing the odds of discovering hidden decking or ventilation problems during tear-off. When the old layers come off, warped or rotten decking often shows up where it's been silently tolerating moisture year after year. Expect some headers, rafter tails, or bottom chords to be more fragile than they look, especially on roofs that faced repeated freeze-thaw cycles. If sheathing needs replacement, the repair adds time, risk, and a cascade of decisions about material, ventilation, and insulation. A careful partner will examine attic ventilation paths, ridge vents, soffit intakes, and any signs of mold or mildew that hint at lingering moisture behind the scenes.
Chimney intersections are a recurring concern on older homes, where masonry and flashing often age differently under repeated winter moisture exposure. The angle where the chimney meets the roof is a common weak point, and compromise there can lead to slow leaks that quietly degrade decking and insulation. Expect lintel caps, step flashing, and counter-flashing to show wear from seasonal shifts. A thorough tear-off should include verifying that flashing around the chimney is mechanically sound and properly integrated with cement or masonry joints. If flashing is breached or gaps are present, water can seek pathways into the roof deck long before a visible drip appears inside the attic.
Homeowners in this area often prioritize cleanup and quick turnaround because many re-roof jobs happen on occupied residential properties in established neighborhoods. That urgency can tempt teams to optimize for speed rather than a comprehensive assessment. The risk is leaving minor leaks or ventilation gaps unaddressed, especially near busy eaves, skylights, and chimney junctions. A prudent approach balances a clean, timely install with a thorough survey of attic space, ensuring proper sealing, adequate attic ventilation, and solid decking. When you're facing a re-roof on a familiar street, you want a plan that prevents the old, creeping moisture from becoming the next costly issue.
Find specialists in TPO, EPDM, and built-up flat roofing systems for residential and commercial properties.
Roberts Restorations, Inc.- Kenosha, WI
(262) 612-0763 robertsrestorations.com
1403 52nd St, Kenosha, Wisconsin
5.0 from 47 reviews
Racine Roofing & Remodeling
(262) 930-6677 www.racineroofingandremodeling.com
Serving
4.7 from 50 reviews