Last updated: Apr 19, 2026
Winter snow and ice in this area can stall work and quietly undermine performance long before the replacement season actually opens. Freeze-thaw cycles push moisture into seams, vents, and underlayment, then freeze again-creating micro-cracks that complicate later repairs. For a Waukesha homeowner, the message is to anticipate delays and schedule contingencies, not wait for the first warm spell to act. Keep a short-term plan in place for temporary protection that can hold through thaw and return of cold snaps, so that when crews finally can start, the roof is ready for a clean tear-off and durable install.
Spring thaw and repeated freeze cycles in southeastern Wisconsin expose weak flashing details and timing-sensitive repairs that might have seemed minor in drier months. A roof plan built around these cycles reduces the risk of water intrusion once temps rise and soils soften. Pay particular attention to deck-to-flashing transitions, chimney and vent boot integrity, and any areas where old sealants have separated. If you notice granule loss, elevated damp spots, or rust on metal components from winter exposure, flag them now. Delaysoprisking is real-addressing flashing early can prevent cascading damage during the summer.
Summer hail storms are a real local project disruptor, often creating a surge in inspections, temporary repairs, and insurance activity. After a hail event, the first 24 to 72 hours matter: document damage with photos, note impacted areas, and keep a log of any temporary patches. When crews arrive, expect a flurry of activity around damaged shingles, dented metal, and compromised edge metal. Having a clear plan for prioritizing critical areas-valleys, ridge lines, penetrations, and skylights-helps you ride out the peak season without losing track of long-term waterproofing goals. If the sky darkens and you suspect new impact damage, arrange a quick, professional assessment rather than relying on visible signs alone.
Insurers and adjusters will want a precise record of what happened, when, and what's been done. Start a damage diary immediately after any storm or freeze event: date-stamped photos of all affected zones, notes on any interior leakage, and a timeline of temporary repairs. Keep receipts for all materials and services, and compile a simple map of shingles, flashing, and vent locations that were damaged or displaced. When you present the claim, include a short, clear description of how repeated freeze cycles affected the specific areas, and how the proposed replacement plan addresses those failures to prevent recurrence.
If you suspect wind or hail damage, don't delay a professional inspection, even if the weather is cooperative only intermittently. Schedule a fast, thorough assessment that prioritizes areas most vulnerable to ice-related stress and wind uplift. Begin collecting your documentation now so you're ready to move quickly once insurers review the claim. In Waukesha, a proactive, documented approach today helps prevent costly leaks and performance issues once the replacement season fully opens.

New Roofs
(262) 232-8004 newroofsinc.com
1596 E North St Suite #2, Waukesha, Wisconsin
5.0 from 143 reviews
New Roofs provides primarily roofing services, but also siding services for both commercial and residential properties in Waukesha, WI and surrounding areas. With over 20 years of experience, New Roofs is a trusted roofing partner for flat roofs and slanted or sloped roofs. With extensive maintenance, repair, installation, and replacement experience on Wisconsin roofs, we're trusted by both home and business owners to care for their roof's needs. Whether the roofing system is made of TPO, EPDM, PVC, torch down (modified bitumen), asphalt shingles, metal roofing, wood shake, or tile roofing; we're able to partner with you to address your roofing needs quickly and efficiently. New Roofs is locally owned and operated.

Mighty Dog Roofing of Milwaukee Metro
(262) 587-5867 www.mightydogroofing.com
w229n2573 Duplainville Rd, Waukesha, Wisconsin
4.9 from 150 reviews
When it comes to your home’s exterior, Mighty Dog Roofing delivers top-of-the-line services matched with the neighborly customer care our clients have come to love. Our team of skilled experts will conduct a free, detailed inspection of your home, treating it as our own. Whether your home needs a simple repair or a full roof replacement, expect to receive the transparent guidance you deserve. Whatever the case, our team will work to meet your safety and budget needs. We take pride in operating with quality materials, hiring skilled roofers, and providing our customers with a high-quality experience. See for yourself; our reviews say it all. Schedule your free, home inspection today!
L. H. Krueger & Son
(262) 547-5054 www.lhkruegerandson.com
1401 Pearl St, Waukesha, Wisconsin
4.8 from 222 reviews
The L.H. Krueger and Son team handles all of your residential roofing, siding, gutter and home repair needs, no matter what the weather. In addition, L.H. Krueger and Son offers insulation, flashing, roof ventilation, leak repair, and chimney repair, as well as soffit and fascia replacement. Each service is delivered with attention to craftsmanship and affordability. Commitment to hard work, customer satisfaction and a reputation for providing quality, reliable residential exterior services is the foundation on which L.H. Krueger was built.
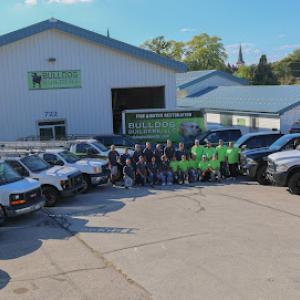
Bulldog Builders
(262) 933-8777 bulldogbuildersllc.com
722 N Hartwell Ave, Waukesha, Wisconsin
4.8 from 282 reviews
Bulldog Builders provides professional insurance restoration and roofing services across southeastern Wisconsin. Call us for a free quote today!

A&M Contractors
(262) 806-1162 amcontractorsllc.com
234 W Broadway, Waukesha, Wisconsin
4.9 from 46 reviews
Locally & Family owned Roofing contractor servicing southeast Wisconsin. Our mission is to be the most trusted roofing, interior, and exterior contractor in the state providing exceptional customer service while upholding our core values Safety, Quality, and Integrity.
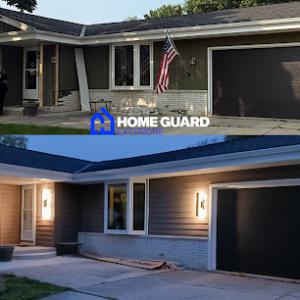
Home Guard Exteriors
(262) 232-8742 www.hgexteriors.com
56, 2111 S West Ave, Waukesha, Wisconsin
5.0 from 23 reviews
At Home Guard Exteriors, we specialize in transforming your home with top-quality roofing and siding services. Our experienced team is dedicated to ensuring your home looks stunning and stands strong against the elements. Whether you're dealing with storm damage or simply want to boost your home's curb appeal, we've got you covered. We offer free inspections and work with insurance claims, making the process hassle-free for you. Trust us to provide exceptional craftsmanship, using only the best materials to give your home the upgrade it deserves. Small enough to listen, big enough to deliver. We put you first. Contact us today and see why so many homeowners choose Home Guard Exteriors for their home improvement needs.
Briggs Family Home Development
(866) 301-0155 briggsfamilyhd.com
2717 N Grandview Blvd suite 201, Waukesha, Wisconsin
4.7 from 116 reviews
WE’RE A FAMILY BUSINESS WE MAKE HOME REMODELING IN OREGON, WI EASY Home remodeling is stressful. You feel pressure to make all sorts of decisions. Possibly the most important choice you make is who you trust to become your remodeling contractors. Based in Oregon & Kenosha, WI, Briggs Family Home Development, LLC has been in the home remodeling business for over 10 years. We’re experienced remodeling contractors who are passionate about making your dreams come true. Our clients come back time and time again because we take the hassle out of renovations. The Oregon, WI community appreciates our: Customer service Cleanliness Value for the money Organization Timeliness Call now for a free estimate on your home remodeling project.
Buck Remodeling
(262) 589-8858 buckremodeling.com
W220n1500 Springdale Rd, Waukesha, Wisconsin
5.0 from 20 reviews
Buck Remodeling is a trusted roofing contractor and remodeling company based in Waukesha, WI, proudly serving Brookfield, Pewaukee, Oconomowoc, Menomonee Falls, and surrounding Southeast Wisconsin communities. We specialize in roof replacement, roof repair, storm damage restoration, insurance claim assistance, siding installation, and gutter systems. As a full-service remodeling contractor, we also provide kitchen remodeling, bathroom renovations, basement finishing, home additions, and whole-home updates. Whether you need a full roof replacement or a complete interior remodel, our team delivers quality craftsmanship, clear communication, and dependable service from inspection to final walkthrough.
Robidoux Brothers
(262) 786-8736 www.robidouxbrothers.com
1112 Pearl St, Waukesha, Wisconsin
4.3 from 39 reviews
Tired of looking at chipped paint, rotten boards and missing shingles? Robidoux Brothers, LLC is your local connection for all your exterior construction needs throughout Southeast Wisconsin. Offering everything from siding, roofing, windows, remodeling, to seamless gutters, attic insulation, skylights, decking, additions and more, all to insure a timeless look that lasts a lifetime. Improving the exterior of your home cannot only increase the curb appeal & resale value of your home, but that of your entire neighborhood. Our professional sales staff offer hassle-free estimate in the convenience of your own home.
Absolute Restorations
(262) 349-9090 www.absolute-restorations.com
330 E North St, Waukesha, Wisconsin
5.0 from 6 reviews
𝐀𝐛𝐬𝐨𝐥𝐮𝐭𝐞 𝐑𝐞𝐬𝐭𝐨𝐫𝐚𝐭𝐢𝐨𝐧𝐬 is a trusted 𝐫𝐨𝐨𝐟𝐢𝐧𝐠 company based in 𝐖𝐚𝐮𝐤𝐞𝐬𝐡𝐚, delivering expert 𝐫𝐨𝐨𝐟 𝐫𝐞𝐩𝐚𝐢𝐫, 𝐫𝐨𝐨𝐟 𝐫𝐞𝐩𝐥𝐚𝐜𝐞𝐦𝐞𝐧𝐭, and 𝐞𝐦𝐞𝐫𝐠𝐞𝐧𝐜𝐲 𝐫𝐨𝐨𝐟 𝐫𝐞𝐩𝐚𝐢𝐫 services across 𝐁𝐫𝐨𝐨𝐤𝐟𝐢𝐞𝐥𝐝, 𝐏𝐞𝐰𝐚𝐮𝐤𝐞𝐞, 𝐍𝐞𝐰 𝐁𝐞𝐫𝐥𝐢𝐧, 𝐃𝐞𝐥𝐚𝐟𝐢𝐞𝐥𝐝, 𝐒𝐮𝐬𝐬𝐞𝐱, 𝐎𝐜𝐨𝐧𝐨𝐦𝐨𝐰𝐨𝐜, 𝐇𝐚𝐫𝐭𝐥𝐚𝐧𝐝, 𝐄𝐥𝐦 𝐆𝐫𝐨𝐯𝐞, 𝐁𝐮𝐭𝐥𝐞𝐫, and 𝐆𝐞𝐧𝐞𝐬𝐞𝐞 𝐃𝐞𝐩𝐨𝐭. We also provide 𝐰𝐚𝐭𝐞𝐫 𝐝𝐚𝐦𝐚𝐠𝐞 𝐫𝐞𝐬𝐭𝐨𝐫𝐚𝐭𝐢𝐨𝐧, 𝐟𝐢𝐫𝐞 𝐝𝐚𝐦𝐚𝐠𝐞 𝐫𝐞𝐩𝐚𝐢𝐫, 𝐦𝐨𝐥𝐝 𝐫𝐞𝐦𝐞𝐝𝐢𝐚𝐭𝐢𝐨𝐧, and 𝐬𝐭𝐨𝐫𝐦 𝐝𝐚𝐦𝐚𝐠𝐞 𝐫𝐞𝐜𝐨𝐯𝐞𝐫𝐲. We simplify 𝐢𝐧𝐬𝐮𝐫𝐚𝐧𝐜𝐞 𝐜𝐥𝐚𝐢𝐦𝐬 and ensure 𝐪𝐮𝐚𝐥𝐢𝐭𝐲 craftsmanship that protects your home.
Waukesha Roofing & Sheet Metal
(262) 521-1112 www.waukesharoofingwi.net
W226N825 Eastmound Dr, Waukesha, Wisconsin
4.4 from 19 reviews
Waukesha Roofing & Sheet Metal is a trusted roofing company providing expert roof repair in Waukesha, WI. Serving southeastern Wisconsin since 1913, we deliver dependable solutions for homes and businesses. As your full-service roofer, we offer detailed roof evaluations, roof repair, and complete roof replacement. We service steep and flat roofs and work with EPDM, TPO, PVC, shingles, slate, tile, and more. Choose experience, honesty, and quality craftsmanship. Call today to schedule your inspection.
Northwest Roofing
(262) 628-3080 www.northwestroofing.net
Waukesha, Wisconsin
4.3 from 17 reviews
Since 1972, Northwest Roofing, Inc. has been a leading roof contractor in Hubertus, WI, Sussex, Waukesha, and Milwaukee. We provide a full spectrum of services, including shingle and flat roof installation, re-roofing, gutter installation, and repair for chimneys and flashing, as well as handling ice damming and snow removal. Our commitment to robust roofing systems, expert commercial roof repairs, and quality home roof replacements is unmatched. Trust our team for superior workmanship and excellent customer service. Contact us today to experience the Northwest Roofing difference!
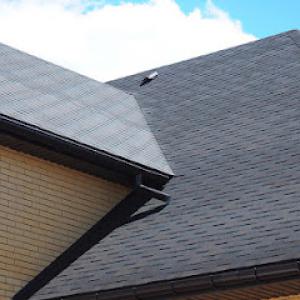
Asphalt shingles are the dominant local choice, and for good reason: they're familiar to many builders, relatively straightforward to install, and perform well with the seasonal shifts seen here. In this climate, a proper installation matters as much as the material itself. Pay attention to underlayment and ventilation during the tear-off and re-roof process, since the city often inspects flashing, ventilation, and nailing at both stages. When storms roll through and hail rattles roofs, asphalt shingles are generally able to shed impact without immediate failure, but choosing a product that has strong wind and impact resistance will pay off in the long run. Seasonal sealing behavior is particularly relevant: ensure shingles are fully sealed before winter freezes set in, and verify that flashing around valleys, chimneys, and vents remains watertight after temperature swings. In snow-prone periods, a well-vented attic helps reduce ice dam risk, which asphalt installations benefit from when paired with a solid drip edge and continuous ridge ventilation. Look for shingles rated for cold climates, and confirm rapid re-sealing capabilities after any freeze-thaw cycles to minimize chance of leaks during thaws.
Metal is a meaningful local option for homeowners prioritizing snow shedding and long-term durability through Wisconsin temperature swings. In freeze-thaw winters, metal's smooth surface and vented channels can help snow slide away more reliably than some other materials, reducing ice buildup along eaves. Installation quality remains critical, especially for flashing and edge details where moisture can linger during rapid temperature changes. If you expect heavy wind events or frequent hail, metal panels with thicker gauge and properly fastened seams offer better resistance and fewer penetrations. However, ensure the substructure and underlayment are compatible with metal's expansion and contraction patterns to avoid nail heads loosening or panel distortion after cold snaps. For best results, coordinate with an installer who prioritizes a weather-tight seal around penetrations and uses corrosion-resistant flashings appropriate for the Wisconsin climate.
Clay tile, concrete tile, wood shakes, and synthetic shingles appear in this market, but their suitability depends heavily on structure, flashing quality, and how they handle freeze-thaw exposure. Clay and concrete tiles are heavy, which means roof framing must be evaluated for load capacity before selection. Freeze-thaw cycles can stress brittle tiles and compromise flashing if installation wasn't meticulous. Wood shakes offer a distinct look but require careful maintenance to prevent water intrusion during wet springs and mid-winter thaws; untreated wood is prone to edge swelling and microbial growth if vents aren't optimally placed. Synthetic shingles present a middle ground, often offering better impact resistance and lighter weight, yet still rely on sound flashing and ventilation to handle freezing temperatures. In all cases, a detailed inspection of the substrate, underlayment, and flashing quality is essential to ensure the chosen material performs reliably under harsh seasonal shifts.
Seasonal timing matters for any material, but it's especially true in a climate with hard freezes and thaws. Plan tear-offs and re-roofing for periods with moderate temperatures and dry conditions to promote sealant and underlayment performance. Inspectors tend to focus on flashing, ventilation, and nailing quality at both completion and tear-off stages, so coordinate with the crew to verify these elements are integrated from day one. After storms, inspect for hail impact and signs of moisture intrusion, and document any damage promptly for insurance-related concerns. A careful, weather-conscious installation schedule helps ensure the roof remains resilient across the year's temperature swings.
In this area, local replacement windows usually run from late spring through early fall, so peak-season scheduling can affect labor availability and pricing. You'll typically see crews booked out weeks in advance once weather cooperates, and hot stretches can push daylight-hours work later into the afternoon. If your roof is already leaking or showing advanced ice damming, plan for a contingency in the schedule because emergency stabilization is more common before a full replacement during storm cycles. Expect some fluctuation in labor rates as the weather tightens the window for work.
Storm-driven demand spikes after hail or wind events can push wait times and shift the project toward emergency stabilization before full replacement. In practice, that means you may end up prioritizing temporary cover or tarping to prevent further water intrusion, while the crew coordinates a more definitive tear-off and replacement. If a hail event hits, anticipate a surge in inspection requests from insurance-driven projects, which can lengthen the path from approval to installation. Having a plan for staged work helps prevent prolonged exposure to thawing and freezing cycles.
Prices here reflect the local market and the impact of the freeze-thaw cycle on both labor and materials. Asphalt shingles remain a common choice for value and ease of install, while metal can offer longer life with rising energy efficiency. Clay and concrete tiles, though more expensive upfront, are found on some of the higher-end homes and multi-story structures in older neighborhoods. Wood shingles/shakes carry a distinctive look but require more maintenance in this climate. Synthetic or composite shingles balance durability with cost. For quick budgeting, the city-wide typical cost ranges per square are: Asphalt Shingles 350-700 USD, Metal Roofing 700-1200 USD, Clay Tile 950-2300 USD, Concrete Tile 800-1800 USD, Wood Shingles/Shakes 600-1200 USD, Synthetic/Composite Shingles 500-1100 USD.
Chimneys, skylights, vents, and flashing details are common asks in this market. After a harsh winter, you'll want careful attention to flashing around chimneys and wall intersections to guard against ice-related leaks. Tear-off requirements after winter wear can influence both timing and cost, because proper disposal and waste handling add to the project scope. A thorough inspection should verify underlayment, ventilation, and nail patterns, as these factors significantly influence long-term performance in freeze-thaw cycles. If your roof has complex penetrations or is paired with older attic ventilation, budgeting for additional ventilation upgrades during replacement can pay off in reduced ice dam risk and improved comfort.
Get a clear picture of your project costs upfront - no commitment required.
Bulldog Builders
(262) 933-8777 bulldogbuildersllc.com
722 N Hartwell Ave, Waukesha, Wisconsin
4.8 from 282 reviews
Briggs Family Home Development
(866) 301-0155 briggsfamilyhd.com
2717 N Grandview Blvd suite 201, Waukesha, Wisconsin
4.7 from 116 reviews
Total Exteriors
(262) 226-4206 www.totalexteriors.com
S30W24784 W Sunset Dr ste a, Waukesha, Wisconsin
5.0 from 4 reviews
A full roof replacement in Waukesha typically requires a building permit. The process is designed to ensure that materials, installation methods, and venting meet local standards and the unique freeze-thaw cycles that shape this area's roofs. Before work begins, verify with the City of Waukesha Building Department that the permit scope includes tear-off, disposal, underlayment, flashing, ventilation, and nailing patterns. This upfront check prevents delays once the project is underway and helps align the sequence with the city's inspection schedule.
The contractor usually files the permit and coordinates with the City of Waukesha Building Department. Expect the permit to specify required information such as roof geometry, attic ventilation details, drip edge or fascia treatments, and the method of fastener installation for the chosen material. In practice, the filing includes project drawings or basic roof plans, a brief materials list, and a description of the tear-off and disposal plan. The permit office may request updates if structural members or venting configurations change during tear-off, so stay in close contact with the contractor and the city.
Inspections are commonly performed after tear-off and again after completion to verify underlayment, flashing, ventilation, and nailing patterns. The post-tear-off inspection confirms that the roof deck is sound, the underlayment is correctly installed, and any required ice and water shield is in place at eaves and penetrations. The final inspection checks flashing details around penetrations, proper compliance with ventilation requirements, and the overall fastening pattern to ensure wind resistance and long-term performance. Expect inspectors to verify that the venting arrangement supports proper attic air flow, which is crucial for a climate with freeze-thaw cycles.
Coordinate with the contractor to ensure that all components align with the permit scope before each inspection window. Have documentation on hand verifying underlayment type, flashing method, and vent placements. Clear access to attic spaces and roof edges helps inspectors assess installation quality quickly. If any deviations occur-such as changes in material or fastening patterns-arrange a quick pre-inspection review with the City of Waukesha Building Department to prevent re-inspection fees and project delays.
Post credible documentation from the contractor about material adherence to code and city requirements, and confirm that the tear-off waste is disposed of per city guidelines. Since inspections focus on flashing, ventilation, underlayment, and nailing, prioritize those elements in the plan and communicate any weather-related scheduling constraints with the Building Department to avoid bottlenecks during harsh winter or storm periods.
Wisconsin insurers commonly expect documentation showing both pre-existing roof condition and post-storm damage condition. That means if you've lived in your home for several years, the carrier may want photos taken before the event and clear images after, so they can see any new damage rather than discounts for wear. In a city where freeze-thaw cycles stress shingles and underlayment, this distinction can determine whether a claim funds a repair or pushes you toward a full replacement. Gather dated photos, and keep a simple before-and-after log that matches the timeline of the storm and the subsequent inspection. If you can access old roof records or contractor notes, include those as well. The more you can prove the transition from sound to damaged, the smoother the claim review tends to go.
After major hail or wind events in the region, claim volume rises and adjusters may become more selective in settlements. That is not a conspiracy, but a practical reality when teams are traversing many roofs in a short window. In Waukesha's climate, wind-driven shingle lifting, granule loss, and hail dents can be subtle yet material, especially on roofs with complex geometry or in shaded areas where moisture hides damage. A cautious homeowner should expect that some claims are opened and later narrowed as evidence is reviewed. Your best defense is timely, professional assessment that documents the full extent of damage, including underlayment and ventilation impact, which an insurer will scrutinize to justify a repair vs. a replacement.
Some Wisconsin carriers have tightened weather-related coverage or added endorsements in recent years, which can change whether repair or replacement makes financial sense. In practice, that means the decision isn't only about what's visibly damaged; it's also about policy language, exclusions, and endorsements that may be triggered by hail, wind-driven rain, or freeze-thaw strain. If a contractor flags potential moisture intrusion or attic vent damage, verify how your policy responds to such findings. A careful homeowner keeps in mind that endorsements can shift the economics of a claim, so understanding the exact language of your policy helps prevent surprises when the adjuster's assessment begins.
Connect with contractors who help homeowners navigate the claims process from damage assessment to final approval.
New Roofs
(262) 232-8004 newroofsinc.com
1596 E North St Suite #2, Waukesha, Wisconsin
5.0 from 143 reviews
Mighty Dog Roofing of Milwaukee Metro
(262) 587-5867 www.mightydogroofing.com
w229n2573 Duplainville Rd, Waukesha, Wisconsin
4.9 from 150 reviews
Bulldog Builders
(262) 933-8777 bulldogbuildersllc.com
722 N Hartwell Ave, Waukesha, Wisconsin
4.8 from 282 reviews
In this climate, flashing details are a recurring weak point because freeze-thaw movement and spring moisture expose small installation errors. Shingle edges, vent bases, and step flashing around dormers or skylights can crack or shift after a hard winter, inviting slow leaks that damage decking and insulation. You'll notice granular loss near roof-to-wall transitions first, then staining or soft spots inside attic corners. Inspect after thaw periods and before heavy rain. If flashing shows lifted tabs, loose fasteners, or DIY patches that crack with cold, plan a careful reseal or full flashing upgrade before the next freeze.
Ventilation is a frequent inspection focus locally, reflecting how attic moisture and winter temperature differences can affect roof performance. Insufficient intake or exhaust causes condensation and frost buildup, which can rot sheathing and accelerate shingle deterioration. Look for attic insulation gaps around vent pipes, improper soffit vents, or blocked turbines during spring cleaning. A balanced, unobstructed vent strategy helps maintain interior temperatures, reduces ice dam risk, and extends the life of underlayment and shingles.
Chimney intersections matter more here than in many markets because chimney-related work is a notable part of the local contractor landscape. The chase cover, side flashing, and counter-flashing must adapt to the masonry's expansion and seasonal moisture swings. Poorly sealed seams or deteriorated mortar joints create pathways for water to reach interior ceilings. If chimney flashing shows wrinkling, tarry patches, or concrete-like seepage around the base, treat it as a warning sign rather than a cosmetic issue.
Cold spells followed by warm thaws stress roofing materials beyond typical wear. Asphalt or composite shingles can lose rigidity and crack; metal panels may develop panel gaps; tiles can loosen and topple in wind events. Be vigilant after storms-look for lifted edges, creased seams, or water trails along ridges. Addressing marginal fasteners or degraded underlayment promptly prevents the cascade of interior damage that typically follows a delayed fix.
Find contractors experienced in skylight installation, flashing, and leak repairs to bring natural light into your home.
Mighty Dog Roofing of Milwaukee Metro
(262) 587-5867 www.mightydogroofing.com
w229n2573 Duplainville Rd, Waukesha, Wisconsin
4.9 from 150 reviews
L. H. Krueger & Son
(262) 547-5054 www.lhkruegerandson.com
1401 Pearl St, Waukesha, Wisconsin
4.8 from 222 reviews
A&M Contractors
(262) 806-1162 amcontractorsllc.com
234 W Broadway, Waukesha, Wisconsin
4.9 from 46 reviews
Snow, ice, and spring thaw drive a different set of concerns for flat and low-slope roofing than the steep-slope sections. In a city with freeze-thaw cycles and periodic hail, the low-slope areas over additions, porches, and attached structures must be treated as a distinct system. A dedicated approach to drainage, flashing, and ventilation helps prevent ice damming and ponding that can damage underlayment and decks.
Low-slope roofs rely on reliable drainage to avoid standing water during the rapid thaw in spring. Pay attention to positive drainage away from foundations and over interior transitions. Check for surface slope, proper seam orientation, and unobstructed scuppers or gutters. Ice build-up along edges can create damming that forces water under flashing or edges. Plan for enhanced insulation and continuous venting near the chimney chase, skylight bases, and parapet walls to reduce ice formation.
These roof areas often need different detailing and inspection attention than the main shingle roof. When replacing, ensure proper flashing at transitions to walls and any existing metal fascia. Confirm that underlayment extends up and under wall flashings, and that fasteners penetrate solid decking with appropriate sealant backer. Add-ons or porch roofs deserve dedicated edge protection and a secondary drainage plan. During inspection, focus on seam integrity, ballast if present, and any settlement that could kink drainage paths.
In winter, keep drainage paths clear of debris, and verify that snow guards or edge clamps are correctly installed. In spring, recheck the integrity of flashing around penetrations and ensure expansion joints are sealed. Regular scans after hail events help catch punctures or micro-leaks that could flow toward interior additions.
Find specialists in TPO, EPDM, and built-up flat roofing systems for residential and commercial properties.
New Roofs
(262) 232-8004 newroofsinc.com
1596 E North St Suite #2, Waukesha, Wisconsin
5.0 from 143 reviews
Waukesha Roofing & Sheet Metal
(262) 521-1112 www.waukesharoofingwi.net
W226N825 Eastmound Dr, Waukesha, Wisconsin
4.4 from 19 reviews