Last updated: Apr 19, 2026
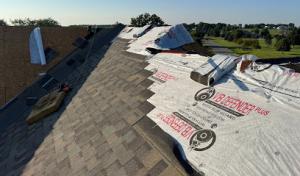
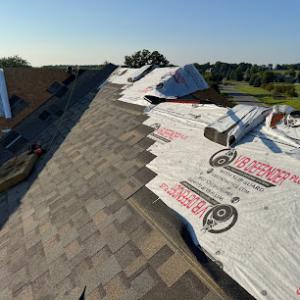
Milwaukee's cold winters and repeated freeze-thaw cycles are a primary driver of shingle wear, flashing movement, and leak development. When moisture sneaks into tiny gaps around vents, chimneys, and roof edges, the daily swings between frozen and thawed temperatures push materials apart. Over multiple seasons, those tiny movements add up, loosening shingles, lifting flashing, and creating channels for leaks. The problem compounds on steeper, older roofs where daytime sun barely warms the surface, then a sudden cold snap snaps the grip of underlayment and sealants. In low-slope urban roofs, water testing becomes cruelly revealing: drainage paths that once seemed adequate can fail once ice forms and expands under the panels. The message is concrete: uniform winter performance hinges on robust flashing, well-seated shingles, and a well-functioning attic system.
Snow accumulation followed by thawing and refreezing commonly creates ice dam conditions at eaves, especially on older homes with uneven attic insulation and ventilation. When warm attic air melts the snow near the top of the roof, that meltwater runs down to the colder eaves and refreezes. The resulting dam holds water against the underside of the shingles, which can back up under the shingles and into the roof deck. The cycle repeats with every freeze, pushing ice into edges, gutters, and downspouts and forcing water into fascia boards or into ceiling joists inside. The risk is highest where soffit vents are blocked, insulation sits unevenly, or small roof areas are shaded by nearby structures or trees. If you notice dark spots or a musty odor inside, or see water stains near the ceiling, treat it as a dam emergency, not a cosmetic issue.
Spring thaw in Milwaukee often exposes drainage and gutter backup problems that were hidden during winter snow cover. As the snow recedes, backed-up gutters and downspouts reveal themselves with sudden leaks or moisture staining along the eaves. Leaves, debris, and freezing remnants clog these pathways, undermining the system that carries meltwater away. When drainage is compromised, even a well-sealed roof can suffer lingering wet spots and accelerated shingle wear at the edges. The alert is practical: schedule a careful post-winter inspection to verify gutter integrity, downspout function, and the alignment of roof drainage paths. Don't rely on looks alone-tap tests and soft water-only flush checks reveal hidden blockages that will fail again under next season's thaw.
Inspect attic ventilation for balance: ensure soffit intake and ridge exhaust are not blocked by insulation or debris, and look for warm spots that indicate air leaks. Check eaves for ice dam evidence, such as ridges of packed ice along the lower edge or water stains inside the attic near exterior walls. Clear gutters and downspouts before the spring thaw to maintain a free water path away from the house. If leaks or recurring dam conditions appear, involve a roofer for a targeted assessment of flashing integrity, shingle seating, and attic sealing-prioritizing fixes that restore proper drainage and prevent repeat dam formation. Time-sensitive action keeps minor repairs from spiraling into costly water damage and structural concerns.
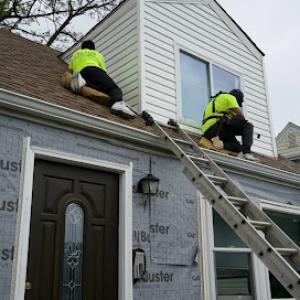
Periodic wind and hail events in this area drive claim frequency and often accelerate replacement decisions for aging roofs. When a storm passes, shingles, flashings, and vents can fail suddenly, especially on roofs with aging underlayment or compromised ventilation. The combination of gusty autumn winds and rapid temperature swings intensifies edge damage, lifted shingles, and concealed leaks. In a city with a mix of steep older roofs and low-slope urban roofs, the failure modes vary-from failed ridge caps and cracked drip edges to membrane punctures and flashing back-damage around chimneys. The risk isn't just immediate; it compounds as snow loads press down and melt cycles rework frozen joints. If a roof shows curling edges, granule loss, or dark staining near penetrations, treat it as urgent and plan a professional inspection without delay.
Fall wind events in this area can complicate tear-off work and debris control, which matters in dense city neighborhoods with close lot lines. When crews remove shingles in fall, high winds can carry debris into street traffic, neighboring yards, or onto adjacent roofs. Proper containment-roofing tarps, edge containment, and waste chutes-must be in place before any removal begins. For homes perched on narrow lots or with adjacent garages and alleyways, securing debris and protecting nearby structures isn't optional; it's a safety and neighbor-relations issue. If a roof shows previous patching or soft spots near valleys or skylines, plan for careful staging and temporary protection to minimize ice dam risk during the changeover. Your project should account for wind thresholds that cancel or delay work to prevent shingle blow-off and to preserve the integrity of newly exposed underlayment.
Local homeowners often need prompt post-storm documentation because Wisconsin insurers typically want roof-condition records, photos, and age estimates. After a major event, assemble dated photographs from multiple angles: overall roof condition, close-ups of shingles, flashing around chimneys and vents, and signs of interiorwater intrusion visible from the attic. A simple, dated roof health summary from a licensed contractor can accelerate claims and reduce back-and-forth. Keep copies of every report, estimate, and communication, and store them in a cloud folder that's accessible from your insurer's portal. If you suspect ice dam development after a storm, document gutter condition and ice buildup with timestamped photos. Clear, organized records help translate storm impact into a timely, accurate assessment for replacement or repair decisions.
Start with a rapid roof health check after any wind or hail event. Look for lifted edges, granule loss, or exposed flashing along the fascia. If you spot active leaks or standing water in the attic after a thaw, reach out to a roofing professional who can perform a rapid assessment and provide targeted guidance for stabilization. In neighborhoods with close lot lines, request a crew leader pre-plan debris containment and street-safe removal strategies. Finally, assemble your storm documentation early so that when insurers request it, you can deliver clear, organized records that reflect the roof's true condition and age.
Find local contractors experienced in assessing and restoring roofs after hail, wind, and severe weather events.
Modern Exterior Roofing
(262) 240-6454 modern-exterior.com
2865 S 67th St, Milwaukee, Wisconsin
5.0 from 246 reviews
Billy Goat Roofing
(414) 426-7885 www.billygoatroofing.com
8035 N Port Washington Rd, Milwaukee, Wisconsin
5.0 from 240 reviews
Community Roofing & Restoration
(414) 332-1139 www.communityroofingandrestoration.com
1776 N Water St, Milwaukee, Wisconsin
4.8 from 306 reviews
Modern Exterior Roofing
(262) 240-6454 modern-exterior.com
2865 S 67th St, Milwaukee, Wisconsin
5.0 from 246 reviews
Modern Exterior is a roofing and siding company in Pewaukee, Wisconsin. Through constant communication and quality ethics we install roofs, siding, gutters and windows. We are Pewaukee proud and locally owned. We also provide a lifetime warranty with all services since we are a LP Pro installer, IKO Certified contractor and in good standing with the BBB.
Billy Goat Roofing
(414) 426-7885 www.billygoatroofing.com
8035 N Port Washington Rd, Milwaukee, Wisconsin
5.0 from 240 reviews
Certified™ GAF Roofing Contractor serving south-eastern Wisconsin
Community Roofing & Restoration
(414) 332-1139 www.communityroofingandrestoration.com
1776 N Water St, Milwaukee, Wisconsin
4.8 from 306 reviews
At Community Roofing & Restoration, we approach every project with the same level of ambition and determination as we did when we got our start in 1975. Now, more than 45 years later, we’ve become a trusted roofing contractor in Milwaukee and the surrounding areas throughout Wisconsin by never compromising on quality and always providing the highest level of workmanship. We’ve been honored and recognized as one of Milwaukee’s best roofing companies for our exceptional track record. In addition to roofing services, we also install and repair gutters, windows, doors, and siding for residential and commercial properties. Contact us today for a fast, free, and friendly quote on your next home improvement project.
DuraShield Roofing & Contracting
(262) 244-0749 durashieldroofingmilwaukee.com
11414 W Park Pl #202, Milwaukee, Wisconsin
5.0 from 37 reviews
DuraShield Roofing & Contracting, located at 11414 W. Park Place Suite 202, is your go-to roofing contractor in Milwaukee, WI. Since 2003, we've been specializing in both residential and commercial roofing projects, offering comprehensive roofing services like repairs, replacements, installations, and inspections. With expertise in a variety of roofing systems, including designer asphalt shingles, metal, cedar shake, slate, and advanced composites, we provide tailored solutions for homes and businesses. Our commitment to quality is backed by top industry certifications, ensuring durable and aesthetically pleasing roofs. Choose DuraShield for expert roofing solutions that exceed expectations.
Absolute Restorations
(414) 739-4251 absolute-restorations.com
3500 S 92nd St Suite 2C, Milwaukee, Wisconsin
4.9 from 85 reviews
𝐀𝐛𝐬𝐨𝐥𝐮𝐭𝐞 𝐑𝐞𝐬𝐭𝐨𝐫𝐚𝐭𝐢𝐨𝐧𝐬 provides expert 𝐰𝐚𝐭𝐞𝐫 𝐝𝐚𝐦𝐚𝐠𝐞 𝐫𝐞𝐬𝐭𝐨𝐫𝐚𝐭𝐢𝐨𝐧, 𝐟𝐢𝐫𝐞 repair, 𝐦𝐨𝐥𝐝 mitigation, and 𝐰𝐞𝐚𝐭𝐡𝐞𝐫 reconstruction 𝐬𝐞𝐫𝐯𝐢𝐜𝐞𝐬 across 𝐌𝐢𝐥𝐰𝐚𝐮𝐤𝐞𝐞. We specialize in restoring 𝐝𝐚𝐦𝐚𝐠𝐞𝐝 homes, multi-family units, condo associations, and commercial properties impacted by unforeseen circumstances. Our trusted team provides 𝐞𝐦𝐞𝐫𝐠𝐞𝐧𝐜𝐲 response, insurance claim support, and complete restoration solutions. With satellite locations in Madison, Fox Valley, and Racine, we proudly serve 𝐖𝐚𝐮𝐰𝐚𝐭𝐨𝐬𝐚, 𝐖𝐞𝐬𝐭 𝐀𝐥𝐥𝐢𝐬, 𝐁𝐫𝐨𝐨𝐤𝐟𝐢𝐞𝐥𝐝, 𝐒𝐡𝐨𝐫𝐞𝐰𝐨𝐨𝐝, 𝐆𝐫𝐞𝐞𝐧𝐟𝐢𝐞𝐥𝐝, 𝐆𝐥𝐞𝐧𝐝𝐚𝐥𝐞, 𝐂𝐮𝐝𝐚𝐡𝐲, and nearby areas in 𝐖𝐢𝐬𝐜𝐨𝐧𝐬𝐢𝐧.
Roofed Right America
(414) 769-0100 www.roofedright.com
429 W Boden St, Milwaukee, Wisconsin
4.8 from 116 reviews
Expert Commercial Roofing, Sheet Metal, Wall Systems, Rooftop Solar, Green Roofing, Blue Roofing and Waterproofing Installer with over 150 in house employees. We also provide specialized services such as tile, slate, copper, cedar and synthetic roofing installations in house. Our sheet metal shop is one of the best equipped in the area, and we have the ability to cut, fold, curve, mill, route, join, solder, weld or shape any type of sheet metal to an expert level.
Horizon Exteriors
(414) 935-2277 horizonexteriorswi.com
161 S 1st St Suite 306, Milwaukee, Wisconsin
5.0 from 24 reviews
Horizon Exteriors specializes in high-quality roof replacement, siding projects, and window installation in Milwaukee, WI designed for durability and performance. We also offer emergency roof repair services to help homeowners respond quickly to storm damage or leaks. Our team uses top-tier materials from GAF, CertainTeed, LP SmartSide, and Andersen to guarantee lasting results. Whether it’s routine roof repairs, siding installations, or upgrading to energy-efficient windows, Milwaukee residents can trust Horizon Exteriors for prompt service, transparency, and expert workmanship.
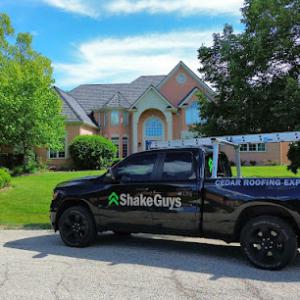
Shake Guys
11414 W Park Pl #202, Milwaukee, Wisconsin
5.0 from 22 reviews
Shake Guys is a well-established, 5-star roofing company that specializes in cedar shake and composite/synthetic shake & slate roofing services. We are dedicated to delivering 100% customer satisfaction!
Nexus Roofing & Construction
(414) 441-4123 nexusdevelop.com
3846 W Wisconsin Ave #104, Milwaukee, Wisconsin
4.9 from 30 reviews
Nexus Development, conveniently located in the heart of Milwaukee, Wisconsin, is your top choice for high-quality roofing, gutter, and siding solutions. Our skilled team specializes in various roofing styles, ensuring that your home is well-protected and visually appealing. We offer durable gutters to manage water drainage and prevent property damage. Our expert siding services enhance curb appeal, providing excellent insulation and weather resistance. With a strong commitment to customer satisfaction and excellence, Nexus Development ensures that every project is completed seamlessly, transforming your property into a stunning masterpiece.
Overland Roofing & Remodeling
(414) 877-0500 www.overlandroofingandremodeling.com
Milwaukee, Wisconsin
4.8 from 44 reviews
We have an extensive and proven record of excellence in Commercial Roofing, Residential Roofing and Remodeling in the Southeastern Wisconsin area. Our family owned business is A+ Rated with the Better Business Bureau. We go to great lengths to accomplish our best work, while staying in contact with our customers through the entire job. No matter the size of your project, and whether its a commercial or residential job, we will do our very best help make your roofing or remodeling project as easy as possible. We try to treat every project as if the work was on our very own home or building. Give us a call today and see what we're talking about. We'd love to hear from you!
JK Contractors
(414) 333-5991 jkcontractorsinc.com
7812 W Clinton Ave, Milwaukee, Wisconsin
4.4 from 139 reviews
JK Contractors is family-owned and operated business, specializing in quality exterior construction work for both residential and commercial properties. With deep commitment to our community and decades of experience, we provide services in roofing, siding, gutters, windows and doors. Whether its protecting your valuable asset with a new roof or enhancing curb appeal we are here to bring your exterior dreams to life - we are the keeper of your exterior dreams! JK Contractors services the Southeast Wisconsin region.
Villwock Roofing & Construction
(414) 531-3036 villwockroofing.com
7017 W Burdick Ave, Milwaukee, Wisconsin
5.0 from 14 reviews
At Villwock Roofing in Milwaukee, WI, we offer excellent roofing and home remodeling services at reasonable and honest rates. Rely on our specialists for all of your exterior home remodeling needs. We strive to save you both time and money. To make sure of this, we apply our knowledge of home improvement no matter how big or small the project is. Our company uses the highest-quality materials and equipment, delivering exceptional services at fair prices. This is because we believe that our clients deserve only the best.
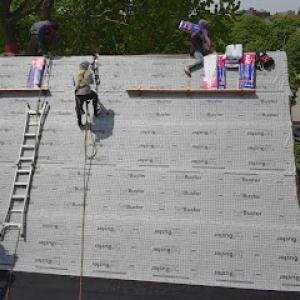
Asphalt shingles dominate replacements because they balance performance with availability in local supply channels and crews. In a climate shaped by freeze-thaw cycles, these shingles pair well with widely stocked underlayment and flashing accessories that crews here trust for quick winter installs. When choosing, prioritize a higher wind rating and a durable cold-weather adhesive strip to minimize suffer during rapid temperature swings and heavy snows common on older, steeper urban roofs.
Metal roofing offers a clear edge for snow shedding and long-term weather resistance, which matters in Milwaukee's harsh winters. The material choice shines on low-slope and mid-slope urban roofs where drainage can otherwise fail under freeze-thaw pressure. Installation quality around flashing and trim becomes critical in winter climates; improper detailing here can trap ice and create new leakage paths. For best results, ensure the installer sequences metal panels with precise closure at eaves, ridges, and transitions to brick or stucco.
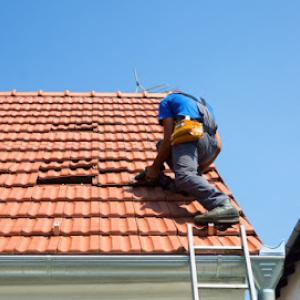
Clay tile and concrete tile appear in smaller market segments, often on homes with distinctive character or heavier roof systems. They demand installers familiar with heavier assemblies and careful detailing-especially where old roofing carries extra load or where attic ventilation must be tuned to manage heat under the tiles. In Milwaukee, these options are more feasible on steeper roofs or when the home's structure has been reinforced to handle the extra weight. Expect specialized flashing strategies and careful integration with soffit and ridge ventilation to counteract ice dam risks.
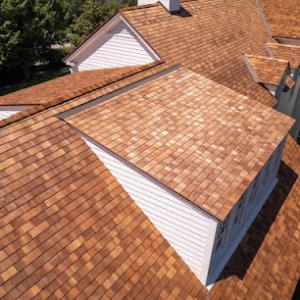
Wood shakes and synthetic products also show up in limited installations, typically on renovations where the aesthetic calls for a traditional look or where weight considerations drive a particular choice. Heavier systems require careful framing checks and longer spans for support, along with detailing that resists moisture intrusion and ice buildup along edges. Synthetic options can offer decent performance in freeze-thaw cycles, but installer familiarity with cold-weather flashing and sealants remains essential for consistent performance.
When evaluating materials, consider not only the roof surface but the full system: attic insulation, ventilation, and the underlayment's ability to bridge freeze-thaw cycles. In areas prone to ice dams, prioritize proper eave protection and continuous airflow to prevent moisture from backing up under the roofing. For any material, insist on detailing that preserves drainage and reduces standing water in winter, and verify that flashing around chimneys, vent pipes, and skylines ties smoothly into surrounding materials. The local market favors installers who can match the roof's weight, slope, and climate-specific detailing with proven fastening and sealing methods.
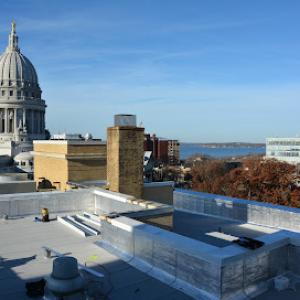
Flat and low-slope roofing is a meaningful part of Milwaukee's market, especially on duplexes, mixed-use buildings, porches, additions, and some urban residential structures. In these settings, drainage and membrane performance aren't abstract concerns-they're daily realities when winter lingers and rain-to-snow cycles flip back and forth. The familiar snowfall you see on a steep roof can sit longer on a low-slope surface, creating a steady push on seals and edges. If the roof can't shed water quickly, you're setting up a slow boil of problems that show up as leaks, discolored ceilings, and hidden rot.
During Milwaukee winters, freeze-thaw cycles turn small vulnerabilities into bigger headaches. Water that finds its way into seams, flashing joints, or around penetrations can freeze, expand, and pry those areas apart. On low-slope sections, that expansion exerts continuous stress along the membrane and edge details, which can lead to micro-tears and accelerated aging. The result isn't dramatic overnight-it's gradual deterioration that compounds with each thaw and subsequent freeze. Without timely attention, those micro-issues become visible, costly repairs, and in some cases, the need for a full re-roof.
Ponding water on flat surfaces isn't just an aesthetic nuisance; it concentrates weight and accelerates membrane wear. In Milwaukee, snow and ice complicate drainage longer into the season, so any low-slope roof must be evaluated for slope adequacy, scupper and gutter performance, and the reliability of drainage paths after a re-roof. City inspections for re-roofing pay attention to drainage compatibility, which is especially relevant on low-slope roof replacements. If water doesn't clear promptly, you'll notice stains, edge bulges, and, eventually, compromised insulation and sheathing.
If your low-slope roof is reaching its mid-life or you're considering an addition, plan for a thorough assessment of membrane condition, flashing integrity, and drainage routes before any work begins. Focus on ensuring positive drainage with clear pathways for both thawing rain and melting snow. Prompt maintenance of perimeter channels and flashings-before the snow season-can prevent a cascade of costly consequences once winter hits. And remember, the goal isn't to chase every tiny leak, but to identify persistent ponding spots and address them head-on to preserve the roof's long-term performance.
Find specialists in TPO, EPDM, and built-up flat roofing systems for residential and commercial properties.
Modern Exterior Roofing
(262) 240-6454 modern-exterior.com
2865 S 67th St, Milwaukee, Wisconsin
5.0 from 246 reviews
Billy Goat Roofing
(414) 426-7885 www.billygoatroofing.com
8035 N Port Washington Rd, Milwaukee, Wisconsin
5.0 from 240 reviews
Community Roofing & Restoration
(414) 332-1139 www.communityroofingandrestoration.com
1776 N Water St, Milwaukee, Wisconsin
4.8 from 306 reviews
Milwaukee cost ranges vary by material, with asphalt shingles at 350 to 600 USD per square and metal roofing at 800 to 1200 USD per square, while tile and specialty materials run higher. When sizing a replacement, your first clock is the material choice, because it drives both upfront expense and long-term maintenance in the Lake Michigan climate. Asphalt shingles are common for older homes and steeper roofs, but metal can pay off with longer life in wind-prone neighborhoods. Clay and concrete tiles push the price higher still, and synthetic or composite shingles sit in between. Factor in the slope, the number of penetrations, and the complexity of flashing when you estimate the total.
Costs in Milwaukee can rise on older homes with steep rooflines, multiple penetrations, chimney flashing work, and tear-offs that require careful debris handling in tighter neighborhoods. Steep pitches demand more safety equipment, fashioning, and time, which adds labor. Climbing around chimneys, skylights, and vents often uncovers additional flashing or rot that wasn't visible from ground level. If a roof replacement includes tear-off, you're not just paying for the new roof; you're paying to responsibly remove and haul away the old materials in a city with tight streets and limited staging space. Expect higher debris management and disposal charges in denser blocks.
Seasonal demand spikes after wind or hail events and the city's shorter ideal installation window from late spring to early fall can affect pricing and scheduling. When a storm hits, crews get booked quickly, and you may face a premium for expedited service or more flexible scheduling. If you're choosing high-end materials, plan for lead times in peak months, and anticipate staggered installations if your roof has multiple levels or unusual shapes. Communication early with a contractor helps lock a practical window and prevent delays that run into less favorable weather.
Start with a clear scope: confirm roof area in squares, list all penetrations, and note any existing damage to sheathing or flashing. Get multiple written estimates that itemize material, tear-off, disposal, and waste containment. In neighborhoods with tight spaces, discuss equipment placement, street permits (if required locally), and the handling of waste to avoid last-minute charges. For long-term value, balance initial cost against expected lifespan and maintenance needs of each material, keeping in mind the freeze-thaw cycles that Milwaukee roofs endure.
Get a clear picture of your project costs upfront - no commitment required.
Billy Goat Roofing
(414) 426-7885 www.billygoatroofing.com
8035 N Port Washington Rd, Milwaukee, Wisconsin
5.0 from 240 reviews
Community Roofing & Restoration
(414) 332-1139 www.communityroofingandrestoration.com
1776 N Water St, Milwaukee, Wisconsin
4.8 from 306 reviews
When performing a complete roof replacement, a building permit is typically required and is issued by the City of Milwaukee. The permit process centers on ensuring that the new roof assembly will integrate properly with the home's ventilation, underlayment, flashing details, and drainage strategy. Submitting a clear plan set that shows roof layout, vent locations, flashing transitions, and drainage provisions helps the review move smoothly. Once granted, the permit ties the project to the required inspections and to adherence to local codes and Milwaukee's climate realities.
Inspections in this city are generally scheduled after rough-in work and again after final completion, with a specific emphasis on how the new system handles moisture management and freeze-thaw stresses. The review team will look closely at attic ventilation alignment with the new roof, the type and placement of underlayment, flashing continuity around valleys, penetrations, and chimneys, plus drainage compatibility to minimize ice dam risk. To avoid delays, ensure that ventilation components, underlayment laps, flashing offsets, and gutter or scupper connections are installed in accordance with the approved plans before the inspector arrives.
Snow and winter weather can delay permit processing or inspection timing, which can disrupt project sequencing during winter and early spring. Plan ahead by factoring in potential weather-driven setbacks and communicating with the permit office about anticipated inspection windows. If a project stretches across seasons, discuss temporary protective measures for the roof deck and underlayment during cold snaps or thaw cycles to reduce exposure risk while awaiting the next inspection.
Begin by confirming the current permit requirements with the City of Milwaukee's permit office, then assemble a compact package that includes a site plan, a roof plan, ventilation particulars, flashing details, and a drainage plan showing gutter and downspout integration. Schedule inspections for both rough and final stages, and confirm access arrangements with the contractor and any property occupants. Keep a written record of inspection dates, inspector notes, and any requested corrective actions so the project can progress without unnecessary delays. In Milwaukee, coordination between weather, drainage strategy, and flashing continuity is essential to a durable roof that stands up to lake-effect freeze-thaw cycles.
Wisconsin insurers commonly ask for roof-age estimates, condition documentation, and photo evidence when evaluating roof claims. In Milwaukee, that means having a clear record of when the roof was installed, any past repairs, and visible issues like curling shingles, deteriorated flashing, or signs of moisture intrusion. Photo evidence should include close-ups of damaged areas and wider shots that show drainage patterns and gutter condition. A dated, professional assessment can streamline the process and reduce back-and-forth with the adjuster.
A contractor report is often useful in Milwaukee-area claims because adjusters may request detailed damage documentation rather than relying only on homeowner descriptions. Have a licensed roofer document observed damage, note potential freeze-thaw effects, and mark targeted areas for replacement or repair. The report should explain how ice dam formation, wind-driven debris, or drainage failures could have contributed to the current condition. If you suspect hidden moisture or structural concerns, ensure the contractor notes those findings with recommendations.
Milwaukee's local wind and hail events can increase claim activity even with no statewide insurer pullback. After a storm, act quickly to prevent further damage-the roof needs to be in a condition where the adjuster can assess it fairly. Photograph wind-stripped shingles, lifted flashing, and damaged vents. If there are ice dam-related concerns, document where meltwater has entered soffits or attic spaces. Timely, organized documentation helps the claim stay on track rather than stalling on vague homeowner descriptions.
Snow and freeze-thaw cycles intensify drainage challenges on both steep older roofs and low-slope urban roofs. Point out drainage failures, gutter ice buildup, and any signs of ice damming along eaves. A well-structured claim packet that includes age estimates, a contractor report, and targeted photos helps adjusters evaluate damage in the context of Milwaukee's climate realities rather than generic conditions.
Connect with contractors who help homeowners navigate the claims process from damage assessment to final approval.
Modern Exterior Roofing
(262) 240-6454 modern-exterior.com
2865 S 67th St, Milwaukee, Wisconsin
5.0 from 246 reviews
Billy Goat Roofing
(414) 426-7885 www.billygoatroofing.com
8035 N Port Washington Rd, Milwaukee, Wisconsin
5.0 from 240 reviews
Community Roofing & Restoration
(414) 332-1139 www.communityroofingandrestoration.com
1776 N Water St, Milwaukee, Wisconsin
4.8 from 306 reviews
Chimney-related roof work is a recurring concern in older housing stock, where masonry intersections and step flashing are common leak points. In areas with brick or stone chimneys, mortar joints and the chimney base can soak up moisture, then freeze and expand. That cycle gradually loosens flashing and invites slow leaks that prefer to hide behind soffits, gutters, or interior ceilings. When a roof is replaced, those masonry transitions demand careful detailing, because a misstep here becomes a stubborn source of trouble that reappears after every thaw.
Freeze-thaw conditions in Milwaukee can worsen flashing separation around chimneys and skylights as materials expand and contract through winter. Metal flashings can crease, sealants can crack, and joints can pull away from siding or brick. Skylight curb systems behave similarly, with seals and pans that are under constant stress as snow load shifts and gutters back up with ice. If flashing isn't precisely integrated with the surrounding roofing plane, you'll see small leaks that intensify during rapid temperature swings. The result is not just moisture; it can be interior staining, wood rot, and degraded insulation.
Because city inspections review flashing details, chimney and skylight transitions deserve extra attention during re-roof projects. A careful, back-to-back check of side-to-side stepping, kickout flashing, and sealant joints lowers the risk of future failures. Ensure flashing meets the slope, connects with counterflashing, and sits beneath the upper roofing material. Small misalignments here become large headaches after heavy snows and thaws, so approach these areas with meticulous preparation and a tested, long-lasting seal.
Find contractors experienced in skylight installation, flashing, and leak repairs to bring natural light into your home.
Community Roofing & Restoration
(414) 332-1139 www.communityroofingandrestoration.com
1776 N Water St, Milwaukee, Wisconsin
4.8 from 306 reviews
DuraShield Roofing & Contracting
(262) 244-0749 durashieldroofingmilwaukee.com
11414 W Park Pl #202, Milwaukee, Wisconsin
5.0 from 37 reviews

Absolute Restorations
(414) 739-4251 absolute-restorations.com
3500 S 92nd St Suite 2C, Milwaukee, Wisconsin
4.9 from 85 reviews
In Milwaukee, the warranty on a full roof replacement often hinges less on the product name and more on how the roof is installed. Winter movement, ice formation, and moisture stress the underlayment and flashing far more quickly than you might expect. If the installation team seals around chimneys, vents, and flue penetrations with improper laps or missing ice and water shield, the warranty can become a paper promise. A solid installation that accounts for freeze-thaw cycles, proper attic ventilation, and correct flashing in low-slope areas reduces the likelihood of early claims and keeps the warranty meaningful when you need it.
Manufacturers do offer contractor networks in the Milwaukee market, and choosing a factory-certified installer matters for warranty credibility on full replacements. Look for Certification badges, documented training, and confirmation that the crew follows the manufacturer's installation manuals to the letter. The installer should provide a written installation plan that aligns with the product's guidelines, including attic ventilation checks and perimetral details that resist ice dam formation. A warranty that references specific installation practices is a signal that the contractor knows how Milwaukee's climate challenges a roof.
Given Milwaukee's robust re-roofing market, the strong differentiators are service and workmanship. Ask for a detailed cleanup protocol after each day of work, including staggered debris removal and tarp coverage to protect landscaping and sidewalks from ice melt. Inspectors or the installer should demonstrate experience with older roof assemblies common in the area, where honeycombed decking or legacy flashing details may require careful adaptation. Inquire how crews handle compromising conditions-like suddenly exposed decking or sagging joints that appear during insulation cycles-and whether they provide a written response window for post-installation touch-ups. A responsive crew with documented experience on older roofs can translate into a more dependable, longer-lasting warranty outcome.