Last updated: Apr 19, 2026
Winter snow loads and freeze-thaw cycles are a primary roof stressor, and they set the stage for each year's damage pattern. When the system shifts from heavy snow to thaw, shingles flex, granules loosen, and flashing seams can fail. Spring hail compounds that wear, leaving pitted surfaces, lifted tabs, and granule loss that accelerates aging. In Verona, that mixture creates a ticking clock: the longer damage sits, the more attic heat buildup and moisture intrusion can worsen under a humid summer. If water finds its way under shingles during a heat spike, the risk of interior staining, mold, and compromised attic ventilation rises quickly. The timing of a full replacement after winter damage is not a luxury but a protection plan-delayed work tends to cascade into higher risk and more invasive repairs.
The weather pattern in Verona shapes every outcome. After a heavy snow year, the freeze-thaw cycle becomes the dominant force on the roof structure, pushing and pulling at joints and sealants. When spring arrives with hail, the immediate aftermath is often hidden damage that only becomes obvious after a few warm days or a shift into summer's UV glare. The warm, humid summers intensify sealing challenges: shingles may not seal properly if the roof is still damp or shaded by lingering attic heat, which can delay reliable replacement performance and shorten the window for a clean, long-lasting install. This is why the right timing isn't about catching a good price; it's about preventing accelerated wear, protecting insulation, and ensuring attic ventilation remains effective through peak heat.
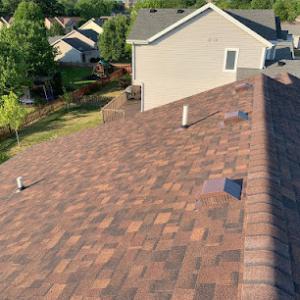
Storm damage in Verona tends to present as a mix: exposed granules in gutters after a hail event, unusual shingle curling or misalignment, and exposed nail heads along the eaves or ridge lines. A telltale sign is moisture intrusion that appears only after a warm day-dark spots or a musty odor in the attic signaling compromised sheathing or inadequate ventilation. If a claim for emergency repair gets filed, the signal mix in the local contractor community shifts toward rapid response and expedited replacement timelines. This is not a long-running project; it's a repair pattern designed to mitigate ongoing water intrusion and to reestablish a sealed, thermally balanced attic environment before the next season's heat.
Start with a professional roof inspection promptly after winter damage or a major spring hail event. Focus on flashing around chimneys, vents, and skylights, plus the integrity of hip and ridge lines, as these areas endure the most stress from freeze-thaw cycles. If damage is confirmed, request a phased plan that prioritizes a full replacement within a single season window, rather than piecemeal repairs that leave vulnerabilities intact during Verona's humid summer. Coordinate with a contractor who demonstrates a track record of storm-driven work, clear communication about insurance-driven timelines, and a schedule that aligns with the end of winter moisture and the onset of summer heat. Ensure attic ventilation is evaluated as part of the plan, since inadequate intake or exhaust can undermine shingle sealing and shorten the life of a new roof. Finally, document every step: photos of damage, notes from inspections, and a written replacement timeline, so insurance claims and weather contingencies won't derail the critical protections a new roof provides.
GR Exteriors
(608) 609-8014 grexteriorsinc.com
245 Horizon Dr #101, Verona, Wisconsin
5.0 from 33 reviews
GR Exteriors is a Family-owned Local business providing exceptional expertise and service in all areas of residential and commercial roofing. GR Exteriors has been providing roofing innovation since 2010. We are passionate and dedicated to our work. Our Company is large enough to provide a quick turnaround, yet small enough to provide low-cost prices. As always, our work is guaranteed. New Construction, Remodeling, Repairs, Hail Damage, Tear-Offs, Flat Roofs, 24-Hour Emergency Service, we got you covered! For more information or to schedule a consultation, contact GR Restoration now!
Craftsman Exteriors
(608) 975-5747 wisconsincraftsman.com
245 Horizon Dr UNIT 106, Verona, Wisconsin
4.8 from 114 reviews
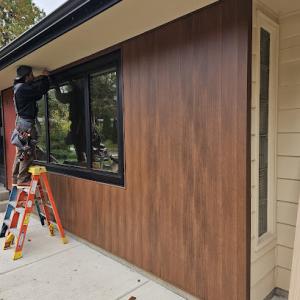
Craftsman Exteriors offers residential roofing solutions for repair, replacement, and storm damage. Our window options include double-hung, casement, awning, slider, bay and bow, architectural, and picture windows. Additionally, we offer vinyl and composite siding, as well as sliding glass patio and front door replacement in Madison, WI. We provide free quotes and are licensed and insured. Serving Southern Wisconsin in communities like Madison, Mt Horeb, Verona, Stoughton, Sun Prairie, Fitchburg, Middleton, McFarland, Baraboo, Janesville, Deforest, Dodgeville, Sauk City, Wisconsin Dells, Barneveld, Monroe, New Glarus, Waunakee, Belleville, Columbus, Portage, and all surrounding areas.

Carl Cure Roofing
(608) 848-2430 madisonroofingsidinggutters.com
2401 Spring Rose Rd, Verona, Wisconsin
4.5 from 21 reviews
Carl Cure Roofing, LLC provides roofing, siding, and gutter services to the Verona, WI area.
Isthmus Roofing
(608) 949-0533 www.isthmusroofing.com
Serving
5.0 from 177 reviews
Isthmus Roofing is a GAF Master Elite certified, full-service roofing contractor serving the Madison, Wisconsin area, known for providing exceptional service to both residential and commercial customers. We specialize in installation, repair and maintenance of different types of roofs, including Asphalt shingles, flat roofs, and many more. We use only the highest quality materials and the proven systems to ensure that your roof is properly installed and protected. Our priority is providing exceptional service and customer satisfaction. That's why we take the time to listen to your needs and tailor our services to meet them. Trust us for all your roofing needs in the Madison area and experience the Isthmus Roofing difference.
Sun Vault Roofing
(608) 608-1082 www.sunvaultroofing.com
Serving
5.0 from 32 reviews
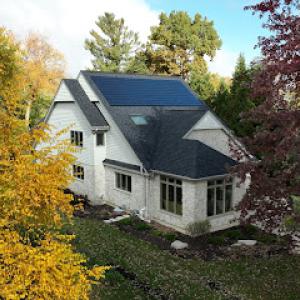
Sun Vault Roofing provides premium roof replacements, repairs, and optional solar integration across Madison and southern Wisconsin. As a CertainTeed SELECT ShingleMaster™, we offer extended warranties and expert workmanship. Whether you’re dealing with storm damage, planning a full re-roof, or considering solar shingles, we deliver honest inspections, clean job sites, and long-lasting results. Contact us today for a free roof inspection and see why homeowners trust Sun Vault Roofing.
AFC Exteriors | Madison, Wisconsin
(608) 571-0717 afcexteriors.com
Serving
4.9 from 59 reviews
We are a commercial and home exterior renovation company with broad industry experience. With a dedication to quality and a passion for excellence, our team specializes in transforming businesses and homes with top-notch roofing, siding and gutter services. Our comprehensive range of services ensures that every aspect of your exterior renovation needs is covered. From repairing storm damage to conducting complete overhauls, we deliver solutions tailored to your specific requirements. Our expert team is skilled in working with various materials and styles, ensuring a perfect match for your business' or home's aesthetic and structural integrity.
Erie Home
Serving
4.4 from 155 reviews
Since 1976, Erie Home has manufactured, supplied, and installed the best-performing roofing on the market. By providing ironclad warranties and convenient financing, we ensure that every homeowner we work with receives top quality service and value for their homes and properties. Erie Home professionals are the roofing company of choice in the greater Madison, WI area. Whether you need roof inspections or roof damage repair services, Erie Home has been the go-to roofing contractor for nearly 50 years because of our attention to detail and dedication to making sure our customers are satisfied with their results. Contact us today for a quote and see why we're the trusted roofing company Madison counts on.
Hardtland Home Improvement, Inc.- Roofing Contractor
(608) 575-9317 hardtlandhomeimprovement.com
Serving
4.8 from 27 reviews
Hardtland Home Improvement, Inc., founded by Tom Degenhardt in 1972, has been a trusted name in roofing, siding, and home improvement services for over 40 years. Serving Verona, Madison, and surrounding communities, we are committed to quality craftsmanship and customer satisfaction. Specializing in roof repairs, siding installation, and storm damage restoration, we make the process seamless by assisting homeowners with insurance claims for hail, wind, and storm damage. Our experienced team ensures precision, durability, and exceptional service in every project. Contact us today for a free inspection and estimate, and let us help you protect and enhance your home with expert care!
Modern Exterior Roofing
(608) 705-7965 modernexteriorroofing.com
Serving
5.0 from 84 reviews
Roofing contractor providing high quality roofing services for residential and commercial properties. We handle everything from new roof installations to repairs and maintenance. Whether you need to fix a leak, replace damaged shingles, or install a brand-new roof, our team of experienced professionals is here to help. We pride ourselves on using durable materials and delivering top-notch craftsmanship to ensure your roof is strong, long-lasting, and looks great.

DG Construction Services
(608) 445-1595 dgconstructions.co
Serving
4.9 from 24 reviews
DG Construction Services, LLC is a reputable and reliable construction company, roofing contractor, and general contractor business based in Verona, WI. With a focus on quality craftsmanship and customer satisfaction, we offer a wide range of construction services to meet the unique needs of our clients. Whether it's a residential or commercial project, our skilled team is committed to delivering exceptional results. From new construction to renovations and repairs, we handle every aspect of the project with professionalism and attention to detail. Trust DG Construction Services, LLC for your construction needs and experience the difference we can make.
Wisconsin Quality Roofing
(608) 451-1290 www.wiqualityroofing.com
Serving
5.0 from 64 reviews
All your Roofing needs, with quality you can trust! Contact us today for your free quote!
Panther Exteriors & Contracting
(608) 212-7473 www.panther-exteriors.com
Serving
4.8 from 149 reviews
To provide select homeowners & businesses in South Central Wisconsin the highest quality exterior product installation and repair options through our relentless pursuit of excellence, commitment to building relationships and our environmentally conscious approach to the roofing, siding, gutter, gutter cleaning, ice dam removal, window/door installation industry.
Wisconsin homeowners insurance typically covers roof replacement for hail or wind damage when the loss is properly documented. In the Verona area, heavy snow loads and rapid freeze-thaw cycles can intensify wind and hail effects on roofing materials, making timely documentation even more important. The policy may include exclusions or rider features, so brief your claim notes with the specifics of the storm, including the date, time, and observed damage patterns on both the roof and any associated flashing, gutters, and vents. The first step is to understand what your policy considers approximately "storm damage" and what mitigation duties accompany a claim, because those details shape how the insurer processes the loss.
Verona-area homeowners should expect insurers to request photos and an adjuster inspection, with deductibles and depreciation treatment varying by policy. Start the documentation early: take wide shots of the roof from ground level, then close-ups of compromised shingles, granule loss, and any dented metal edges or lifted vent flashing. Include photos of exterior hail impact evidence on siding and trim, if visible, since this can support a broader storm-damage assessment. Keep a dated record of when you noticed issues and when you contacted the insurer. If an adjuster is scheduled, prepare a list of observed problem areas, including attic signs of leaks such as staining or damp insulation, which can appear after the thaw. Answer all questions directly and attach the best-quality images you have; higher resolution shots tend to speed up the process.
Collect service records from any prior roof work, especially recent shingle replacements or repairs around the chimney, vents, and skylights. If possible, obtain a second opinion from a qualified roofing contractor who can identify hail bruising, missing granules, or granule loss on the shingles, and point out underlying deck or underlayment concerns that may require replacement. The adjuster will assess the damage and estimate replacement needs, so having a professional opinion aligned with your photos helps reduce back-and-forth. In markets like this, contractors often specialize in claim-process support, helping homeowners navigate the paperwork, estimate discrepancies, and scheduling challenges. Expect to encounter such services; use them if they add clarity and speed to the claim without pressuring decisions.
After filing, set expectations for the timeline: an adjuster will typically inspect within days to weeks, depending on the storm's scope and insurer workload. If the damage is clear and supported by documentation, the insurer may issue an approval for replacement or mitigation work. If depreciation is applied, discuss whether replacement-related costs will be recovered through the claim or when final payments are issued. Take notes on any changes proposed by the adjuster and verify that the scope of work includes full shingle replacement where necessary, along with flashing, underlayment, and ventilation considerations that address the climate realities of winters with freeze-thaw cycles. In cases where the claim intersects with storm-response timing for a full replacement, align your contractor's schedule with the insurer's approval to minimize exposure to ongoing weather risks. This alignment reduces the chance of temporary patchwork that could fail during spring storms.
Connect with contractors who help homeowners navigate the claims process from damage assessment to final approval.
GR Exteriors
(608) 609-8014 grexteriorsinc.com
245 Horizon Dr #101, Verona, Wisconsin
5.0 from 33 reviews
Craftsman Exteriors
(608) 975-5747 wisconsincraftsman.com
245 Horizon Dr UNIT 106, Verona, Wisconsin
4.8 from 114 reviews

Carl Cure Roofing
(608) 848-2430 madisonroofingsidinggutters.com
2401 Spring Rose Rd, Verona, Wisconsin
4.5 from 21 reviews
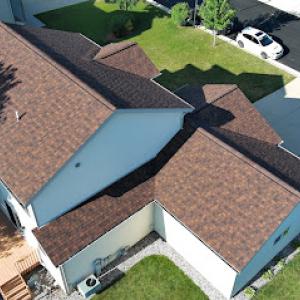
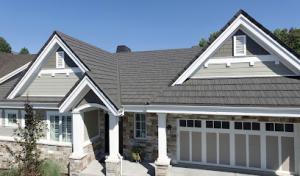
Verona's residential roofs are most commonly asphalt shingles and metal roofing, with tile, wood shakes, and synthetic/composite options present but less typical for mainstream replacement work. Asphalt remains popular for its balance of cost, performance, and广road compatibility with the region's snow loads. Metal roofs are favored where long life and clean drainage are priorities, especially on newer homes or properties with steeper pitches. When selecting a replacement, consider how each material handles the freeze-thaw cycles that define Verona winters and how it responds to warm, humid summers.
Cold winters with significant snow loads demand attention to underlayment, fastening, and ventilation across all materials. In Verona, an extra-thick, well-sealed underlayment helps prevent ice dams and moisture migration behind shingles or panels. Fastening patterns should accommodate snow drift and wind zones typical for the Madison edge; this means closer spacing and using corrosion-resistant fasteners. Ventilation matters for every roof type to keep attic temperatures low in winter and reduce condensation that can worsen ice dam risk. If a roof has a long eave-to-peak run or sits above a poorly vented attic space, the risk of moisture buildup increases, regardless of material choice.
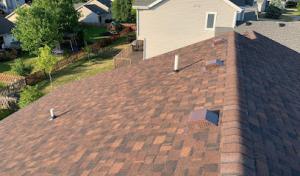
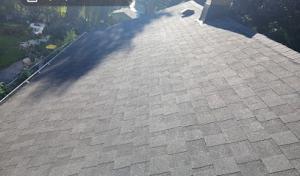
Summer heat and humidity accelerate asphalt aging in south-central Wisconsin, driving expansion-contraction cycles that stress tabs and sealant over time. In Verona, this translates to more frequent inspections for lifted edges, granule loss, and nut-bolt or shingle-fastener security after heat waves. Proper attic ventilation and a breathable underlayment are essential to minimize heat buildup beneath asphalt, helping preserve adhesive strength and extend the effective life of the roof. If the home has a continuous soffit-to-ridge vent, ensure baffles are in place to maintain consistent airflow even as attic temperatures spike in midsummer.
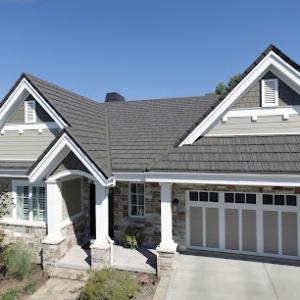
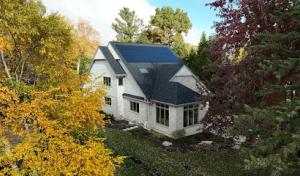
Metal roofs respond well to snow and ice, shedding bulkier loads more predictably and offering excellent longevity with proper installation. In Verona, metal systems shine when paired with solid deck fastening and a continuous membrane underlayment at eaves and valleys to guard against ice issues at penetrations and transitions. The weight and resilience of metal can reduce maintenance frequency, but care must be taken with panel overlaps, hidden fasteners, and sealants around vent pipes and chimneys to prevent moisture intrusion during freeze-thaw cycles.
Clay or concrete tile brings excellent durability and a distinct look, but Verona's climate tests their weight tolerance and fastener detail, especially on structures with marginal attic ventilation. Concrete tiles generally perform better in freeze-thaw cycles than clay, but both require careful underlayment and precise slope to avoid water ingress. Wood shakes add character but demand meticulous ventilation and moisture control; in Verona's seasonal swings, they can deteriorate faster if attic ventilation is insufficient or if humidity is high in the summer.
Synthetic or composite shingles offer a middle ground, often handling expansion-contraction more gracefully than traditional asphalt while delivering reasonable weather resistance. They respond well to Verona's variable climate when paired with a robust ventilation plan and a high-quality underlayment. As with other materials, the success of a long-term roof replacement hinges on meticulous installation details at eaves, penetrations, and transitions to ensure moisture control across seasons.
Verona generally requires a building permit for a full roof replacement. Before any shingle or panel work begins, a permit should be pulled through the city building department. This ensures that the plan aligns with local code requirements and climate considerations that matter in this part of Wisconsin, where cold winters and freeze-thaw cycles can stress ventilation and underlayment. If a contractor won't provide a permit path, that's a red flag for Verona's process. Start by confirming the necessary paperwork with the city to avoid delays once material orders are placed.
Applicants in Verona must submit plan details to the city building department before work proceeds. The submission usually includes roof dimensions, the proposed materials, anchor and fastener specs, vent locations, and attic ventilation strategy. For a full roof replacement, the city often wants a thorough ventilation plan and an adherence checklist for underlayment and ice dam protection. Prepare clear diagrams and a quick notes sheet that highlights any unusual penetrations, skylights, or venting changes. A neatly organized submittal can speed review and reduce back-and-forth during the waiting period.
City inspections are scheduled after rough and final completion. In Verona, the inspection cadence typically follows a rough-in stage, where ventilation, underlayment, and anchorage are visible, and a final stage, when the visible components are complete and the structure is weather-tight. Plan for both visits in your project timeline, and coordinate with the contractor to ensure access for the inspectors. If weather windows compress, the city's inspection slot may shift, so keep a contingency in the schedule for unforeseen delays.
During rough inspections, inspectors verify proper ventilation layout, underlayment installation, proper flashing, and correct nail patterns and fastener specs. They check that attic venting is unobstructed and that the roof deck is sound under the chosen underlayment. On final inspection, they confirm that penetrations, vents, and flashing integrate with the existing drainage plan and that the overall roof assembly aligns with code and Verona's climate expectations. If any aspect doesn't meet code, the inspector will itemize corrections that must be completed before final approval.
Track permit status and inspector appointment dates from the start; a delay here can ripple into weather-related risks, especially after winter storms. Have the contractor provide a written ventilation plan and a clear underlayment specification for Verona's cold, freeze-thaw environment. Prepare the attic access and clear pathways so inspectors can move freely and assess ventilation and decking. Confirm that the contractor is familiar with Verona's inspection expectations, and keep a copy of the permit and submittals on site for quick reference during visits.
You'll see cost ranges in this area that reflect the mix of aging suburban homes and new builds on the Madison edge. The ballpark for asphalt shingles runs from 350 to 700 USD per square, metal from 700 to 1400, clay tile 900 to 2000, concrete tile 900 to 1700, wood shingles or shakes 600 to 1100, and synthetic or composite shingles 450 to 900 per square. When wild weather hits-hail, strong wind, freeze-thaw cycles-the demand spike can tighten contractor availability and push pricing and scheduling pressures higher. Expect a faster turn when a storm hits, but also potential backlogs if crews are tied up on nearby homes after a hail event.
Verona's cold winters and spring thaw create two practical needs: ice-dam protection and reliable ventilation. In a re-roof, those needs can shift the job from "materials-only" to a package that includes upgraded underlayment, improved attic ventilation, and fastening patterns optimized for winter performance. If a reroof happens after a harsh winter, crews may identify ventilation corrections during the inspection that add to the base material cost. In plain terms: you rarely pay only for the visible shingles; the project often expands to address local winter loads and air-flow issues so the roof performs through a typical Verona season.
First, compare the storm-damage scenario to the base condition. If hail or wind has compromised roofing felt or underlayment, upgrade to a more robust underlayment and consider a vented ridge or additional soffit vents to improve winter shedding and reduce ice dam risk. Second, factor in fastening choices. In climates with freeze-thaw swings, a roofing system with upgraded fasteners and a tighter nailing pattern can improve wind uplift resistance and nighttime deck warmth. Third, verify whether the chosen material justifies the long-term energy and maintenance savings given Verona's seasonal swings; metal or tile options may deliver longer service life but come with higher upfront costs.
Plan for a modest cushion if a storm has recently increased demand. If you're choosing asphalt, expect the lower end when the weather cooperates and the schedule is open, but prepare for a small premium if a hail storm has just happened. For heavier materials like clay or concrete tile, the same storm dynamics can magnify scheduling delays and material lead times, which translates into higher installed costs beyond the base per-square price. In all cases, prioritize a detailed written scope that includes underlayment upgrades and any ventilation improvements to ensure the roof remains dependable through Verona's wintry cycles.
Don't let upfront costs delay a critical repair - these contractors offer payment plans to fit your budget.
GR Exteriors
(608) 609-8014 grexteriorsinc.com
245 Horizon Dr #101, Verona, Wisconsin
5.0 from 33 reviews
Craftsman Exteriors
(608) 975-5747 wisconsincraftsman.com
245 Horizon Dr UNIT 106, Verona, Wisconsin
4.8 from 114 reviews
Skylight service shows up often enough in the local contractor scene to be a meaningful repair category for homeowners. In this climate, those skylight penetrations can become chronic trouble spots if flashing and curb details aren't solid from the start. Verona winters push ice and snow toward top-edge seals, and spring hail can jar loose muntins or sealant, turning a small drip into a bigger leak quickly. When you notice condensation between panes or interior staining near a skylight, don't assume it's just a minor nuisance-flashings and the surrounding roofing deck may already be compromised.
Flat-roof expertise exists here, but it's more common in additions, porches, garages, and some mixed-use structures than in the typical pitched-suburban home. If your project involves a flat section or a low-slope transition from a main roof, pay particular attention to drainage details and membrane integrity. In Verona, this matters more because freeze-thaw cycling can trap water at penetrations and cause fast deterioration of seams and edge flashing.
Low-slope drainage is a recurring weak link when leaks develop around penetrations. Ice buildup at flashing corners, step-flashing gaps, or poorly sealed risers can lead to hidden rot behind the fascia before you see daylight inside. The combination of cold winters and thaw cycles elevates the risk, so when a low-slope area around a skylight or vent starts to pool or seep, address it promptly. Proactive flashing verification and careful sealant remediation now save more invasive repairs later.
Find contractors experienced in skylight installation, flashing, and leak repairs to bring natural light into your home.
GR Exteriors
(608) 609-8014 grexteriorsinc.com
245 Horizon Dr #101, Verona, Wisconsin
5.0 from 33 reviews
Contractors offering warranties are active in the area, but they are less prevalent than storm-response and re-roofing firms. In this market, workmanship guarantees matter more than the fine print of warranty language. When evaluating options, focus on what the warranty actually covers during the critical first winter after a full roof replacement, and how claims are handled if a problem shows up after a freeze-thaw cycle. A solid workmanship warranty signals that the company expects to stand behind its installation through Verona's icy springs and spring hail.
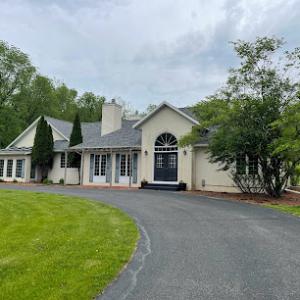
The local market includes many long-established, locally owned, and family-owned companies. Tenure and responsiveness are strong signals of reliability. Look for crews with a track record of timely arrivals, clean jobsite management, and clear communication about schedule updates, especially after a storm. In Verona, responsiveness during and after a storm is just as important as the actual roofing materials chosen. A contractor who returns calls quickly and follows through on cleanup and debris removal earns higher trust than one that leaves a handled bag of nails behind.
Cleanups included and quick response are two of the strongest market signals. Verify that post-storm follow-up is built into the project plan, with a clear point of contact for questions about attic ventilation, ice-dam mitigation, and attic inspections after the installation. Ask for the crew's scope of work on-site, including daily cleanup milestones and how waste is disposed of. A Verona project benefits from crews who show up with organized staging, proper protection for flower beds and driveways, and a documented method for protecting siding and gutters during tear-off.
Post-installation checks should be standard. Request a walkthrough focusing on ventilation and ice-dam protection details, especially given winter loading and freeze-thaw swings. If a storm hits soon after installation, ask about expedited follow-up to address any settlement, shifting shingles, or flashing concerns. In this market, a contractor's willingness to engage promptly after a storm often reflects the overall commitment to service quality.