Last updated: Apr 19, 2026
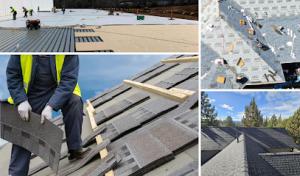
Spring in this area brings milder temperatures and fewer interruptions from Santa Ana winds, making it a practical window for full roof replacements. Start planning early to align with the calmer shoulder season after winter storms but before the peak of summer heat. When the scaffolds go up, you'll typically see safer handling of underlayment and shingles as crews work along sun-exposed slopes without the blistering heat of July. If there was winter rain, homeowners gain additional margin in spring to address any incidental damage before the dry season settles in. On hillside and tract homes alike, a spring schedule often reduces the risk of weather-driven delays and keeps crews moving with predictable daylight.
Summer heat in inland Orange County can affect material handling and thermal movement, especially on tile roofs and sun-exposed slopes common in neighborhood layouts. If a replacement must occur in late spring or early summer, plan for early starts to avoid the hottest afternoon periods and to minimize expansion-related movement in long runs of underlayment and tile. On tile roofs, consider staged work where crews rotate sections rather than performing a full tear-off in a single blistering day. Have a contingency plan for heat-related stops, such as shaded staging areas and hydration, so the project doesn't stall on the hottest days. For homes with multiple roof planes, prioritize the most sun-exposed sections first, then move to cooler pockets to balance thermal expansion across the structure.
Fall offers a reliable balance of cooler temps and reduced direct sun, which helps with handling and placement of tiles and shingles. This window is favorable for staged tear-offs, allowing crews to complete sections before early wet-season moisture returns. In neighborhoods with mixed roof types, coordinate the sequence so that concrete or clay tiles on exposed elevations are replaced after the typically gentler late-summer heat subsides. By planning fall work after Santa Ana wind events subside, you can minimize the risk of debris intrusion mid-project and reduce rework from wind-driven debris during tear-off.
Winter brings milder rain, but that moisture can interrupt a tear-off and complicate underlayment installation. If rain is present, scheduling should shift away from the busiest roof angles and toward sheltered sections or to a brief pause until the forecast clears. On hillsides and in tract developments, snow is rare but brief showers can still compromise laps of the deck and underlayment. In Brea, the goal is to avoid the heart of winter storm windows while ensuring enough dry days to complete critical phases like underlayment and starter courses. When a storm season looms, the project can be tightened into a tight window between late fall and early spring to minimize weather-related delays.
Santa Ana wind events in North Orange County can create debris hazards, expose underlayment during tear-off, and force short-notice schedule changes. Build in buffer days around expected windy spells, keep debris containment tight, and communicate with the crew about temporary pauses if gusts exceed safe thresholds. For any roof type common in this area, the key is to maintain tight sequencing and rapid response to shifting wind forecasts, so a project remains on track despite the season's characteristic gusts.
Clay tile and concrete tile are dominant roof types in Brea, matching the city's large stock of Southern California tract homes and Mediterranean-style architecture. Those ceramic-and-earth profiles age differently from asphalt, and the underlayment often shows its retirement long before the visible field tiles fail. In many cases, you'll notice compromised felt or synthetic underlayment beneath tiles that otherwise look salvageable. When a tile roof is evaluated, the focus turns to whether the underlayment has lost its protective grip, whether flashing around chimneys and skylights has deteriorated, and whether the substrate has accumulated moisture under the dry, hot Santa Ana stretches. This dynamic means a reroof can sometimes be scheduled around preserving reusable tiles rather than ripping the entire roof down to the plywood.
Brea's Santa Ana wind events push roofs to their wind-driven limits, especially on hillside properties where gusts funnel through streets and canyons. If the underlayment shows age, those winds can lift sections of tile and expose the deck even when the surface looks intact. In planning a replacement, anticipate a window that avoids the peak wind season and the early- or late-season rain periods. A staged approach-replacing the most vulnerable areas first, then completing a full dry-in when winds subside-helps prevent wind-driven damage during construction. For concrete and clay tile systems, the weight makes careful staging essential: broken tiles, flashing updates, and a secure dry-in are steps that must be completed before any forecasted rain or strong gusts. This is not a quick flip; it's a sequence that protects the structure while the work progresses.
Heavy tile systems can make replacement more labor-intensive than asphalt, especially when broken tiles, flashing updates, and staged dry-in are needed before wind or rain. The handling and re-seating of large, heavy tiles require experienced crews that understand the nuances of clay versus concrete tile and their different failure modes. When tiles are intact but the underlayment or sheathing is marginal, crews may prioritize careful removal and reinstallation rather than a full tear-off, depending on the roof's condition and local weather outlook. Expect more time on site if the roof has multiple levels, numerous penetrations, or hillside transitions where access is tighter. The result is a replacement that preserves as much of the original tile when feasible, while upgrading underlayment, flashing, and ventilation to resist the season's heat and Santa Ana-driven dryness.
Because underlayment aging underneath reusable field tiles is a common pattern in this area, you want a proactive inspection cadence. After strong wind events or the first heavy winter rain, do a targeted check for lifted or cracked tiles near eaves, ridges, and penetrations. Inspect flashing around vents, skylights, and chimneys for hairline gaps or corrosion. If you notice any soft spots on the deck or persistent staining, treat it as a warning sign that the underlayment may be nearing its end. Seasonal checks help determine whether a small repair-such as replacing a handful of tiles, resealing flashing, or upgrading underlayment-precedes a larger re-roof plan. For Mediterranean-style architecture, maintaining the aesthetic balance between tile color, texture, and underlayment is not merely cosmetic; it shields the substrate from sun-induced deterioration that accelerates with age.
Extreme summer heat not only stresses tiles but accelerates underlayment aging and sealant degradation. When planning, aim to complete major work during the cooler months, with a buffer for potential Santa Ana wind spikes. If a complete overlay is not necessary, a staged dry-in can allow portions of the roof to be weather-tight while work continues on other sections. This approach helps minimize heat-related wear on crews and keeps indoor environments more comfortable during construction. By aligning the work with the local climate realities-hot days, windy periods, and a wet-season lull-you improve the odds that the reroof will hold strong through the seasons that define this tract-heavy landscape.
Find contractors who specialize in clay and concrete tile roofs, known for their durability and curb appeal.
All In One Roofing & Solar
(714) 476-3304 www.allinoneteam.com
371 Oak Pl Suite #F, Brea, California
4.9 from 40 reviews
Micasa Pro Roofers
(714) 616-5700 www.micasaroofingoc.com
135 S State College Blvd, Brea, California
5.0 from 8 reviews
The Affordable Roofers
(714) 364-4998 www.affordableroofers.net
565 W Lambert Rd, Brea, California
5.0 from 68 reviews
The Affordable Roofers is your go-to roofing company in Brea, CA and nearby, offering reliable, budget-friendly solutions without compromising on quality. We specialize in residential and commercial roofing services, including repairs, replacements, and new roof installations. Our experienced team uses high-quality materials to ensure your roof stands strong against the elements. With a focus on honesty, affordability, and customer satisfaction, we make the roofing process stress-free and affordable for homeowners and businesses alike. Trust The Affordable Roofers for expert craftsmanship at a price you can afford. Contact us today for your free quote!
All In One Roofing & Solar
(714) 476-3304 www.allinoneteam.com
371 Oak Pl Suite #F, Brea, California
4.9 from 40 reviews
All In One Roofing specializing in customer service. All of our business starts from people like you referring us to our next customer. From residential to commercial roofing and solar Installation. For a yearly maintenance, repair or a complete new roof we have you covered. Our roofing installations include tile, composition, metal, hot mop, torch down, and many other types of roofing. Solar and battery backup. With very competitive pricing and great service we are the go to company. As a 3rd generation roofing company we have years of experience. It all started with my father who opened his own roofing company in 1977, where my 3 brothers and I started learning to remove and install roofs with him on weekend and during summer breaks.
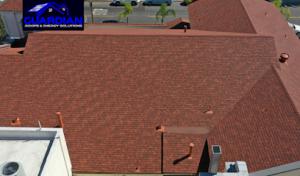
SoCal Roofing Solutions
Brea, California
5.0 from 23 reviews
We are a proud family owned and operated roofing contractor with an established and successful track record. We specialize in all roof types, asphalt shingles, tile, torch-down. We understand the roofing process can be a challenging one for some. Allow us the opportunity to make it as HASSLE-FREE as possible while delivering maximum VALUE! We are an Owens Corning and a GAF certified contractor offering great financing options through GoGreen Financing. CA License #1032698 Call us to schedule an appointment.
Bravo Roofing
(714) 672-9061 bravo-roofing.com
255 Viking Ave, Brea, California
5.0 from 11 reviews
Bravo Roofing aims to provide high quality roofing applications with long-term sustainability, in the safest way possible, matched with outstanding customer service and response times. As a family-owned and operated company for more than 50 years, we take pride in providing 5-star service to every business partner. Clients are not a number, they are a name and each project is unique and important. Our strong values are reflected in our industry relationships, which boast in longevity and integrity. Contact us to talk about your Orange County, CA commercial roofing needs.
Micasa Pro Roofers
(714) 616-5700 www.micasaroofingoc.com
135 S State College Blvd, Brea, California
5.0 from 8 reviews
Giving the best experience is our uppermost priority and we are ready to give it to your satisfaction
Santiago Roofing
(714) 745-5178 santiagoroofing.com
361 Oak Pl Suite H, Brea, California
4.5 from 17 reviews
In business over 42 years / since 1980 Licensed and insured with worker's comp and liability insurance Deal directly with the contractor Quality workmanship Residential and Commercial New roofs, reroofs, recover, and repair work

Brea Roofing
(714) 879-1588 brearoofing.com
171 Gemini Ave, Brea, California
4.1 from 22 reviews
Professional roofing services
Roof Pro
(714) 752-6999 www.roofprooc.com
Serving
4.8 from 150 reviews
Roof Pro is a roofing company with offices in La Habra, CA and Irvine, CA that offers the best roofing materials and installation practices on the market. With a well-trained team of professionals, you can be sure your new roof will be installed correctly the first time around. Thanks to our experience with different manufacturers, we have great partnerships for all your needs. We offer a wide range of roofing solutions for all types of homes, including shingle roofs, flat roofs, tile roofs, metal roofs and roof coatings. Our team is highly trained in both residential and commercial roofing systems to ensure that you get top quality workmanship at every step of the process. Call us for your new roof! We service Los Angeles and Orange County

California roofing & repair construction
(657) 551-4639 californiaroofingrepairconstruction.com
Serving
5.0 from 10 reviews
California Roofing & Repair, located in Anaheim, California, is your premier choice for all roofing and construction needs. With a dedicated team of experienced professionals, we specialize in a full range of roofing services, from installation and repair to maintenance and inspections. Our commitment to quality and customer satisfaction sets us apart, ensuring that every project is completed with the utmost attention to detail and craftsmanship. Whether you're a homeowner looking to enhance your property’s curb appeal with a new roof or a business owner needing reliable repair services, California Roofing & Repair is here to provide tailored solutions that meet your specific requirements. We use only high-quality materials.
Roofing Standards
(714) 993-9715 roofingstandards.com
Serving
4.7 from 68 reviews
Roofing Standards is a full service roofing company the works in all parts of California and Arizona. We have over 125 full time employees. We offer all types of roofing, rain gutters, sheet metal, roof maintenance, and repairs. We have been in business for over 25 years and have completed over 20,000 jobs. Call anytime for an estimate.
Rudy's Roofing
(714) 588-5994 rudysroofinginc.com
Serving
4.8 from 26 reviews
ROOFING COMPANY WE SPECIALIZE IN RE ROOFS ROOF REPAIRS SIDDING WOOD SHAKES SHINGLES CONCRET TILES

Roof Service Providers
(562) 398-3411 roofserviceproviders.com
Serving
5.0 from 36 reviews
We are a GAF Master Elite contractor for all your roofing needs from certified roof inspections to roof installation, replacement and repair, and skylights. We specialize in both Residential and Commercial Roofing, for all types of materials including shake, tile, single, and metal. Our team is committed to quality craftsmanship using premium, locally sourced materials, ensuring peace of mind with industry-leading warranties. By integrating cutting-edge technology, we provide precise estimates and sustainable solutions. Trust us to handle your roof leak repair with speed and efficiency. Experience superior customer service with transparent communication and competitive pricing today. Located in La Habra Heights but serve all areas nearby.
South- and west-facing roof slopes take the brunt of the strongest sun in the Hometown of orange skies and long summer days. In Brea, that relentless UV hit accelerates aging on the surface materials, especially on asphalt shingles and synthetic composites. The result is faster granule loss, more visible fading, and accelerated drying that makes you notice wear long before other sections of the roof. If a shingle or tile on these faces starts curling or losing flexibility sooner than expected, it's often a sign that UV weathering is catching up. Plan inspections that pay attention to the south-facing slopes, and consider an earlier replacement cycle there, rather than treating all sections as equal.
Occasional heavy winter rainfall in this climate can expose long-developing weak points at flashings, valleys, and penetrations after extended dry periods. When the dry stretch ends and the rain returns, brittle sealants and degraded flashing joints show up as leaks or damp spots along the most exposed lines. In practice, that means you should not dismiss a dry-weather dry-out as harmless. A few seasonal checks after a dry spell, especially around chimney stacks, vent penetrations, and valley intersections on the sunlit slopes, can catch issues before winter storms intensify them. If a flashing detail is past its prime, a single heavy rain can amplify the problem, prompting more extensive repair work or a full replacement on the affected planes.
Santa Ana exposure adds a practical wrinkle: higher wind loads on exposed faces can lift edges and exacerbate seam or fastening failures. South-facing slopes are more vulnerable when wind-driven rain pushes against compromised seals. The consequence is accelerated wear along eaves, ridges, and cap shingles, with potential for wind-driven leaks during Santa Ana episodes. Routine checks should include a close look at fasteners and overlaps on those faces, especially after windy spells and before the heat season returns. If fastener corrosion or loose edges are found, address them promptly to prevent broader, corner-to-corner deterioration.
The combination of intense sun, episodic heavy rain, and wind means that timing your maintenance around these factors matters. A proactive, staged approach-captioning attention to the south-facing slopes during mid-summer inspections for UV wear, then scheduling flashings and penetrations checks after first winter rains-helps prevent small problems from becoming larger failures. In the end, south-facing wear isn't a random event; it's a predictable pattern you can manage with targeted, timely attention before the next peak sun and next storm cycle.
The most popular roofing material in the US. Find pros who install, repair, and replace asphalt shingles.
All In One Roofing & Solar
(714) 476-3304 www.allinoneteam.com
371 Oak Pl Suite #F, Brea, California
4.9 from 40 reviews

Typical Brea material ranges are about $350 to $700 per square for asphalt shingles, $700 to $1200 for metal, $1100 to $1800 for clay tile, $900 to $1500 for concrete tile, $500 to $900 for synthetic/composite shingles, and $1600 to $2800 for slate. In practice, that means a mid-range asphalt job lands around the low to mid hundreds per square, while a tile roof pushes the budget toward the higher end due to heavier labor and careful handling. When you're comparing bids, ask for a per-square price that explicitly includes tear-off, disposal, underlayment replacement, and flashing work so you're not surprised by added line items later in the project.
Costs in Brea often rise on tile projects because labor includes careful tear-off, underlayment replacement, flashing work, and sorting or replacing cracked field tiles. On a hillside or aging tract home, cracked field tiles are common after a wind event or during a winter season where paving and roofing work slows down. If your home has a tile roof, plan for a slightly longer install window to allow for tile sorting and accurate color matching, and budget extra for potential tile substitutions if matching field tiles proves tricky. Synthetic or composite tiles can be a more predictable option if you're balancing cost and maintenance, but the look and weight will differ from concrete or clay, so discuss long-term performance in Santa Ana wind exposure with your roofer.
Project pricing can also move with seasonal demand because many homeowners try to avoid both winter rain delays and the hottest summer installation windows. In Brea, you'll typically see a dip in activity in late fall and winter, but winter rain can still push schedules back and require temporary protection and tarping. Late summer heat can complicate installation and drying times, especially on metal or tile systems that expand with heat. If you're weighing asphalt versus tile, aim for a shoulder-season start when the forecast shows a stretch of dry days without extreme heat; you'll get better workmanship and fewer scheduling bottlenecks. For every material type, ask for a detailed start-to-finish timeline that includes tarp protection, any necessary interior protection, and a clear plan for staged work if wind advisories or heat waves arise.
Get a clear picture of your project costs upfront - no commitment required.
The Affordable Roofers
(714) 364-4998 www.affordableroofers.net
565 W Lambert Rd, Brea, California
5.0 from 68 reviews

Re-roof permits are typically required in the City of Brea. The permit process is not something to "pass off" to the contractor alone; it's a coordinated step that helps ensure the project meets local codes and climate-specific considerations. In practice, the permit is not simply a stamp of approval-it's the framework that guides required materials, sequencing, and safety measures for the Santa Ana wind exposure, hillside roofing nuances, and the seasonal re-roof timing around winter rain and late-summer heat events.
Permit filings are generally handled through the City of Brea Development Services rather than left to the homeowner to navigate alone. The contractor or a licensed roofing professional typically initiates the application, but you should stay involved to confirm the scope, the proposed schedule, and the specific roof type (tile, shingle, or other) being installed. Expect back-and-forth on details such as disposal control, ventilation, underlayment choices, and flashing methods, all of which influence inspection readiness.
Coordinate filing and inspection windows with the local climate realities. Brea's hotter summers and wind-prone Santa Ana conditions mean inspections are often scheduled to line up with material delivery and on-site work windows that minimize exposure to rain or extreme heat during critical phases, such as underlayment installation, tile or shingle reseaming, and flashing setup. Align the permit timeline with your contractor's sequence to avoid delays that could push work into risky weather periods.
Inspections are scheduled during and after the work, including a final inspection that checks proper installation details and flashing. You should expect inspectors to verify that roof deck preparation, underlayment, tile or shingle layout, flashing at penetrations, and valley details meet code requirements. If the inspector flags an issue, address it promptly to keep the project moving and to prevent a re-inspection fee or a project pause.
A common pitfall is starting work before the permit is issued or before the required plans are reviewed. That can trigger penalties or require rework that disrupts a winter rain or late-summer heat window. Another pitfall is incomplete submittals-ensure the project package includes roof vent details, flashing products, and moss-and-algae mitigation plans if applicable. Stay in touch with the City and your contractor to confirm approval milestones and keep the project on track.
When planning a roof refresh, consider how seasonal dynamics in North Orange County shape damage risk. In Brea, winter rain and occasional storms are more likely to expose leaks through flashings and penetrations than to create the hail-driven loss patterns seen in other regions. This means you should pay close attention to edges, vent seals, chimney collars, and any penetrations around skylights during inspections and after storms.
Santa Ana wind events can produce debris-related damage and uplift concerns, making photo documentation especially important when filing or discussing a claim. After a windy spell, photograph all exposed fasteners, flashing joints, and ridge and hip lines. Keep a running visual record of attic ventilation, underlayment, and any signs of wrinkling or creasing in roof decks that might indicate underlying issues.
California insurers increasingly scrutinize roof condition, so you should keep dated photos, inspection notes, and contractor documentation before and after replacement. A clear file helps demonstrate pre-existing conditions, improvements, and the quality of workmanship. Include notes on attic condensation, vent seals, and any observed moisture staining near penetrations.
On claim days, use those records to illustrate exposure points, misalignment, or wind-driven debris that could influence coverage decisions. If a wind event nearby rattles loose tiles or shingles, report promptly with timestamped photos and a short narrative. Promptly sharing complete, organized documentation can prevent disputes later.
Finally, align replacement timing with the typical Brea window-winter rains and late-summer heat and fire weather-and document how installation mitigates exposure to Santa Ana winds, heavy rain, and expanding heat cycles. Clear before-and-after comparisons support both performance and claim discussions.
Connect with contractors who help homeowners navigate the claims process from damage assessment to final approval.
The Affordable Roofers
(714) 364-4998 www.affordableroofers.net
565 W Lambert Rd, Brea, California
5.0 from 68 reviews
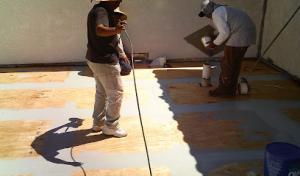
Although pitched tile and shingle roofs dominate, local contractor demand shows a meaningful need for flat and low-slope work on additions, patio covers, and some commercial properties. Dry air in the summer can make small drainage issues hard to spot, while winter rain reveals ponding and edge failures that were hard to notice during dry months. Plan additions with a thoughtful approach to water flow and membrane longevity from the start.
In this climate, a low-slope roof patch or addition must be evaluated for proper slope and drainage details. Hidden membrane wear can lurk under surface layers until the first heavy rain; when that happens, water may pool along edges or at terminations that were not originally designed for a flat-to-slope transition. Be vigilant for shallow drainage paths, clogged scuppers, and failed roof edge details that can escalate into leaks after a dry period ends or during a sudden rain event.
Low-slope sections tied into a steeper main roof require careful transition flashing. Poorly integrated flashing can create a false sense of security, only to fail when Santa Ana winds press against the edge or winter rain forces water to seek alternative paths. Use integrated membrane transitions, continuous counter-flashing, and compatible sealants chosen for local temperatures and UV exposure. The goal is a seamless, continuous barrier that keeps water moving toward outlets rather than seeping into concealed corners.
Adopt a proactive maintenance mindset for additions. After installation, re-check flashing penetrations, drainage outlets, and edge detailing at least twice per year. In dry months, inspect for creases or dry rot that may not immediately show up, and schedule a follow-up inspection before the winter rains arrive to catch potential issues before they become active leaks.
Find specialists in TPO, EPDM, and built-up flat roofing systems for residential and commercial properties.
Santiago Roofing
(714) 745-5178 santiagoroofing.com
361 Oak Pl Suite H, Brea, California
4.5 from 17 reviews

When planning a solar install in a home with a tile roof, the strong sun exposure in this area makes timing crucial. A roof that is near its replacement window can benefit from a solar installation that coincides with the new roof decking and waterproofing details, preventing the need to work on hot, exposed surfaces twice. In practice, this means you should set a plan that targets a period when the roof is already planned for replacement or when the current tiles are at a stable, low-risk stage for panel mounting and penetrations.
Tile roofs common in this market require extra coordination around mounts, replacement tiles, and waterproofing details at penetrations. The mounting hardware for solar should be designed to integrate with the existing tile layout, and compatible flashing systems must be selected to avoid leaks where mounts pass through. If panels are installed on a roof with curved or irregular tile patterns, plan for additional layout time and, where possible, use flush or low-profile racking to minimize tile breakage and weather gaps. Have a dedicated plan for spare tiles and matching color-thickness variants so replacements blend, especially on hillside properties where views and lines of sight emphasize roof color and texture.
Winter rain and Santa Ana wind cycles in this area further shape the solar timeline. The winter window offers more predictable weather for roof work and panel installation, while the Santa Ana winds can complicate installation and fastening if hardware is not fully secured. In practical terms, coordinate a stretched but concise sequence: timing the roof work so mounts go in once the underlayment and flashing are prepared, then completing the solar racking and electrical connections within a single dry period to minimize exposure of newly replaced areas.
A local contractor pair-up approach helps here. Aligning the roof replacement plan with the solar scope early ensures panels are placed after a solid, weatherproof roof base is achieved and before any further disturbance of the roof surface. This approach reduces the risk of leaks, minimizes rework on tile details, and keeps the project flow tight during Brea's peak sun season.
Find contractors who integrate solar panels or solar shingles into your roof for long-term energy savings.
All In One Roofing & Solar
(714) 476-3304 www.allinoneteam.com
371 Oak Pl Suite #F, Brea, California
4.9 from 40 reviews
Weatherline ReRoofing & Repairs
(714) 731-3425 www.weatherlineroofing.com
Serving
4.9 from 28 reviews