Last updated: Apr 19, 2026
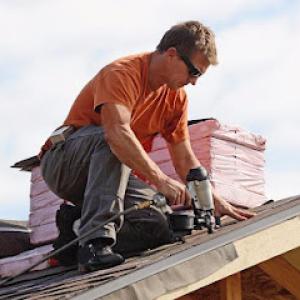
Spring hailstorms and wind damage are the biggest trigger for roof inspections and replacement activity in Aurora. After a severe storm, shingles can look intact from the ground but have unseen granule loss, punctures, or uplifted edges that spell trouble once a quick thaw arrives. Freeze-thaw cycles in the weeks that follow drive micro-cracks into underlayment and seals, accelerating water intrusion risk. If it's been a storm day or two and you notice unchecked leaks, creaking attic boards, or damp smells near vents, treat it as urgent. Delayed diagnosis means moisture can race through roof decks, joists, and insulation, complicating repairs later and potentially raising the replacement timeline.
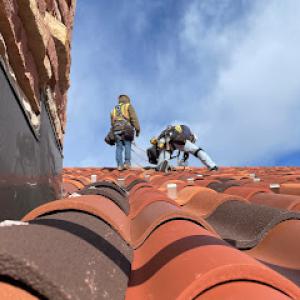
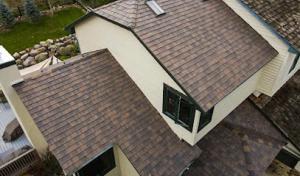
Look for bruising on shingles, random dimples, and asphalt granule shedding-the sort you find in gutters and downspouts after a storm. Metal roofs may show denting, loose fasteners, or seam separation. Tile roofs commonly crack or spall, with small, hard-to-see fractures that let water in during freeze-thaw cycles. If you own a large suburban home with mixed roofing types, prioritize the areas where hail typically lands hardest: upper slopes, edges, overhangs, and near the chimney or vents. For many homes, the most important signs aren't visible from the ground: moisture in the attic, disproportionate insulation wear, or sudden changes in indoor humidity after a storm.
Aurora homeowners often have to coordinate roof decisions around insurer documentation requirements such as photos, estimates, and roof-condition reports after storm events. Start gathering proof immediately after a hail event: high-resolution photos of impacted surfaces from multiple angles, close-ups of damaged shingles or tiles, and a dated record of weather conditions. Keep a running file of any temporary repairs you authorize to stop leaks, since insurers may require a record of every step taken to preserve the property. When requesting estimates, ensure your contractor documents all damaged roof sections, attic insulation, and any decking or underlayment that shows signs of moisture intrusion. The insurer's adjuster will rely on this material to determine scope and replacement eligibility, so tight, clear documentation speeds the process and helps avoid back-and-forth delays.
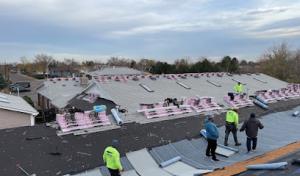
Late spring through early fall is the preferred replacement window in Aurora because winter snow, ice, and weather delays can disrupt tear-off and dry-in schedules. If a claim is approved in late spring, crews can complete a full tear-off, install underlayment, and achieve a proper dry-in before the first cold snaps return. Timing matters for avoidable interruptions: shorter daylight hours, afternoon hail squalls, and stubborn moisture can stall progress. When planning replacement, align your project start with favorable forecast blocks and buffer for unexpected rain or wind days. A well-timed project reduces the risk of hail-season reentry or wind-driven debris compromising newly installed roofing.
Begin with a rapid, professional inspection after a storm, even if appearances seem fine. Schedule an inspection within 48 to 72 hours to capture the most accurate assessment before any potential widening of damage. Photograph thoroughly, request a formal roof-condition report, and secure a written estimate that itemizes each damaged area. Communicate openly with your insurer about the exact scope-don't rely on verbal statements or generic repair plans. If damage is confirmed, prepare for a replacement decision that fits the insurer's timeline, the weather window, and your home's ongoing protection needs.
Roof Solutions
(720) 789-8985 roofsolutionsco.com
6320 S Newbern Way, Aurora, Colorado
5.0 from 75 reviews
Roof Solutions is a family-owned team of Colorado natives with over 15 years of experience in the roofing and construction industry. Working closely with a crew of construction experts that we’ve collaborated with for over a decade. Versico Roofing Systems Authorized Contractor. All work backed by a company that stands behind their work. Trusted by countless customers, improve and increase property values, 100% referral business. Expertise in roof repairs, re-roofing, rebuilds, painting, gutters and window replacements. We’ll even handle your insurance claim, for all exterior repairs, from start to finish. We’ll work hard to make every step of your experience with us as stress free as possible, so you can relax and enjoy your restored home.
Rocky Mountain Roofing & Exteriors
895 Laredo St Suite C, Aurora, Colorado
4.7 from 463 reviews
Rocky Mountain Roofing and Exteriors in Aurora, CO provides professional roof replacement services designed to protect homes from Colorado’s unpredictable weather. From hail damage to heavy snow and high winds, our experienced team ensures every roof is built to last. We specialize in full roof replacements that improve durability, energy efficiency, and curb appeal, giving homeowners long-term peace of mind. With a strong focus on quality workmanship and local expertise, Rocky Mountain Roofing and Exteriors is the trusted choice for reliable roofing solutions and experienced roofers in the Aurora area.
Reliable Exteriors Group
(720) 755-8800 www.therelexgroup.com
6105 S Main St #200, Aurora, Colorado
5.0 from 37 reviews
Reliable Exteriors Group is a trusted residential exterior construction company serving homeowners across the Denver Metro area. We specialize in high-quality roofing, siding, gutters, and windows, delivering durable solutions designed to protect and enhance your home. With a commitment to integrity, craftsmanship, and exceptional service, we provide personalized consultations, transparent communication, and expert installations. Whether you're repairing storm damage or upgrading your home’s exterior, our experienced team is here to help. Call today and experience the Reliable Exteriors Group difference!
Academy Roofing
(303) 360-0708 academyroofinginc.com
1610 Jasper St, Aurora, Colorado
4.8 from 146 reviews
About Academy Roofing is a locally-owned Denver roofing company. Academy Roofing was founded by current President, Curt Boyd, in 1980. His vision was to build a roofing company that customers and employees alike could trust and depend upon. With more than 40 years serving homeowners, business owners, and contractors throughout Colorado, Academy Roofing is known for exceptional service and uncompromising integrity.
Pinnacle Roofing Associates LLC Roof Repair & Replacement
(303) 589-0708 pinnacleroofingassociates.com
18121 E Hampden Ave Unit C-228, Aurora, Colorado
4.9 from 63 reviews
With over 25 years of experience, Pinnacle Roofing Associates provides reliable roofing, gutter installation and other additional services including painting, drywall repair, siding and skylight installation services in Aurora CO and the surrounding areas. Our roofing services are based out of Aurora, CO, but extend to the Denver Metro area to better serve our clients. The Centennial State has trusted us with their roof projects for eight years and counting. For more details on our roofing services, call us on (303) 589-0708.
Monumental Construction
(303) 947-4652 monumentaldenver.com
4343 S Buckley Rd Suite 350, Aurora, Colorado
4.9 from 47 reviews
Veteran Family owned and operated construction company. We specialize in Asphalt Shingles & install Complete Roofing Systems, Seamless Gutters, Windows, Skylights, Siding, Soffit, Fascia & Paint. We are fully Licensed & GAF certified, with service awards from HomeAdvisor and Angie's List, with an A+ rating in the Better Business Bureau. The Denver Metro area is one of the highest areas that endures hail storms in the country. Because of this, we use a 24/7 hail monitoring program. This is a free service that we provide to our customers this gives you the comfort of knowing your area and home is being monitored even when you are not home. We proudly served in the military and now we are proud to serve you in all of your exterior home needs.
Triple J Inc Roofing
(720) 459-4313 triplejincroofing.com
19118 E Lasalle Pl, Aurora, Colorado
4.9 from 42 reviews
Whenever you need a trustworthy roofing replacement Aurora, J Roofing is ready to help. We can help fix a leak, replace a worn out roof, and we have a track record of doing the job right the first time. We offer our services to homeowners and real estate pros. Some of our services include, roof inspections, certifications, siding, windows, and painting. We believe in treating our customers as we would like to be treated. That's why we always do quality work and use premium materials that will serve you for years. Since we are a local company, we like viewing our clients as neighbors. So if you are in the Denver Metro area, we are your go-to company for all your roofing and home exterior projects.
Linear Roofing & General Contractors
(888) 424-8280 www.linearroofing.com
Aurora, Colorado
4.8 from 72 reviews
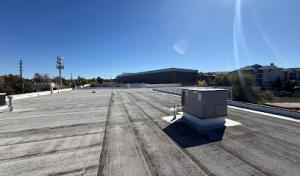
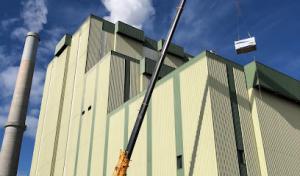
Linear roofing offers multi-family, commercial and residential roofing services. We specialize in roof replacement, repair and general contracting in Denver and all surrounding areas of Colorado. Our HAAG certified and trained team provides excellent service with quick project turnaround. Linear serves property management companies, commercial building owners and homeowners with a focus of combining quality roofing products and workmanship. We offer roof systems for both low-slope and steep-slope structures and are certified to install all Tier 1 roofing material brands. At Linear, we care about our customer's satisfaction and are dedicated to providing you with the best results possible for any size project. Your roof IS our passion.

Roof Brokers
(303) 750-1900 www.roofbrokersinc.com
2222 S Fraser St UNIT 1, Aurora, Colorado
4.7 from 92 reviews
Roof Brokers, Inc. is proud to be a Colorado Company in business since 1992, providing professional roof inspections and evaluations. We have been a member of the BBB long enough to have earned a longevity award in addition to an A+ rating. We serve the entire Denver metro area, Fort Collins, Colorado Springs, Bennett & Kiowa, and west to Bailey. We perform roof inspections, certifications, evaluations, bid for leak repairs, and single shingle repairs all the way up to complete roof replacements, as well as maintenance. One call, fax, or email in most cases gets you an inspection from Roof Brokers and/or quotes from three roof contractors within 48 hours. We provide FREE Hail and Wind checks!
Assured Roofing
(303) 646-9300 www.assuredroofing.com
Aurora, CO
4.9 from 32 reviews
We are a locally owned, family-operated, and veteran-owned business based in Aurora, CO, and proudly serving Colorado since 1997. While other roofers chase storms across the country, WE STAY HERE—committed to serving our community year-round! Assured Roofing & Exteriors is a trusted leader in roofing, skylights, gutters, painting, and window services.

Sauve Construction
(720) 475-1114 www.sauveconstruction.com
943 S Zeno Way UNIT 204, Aurora, Colorado
4.6 from 43 reviews
Sauve Construction is a leading roofing contractor in Denver Colorado. In addition to roofing, they also provide construction services for gutters, windows, decks, siding, painting and more. You can count on Sauve Construction to get the job done right!
S&S Construction Services
15200 E 33rd Pl Suite D, Aurora, Colorado
3.9 from 42 reviews
From protecting family homes to securing commercial properties nationwide, S&S Construction Services, a woman-owned family company, delivers exceptional roofing with unwavering quality and care. Experience the difference dedication makes, whether it's the roof over your loved ones or the foundation of your business. Let's build a secure future, together. Contact S&S Construction Services today.
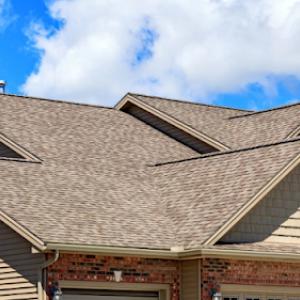
Aurora's housing stock runs a diverse gamut: asphalt shingles, metal roofing, clay tile, concrete tile, wood shingles or shakes, and synthetic or composite shingles. Each material has a practical lane in this climate, where Front Range hail exposure, freeze-thaw cycles, and winter snow shape performance. The choice should start with the roof's primary job-protecting the home from moisture-and then consider how the material handles quick temperature swings and heavy snowfall. Asphalt remains common for good reason, but metal and tile offer distinct advantages when storms hit and temperatures swing.
Freeze-thaw cycles in the shoulder seasons can speed up wear on shingles and the underlayment. The aging clock for asphalt can advance faster if granule loss accumulates and the underlayment starts to crack from repeated freezing. Metal roofs resist granule loss and can shed hail with less damage, but the fasteners and seams demand meticulous sealing to avoid panels loosening in wind-driven snow. Tile systems-clay or concrete-handle hail differently: clay is more forgiving in some impact scenarios but can crack under heavy blows if not properly supported, while concrete tends to shrug off light impacts but may crack at the edges in cold snaps. The practical takeaway is that the roof system, not just the surface, must be engineered for repetitive cold cycles. Choose underlayment with excellent moisture protection and consider a dedicated ice and water shield along eaves and rake edges where snow and ice accumulate.
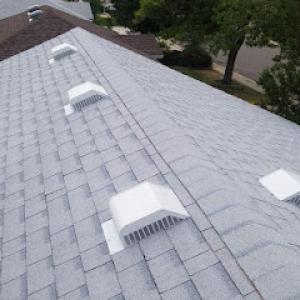
Winter snow and ice damming risk in this region makes edge detailing especially important across both shingle and tile systems. For asphalt and synthetic shingles, ensure a robust continuous underlayment at eaves and along low-slope transitions, plus properly installed drip edges to direct meltwater away from fascia and soffits. Metal roofs benefit from sealed seam detailing and careful valley flashing, since reflected sun and radiant heat can create variable expansion at joints. Tile roofs demand precise installation around rakes and eaves, with wind clips and ridge vents sized to accommodate snow load and potential freeze-thaw movement. In all cases, adequate attic ventilation and a well-sealed attic floor reduce indoor condensation and help the roof system stand up to long winters.
A practical approach is to align material characteristics with local storm patterns and maintenance capacity. Asphalt shingles offer straightforward repairs when hail damage occurs, while metal provides exceptional hail resistance with careful fastener management. Tile systems deliver longevity when installed on a properly engineered roof deck with compatible underlayment. Wood shingles or shakes bring a classic look but require fastidious maintenance to prevent moisture intrusion in snow-heavy seasons. Synthetic or composite shingles can balance weight, hail resistance, and impact performance for homes facing frequent hail events. In this climate, the best choice hinges on how a homeowner prioritizes hail resistance, edge protection, and the ability to manage freeze-thaw wear over time.
In this market, material choices drive most of the variation in your quote. Asphalt shingles sit in a relatively accessible range, about 350 to 700 USD per square. Metal roofs pull a wider, higher band from 700 to 1600 USD per square due to profile and installation nuance. Clay tile typically lands between 1000 and 2400 USD per square, while concrete tile runs 900 to 1800 USD per square. If wood shingles or shakes are selected, expect 600 to 1300 USD per square. Synthetic or composite shingles can be the most budget-friendly option among specialty materials, at roughly 500 to 900 USD per square. These ranges reflect the local housing mix, hail exposure, and the long-term durability expectations common here.
After a notable hail event, contractor demand spikes quickly, and that surge can tighten availability for a period. If a roof needs replacement in the weeks after a big storm, scheduling may slip and price pressure can rise compared to calmer times. When planning, you should expect some flexibility in both start dates and crews, as crews get booked to handle storm-impacted neighborhoods first. It's practical to line up quotes quickly after a hail event, but verify the forecast for any potential weather-driven delays that could extend the project window.
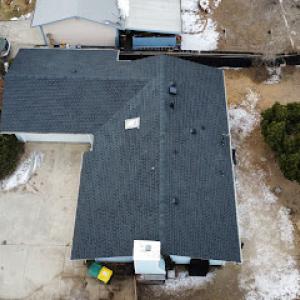
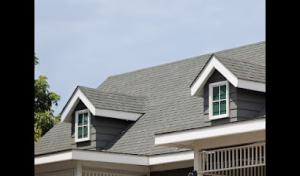
Aurora homes exhibit a mix of roof lines, dormers, and varying pitches, and more intricate layouts can trigger additional administrative steps that affect total cost. Complex roof geometry may require longer design time, more material cuts, and sometimes temporary access adjustments during the replacement. This means that two identical roof area estimates can diverge once the contractor accounts for layout intricacies. Be prepared for a modest rise in cost when the plan requires extra detailing or nonstandard configurations.
Start with a careful measurements pass of the roof area to confirm square footage, then compare material options against your priorities for durability, aesthetics, and maintenance. Given the cost ranges, a switch from asphalt to metal or tile can substantially shift the project budget, so consider long-term performance in addition to upfront price. When hail season looms, contact multiple reputable installers early in the cycle to lock in scheduling slots and to clarify itemized line items-sheathing, underlayment, and fasteners all influence final numbers. Expect weather-driven delays to be the biggest risk to timelines, not the weather itself.
Get a clear picture of your project costs upfront - no commitment required.
In Aurora, a residential full re-roof typically requires a City of Aurora building permit. The permit helps ensure that the new roof meets local wind and weather requirements and that the work aligns with setback and ventilation rules for the structure. This is not a formality you can skip; a compliant permit reduces the risk of scheduling delays or later issues with homeowners' insurance claims. Metering and retrofit of skylight openings, vent stacks, and metal flashing can trigger additional permit conditions. Expect a review timeline that adapts to weather and the city's inspection queue.
Applications are commonly submitted by the contractor either online or in person, depending on the firm's workflow and current city options. A typical submission includes project details, roof replacement scope, material selections, and proof of contractor license and insurance. The city's staff will review for code compliance, including flashing, vent placement, and required attic ventilation. Plan for a brief review window if the project includes complex elements such as a mixed roof plane, metal flashing upgrades, or skylight modifications. Busy seasons may slow document handling; contractors attach subcontractor licenses and proof of workers' compensation. The plan set should show slope calculations and drainage paths. Have the contractor provide a formal schedule of inspection windows to reduce back-and-forth delays.
Inspections typically occur at underlayment or deck stage and again at final. The underlayment inspection confirms that the roof deck is solid, properly fastened, and that the underlayment is installed in a weather-tight manner. The final inspection validates that utilities, penetrations, and transitions are properly sealed and that the overall installation aligns with the approved plans. Complex roofs may receive plan review with contractor license and insurance documentation required. Keep copies of your permits and notices of inspection on site so workers and inspectors have immediate access. Inspectors may request attic count zones or bolstered shields on reflections from metal roofs. If a prior re-roof occurred, expect a more detailed review. Document any conditions and photos to accompany the plan review.
Coordinate timing with your contractor so that inspection slots align with critical milestones to avoid rework or weather delays. If a plan review is needed, expect some back-and-forth on details such as venting, drip edge, and attic hatch closures. Having the license and insurance documentation ready early can streamline approval. Ask your contractor to provide a pre-inspection checklist and a clear schedule that shows when the underlayment, decking, and final inspections will occur, since the pace of re-roof projects in a populous suburban area hinges on inspector availability and permit status. Keep digital copies of permit correspondence and amendments. If access is limited, arrange a pre-inspection walkthrough to spot deficiencies early.
In the area's winters, snow loading and ice damming push against roofs in ways that can turn a small flashing seam or ventilation gap into a stubborn interior leak. Ice creates additional weight and expands the risk of shingle laps lifting or valley flashing pulling away. Vulnerable spots to watch include where a roof meets a gutter line, around dormers, and at chimney terminations. The practical consequence is that a routine flashing check in fall becomes a proactive shield: inspect seals around vent stacks, re-caulk any gaps, and ensure eaves have unobstructed downstream drainage. If icicles hang aggressively along the rake edges, consider a quick assessment of attic insulation and ventilation to prevent warm, moist air from meeting the cold roof deck and freezing up at the eaves.
Summer thunderstorms and high winds can expose edge flashing and expose vulnerabilities created during prior storm seasons. In a typical Aurora home with asphalt, metal, or concrete tile, the first strong gust after a hail or heavy rain event is often when trouble shows up. Look for loose or lifted edge tiles, bent drip edges, and any shingle or panel edge that looks uneven or creased. A damaged edge can catch wind like a sail, accelerating deterioration and creating unchecked water entry paths. Replace or secure loose pieces promptly, and re-seal any fastener corrosion. If a roof edge has a history of wind-driven leaks, consider a targeted edge reinforcement plan for the next maintenance cycle to slow repeat damage and reduce interior risk.
Emergency tarping demand climbs when a storm hits and cold weather follows, because temporary protection is the only thing that stands between a leaking interior and more costly repairs while weather, schedules, and crews line up for a full replacement. When tarping, prioritize a snug, weather-tight seal at the most vulnerable edge and around penetrations. Use heavy-duty tarps, secure with roofing nails or screws, and lay a plywood base to prevent tearing from wind. Keep a plan in place for rapid tarping after a hail event or a sudden roof breach, and document damage with photos for insurance follow-up so the temporary cover doesn't become a long-term patch rather than a proper fix.
When you can't wait, these contractors offer fast response times to stop leaks and prevent further damage.
Rocky Mountain Roofing & Exteriors
895 Laredo St Suite C, Aurora, Colorado
4.7 from 463 reviews

Aurora is a high-claim roofing market because hail and wind events regularly generate concentrated damage across neighborhoods. When a storm hits, neighboring homes can show very different damage patterns, so documenting what happened is essential. Insurers serving this area commonly coordinate adjusters with contractors and may apply depreciation rules that affect how much of a roof replacement is reimbursed. Understanding these dynamics helps you align your expectations with the process and protect your investment.
Immediately after hail or wind damage, gather clear, date-stamped photos from multiple angles: shingles, flashing, gutters, and any interior signs of leakage. Collect contractor estimates that show scope, materials, and line-item quantities. If the carrier requests a roof-condition report or a professional assessment, have that report ready and submitted promptly. In practice, keeping a dated file with photographs and notes helps you track deterioration as the season progresses and supports a straightforward claim review.
Because insurers often pair adjusters with local contractors, it helps to identify a trusted, independent inspector or estimator who can provide a second opinion if needed. Your contractor should be prepared to walk through the roof with the adjuster, point out hail impact zones, and explain any wind-related losses that aren't immediately obvious from the ground. Make sure estimates reflect the actual replacement scope, including underlayment, flashing, and ventilation components, so the assessment doesn't hinge on a narrow interpretation of damage.
Depreciation rules can influence when a replacement is approved and paid, so you want a clear record of damage and the estimated replacement timeline. If repairs are proposed as a temporary measure, ensure you understand how long that solution remains viable and what triggers a full replacement. Having organized documentation makes it easier to navigate decisions when insurers request updates or additional information after an initial evaluation.
Connect with contractors who help homeowners navigate the claims process from damage assessment to final approval.
Roof Solutions
(720) 789-8985 roofsolutionsco.com
6320 S Newbern Way, Aurora, Colorado
5.0 from 75 reviews
Rocky Mountain Roofing & Exteriors
895 Laredo St Suite C, Aurora, Colorado
4.7 from 463 reviews
Reliable Exteriors Group
(720) 755-8800 www.therelexgroup.com
6105 S Main St #200, Aurora, Colorado
5.0 from 37 reviews