Last updated: Apr 19, 2026
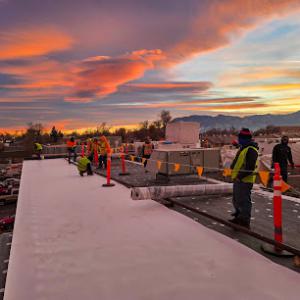
Spring brings rapid weather swings and heavy hail exposure along the Front Range, and that combination compresses contractor schedules. When a major hailstorm hits, crews flock to the high-demand market, and slots can fill up in a matter of days. If a roof is damaged, delays mean more exposed underlayment, potential leaks, and cascading issues with attic ventilation and interior finishes. Acting quickly helps lock in a suitable contractor, ensure your insurance window stays open, and reduces the risk of secondary damage that can complicate a claim later.
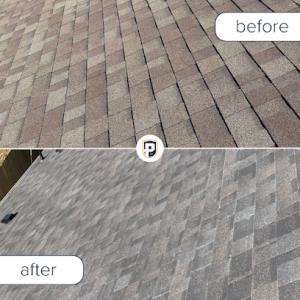
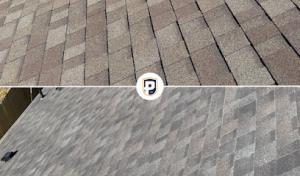
Insurers in this market consistently seek photo documentation, clear storm-date context, and evidence distinguishing new hail strikes from prior wear. A homeowner who can provide dated photos of the damage after the storm, plus a simple diary of the storm sequence (dates, hail size if known, wind events, and any related leaks), strengthens the claim. Supplying comparative shots of pre-storm conditions alongside post-storm conditions helps the adjuster see the difference, especially on roofs with complex textures, dormers, or skylights. If gutters, fascia, or window screens show hail impact as well, include those images to build a cohesive narrative. This is not a one-and-done task; the clearer the record, the less room the insurer provides for piecemeal repairs or denial.
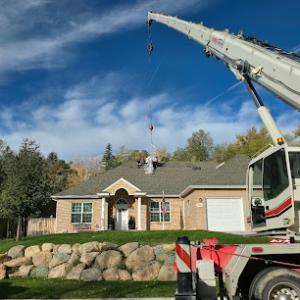
After a major hail event, adjusters often lean toward full replacement rather than isolated patching because matching and remaining service life become harder to justify. The goal is to avoid a half-fix that looks out of place on a roof with varied panels, colors, and textures from years of weather exposure. A full replacement may be recommended if severe granule loss, widespread denting, or sustained wind uplift is evident, and if the roof's remaining life would be limited by age and prior wear. If that happens, prepare for a decision timeline that aligns with the adjuster's assessment, but do not hesitate to request a second opinion or bring in your own trusted contractor to validate the claim scope. Consistency in materials and color across the roof helps preserve home value and curb appeal, especially on high-profile front facades common in this market.
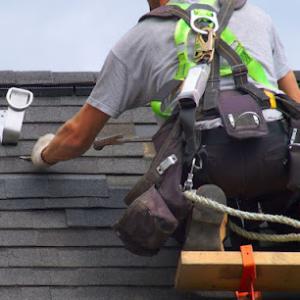
Start with a rapid post-storm roof inspection by a licensed professional who understands Colorado's wind-driven hail patterns. Capture high-resolution images that show impact marks, granule loss, and flashing condition around chimneys and vents. Keep a simple log of damage zones and any interior signs of intrusion, such as staining in the attic or ceiling. When meeting with the adjuster, present a straightforward, itemized scope of work that addresses wind-related vulnerabilities-ventilation, flashing, and eave detailing-baked into the replacement plan. In a climate where spring storms cluster and schedules tighten, readiness and precise documentation translate to fewer delays and a more favorable, timely roof recovery.
Pioneer Construction & Roofing
(719) 822-9222 pioneer-cos.com
405 Juanita St, Colorado Springs, Colorado
5.0 from 164 reviews
Pioneer Construction is a full-service general contractor specializing in roofing, painting, siding, gutters, and windows. Recognized as a top roofing contractor by Forbes, we’ve built a reputation for providing high-quality craftsmanship and unparalleled customer service. With over 20 years of experience, our team combines expertise and dedication to deliver exceptional results on every project. We also specialize in helping clients navigate the complexities of the insurance claim process. We will guide you through every step and work with your insurance directly, ensuring you receive the maximum coverage available. Let us show you why we're recognized as a leader in the roofing industry - your satisfaction is our priority!
Native Roofing & Solar
6636 Delmonico Dr, Colorado Springs, Colorado
4.9 from 590 reviews
We are a locally owned roofing and solar company. Our mission is to provide excellent quality and service to every client. We pride ourselves in offering affordable pricing while also maintaining a strict standard of excellence. We are insurance restoration claims experts who strive in getting homeowners everything they deserve while we return their home back to pre-storm condition. One of our mottos is to “leave every home better than we found out.” Along with roofing and solar, we also service windows, painting and gutters.
Pierce Roofing
(719) 630-1044 pierceroofingco.com
309 Mt View Ln, Colorado Springs, Colorado
5.0 from 239 reviews
Brian Pierce, owner, has over 30 years of roofing experience in the Pikes Peak region. Brian began roofing with his father as a young man and wore his tool bags for 17 years roofing hundreds of homes all over Colorado. Then in 2005, Brian and his wife Karen, decided to start their own roofing business called "Brian Pierce Roofing". After 15 years of successful service to Colorado Springs and the introduction of his sons into his business, Brian found that the name "Pierce Roofing" better fit the company. Pierce Roofing has deep roots in the Colorado roofing industry and a family dedicated to serving their customers. You can be certain that the job we do for you will be done with excellence!
Petrali Roofing - Central
(719) 375-8773 petraliroofing.com
5376 Tomah Dr #101, Colorado Springs, Colorado
4.9 from 496 reviews
Come visit Petrali Roofing at our new headquarters located Just off Powers & Barnes at 4505 Chaparral Road, 80917. Petrali Roofing specializes in residential and commercial roofing services in Colorado Springs and the surrounding areas, serving both homeowners and business owners with trusted, high-quality roofing solutions. We provide new roof installations, roof replacements, expert hail claim management, roof repairs, and emergency leak response throughout Monument, Black Forest, Colorado Springs, Peyton, Falcon, Manitou Springs, Fountain and nearby cities. Contact us today for a Free, 21-Point Inspection! Quality is in our DNA!
Liberty Construction
(719) 465-2788 colibertysolutions.com
88 Talamine Ct, Colorado Springs, Colorado
5.0 from 140 reviews
Are you looking to add value and integrity to your home? Upgrade your roofing and exteriors in Colorado Springs, CO with Liberty Construction. We believe in delivering top-notch services with a personal touch. As proud supporters of our military community, we offer exclusive military discounts to honor your service. Plus, our free estimates ensure you know exactly what to expect without any surprises. From renovations to new builds, we've got you covered. We do it all, from roofing and gutters to painting, windows, and doors. Contact us today and let's get started!
Guardian Roofing & Restoration
(719) 755-8465 www.guardianroofingandrestorationllc.com
635 Southpointe Ct suite 200, Colorado Springs, Colorado
5.0 from 94 reviews
Guardian Roofing and Restoration is a locally owned and operated roofing company in Colorado Springs, CO that is committed to excellence in every aspect of our business. We service most surrounding areas as well. Our distinction is the quality of service we bring to our customers. Accurate knowledge of our trade combined with ability is what makes us true professionals. We offer a variety of services such as roof replacement, roof leak repair, roof skylight installation, and we specialize in hail damage repairs and working with your insurance for support through a claim. Call today!
Wyndhill Roofing
(719) 344-9724 www.wyndhillroofing.com
2315 E St Vrain St, Colorado Springs, Colorado
4.9 from 254 reviews
Wyndhill Roofing is a locally owned and operated Colorado roofing contractor, proudly serving homeowners and businesses across all of Colorado since 2013. We specialize in residential and commercial roof replacement, roof repairs, storm and hail damage restoration, metal roofing, and insurance claim assistance. Fully licensed and insured, our experienced team delivers high-quality workmanship, premium materials, and dependable service from inspection to completion. Contact Wyndhill Roofing today to schedule a free roof inspection or estimate anywhere in Colorado.
CO Roofing & Solar
(719) 232-8747 www.coroofing.com
5590 N Academy Blvd, Colorado Springs, Colorado
4.9 from 178 reviews
CO Roofing & Solar is your trusted provider of comprehensive roofing and solar solutions in Colorado Springs, CO. As a leading residential and commercial roofing and solar contractor since 2006, we are committed to delivering top-notch services tailored to your needs. Our skilled team specializes in class 4 impact resistant roofing systems. With our expertise and dedication, we ensure your roofing and solar projects are executed with precision and excellence. Experience the power of sustainable energy and superior roofing solutions with CO Roofing & Solar in Colorado Springs, CO.
Rampart Roofing
(719) 487-7663 www.rampartroofing.com
912 N Circle Dr, Colorado Springs, Colorado
4.9 from 552 reviews
Rampart Roofing, a local and family-owned company, specializes in installing top-quality roofing products with an emphasis on detail and excellence.
High Valley Roofing
(719) 249-7818 highvalleyroofing.com
1125 Bayfield Dr, Colorado Springs, Colorado
5.0 from 71 reviews
High Valley Roofing, LLC is your top choice for roofing services in Colorado Springs, specializing in roof repair, replacement, and hail damage repair for both residential and commercial clients. As one of the top roofing companies in the area, we excel in metal roofing and emergency roof repair, offering high-quality craftsmanship with premium materials. Located at our Home Office 1125 Bayfield Dr, we pride ourselves on being the best roofing company near you, delivering exceptional service and customer satisfaction. Our experienced team is dedicated to providing competitive pricing and free estimates, ensuring transparency and trust. Contact us today for all your roofing contractor needs in Colorado Springs.
Cheyenne Mountain Roofing - Colorado Springs Roof Repair & Replacement
(719) 259-0731 cheyennemtnroofing.com
712 Clark Pl Unit 110, Colorado Springs, Colorado
4.9 from 224 reviews
We are a Residential and Commercial roofing contractor. We perform both repairs and replacement of all types of roofing systems. We pride our self on excellent customer service and educating owners on quality roofing systems.
Rock Solid Roofing
(719) 799-3329 rocksolidroof.com
1705 S 8th St, Colorado Springs, Colorado
5.0 from 69 reviews
Rock Solid Roofing is a locally owned roofing contractor serving Colorado Springs, Monument, and the Front Range since 2006. We specialize in hail & wind storm restoration—roofing plus coordination of gutters, siding/stucco, windows, and interior leak repairs—so you have one point of contact after a storm. We also handle residential, commercial & multifamily roof replacements, including flat/low-slope TPO/EPDM. Certified insurance adjuster on staff to document damage, meet the carrier adjuster, and support an accurate scope. Coverage decisions are made by your insurer. Call/text for a free inspection.
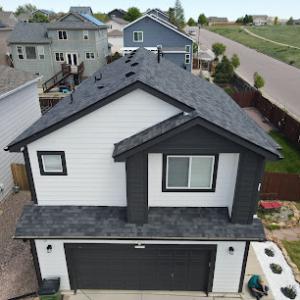
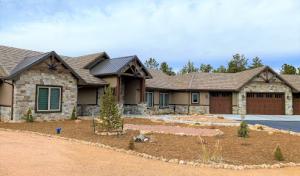
Asphalt shingles remain common in Colorado Springs, but hail resistance is a central buying factor because frequent hail can shorten replacement cycles compared with calmer markets. When evaluating asphalt, focus on impact-resistant (IR) or laminated shingles rather than basic strip varieties. Look for higher wind uplift ratings and evidence of stout nailing patterns, since high winds and rapidly changing weather can loosen shingles even after a professional install. In practical terms, choose a product with a thicker layer and a robust warranty that covers hail impact. Also consider a roof deck inspection plan after hail events to verify there are no hidden delaminations or nail pops that could compromise long-term performance.
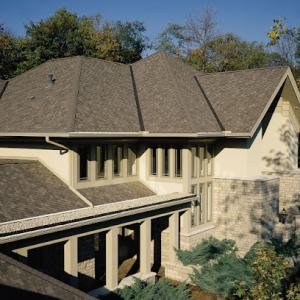
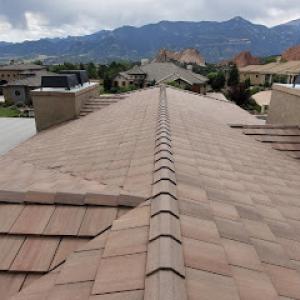
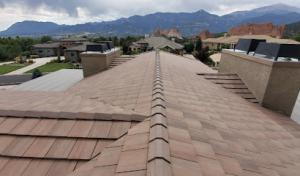
Tile roofs are visible in the market here, but both clay and concrete can suffer impact breakage from hail and require careful inspection for cracked individual units after storms. If you already have a tile roof, discuss with the installer or a tile specialist about upgrading to a more impact-tolerant tile profile or switching to a reinforced underlayment and improved flashing details. For new installs, weigh the trade-offs: clay tends to be lighter visually and offers color longevity, while concrete provides heavier impact resistance but can be more brittle in extreme freeze-thaw cycles. Regardless of material, plan for more frequent spot-checks after hail events to catch cracked or misaligned tiles before water intrusion begins. Ensure installers address proper ventilation and comprehensive sealing at hips, ridges, and penetrations, since misfits there amplify stress in severe Colorado weather.
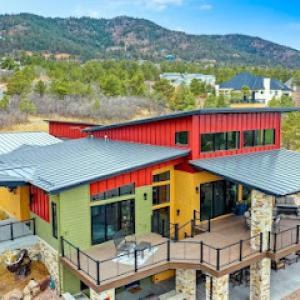
Metal roofing handles hail well when installed with proper fasteners and a secure, continuous underlayment. In this climate, metal's UV resistance helps with long-term color retention and reflection of summer heat. However, metal panels require meticulous flashing and edge detailing to resist wind-driven moisture during winter storms. A dedicated venting strategy matters for metal roofs to prevent condensation trapped behind the panels. If choosing metal, prioritize systems with rigorous edge sealing and a proven track record in Front Range conditions, and insist on a professional assessment of fastener layout to minimize lingering panel movement after hail impacts.
Synthetic and composite shingles offer a practical middle ground, combining hail resistance with a lighter weight profile and a broad color selection. In a high-UV environment, these products often maintain color and flexibility longer than some natural materials, reducing the risk of cracking or chalking. Look for cores and laminates designed for freeze-thaw cycles, and verify dimpling or indentation tendencies after hail tests. As with other materials, ensure the installation includes reinforced edge details and a robust underlayment that can withstand the Front Range's rapid weather swings.
Regardless of material, emphasize three elements: impact resistance, flashing and edge detailing, and ventilation. The Front Range's sunny semi-arid climate injects strong UV exposure in summer, while winter freeze-thaw cycles stress underlayments and sealants across all roof types. A sound installation that integrates wind-resistant flashing at eaves and penetrations, along with a well-ventilated attic to moderate temperature swings, will extend the life of the roof. After a hailstorm, prioritize a professional inspection to identify cracked units, popped nails, or compromised sealants, then plan timely repairs to prevent interior damage.
The local pricing picture for roofing starts with the common material options and their behavior here at high elevation with Front Range hail exposure. For asphalt shingles, the provided local ranges run about $360 to $750 per square. If metal is in your plan, expect roughly $800 to $1,600 per square. Clay tile sits around $900 to $1,700 per square, while concrete tile runs about $1,000 to $1,600 per square. Wood shingles or shakes tend to be in the $600 to $1,100 per square bracket, and synthetic or composite shingles sit in the $520 to $900 per square range. These figures reflect typical replacement projects in our market and can shift based on roof complexity, attic ventilation, and the level of flashing detail needed.
Colorado Springs pricing can rise after major hail events because storm-driven demand spikes affect labor availability, scheduling, and material lead times across the re-roofing market. In the days and weeks after a hailstorm, crews may be booked out, and suppliers might be backed up for faster-delivery materials. That squeeze can push both labor rates and lead times upward, so you'll often see higher bids or compressed timelines following hail. If you anticipate ongoing hail repairs, align expectations with neighbors and local contractors about potential delays so your project doesn't surprise you with a rushed decision or a missed window.
Costs here are also shaped by permit requirements for full replacement, inspection coordination with the city, and the added attention often needed for ventilation, flashing, and wind-resistance details. You'll notice that the difference between a straightforward shingle replacement and a more complex, wind-rated installation isn't just the material, but also the kneepoints of the roof line, attic venting strategy, drip-edge quality, and flashing around chimneys, skylights, and valleys. For higher-wind zones and hail-prone sections, the plan often includes upgraded underlayment, HIP ventilation considerations, and enhanced edge metal, all of which can lift the project price beyond the raw material rate.
Before committing, compare multiple bids and ask each contractor to itemize labor, disposal, and material costs, plus any recommended wind-resistance upgrades. If you're deciding between materials, weigh not only the upfront per-square cost but the long-term performance in hail-prone conditions and the potential need for more frequent maintenance. For metal, consider coating options and metal gauge that balance durability with cost over the life of the roof. With clay or concrete tiles, verify deck support and weight requirements, since heavier options can necessitate additional framing adjustments. Plan ahead for after-storm demand by scheduling a strategic inspection window rather than waiting for a sudden hail-damaged urgency.
Get a clear picture of your project costs upfront - no commitment required.
Liberty Construction
(719) 465-2788 colibertysolutions.com
88 Talamine Ct, Colorado Springs, Colorado
5.0 from 140 reviews
Wyndhill Roofing
(719) 344-9724 www.wyndhillroofing.com
2315 E St Vrain St, Colorado Springs, Colorado
4.9 from 254 reviews
High Valley Roofing
(719) 249-7818 highvalleyroofing.com
1125 Bayfield Dr, Colorado Springs, Colorado
5.0 from 71 reviews
A full residential roof replacement in Colorado Springs typically requires a permit submitted to the City of Colorado Springs Building Department. The permit process isn't just a formality, and it helps ensure the work will meet wind resistance, proper flashing, and ventilation standards that matter in this climate. Before any shingle tear-off begins, your contractor should pull the permit, line up the required drawings, and schedule inspections. Expect the process to involve a plan review and on-site verification that the new roof components and attic venting match the approved design. Delays can happen if a submittal isn't complete, so confirm who is handling the permit paperwork and what documents the city will expect.
Inspections in Colorado Springs occur at key installation milestones and again at final completion rather than being treated as a purely paperwork-only reroof process. Typical checkpoints include a pre-installation framing or sheathing inspection, a mid-installation inspection to verify nailing patterns, attic ventilation, and flashing details, and a final inspection to confirm all components meet code and the permit scope. Planning around these visits helps you coordinate with your contractor and avoid last-minute surprises. Keep a visible record of the inspection dates and any notes from the building official, and ensure access is clear for inspectors during peak work windows.
Local review may focus on wind-resistance and ventilation compliance, including attic venting and flashing details that can affect approval and long-term performance. Colorado Springs experiences rapid weather swings and high winds, so the contractor should emphasize a wind-rated underlayment, ridge and continuous eave ventilation, and properly sealed flashing around chimneys, vents, and skylights. Attic venting should be sized and balanced to prevent moisture buildup and hot spots in summer; improper venting can reduce roof life and complicate inspections. If the attic is insulated, confirm that the new installation won't block vents or create pinch points for airflow. For flashing, insist on corrosion-resistant materials and a continuous, properly lapped setup that minimizes gaps at roof-to-wall transitions and around proprietary vent elbows.
Ask the contractor how they will document compliance with wind and ventilation requirements for the city's file, including photos of critical details and a labeled vent map. Understand who will be on site for each inspection window and what to expect in terms of access, timing, and weather contingencies. A well-planned permitting and inspection sequence reduces risks of rework and contributes to a resilient roof that stands up to hail, wind, and the seasonal shifts that define this area.
Winter in this high-desert climate brings snow, ice, and days where temperatures bounce between below freezing and just above. Those freeze-thaw cycles make safe access to the roof a daily challenge, and they slow or halt tear-off and installation. Shingles, underlayment, and sealants don't perform the same when temperatures dive; ladders slip more easily, adhesive products can seize or fail to cure, and crews may need to delay work until surfaces are dry and temperatures stay above a workable threshold for several hours. If a storm dumps deep snow, crews often have to clear and re-tarp sections, which pushes timelines and increases the chance of rework. Expect intermittent delays after heavy snowfall and during cold snaps, and plan around days when crews can safely handle materials to avoid post-install issues.
The other side of the calendar brings long, hot days and intense sun. In this climate, exposed underlayments can dry out and degrade faster when left uncovered or installed during peak heat, which can compromise wind uplift resistance and overall roof performance. Sealant performance becomes a consideration too: some products cure more slowly or fail to seal properly if temperatures spike mid-sequence or if a roof is left partially exposed between steps. Scheduling becomes a careful game of chasing mild mornings and cooler afternoons, coordinating material deliveries to minimize time on a hot surface, and ensuring crews have adequate shade and hydration to maintain quality. The heat also magnifies the consequences of even small mistakes in nailing or flashing installation, so patience during mid-summer sequencing matters.
Autumn introduces its own volatility: gusty winds and sudden storms can trigger last-minute damage calls and push replacement timelines aside from the usual spring peak. Wind-driven debris, shingle curling, and edge damage can appear overnight, creating unexpected scoping changes and urgent repairs that interrupt planned sequences. As temperatures begin to moderate, crews may face shorter daylight windows and more rapid weather shifts, which heighten the risk of rushed work and overlooked details. Acknowledge that autumn weather can reshape the calendar on short notice, and build contingency time for inspections, re-nail checks, and flashing verifications so high-wind episodes don't undermine the finished roof.
Colorado's bright days and high elevation mean skylights and rooftop solar penetrations sit under more annual sun exposure and stronger UV than many markets. That sun exposure makes flashing around these penetrations a frequent inspection point after hail events, and it also heightens the need for robust, well-sealed flashing details during any reroof. If a skylight or solar array shares a roof plane with venting or attic access, the chances of wind-driven leaks grow unless the transition from sheet metal to flashing is continuous and properly backed by sealing underlayment.
Hail in this area isn't a one-and-done event; it often reveals itself in the days after a storm as tiny leaks near roof penetrations. When a roof is being replaced, plan for multiple pass inspection around penetrations, especially where the skylight curb or racking rails intersect the roof deck. A focused check on rake and valley flashing near skylight units helps catch micro-cracks and loose fasteners before they become active leaks. Have the contractor document the exact flashing details around each penetration, including step-flashing, end-ginger seals, and drip edge alignment.
Because local permit review may consider flashing and ventilation details, skylight and solar-adjacent reroof work needs careful coordination during replacement projects. Tie in the flashing around skylights and solar mounts with the main roofing system so there is a continuous, weather-tight barrier. If a vent or exhaust stack sits adjacent to a skylight, ensure the shared flashing is integrated, not stacked awkwardly on top of one another. The goal is a seamless transition that avoids voids where wind-driven rain can intrusion.
After severe weather, inspect around every skylight curb and solar attachment. Look for lifted shingles, loose nails, and flashing gaps. In Colorado Springs, small gaps can widen quickly with wind gusts and freeze-thaw cycles, so address any suspect areas promptly. A short, targeted follow-up inspection after the first full season is a practical habit to keep the roof resilient to the next round of sun and hail.
Find contractors experienced in skylight installation, flashing, and leak repairs to bring natural light into your home.
Petrali Roofing - Central
(719) 375-8773 petraliroofing.com
5376 Tomah Dr #101, Colorado Springs, Colorado
4.9 from 496 reviews
Guardian Roofing & Restoration
(719) 755-8465 www.guardianroofingandrestorationllc.com
635 Southpointe Ct suite 200, Colorado Springs, Colorado
5.0 from 94 reviews
Wyndhill Roofing
(719) 344-9724 www.wyndhillroofing.com
2315 E St Vrain St, Colorado Springs, Colorado
4.9 from 254 reviews
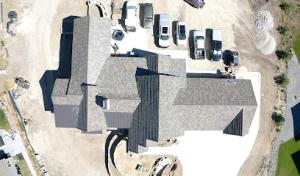
Although pitched residential roofs dominate, Colorado Springs also has a meaningful low-slope segment in additions, porches, and mixed residential-commercial work reflected by active flat-roof specialists. Those projects bring unique material choices-from modified bitumen and EPDM to TPO-that respond differently to spring hail and fast-moving winter fronts. When assessing a low-slope roof, consider how the original installation era and the contractor's flat-roof experience influence current performance, especially around edge details and flashing transitions.
Hail and wind in this area can damage membranes, seams, and edge details differently than steep-slope systems, so inspection methods and repair scopes often diverge. Look closely at seam laps, exposed fasteners, and terminations at parapets or parapet-like edges. In storms, damage may appear subtle but compromise ponding resistance and slope drainage, inviting water intrusion under flashing. A thorough inspection should include interior checks for staining near walls, plus a careful lift-and-seal assessment of flashings where roof-to-wall transitions occur. If hail hits, scrutinize the fastener pattern and any hail pitting on roof surfaces; even small breaches can escalate quickly with the dry, sun-drenched periods that follow.
The city's storm history still drives whether repair or replacement makes sense. After significant hail or multiple wind events, a low-slope roof may benefit from a full replacement to refresh the membrane, reinforce edge details, and ensure uniform insulation and ventilation at the decking level. Conversely, minor hail damage with intact underlying layers and no moisture intrusion can sometimes be addressed with targeted patching and resealing, provided drainage remains unblocked and coatings are compatible with the chosen membrane.
The dry sunny summers can make restoration and coating discussions relevant on some low-slope assemblies, but the choice hinges on present condition and future weather exposure. Reflective or elastomeric coatings can extend life on compatible membranes if the substrate is sound and vented, yet coatings must align with local temperature swings and roof geometry. For additions or porches, coordinate coating schedules with any interior HVAC or attic ventilation considerations to avoid trapping moisture behind changes in system airflow.
Find specialists in TPO, EPDM, and built-up flat roofing systems for residential and commercial properties.
Wyndhill Roofing
(719) 344-9724 www.wyndhillroofing.com
2315 E St Vrain St, Colorado Springs, Colorado
4.9 from 254 reviews
Rampart Roofing
(719) 487-7663 www.rampartroofing.com
912 N Circle Dr, Colorado Springs, Colorado
4.9 from 552 reviews
Cheyenne Mountain Roofing - Colorado Springs Roof Repair & Replacement
(719) 259-0731 cheyennemtnroofing.com
712 Clark Pl Unit 110, Colorado Springs, Colorado
4.9 from 224 reviews
Because Colorado Springs sees repeated hail and wind events, homeowners benefit from keeping dated roof photos to help separate current storm damage from prior conditions. Start a simple filing habit: store images by date, storm name if available, and note the approximate time of day. When taking photos, capture the whole roof layout first, then close-ups of hail dents, lifted shingles, and exposed flashing. Include nearby features such as chimneys, vents, and fascia for reference. A quick, dated log alongside the shots can prevent confusion when insurers review the file after a claim.
Local claim handling often turns on documentation of collateral indicators and roof-slope photos because insurers may question whether damage is functional, cosmetic, or pre-existing. Document attic ventilation, signs of moisture intrusion, and any observed sagging or step-cracking in valleys. Photograph the roof slope from multiple angles; steeper pitches, common in this market, can alter the interpretation of wear versus new impacts. Collect evidence of previous repairs or patches with dates if visible from the exterior. Clear, well-organized images help separate workmanship issues from genuine storm damage.
Storm-heavy years can affect insurer timelines and coverage decisions in this market, making prompt inspection and organized records more important than in lower-claim cities. Arrange an inspection promptly after a major event, and keep a simple, dated progress log. Share the log and photos with the insurer or adjusting adjuster as soon as the report is ready. If rows of hail impacts line up in a street, note that pattern in the file so decisions aren't clouded by a single, scattered photo set.