Last updated: Apr 19, 2026
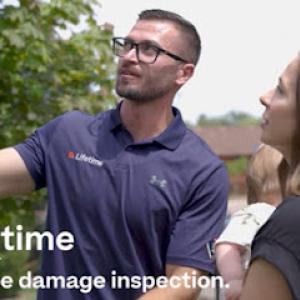
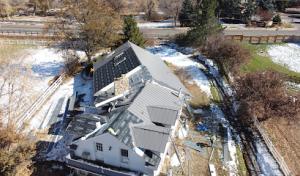
Denver sits along the Front Range, where spring hail is a routine roofing hazard and a major driver of full roof replacements. The weather here can flip from sun-soaked to sleet-cold in a matter of hours, and hail alone can create a cascade of damage that isn't always visible from street level. This section speaks directly to homeowners facing hail events, with practical steps to protect your home, document damage, and navigate the claim process when storms roll through.
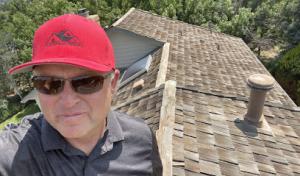
When the storm clears, the first priority is to protect the roof and interior from further exposure. In this climate, hail can create microcracks in shingles that may look harmless at first glance but can let water permeate during the next warm spell or quick freezing-thaw cycle. Immediate temporary protection matters: tarping exposed areas, covering broken skylights, and securing loose gutters that could become projectiles in a gust line. In practice, a careful, careful assessment from ground level won't always reveal the full extent of damage. So, plan for a walk-around with a flashlight at dusk or dawn to notice lifted granules, dented metal edging, or pocked shingles that only show up when sunlight angle hits them just right. Because spring hail exposure is routine here, expect that some damage won't be obvious until weeks later when a weather cycle reveals a stained ceiling, a damp spot on an attic sheathing, or granules washing into gutters.
During the days after a hail event, the most reliable path to a proper evaluation is a documented, scheduled inspection by a licensed roofer who understands this climate's peculiarities. A reputable local contractor should begin with a careful exterior inspection and, if warranted, a comprehensive interior look for signs of moisture intrusion. The goal is to identify whether the hail caused discrete impact damage, and whether that damage aligns with the storm date and weather record. This is where a coordinated approach with the insurance process matters: your contractor should help translate what they find on the roof into claim-worthy evidence that matches the adjuster's expectations.
A successful claim in this market hinges on thorough photo documentation that captures both broad views and close-ups of suspected impacts. Start with photos of the entire roof from multiple angles, then zoom in on any bruising, chipping, or granule loss. Photograph all visible damages to gutters, flashing, vents, skylights, and nearby siding if moisture has a path to your interior. It's not unusual for a Denver storm to ripple through a neighborhood in a single afternoon-so you want time-stamped, dated images and a simple narrative that connects the date to the observed damage. Keep a dated log of every contact with your insurer or adjuster, and request an itemized claim lodgment receipt that shows the exact scope of coverage being considered. When possible, align your documentation with the actual storm date as recorded by local weather data, because adjusters often cross-check storm timing against meteorological records.
Arrange an on-site adjuster inspection promptly after you've secured the most critical photos and a preliminary roofer assessment. The adjuster will want to see the same damage you documented, plus any prior conditions that could complicate the claim. Your roofer can help prepare a detailed damage report that explains how hail interacts with this specific roof type and elevation, which is essential for convincing an insurer that a full replacement is warranted rather than a patch or cosmetic fix. If a dispute arises over the extent of damage, you'll benefit from a clear, evidence-backed report that demonstrates consistent hail impact patterns across the roof plane and a strong link to the storm date.
Post-storm contractor demand spikes are common in this market, which can lengthen scheduling for inspections, temporary protection, and full replacement. Secure a firm appointment as soon as feasible, and be explicit about urgency if interior leaks are involved. Some insurers require a specific window for the adjuster to view the roof, so coordinate with your contractor to produce a turnkey package: pre-inspection documentation, a robust damage report, and a contingent replacement plan that aligns to the insurance scope. Expect a back-and-forth as the claim moves through the system, and plan for potential delays caused by high demand after major hail events. Stay proactive, keep the lines of communication open with your contractor and insurer, and document every step-the Front Range weather pattern rewards homeowners who stay organized and vigilant in the moments after a hailstorm.
Lifetime Roof & Solar - Denver
(303) 335-6097 mylifetimehome.com
9525 E 40th Ave suite 160C, Denver, Colorado
5.0 from 434 reviews
Denver's trusted choice for top-quality roofing and solar solutions, Lifetime Roof & Solar is a GAF Master Elite contractor bringing peace of mind to homeowners. We understand replacing your roof is a big decision. That's why we offer hassle-free assessments and a consultative approach to ensure you get the perfect fit for your home, increasing its value. With over 10,000 successful projects in the Denver metro area, our experienced team is dedicated to exceeding expectations. We're committed to quality, backed by an A+ Better Business Bureau rating and a lifetime warranty on our work. Schedule your free consultation today and experience the Lifetime difference!
New Roof Plus
(303) 529-7554 www.newroofplus.com
110 16th St Mall Suite 1455, Denver, Colorado
5.0 from 180 reviews
New Roof Plus, located in the heart of Denver, is your premier destination for all roofing needs, specializing in both residential and commercial flat roofs. As top-rated Denver roofing contractors, we excel in roof repair and installation, offering advanced solutions like metal roofing and hail-proof Class 4 shingles. Our expert team is led by Haag-certified inspector Greg Jones, ensuring thorough, quality service. We provide free roof inspections and work closely with insurance providers to maximize your benefits, making us your go-to "roofing contractor" for reliable Denver roofing and outstanding customer service. We serve the entire Denver Metro Area, including Littleton, Lakewood, Centennial, Arvada, Englewood, and more. Call today!
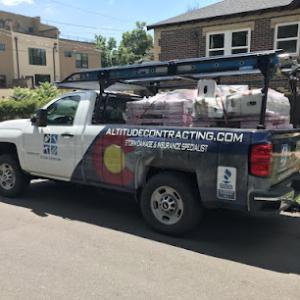
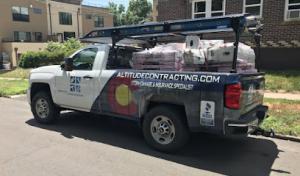
Altitude Contracting
(720) 329-4113 www.altitudecontracting.com
3701 S Spruce St, Denver, Colorado
5.0 from 137 reviews
Altitude Contracting is a full service storm damage remediation company specializing in hail and wind claims focusing on Roofing, Gutter Replacement, and Painting across the Denver Metro Area. We are focused on providing high-quality service and customer satisfaction - we will do everything we can to meet your expectations. Established in 2011. Family owned and operated. Altitude Contracting's mission is to provide the highest-quality workmanship possible. We succeed at this because of the integrity of our subcontractors and staff, our commitment to a solid work ethic, and our passion for staying current with the newest innovations of our industry.

Riley's Roofing
(720) 910-1470 www.rileysroofing.com
4160 Fox St, Denver, Colorado
5.0 from 118 reviews
At Riley’s Roofing, we are committed to providing exceptional roofing solutions for a diverse range of clients while fostering an inclusive and equitable work environment. Our mission is to be a leader in the industry by valuing diversity, equality, and inclusion in all aspects of our business, from the clients we serve, to the team members we employ. We strive to provide high-quality roofing services that meet the unique needs of each of our clients, while ensuring that our work is done safely, efficiently and in a professional manner.
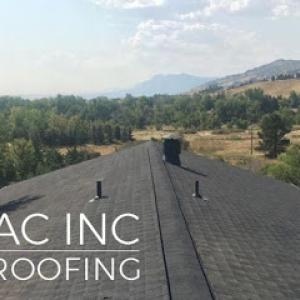
AC INC. Roofing | Denver's Trusted Roof Experts
(303) 550-4530 acincroofing.com
6145 Broadway Suite 25, Denver, Colorado
5.0 from 168 reviews
AC INC. Roofing - where protecting what’s under your roof is what matters most. Licensed and insured in over 25 municipalities + counties, our licenses are verified by Thumbtack. Check out our credential details tab! AC INC. Roofing will help you find the roofing solutions you need by providing you top quality workmanship, exceptional customer service and prompt communication. Our goal is to bring real value and integrity to our customers. If you are looking for an affordable out-of-pocket bid or need a repair inspected ASAP, we can promptly provide options for you. If you are dealing with hail or wind damages we have you covered. Instant Online estimates and free inspections.
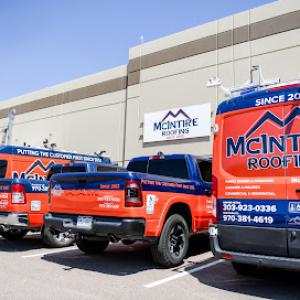
McIntire Roofing
(303) 962-7599 www.mcintireroofing.com
7270 Gilpin Way Unit 160, Denver, Colorado
5.0 from 162 reviews
McIntire Roofing provides professional roofing and exterior services to the entire Front Range of Colorado.
Weaver Construction
(303) 526-6767 coloradostormfix.com
Denver, Colorado
5.0 from 132 reviews
Welcome to Weaver Construction, where expertise meets excellence in roofing and siding installation. As your local roofing contractors, we specialize in roofing installation, skylight installation, and insurance restoration. Whether you need a roofer near you or are searching for the best roofing company, count on us for quality craftsmanship and reliable service. We're here to assist with roofing insurance claims and provide expert solutions tailored to your needs. Choose us for trusted roofing expertise and superior customer satisfaction.
Foothills Exteriors
(720) 484-1600 www.foothillsfirst.com
1776 S Jackson St # 520, Denver, Colorado
5.0 from 89 reviews
Established in 2019, Foothills Roofing and Exteriors is a Denver-based roofing contractor serving the greater Denver and Boulder areas, including Vail and Eagle County. They specialize in residential and commercial roof repair and replacement, offering free inspections by knowledgeable project managers. Led by an industry leader who shares roofing expertise through his podcast, Foothills Roofing and Exteriors prioritizes customer service with a friendly and professional approach.
Red Diamond Roofing
(303) 529-7025 reddiamondroof.com
7000 N Broadway Unit 101, Denver, Colorado
4.9 from 276 reviews
Red Diamond Roofing of Colorado prides itself on upfront and ethical contracting services. As a family-owned and operated business we believe in passing the savings on to our customers, while still ensuring that they receive the best roofing services possible. Our Denver & surrounding areas Roof Repair and property maintenance services are affordable, reliable, and always professional. If you need new or repaired roofing, gutters, siding, or a new exterior paint job, we are here to serve you. We can even assist with insurance claims. We are GAF certified, Malarkey Emerald Premium Certified & an Owens Corning Platinum Preferred Contractor.
730 South Exteriors & Roofing
(303) 698-0580 730southexteriors.com
2281 S Acoma St, Denver, Colorado
4.9 from 367 reviews
730 South Exteriors & Roofing Denver is a locally-owned and operated Denver roofing company. We have over 25 years combined experience in residential roofing in Metro Denver. 730 specializes in new roofs, roof repairs, maintenance and emergency roofing services. Insurance claim repairs for homeowners throughout Metro Denver are a breeze with the right connections.
Integrity Pro Roofing | Denver Commercial Roofing
(303) 968-9842 integrityproroofing.com
1415 Park Ave W, Denver, Colorado
4.9 from 219 reviews
Specializing in commercial roofing solutions across Metro Denver, including: - Flat roofs (TPO, EPDM, built-up, modified bitumen, etc) - Warehouse, office, retail, HOAs, and industrial facilities (metal, shingle, tile, etc) - Commercial roof coatings & maintenance - Insurance-claim expertise for hail/storm damage ✅ Licensed, bonded & insured ✅ 3‑year workmanship warranty ✅ Complimentary digital roof reviews and project portfolios Your experience matters to us - communication and helpfulness is what our team focuses on. We do also have industry affiliations and certifications such as Gaco and Owens Corning. Give us a call today for your honest roof assessment!
Go In Pro Construction
(720) 550-3851 www.goinproroofing.com
4136 Odessa St, Denver, Colorado
5.0 from 116 reviews
Go In Pro Construction for all your roofing needs, where reliability meets innovation, and quality craftsmanship is guaranteed. Discover why they are the leading experts in roof repair in Denver, dedicated to delivering top-tier service, ensuring your home remains a safe haven through every season.
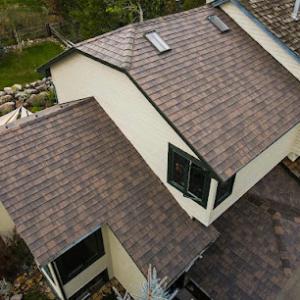
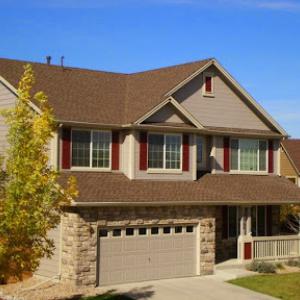
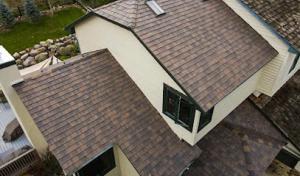
Asphalt shingles remain common in Denver, but repeated hail exposure and strong sun can shorten service life compared with milder climates. In Front Range storms, hail can ding asphalt to the point of revealing the underlayment or decking if the impact is repeated over years. This means choosing shingles with good impact resistance and installing quality underlayment becomes a practical first step. Look for a high NDL (nail-down durability) rating and an underlayment that stands up to UV and heat cycling. A roof that has solid flashing and properly sealed joints will fare better when hail comes through and sun bakes the surface.
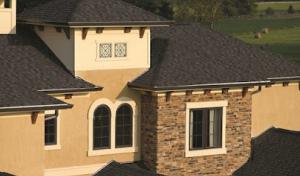
Clay tile, concrete tile, synthetic products, metal, and slate all appear in Denver, reflecting both historic neighborhoods and newer Front Range construction styles. Clay and concrete tiles offer long life and strong hail resistance if properly installed, but they're heavier and may require structural checks for the added load. Synthetic or composite shingles bring a practical balance of impact resistance and weight, often with better flexibility under freeze-thaw cycling. Metal roofing handles hail well and reflects heat, which helps reduce UV-related wear, but requires precise flashing details to prevent leaks around edges and chimneys. Slate presents a premium, durable option with excellent longevity, yet the weight and the need for skilled installation mean it's typically reserved for specific projects or high-end homes. In newer builds, metal or synthetic options can pair well with contemporary lines; in historic districts, clay or slate can preserve the look while delivering performance that aligns with Denver's weather.
Denver's combination of snow load, freeze-thaw cycling, and UV exposure makes impact resistance, flashing quality, and underlayment choice especially important by material. For hail-prone seasons, ensure the installation includes reinforced fasteners, a continuous underlayment system, and properly sealed penetrations around vents and chimneys. Snow regions benefit from roof profiles that shed snow gradually rather than trap it, which reduces ice dam risk and edge damage during thaw cycles. UV-heavy summers mean choosing a color and coating that resist fading and cracking, preserving the roof's integrity and reducing micro-cracks that can snowball into leaks during rapid thaw.
With Denver's weather swings, routine inspections should focus on hail-affected areas, flashing seams, and the condition of the underlayment after storm seasons. After hail events, schedule a professional inspection promptly to catch denting or penetrations before they compromise decking. In all material choices, pay attention to valleys, skylines, and chimney flashing, since these are common failure points when aging under the Front Range cycle. Regular cleaning of debris and checking for missing or loose fasteners helps maintain performance across the roof's life.
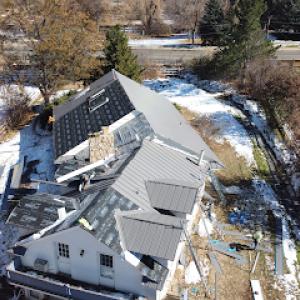
Snow accumulation followed by thawing and refreezing creates a relentless stress pattern on roofs with Front Range exposure. In practice, the weight of new snow combined with shrinking and expanding roof materials can push shingles, flashing, and decking beyond their comfort zone. The cycle is especially rough on asphalt shingles and any flashing details that aren't fully sealed or properly backed by solid attic ventilation. As temperatures swing, the sun's UV exposure ages surfaces unevenly, leaving some areas more brittle than others. That uneven aging translates into unpredictable showings of wear, small cracks, and occasional misalignment after a thaw.
Ice-related leak risks in Denver often show up around eaves, valleys, penetrations, and poorly ventilated attic spaces after snow events. When warm sun hits the roof, melted water can refreeze at the eaves if there isn't enough soffit ventilation or a clear line of drainage. Valleys become sinks for meltwater, and any gaps in flashing around chimneys, vents, or skylights become potential paths for leaks. In attic spaces, poor ventilation allows warm air to back up into the roof deck, promoting ice dam formation and hidden rot. The result is a leak that isn't obvious from the outside but shows up as wallpaper staining, attic dampness, or a sudden drip after a storm that followed a warm day.
Ventilation matters more here than in milder climates. A well-vented attic keeps the roof deck closer to the outdoor temperature, reducing the likelihood of ice dams forming along the edges. If the attic is stuffy or moist in the winter, the risk rises that moisture will condense on colder decking, leading to mold growth and accelerated shingle deterioration under the eaves. You can check for proper intake and exhaust placement, clear soffit vents, and insulation that doesn't block flow. A simple reminder: any insulation that lies against the roof deck should be kept away from the sheathing to preserve airflow and reduce heat buildup that worsens ice formation.
Replacement timing in Denver often shifts toward late spring through summer because winter conditions complicate tear-off, dry-in, and inspection scheduling. Narrow windows for safe workmanship are real, and storms can interrupt an already tight schedule. If a leak or damaged flashing emerges after a thaw, plan with a realistic expectation for post-winter work windows. When choosing materials and detailing, emphasize products and flashings designed to handle rapid weather swings and sustained UV exposure. The goal is to set up a roof that can handle weeks of freeze-thaw without relenting, rather than chasing quick fixes that fail as the next storm rolls in.
When you can't wait, these contractors offer fast response times to stop leaks and prevent further damage.
Lifetime Roof & Solar - Denver
(303) 335-6097 mylifetimehome.com
9525 E 40th Ave suite 160C, Denver, Colorado
5.0 from 434 reviews
Foothills Exteriors
(720) 484-1600 www.foothillsfirst.com
1776 S Jackson St # 520, Denver, Colorado
5.0 from 89 reviews
After a major hail event across the metro, pricing moves quickly as storm-driven demand surges. In practical terms, that means contractors may schedule earlier or later than usual, and material availability can tighten for a few weeks. Asphalt shingles remain the most common option for many homes, but the price bands shift with storm traffic, so a typical asphalt job can drift toward the higher end when crews are in high demand. Heavier, more durable systems like slate or concrete tile tend to see even sharper price movements because the job requires more crew time and sometimes specialized equipment. Acknowledge that pricing in this window is not just a line item on a bid; it reflects the surge in scheduling urgency and material availability.
Material choice in this climate ranges from lower-cost asphalt shingles to high-cost slate and tile, and each option carries distinct labor and structural considerations. Asphalt shingles typically start around the lower end of the spectrum, but Denver's strong UV exposure and hail history can shorten their life, pushing some homeowners toward midrange or premium options. Metal roofing sits mid-to-high in cost and offers durability against hail with lighter surface impact, which can influence insurance discussions. Tile systems-clay or concrete-command the higher end of the price scale, often along with added labor time and potential structural checks to support heavier loads. In practice, a heavier system may require truss assessments or reinforcement, and that can translate into additional upfront costs and a longer installation window. Synthetic or composite shingles can blend cost efficiency with enhanced impact resistance, providing a middle ground that still respects Denver's weather realities.
Scheduling in a late-spring to summer window is common when many homeowners aim to replace roofs after winter and spring storms. However, this preferred timing can compress crew availability and drive up labor costs if multiple neighbors go for replacements at the same time. If timing flexibility exists, shifting a project to a shoulder period can secure steadier crew allocation and potentially better material pricing for the same quality. When the calendar is crowded, expect shorter bidding windows and more urgent decision points-promptly reviewing bids and confirming material choices helps prevent last-minute price jumps.
Storm season often triggers insurance activity, making timely claim documentation essential. While not a permitting issue, securing a clear, comprehensive scope and agreed-on replacements with the insurer can avoid mid-project change orders. The cost picture should include a cushion for potential changes or upgrades driven by better hail-resistant materials or code-adjacent improvements that your adjuster approves. In the end, the goal is a durable, hail-resilient roof that fits the home's structure and the neighborhood's storm history, without letting short-term pricing volatility derail a sound long-term decision.
Get a clear picture of your project costs upfront - no commitment required.
Foothills Exteriors
(720) 484-1600 www.foothillsfirst.com
1776 S Jackson St # 520, Denver, Colorado
5.0 from 89 reviews
Maddox Construction
(720) 310-0610 www.maddoxconstruction.co
4869 Irving St, Denver, Colorado
5.0 from 74 reviews

covR Roofing + Exteriors
229 Vallejo St, Denver, Colorado
4.9 from 198 reviews
A full re-roof project in this area commonly requires a building permit reviewed by the city building department. The permit signals that the work will meet structural, electrical, and ventilation standards, which is crucial for a roof facing Front Range hail and high UV exposure. The city's process helps ensure repairs integrate with existing attic ventilation and attic access, as well as proper alignment with roof decking and underlayment requirements. Expect the permit to cover minor corrections if the inspector spots flashing or ventilation issues during review, and plan for a small lead time to secure approvals before the first shingle is removed. If the project includes any structural modification or changes to roof penetrations, the permit becomes even more essential. Neighborhoods beyond the core urban core may have additional layering of paperwork, so verify whether your block has a supplemental review.
Roof work is commonly inspected at rough and final stages. The rough inspection focuses on safe scaffold setup, deck integrity, and the installation of underlayment and flashing in a way that resists Denver's moisture and hail impact. The inspector will check that ventilation paths remain clear and continuous from soffits to ridge vents, and that any vent flashing is properly sealed to prevent moisture intrusion. The final inspection concentrates on overall installation quality, including shingle alignment, sealed edges, and that flashing around chimneys, skylights, and vall doors is properly integrated with the membrane barrier. Attention to code-compliant installation is especially important here because the Front Range weather can expose any weak points quickly during rapid temperature swings and hail events. If a contractor uses a ventilation baffle system or a radiant barrier, expect the final check to confirm these components are correctly installed and functional.
Some Denver neighborhoods may face added requirements or extra review beyond the standard city roofing permit process. This can include more stringent storm-water management considerations, neighborhood association guidelines for appearance, or expedited review for work near historic districts. If the home sits in a historic or architecturally sensitive area, prepare for potential design review of fascia, gutters, and color selection to align with local guidelines. In tight residential blocks, inspectors may pay closer attention to ladder placements and site safety measures to minimize disruption to surrounding properties. Plan for a wider window between permit issuance and final completion if a supplemental review is anticipated, and coordinate with the homeowner's association or neighborhood committee early to avoid delays.
Keep a clean, up-to-date project log noting permit numbers, inspection dates, and any permit corrections. Bring a complete set of project plans, including flashing details and ventilation layouts, to each inspection. Have the contractor confirm that all components-underlayment, flashing, attic ventilation, and drip edge-are aligned with the latest code revisions and any neighborhood-specific requirements. On hail-prone days, weather windows for inspections matter; aim to schedule inspections after a dry spell and before the next forecasted hail event to minimize rework.
Hail storms along the Front Range have a telltale pattern: sudden, severe damage clustered in a short window, followed by weeks of intense scrutiny from insurers. This is a high-claim market, so carriers sit up and review storm history, roof age, and the documentation you bring to the table. The evidence path is not as forgiving as in milder climates, and roofs often show wear that complicates a straightforward hail replacement.
Carriers serving homeowners may closely review recent storm activity, the roof's age, and the condition visible when the adjuster inspects. A standout factor is whether a claim aligns with a known hail event and how much of the damage actually reflects recent impact versus preexisting wear. Inadequate documentation or a delayed report can tilt the adjustment toward partial coverage or depreciation, especially if the roof has already seen several Colorado winters and UV exposure. Expect questions about previous repairs and the roof's current condition as seen from ground level and from a ladder.
Having clear, dated photos from after the storm helps establish the claim's credibility. A third-party roof report or a contractor's written assessment can corroborate hail damage beyond what the adjuster notes on site. Timely communication with the carrier matters; delays can invite questions about the storm's impact timing and the roof's age. If a claim is opened after a long gap, insurers may interpret that gap as uncertainty about the damage's relevance, which can impact the settlement trajectory.
Depreciation is a factor influenced by recent storm activity and the condition evidence available when the adjuster inspects. If evidence points to active, ongoing deterioration from hail-initiated damage rather than a single event, depreciation may be applied differently. Understanding how the adjuster interprets the roof's current state-shingle granule loss, punctures, or dented metal-helps set realistic expectations for what the claim might cover and how broader replacement decisions unfold.
Connect with contractors who help homeowners navigate the claims process from damage assessment to final approval.
Lifetime Roof & Solar - Denver
(303) 335-6097 mylifetimehome.com
9525 E 40th Ave suite 160C, Denver, Colorado
5.0 from 434 reviews
New Roof Plus
(303) 529-7554 www.newroofplus.com
110 16th St Mall Suite 1455, Denver, Colorado
5.0 from 180 reviews
Altitude Contracting
(720) 329-4113 www.altitudecontracting.com
3701 S Spruce St, Denver, Colorado
5.0 from 137 reviews
Denver's housing stock includes a meaningful share of tile and metal systems, not just standard asphalt, so replacement planning often depends on specialized crews. When a storm hits, you're not just swapping shingles; you're coordinating with crews that can handle heavier materials and the unique fastenings those systems require. Tile and metal installations demand careful matching of profile, color, and attachment method to ensure a seamless look and reliable performance. In higher-end neighborhoods or older areas, it's common to see materials that aren't readily swapped with a simple shingle change, so expect to discuss material availability and lead times with a contractor who understands local quirks and the local mix of roof types.
Heavier materials such as clay tile, concrete tile, and slate are part of Denver's housing stock and can raise complexity during tear-off and replacement. A full tear-off with tiles or slate requires solid staging and proper waste handling to avoid damaging delicate surfaces on the way down. The weight of these materials also influences structural checks by the crew; some existing roofs aren't designed for a rapid, heavy swap, and reinforcement or framing assessment may be needed. Practically speaking, when hail damage is involved, you'll want a crew that can verify deck condition, inspect for hidden damage under battens, and ensure that the existing chimney and vent penetrations are properly sealed to prevent future leaks.
Homes in older and higher-end neighborhoods may require matching specialty materials rather than simple shingle swaps after storm damage. A discreet restoration can hinge on finding a close material match or an exact profile, which often means sourcing from manufacturers' inventory or using reclaimed options. The goal is a durable, visually cohesive result that doesn't stand out between the new and existing sections of the roof. Expect that the color, texture, and edge details matter as much as the structural repair, and plan for a few extra weeks if a precise match or custom color is requested. In any case, ensure the contractor provides a clear plan for flashing, ridge caps, and valley installations to maintain a weather-tight seal across the entire roof.
Find contractors who specialize in clay and concrete tile roofs, known for their durability and curb appeal.
Foothills Exteriors
(720) 484-1600 www.foothillsfirst.com
1776 S Jackson St # 520, Denver, Colorado
5.0 from 89 reviews
Integrity Pro Roofing | Denver Commercial Roofing
(303) 968-9842 integrityproroofing.com
1415 Park Ave W, Denver, Colorado
4.9 from 219 reviews
Sol Vista Roofing
(720) 665-9868 solvistaroofing.com
5855 E 45th Ave A-132, Denver, Colorado
4.9 from 283 reviews
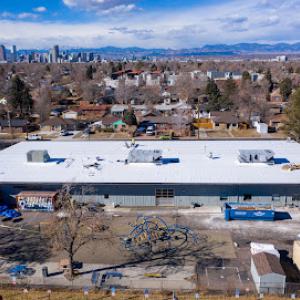
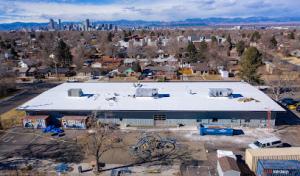
Denver's dry, sunny climate can make reflective coatings and restoration relevant on some low-slope roof systems. If you have a flat or near-flat section on an addition or a multifamily building, reflective caps or white coatings can cut heat buildup and extend membrane life. Choose coatings labeled for UV resistance and asphalt compatibility, and plan for a recoat cycle that aligns with seasonal heat exposure.
Summer thunderstorms and winter freeze-thaw can expose drainage and seam weaknesses on low-slope roofs in the Front Range. Inspect for ponding water after storms, and check seams, penetrations, and flashings where rainwater collects. In winter, monitor for ice dam formation along edges and at transitions to steeper sections, which can stress seals. A targeted maintenance routine-cleaning gutters, clearing debris, and resealing suspect laps-helps prevent leaks when temperatures swing.
Low-slope roof needs in Denver are more common on additions, multifamily, and commercial-style sections than on standard pitched suburban roofs. If you're evaluating a retrofit, map drainage to ensure scuppers and downspouts align with seasonal runoff patterns. On coatings, consider a system that tolerates the Denver sun and the occasional hail impact; seek warranties that cover both reflective performance and membrane integrity after hail events.
Establish a semiannual inspection cadence timed after peak storm season and after the first heavy freeze. Look for blistering, granule loss, and fastener corrosion, which can accelerate under rapid temperature shifts. For any signs of membrane wear, address small defects before they propagate into larger leaks. Keep an eye on edge details where parapets meet the membrane, as these junctions are common failure points in storm cycles.
Find specialists in TPO, EPDM, and built-up flat roofing systems for residential and commercial properties.
New Roof Plus
(303) 529-7554 www.newroofplus.com
110 16th St Mall Suite 1455, Denver, Colorado
5.0 from 180 reviews
730 South Exteriors & Roofing
(303) 698-0580 730southexteriors.com
2281 S Acoma St, Denver, Colorado
4.9 from 367 reviews
Integrity Pro Roofing | Denver Commercial Roofing
(303) 968-9842 integrityproroofing.com
1415 Park Ave W, Denver, Colorado
4.9 from 219 reviews