Last updated: Apr 19, 2026
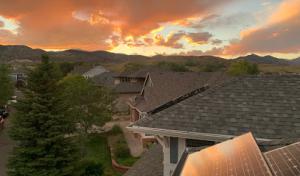
Front Range exposure drives a sharp spring and early summer surge in hail-related roof concerns. The neighborhood mix of steep-slope asphalt and tile roofs means that a single hail event can create a cascade of urgent needs: shingle bruising, granule loss, cracked tiles, and hidden moisture issues that only reveal themselves after thaw. Hailstorms tend to arrive in quick, powerful bursts, sometimes with fast-moving, intense weather cells that catch residents off guard. When the radar shows a storm line over the Front Range, expect the first wave of roof inspections to light up within 24 to 48 hours for many homes. That timing matters because insurers typically want a prompt, documented starting point for claims, and the clock can run fast when storms roll through.
After a big hail event, the window to secure a timely claim is narrow and highly variable. Local demand spikes compress scheduling, and a busy contractor calendar is common in the days immediately following a storm. If you wait too long to arrange an inspection, you risk evidence fading: granules in gutters, dented flashing, or soft spots that can worsen with rain and freeze-thaw cycles. The best approach is to pre-arrange a trusted inspector or roofer who can respond quickly and document the roof's condition with notes and photos. Speed matters, but accuracy is non-negotiable: insurers will scrutinize whether damages align with the storm timeline and whether prior maintenance or pre-existing wear could confound the claim. In this market, a well-documented current condition paired with weather chronology can make the difference between a straightforward replacement and a contentious adjustment.
Documentation integrity is the backbone of a smooth claim process. From the moment a hail event ends, you should begin compiling a concise record set: dated photos of the entire roof taken from multiple angles, close-ups of damaged shingles or tiles, and a log of any observed leaks or attic staining. Keep a dated note of the exact time of the storm's arrival and its estimated hail size if possible. Collect receipts for any immediate temporary measures, such as tarps or leaks contained by plastic sheeting, and note soil or debris buildup in gutters. A roof-condition report from a licensed roofer that ties the observed damage to the recent hail event should be ready to share with the insurer at first contact. If your home has two-stage damage-shallow surface bruising plus deeper core issues-the documentation should clearly separate what is cosmetic from what implicates structural concerns, as insurers will evaluate each finding against their assessment criteria.
Colorado is known for high-frequency hail activity, and the insurance community responds with standardized expectations. Photo documentation is not optional; it is the minimum that insurers expect to see in a claim packet. Prompt post-storm inspections help prevent disputes about whether damage existed before the event or was caused by it. Roof-condition records, including notes on moisture intrusion or insulation concerns, strengthen the case for replacement versus repair decisions. As seasonal weather patterns drive repeated events, insurers often favor homeowners who present a clear, chronological narrative: the storm date, the observed damage, the steps taken for temporary mitigation, and a professional assessment linking damage to the recent hail. Having this narrative ready reduces back-and-forth and accelerates the decision-making process.
When storms hit, the scheduling pressure peaks, and deadlines to submit documentation tighten. You should consider initiating contact with your insurer within 24 to 72 hours after the event, especially if your roof shows visible damage. Simultaneously, secure a reputable local roofer who can provide an urgent but thorough inspection and a written assessment that aligns with insurer expectations. If multiple storms occur in quick succession, it's prudent to differentiate the most recent events from earlier ones in your records, so the claim trajectory remains clear and defensible. The combination of rapid response, precise documentation, and a credible professional assessment creates the strongest footing for navigating the hail claims timeline in the Front Range climate.
North Peak Roofing & Contracting
(303) 357-9719 northpeakroofing.com
209 Saratoga Mine Dr, Castle Rock, Colorado
5.0 from 155 reviews
North Peak Roofing & Contracting is Owned & Operated by Jeff (an ICC Certified Contractor) & Megan Folck. Specializing in Roof Repair, Replacement and Storm Damage Insurance Claim Restoration, we offer Free & Honest Inspections.
Abraham Benson Roofing
(303) 532-6319 www.abrahambensonroofing.com
4798 Fiadore Ln, Castle Rock, Colorado
4.9 from 62 reviews
Abraham Benson Roofing is a top-rated roofing contractor in Castle Rock, proudly serving the entire Denver Metro area. We specialize in hail damage roof repair, insurance claim assistance, and complete roof replacements for residential and commercial properties. Our licensed and insured team installs asphalt, metal, and flat roofing systems with precision and care. From detailed roof inspections to emergency storm repairs, we deliver lasting workmanship and clear communication. Homeowners and businesses trust Abraham Benson Roofing for dependable service, quality materials, and protection built for Colorado’s toughest weather.
Rex Roofing & Solar
(720) 682-1799 www.rexroofing.com
3634 Happyheart Way, Castle Rock, Colorado
4.9 from 58 reviews
Rex Roofing & Solar, LLC is Colorado's roofing authority for tile roofing, & tile roof repairs. We also specialize in synthetic wood shake roofing, metal roofing, commercial flat roofing, asphalt shingles, and are experts at navigating insurance claims and property restoration. Our roofers are here to treat your property like royalty!
The Roofing Revolution
(303) 937-7777 theroofingrevolution.com
Castle Rock, Colorado
5.0 from 36 reviews
We provide all roof-related services throughout the Greater Denver Metro area. Whether it's roof replacement or roof repair, we are the Denver roofing contractor that can get the job done quickly, with high quality workmanship, at a price that respects your budget. The owner of The Roofing Revolution has worked in the roofing industry for over 25 years and has the experience, knowledge and transparency that homeowners look for in a Denver roofing contractor. If your roof replacement is being paid for out of pocket, or by insurance–we are familiar with both processes and will ensure the process is as smooth as possible. We're ready when you are! We'll schedule your inspection within 48 business hours. Call now!
Golden Sky Roofing
(720) 883-6100 www.goldenskyroofing.com
2878 Low Meadow Blvd, Castle Rock, Colorado
4.9 from 50 reviews
Golden Sky Roofing is a trusted roofing contractor offering top-quality services in Colorado. With a commitment to excellence, our team of skilled professionals provides reliable roof installations, repairs, and maintenance solutions. We specialize in a wide range of roofing materials, including shingles, tiles, and metal roofs, ensuring durability and aesthetic appeal. Our expertise extends to both residential and commercial projects, and we prioritize customer satisfaction by delivering timely and cost-effective services. Trust Golden Sky Roofing to safeguard your property with our reliable and long-lasting roofing solutions. Visit our website for more information and to request a free quote.
Columbine Roofing & Exteriors
(720) 452-7663 columbineroofing.com
218 Wilcox St, Castle Rock, Colorado
4.7 from 123 reviews
Columbine Roofing & Exteriors is your locally owned and family-operated storm damage repair company, specializing in roofing, exterior painting, siding, and more! Our highly-skilled crews have a wide array of expertise. As an Owens Corning Preferred and GAF Shingle Contractor, we use only the best materials available to restore, repair, or replace your roof, and we also use satellite on every roof to provide pinpoint measurements. Our company is fully licensed and insured, and our technicians are trained and certified to carry out the needed work to the highest standards."
Celtic Roofing
(720) 270-1300 www.celticroofing.com
834 S Perry St Unit F, Castle Rock, Colorado
4.9 from 29 reviews
The foundation of everything we do is built on Quality, Loyalty, and Dependability. As a Castle Rock Roofer and Premier Castle Rock Roofing Company, Celtic Roofing delivers trusted local roof repair in Castle Rock and across the Front Range. We’re locally owned in Douglas County, CO, and proudly serve Castle Rock, Golden, Akron, Kit Carson, Yuma, Hugo, Littleton, Denver County, Larimer County, Limon, Stratton, Larkspur, Milliken, Douglas County, Broomfield, Highlands Ranch, Greeley, Elbert County, Burlington, Severance, Fort Collins, Avon, Lakewood, San Diego (CA), Windsor, New York, Aurora, and New Jersey. We offer residential roofing, commercial roofing, metal roofs, barn repair, and hail-resistant systems like F-Wave and TPO.
Raptor Roofing of Castle Rock
2189 Morningview Ln, Castle Rock, Colorado
5.0 from 16 reviews
Introducing Raptor Roofing & Restoration, your trusted solution for all roofing and restoration needs in Castle Rock. Our skilled team specializes in roofing repair, replacement, and installation, ensuring the utmost quality and durability for your home or business. Plus, we offer solar panel installation to help you harness the power of renewable energy and reduce your carbon footprint. For a comprehensive approach to protecting your property, look no further than our expert gutter repair and installation services. At Raptor Roofing & Restoration, we take pride in delivering exceptional workmanship and customer satisfaction, offering unmatched expertise you can trust. Contact us today to experience our exceptional service!
Sonners Contracting
(303) 847-1708 sonnerscontracting.com
3538 Collins St, Castle Rock, Colorado
4.7 from 29 reviews
Since 2013, Sonners Contracting has been providing the highest quality roofing and gutter solutions for our clients’ homes or investment properties in the greater Denver metro. Our reach has now expanded to Colorado Springs and all the way up to Fort Collins on the Front Range! We can cater to all of your roofing or gutter needs, including: new roof installation, gutter system service, storm damage repair, or replacement – just say the word! We are a locally-owned and operated business with over 15 years of roofing experience and extensive experience in other trades. As licensed roofing contractors, we are well versed in Colorado’s stringent state code requirements for roofs.
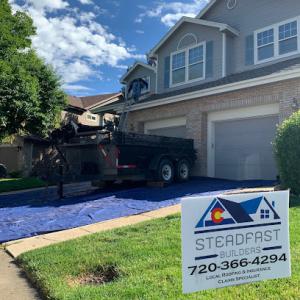
Steadfast Builders
(720) 366-4294 steadfastbuildersco.com
1006 I-25 Suite C-4, Castle Rock, Colorado
4.7 from 35 reviews
We Treat Your Home Like Its Our Own
ProCraft Roofing
834 S Perry St, Castle Rock, Colorado
4.8 from 17 reviews
At ProCraft Roofing We believe in helping people restore their property for lasting peace of mind by providing restoration roofing services for damaged and deteriorated properties. We approach every project with a restoration mindset. We don’t just repair or replace, we carefully consider how to best return your property to its prior good condition.
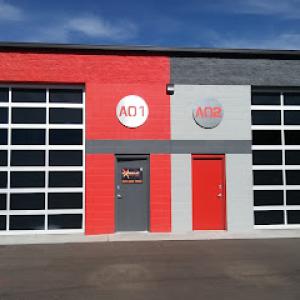
Extreme Roofing
2274 Manatt Ct A02, Castle Rock, Colorado
4.5 from 30 reviews
We are a locally owned and operated roofing contractor that has served the Castle Rock area since 2007. We offer top-quality roofing services to both residential roofing and commercial roofing customers that only want the highest quality and results. Some of our services include roof installation, roof repairs and roof inspections to name a few. To see why our customers recommend us to their friends, family and neighbors, contact us today to get started with a free estimate!
Castle Rock's mix of Front Range hail exposure, bright summer sun, and winter freeze-thaw cycles drives a practical approach to roof selection. The semi-arid climate means roofs must resist impact from hailstorms that arrive with little warning, while also standing up to rapid temperature swings that stress shingles and underlayment. This combination makes a single "one-size-fits-all" material less effective; the best choices balance impact resistance, thermal cycling durability, and curb appeal that fits the varied neighborhoods around town. The goal is a roof that holds its shape and color after hail events, seasons of sun exposure, and the occasional heavy snow.
Most homes in this area settle on asphalt shingles, with many high-end properties leaning toward tile options such as clay or concrete. Asphalt remains straightforward to repair after hail and typically offers a broad selection of hail-rated products that slide into existing roof lines with minimal drama. Clay and concrete tiles bring a distinctive look and excellent longevity, but tile can crack under direct impact and may require careful matching if storm damage necessitates replacement pieces. Wood shakes offer a rustic character and strong curb appeal, yet they demand regular maintenance and can be more sensitive to hail and sun exposure over time. Synthetic or composite shingles provide a modern mix of impact resistance and lighter weight, often with improved warranties against weather aging. Slate delivers long life and a premium feel but can be less forgiving for hail-induced damage and higher replacement complexity in certain layouts.
Tile roofs are especially relevant in higher-end neighborhoods and require particular attention after a hail event. The hard impact of hail can crack tiles, exposing underlayment to moisture and accelerating aging. Underlayment in these systems tends to play a larger role; aging or damaged underlayment can shorten the life of the roof even if tiles themselves remain sound. After a storm, close inspection should verify tile integrity, identify any broken pieces, and confirm that matching replacements exist, because color and profile continuity matters for both performance and resale appeal. If a retrofit becomes necessary, ensure the replacement pieces blend with the existing roof line and that the fastening method and underlayment are upgraded to current standards to address both wind and temperature cycling.
Weather extremes in this area stress roofs through repeated heating and cooling cycles, which can loosen fasteners and degrade underlayment over time. Choosing a system with solid impact resistance helps reduce the likelihood of costly repairs after hail. For steep-slope roofs, the fastener pattern and shingle or tile compatibility with high-altitude wind conditions matter. Underlayment quality should be prioritized, especially for tile roofs, where water intrusion risks after a storm can compound the cost of repairs. Consider products with reinforced or secondary water barriers and breathable, yet weather-tight, membranes. In homes with clay or concrete tiles, ensure an appropriate substructure that supports weight and resists movement under freeze-thaw cycles.
Post-storm inspections should focus on both visible damage and subtle signs of aging in fasteners, edge metal, and valley areas. A proactive approach, inspecting after the peak storm season, helps catch issues before they escalate. For tile roofs, look for cracked or displaced pieces and confirm the integrity of flashing around chimneys and vents. Asphalt and synthetic options benefit from checking for lifted or blistered shingles, which can indicate wind uplift or aging under summer sun. In all cases, plan repairs promptly and maintain a consistent inspection schedule to keep a roof performing through the next round of hail and temperature swings.
Castle Rock's shoulder seasons bring sharp day-night temperature shifts that test the integrity of sealants, flashing transitions, and other brittle roofing components. On a clear morning, shingles can feel almost pliant; by nightfall, freezing temperatures set in and any small gap or micro-crack in sealant contracts. Those tiny movements add up across a roof surface, especially where asphalt shingle tabs meet valleys and roof penetrations. If sealants haven't aged gracefully, you'll notice hairline cracks that can invite moisture intrusion during the next thaw cycle. The result isn't dramatic at first, but it compounds over seasons, turning a manageable leak into widespread interior water damage.
Winter freeze-thaw cycles in this area can worsen small moisture-entry points around penetrations and flashing, especially after prior hail damage has already compromised the roof surface. Hail can create micro-dents and micro-cracks that aren't obvious from the ground but act as moisture funnels once moisture enters the attic space. When temperatures dip, any trapped water freezes and expands, widening those cracks. The next thaw releases that water into the attic or along interior walls. Repeated events create a pattern of stress that shortens the lifespan of flashing transitions and can loosen step and counter-flashing around chimneys, skylights, and vent stacks. If your roof has a history of hail impact, expect the freeze-thaw cycle to amplify the problem rather than just maintain it.
Cold winters followed by hot, dry summers accelerate aging differently than humid climates, making this roof wear a combination of impact damage and thermal fatigue. Asphalt shingle surfaces may fade, curl, or delaminate where hail damage already weakened the lamination. Tile roofs-whether clay or concrete-face their own brittleness challenges when cold snaps hit, then heat up rapidly during dry periods, stressing fasteners and bedding mortar. Wood shingles and shakes are particularly vulnerable to crack propagation under freezing, then rapid drying in summer sun. Synthetic or composite options aren't immune; they can show surface checking or loss of flexibility after repeated cycles. The common thread is that a roof's age and prior damage set the stage for accelerated fatigue when temperatures swing so dramatically.
Focusing on transitions and penetrations pays dividends. After notable hail events or severe storms, walk the roof with a keen eye for lifted shingles, damaged flashing, or stained patches near vents and chimneys. In late winter, inspect the underside of attic rafters for condensation that hints at hidden leaks, especially where prior hail damage was evident. Sealant maintenance matters less as a one-time fix and more as an ongoing habit-renewing compromised caulk and ensuring flashing is bedded properly can prevent accelerated wear from the next freeze-thaw cycle. During spring thaws, look for moisture signs that track along drip edges or fascia boards, and schedule a professional inspection before the heat of summer amplifies existing weaknesses.
Typical Castle Rock pricing ranges from about $350 to $800 per square for asphalt shingles, $700 to $1500 for clay tile, $650 to $1100 for concrete tile, $600 to $1200 for wood shingles or shakes, $450 to $900 for synthetic/composite shingles, and $900 to $2000 for slate. These ranges reflect the mix of steep-slope architectural styles common here and the tendency to lean toward heavier materials on more visible rows of homes. When estimating, you'll be comparing not just the product, but the full package: removal of old roofing, disposal, underlayment or roof underlayment refresh, flashing, and any required vent or accessory replacements.
Costs in Castle Rock can rise after regional hail events when Front Range demand surges and crews are booked across Douglas County and the south Denver metro. If a hail season hits, you should expect bids to come in tighter and schedules to compress. This isn't just labor availability; materials can spike as suppliers reroute stock to meet front-range demand. The premium isn't always obvious at the first quote, so ask for a clear line item breakdown: tear-off, disposal, underlayment, fasteners, flashing, and any mitigation steps for gutters and skylights. If you're facing multiple bids, compare both price and timing windows, since a quicker start can sometimes reduce incidental costs tied to weather delays.
Homes with steeper slopes or heavier materials like tile or slate drive up labor complexity and tear-off handling. Accessory replacement costs-like ridge vent, boot flashings, and metal drip edging-also rise when crews must work at challenging angles. Tile and slate demand careful handling to avoid breakage, and some castles of your roof line may require additional installation details to maintain water tightness after a hail event. Synthetic or composite shingles can offer a middle ground in performance and install ease, but don't assume they always lower total project cost if replacement of many accessories is needed.
Insurance-driven replacements may compress decision timelines, but the right choice still hinges on expected remaining roof life, local weather exposure, and the cost of future maintenance. In Castle Rock, your decision matrix often balances immediate hail repair needs with the long-term performance of tile or slate against asphalt. If hail rules in your area have left you with a damaged, mismatched, or uneven roof plane, factor in potential partial replacements versus full re-roofing, ensuring the selected system withstands Front Range storm cycles and freeze-thaw cycles.
Get a clear picture of your project costs upfront - no commitment required.
Golden Sky Roofing
(720) 883-6100 www.goldenskyroofing.com
2878 Low Meadow Blvd, Castle Rock, Colorado
4.9 from 50 reviews
Columbine Roofing & Exteriors
(720) 452-7663 columbineroofing.com
218 Wilcox St, Castle Rock, Colorado
4.7 from 123 reviews
A full re-roof in Castle Rock generally requires a permit through the Town of Castle Rock Building Department. The permit ensures the project meets local wind, fire, and structure standards that are specific to Front Range conditions-where hail exposure and rapid weather swings can influence roof durability. Before long-lead items like underlayment, fasteners, and flashing details are approved, the permit also sets expectations for inspections tied to the sequence of work.
Permit applications are typically handled online through the town's building process rather than only over the counter. The online portal streamlines document submission, plan review, and progress updates, which is especially helpful if weather windows compress windows for roof work. Upload current roof plans or drawings if required, and verify any special details for steep slopes or tile assemblies that Castle Rock inspectors expect to see. If you're coordinating with a contractor, confirm that their license and insured status are current in the portal so the review moves smoothly.
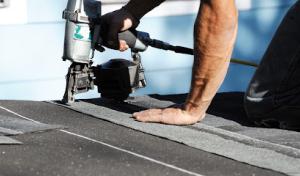
Castle Rock roofing work commonly involves an in-progress roof inspection during construction. This inspection verifies that the roof assembly is installed per code and that critical components-underlayment, drip edges, and flashing around dormers or chimneys-are secured correctly before top-side work progresses. Expect the inspector to check attic ventilation details and proper nail patterns or fastener counts, particularly on steep slopes where wind uplift and hail impact can drive damage if not executed to spec. Keep access clear and provide any requested documentation promptly to avoid delays.
A final inspection is required before the permit is closed out. This review confirms the roof installation is complete, all penetrations are flashed and sealed, and the overall system is ready to perform through freeze-thaw cycles and summer hail events. If any work remains or repairs are noted, schedule a follow-up inspection promptly. Have photos of the completed roof available as a reference for the inspector, especially for sections where tile, shingles, or synthetic products interface with existing structures.
Coordinate timing with the town's scheduling to avoid overlap with seasonal weather pauses typical to Front Range swings. Ensure contractor-issued weather protection plans are in place in case of late-season hail events that could affect inspection readiness. If attention is needed on attic ventilation or eave details, address those items before the final walk-through to prevent re-inspection and permit delay.
Castle Rock homeowners operate in Colorado's hail-driven insurance market, where roof claims are common and carrier scrutiny of damage documentation is high. That means every claim file benefits from clear, timestamped evidence of damage and a straight narrative linking recent hail events to observed issues. Insurers may request photos from multiple angles, notes from professional assessments, and a chronological record of storm dates. In practice, the more organized the documentation, the steadier the claim path, especially after a severe thunderstorm season or a rapid sequence of hail events.
Because coverage terms can vary significantly by carrier and policy type in Colorado, verify whether cosmetic versus functional damage, depreciation, and matching issues affect the claim outcome. Cosmetic wear lines up differently with actual structural impact, and some policies only reimburse for repairs that restore functionality rather than cosmetic improvements. Depreciation can reduce the reimbursement on older systems, and matching requirements may force replacement of adjacent, undamaged material to achieve a seamless look. That nuance matters when a roof comprises a mix of asphalt, tile, or synthetic shingles common in the Front Range housing mix.
Timely inspections matter locally because repeated storm cycles can make it harder to separate fresh hail impacts from older wear if documentation is delayed. A delayed report risks conflating preexisting conditions with new damage, which can influence settlement direction. Scheduling a roof assessment soon after a hail event helps protect the integrity of the claim and reduces the chance of misinterpretation by the insurer. If a claim is approved, prompt follow-through with a repair plan aligned to policy terms can prevent secondary moisture or structural concerns that often accompany Colorado's rapid weather swings.
After a hail-driven or wind-driven summer storm, the risk of rapid secondary leaks climbs fast. In this town, emergency tarping and leak control are most relevant after hail events and intense summer gusts, not typical tropical rain. Move quickly to assess exposed areas and trap the flow of water before it spreads into soffits and ceilings. Prioritize steep-slope systems, where broken units can expose underlayment and create hidden damage that worsen with freeze-thaw cycles.
On tile, slate, and other steep-slope roofs, temporary protection matters more than on low-slope surfaces. If a tile or slate is displaced, place a sturdy tarping or board barrier over the area and secure it to minimize wind uplift. Use roofing plastic or heavy-duty contractor tarps to cover gaps until a full repair can be scheduled. Avoid walking on damaged sections; uneven footing can cause further breakage and escalate the problem.
Control interior damage by placing buckets under active drips and laying down towels or containment blankets to catch stubborn leaks. Take clear photos from multiple angles, including the roof edges and interior ceiling spots, for insurance and contractor records. Document weather timing, the extent of visible damage, and any prior repairs that might affect coverage. Local homeowners often face rapid contractor backlogs after storms, so meticulous records expedite triage and avoid disputed repairs.
Once initial temporary fixes are in place, expect delays due to high demand. Plan for a prioritized repair path that focuses on preventing water intrusion now, with a clear timeline for permanent restoration. Staying proactive reduces the risk of recurring leaks during the next storm cycle.
When you can't wait, these contractors offer fast response times to stop leaks and prevent further damage.

Abraham Benson Roofing
(303) 532-6319 www.abrahambensonroofing.com
4798 Fiadore Ln, Castle Rock, Colorado
4.9 from 62 reviews
Golden Sky Roofing
(720) 883-6100 www.goldenskyroofing.com
2878 Low Meadow Blvd, Castle Rock, Colorado
4.9 from 50 reviews
Roof Repair & Maintenance
(303) 373-0755 roofrepairandmaintenance.com
Castle Rock, Colorado
5.0 from 7 reviews