Last updated: Apr 19, 2026
Merritt Island sits on Florida's Space Coast in Brevard County, where hurricane season from June through November is a primary driver of roof damage claims and replacement timing. The island setting between the Indian River Lagoon and Banana River leaves homes exposed to wind-driven rain from multiple directions during tropical systems. That means your roof faces wind gusts that can hit from angles you might not expect, with rain driven in horizontally during squalls. The result is not just missing shingles; it is accelerated wear on flashing, fasteners, and edge detailing that can let leaks start in minutes when a storm hits.
Summer afternoon thunderstorms are frequent in coastal central Florida, so even non-hurricane events can turn small flashing or shingle failures into active leaks quickly. A single microburst or sudden gust can tear up the edge of a ridge vent, loosen a corner seam, or push ponding on a flat plane into the attic space via compromised drainage or cracked seals. Leaks may appear far from where the visible damage started, because wind-driven rain finds the fastest path through the roof line and into attic spaces, soffits, and ceiling cavities. On Merritt Island, the combination of salt air and high humidity accelerates corrosion on fasteners, metal components, and underlayment, reducing the window for dramatic failure before repairs are needed.
When choosing materials and upgrades, focus on wind resistance, corrosion resistance, and secure integration with flashing and edging. In this environment, roof systems that maximize edge-to-edge wind uplift resistance and that use corrosion-resistant fasteners perform best. Because this area experiences rapid weather shifts, a roof that tolerates moisture without warping or losing sealant integrity helps keep interior spaces dry after a heavy shower or storm. Flashing around chimneys, vent stacks, skylights, and valleys should be continuous and mechanically fastened, with corrosion-protected metals where possible. The goal is to create a system that channels rain away from the interior rather than letting water follow the most convenient path through the roof deck.
If a hail event, heavy wind, or coastal squall hits, your first move is to inspect priority areas: valleys, flashing joints, roof-to-wall interfaces, and around penetrations. Look for lifted shingles, exposed underlayment, or granule loss in the gutter flow line. Even small gaps in the flashing can become full leaks after a short, intense downpour. If you detect active leaks, place a temporary tarp or waterproof sheeting over the affected area to minimize interior water intrusion while you arrange a professional assessment. Time is of the essence: delaying help increases interior moisture, mold risk, and structural concerns in a climate that cycles between heat and rain.
Seasonal maintenance matters more here than in milder climates. After each major storm, perform a careful exterior check: verify shingle alignment, confirm sealant integrity around vents and chimneys, and ensure gutters and downspouts are clear so water moves away from the roof edge rather than pooling at eaves. Schedule regular inspections of metal components for corrosion and verify that fasteners remain tight, particularly after strong winds or lightning storms. If any doubt exists about the roof's resilience after a storm, err on the side of a professional evaluation-early reinforcement prevents widespread interior damage and reduces the likelihood of costly, year-long repairs in the wake of hurricane season.
On Merritt Island, the coastal environment makes corrosion resistance a bigger material-selection issue than in inland central Florida, especially for exposed fasteners, flashing, and metal accessories. When you plan a roof, think about not just the look but how long hardware will hold up in salt spray and high humidity. For metal options, choose products with proven corrosion resistance and longer life coatings, and prioritize exposed-fastener systems with sealant strategies designed for tropical salt exposure. If a roof section vents near the shoreline, verify that the fasteners and flashings are the same material family as the panels to minimize galvanic reactions over time.
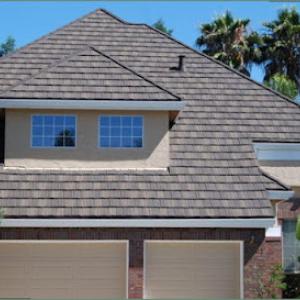
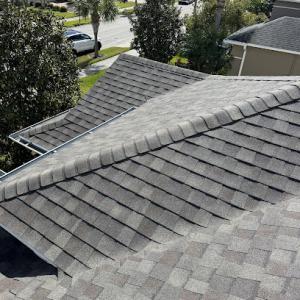
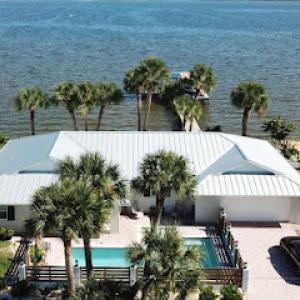
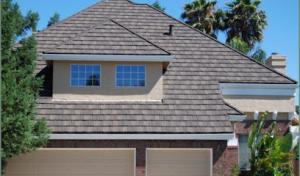
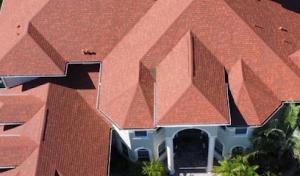
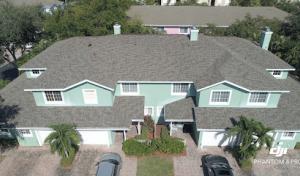
The local material mix is unusually broad, with asphalt shingles, metal, clay tile, concrete tile, wood products, and synthetic shingles all present in the market. This variety makes it possible to tailor a roof to a Mediterranean- or coastal-style home without sacrificing performance. For homes with heavy, sweeping lines or exposed eaves, tile and metal can deliver the visual heft and wind resilience that residents often seek. The trade-off is that heavier materials demand structural checks and compatible underlayment decisions. When evaluating options, balance curb appeal with the roof's ability to resist wind-driven rain and salt-saturated air, as well as the ease of repair after a storm.
Tile and metal are especially relevant locally because many Space Coast homes use Mediterranean- or coastal-style rooflines that make heavier or higher-wind materials common discussion points. Clay and concrete tiles bring durability and a distinctive silhouette, but weight and fastening complexity matter in a storm season where wind uplift testing becomes a focal point. Metal roofing offers quick homeowners' confidence in wind resistance and rapid shedding of storm moisture, yet the choice hinges on selecting corrosion-resistant alloys and durable flashing systems. For both materials, confirm compatibility with existing framing, and plan for premium sealants and edge details that deter salt-laden spray from creeping into vulnerable joints.
Storms on the island typically leave a salt-logged residue and higher corrosion potential around flashings and penetrations. A practical approach is to rinse or gently wash salt buildup after a significant storm window and inspect exposed fasteners for loosening or staining. Keep an eye on sealants at rake edges and valleys, where salt spray can accelerate cracking. If a section shows frequent staining or small rust spots, schedule a targeted inspection before the next hurricane season to address it before it propagates. This proactive rhythm helps preserve the chosen material's performance through years of coastal exposure.
On Merritt Island, many full replacements are scheduled in the late-fall to winter dry season to reduce rain interruptions and exposed-deck risk. If you are planning a complete tear-off and re-shingle, aim to start the project after hurricane season winds have settled and before the cold fronts ramp up the next year. The objective is to complete the work during a stretch with the lowest likelihood of rain and the most predictable dry spells, so the crew can finish sequencing without sudden weather delays.
During the wet summer pattern in coastal central Florida, crews often have to work around daily thunderstorm windows that can slow tear-off and dry-in sequencing. This means you should expect lighter daily progress during peak storm activity and plan for flexible windows. The contractor should map a rough daily target based on typical storm timing (afternoon buildups) and buffer the schedule for sudden downpours. If a storm interrupts tear-off, ask about resequencing the daily plan to maintain momentum without sacrificing quality or safety.
After major storms affecting Brevard County, demand spikes can lengthen scheduling times for both inspections and contractor availability. In those periods, coordinating access for data, inspections, and material delivery becomes critical. Build in extra lead time for material procurement and for the crew to secure reliable subcontractor help if needed. If a storm has recently passed, the contractor may need to reassess structural checks, moisture readings, and deck protection before resuming tear-off, so expect slight delays while the team re-stacks priorities and confirms roof deck condition.
A practical approach is to align the project with a clear, staged sequence: preliminary roof assessment and tarp setup if needed, then a controlled tear-off with temporary decking and edge protection, followed by underlayment installation, insulation checks, and final shingle or tile application. In a dry-season window, aim for a tight sequence that minimizes deck exposure time. When storms loom, prioritize securing the home's perimeter, sealing penetrations, and safeguarding interior spaces while you wait for better weather to resume roof installation.
Monitor local forecasts closely in the weeks leading up to the planned start. If a cold front or dry spell is forecast, confirm with the contractor that the schedule includes a contingency for shifting days or weeks within the dry-season window. Build a small, practical contingency into the plan for days with elevated thunderstorm risk, ensuring crew safety and material protection without compromising the project's overall timeline. Consider how rain delays could affect interior humidity and ventilation during the dry-in phase, and arrange temporary climate management if the structure will be under repair for an extended period.
Stay in regular contact with the project lead and ensure that any weather-driven changes are documented in the daily log. Clear written updates help coordinate access, deliveries, and inspections, especially when post-storm demand pedals up. Confirm that the chosen dry-season window remains feasible as weather patterns evolve, and be prepared to adjust the schedule if a prolonged wet spell or another storm system emerges. By keeping the plan transparent and flexible, the re-roof can proceed efficiently through Merritt Island's unique seasonal rhythms.
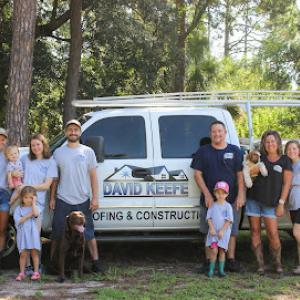
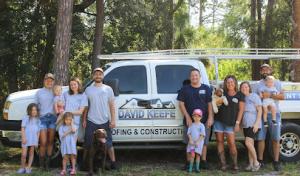
David Keefe Roofing & Construction
(321) 639-3283 davidkeeferoofing.com
Merritt Island, Florida
5.0 from 98 reviews
Roof Replacement Specialist
Clark Brothers Roofing & Construction
(321) 342-2900 clarkbrothersroofingconstruction.com
141 S Courtenay Pkwy, Merritt Island, Florida
4.9 from 87 reviews
OUR VALUE Offering a range of construction services like siding, gutters, and windows

IRC Roofing & Construction
Merritt Island, Florida
5.0 from 71 reviews
Focused on the very best in customer service and quality workmanship, IRC Roofing & Construction is a comprehensive building contractor servicing Brevard, Volusia, Orange, and Indian River Counties. Given the area’s volatile weather conditions and its potential damaging impact on your roof, we use only the best materials to insure your home is weather-proof, come rain or storm. Our mission is to provide the highest quality products, workmanship, and service to our customers – ensuring 100% satisfaction. The work doesn’t end when the job ends – we pride ourselves on being there for customers before, after, and during the storm.
Crawford Roofing & Construction
(321) 218-4060 www.crawfordroofingfl.com
Merritt Island, Florida
5.0 from 48 reviews
Crawford Roofing & Construction provides roofing services to the Brevard County, FL area.

JMak Roofing
(321) 759-5625 www.jmakroofing.com
415 W Merritt Island Causeway Suite 1, Merritt Island, Florida
4.8 from 116 reviews
JMak Roofing specializes in residential and commercial projects here in Brevard County. As a preferred installer for Owens Corning, we are able to guarantee the material for the life of your roof and offer the best warranty in the industry. We install and service: Shingle, Metal, Tile, Flats, TPO and Taper Systems. We know trusting us with your roof and home is a large responsibility, and it's not one that we take lightly. Give us a call to set an appointment today.
Gorilla Roofing
(321) 613-5158 mygorillaroofing.com
38 Nevins Ct, Merritt Island, Florida
4.7 from 182 reviews
With over 30 years in the industry, whether it is retail, restoration, or repairs, we are here to serve you and your family, with reliable strength, and remarkable service. As a locally owned and family-operated business, we take pride in delivering top-quality workmanship and outstanding customer service. Whether you need roof repairs, storm damage restoration, or a complete roof installation, our team is dedicated to helping you every step of the way. At Gorilla Roofing, our team is ready to provide the highest level of service, whether it’s a small repair or a large-scale roofing project. Trust us to protect your home or business with the reliable strength and remarkable service you deserve.
Seal Tight Roofing Experts
(321) 806-3999 www.sealtightroofingexperts.com
335 S Plumosa St Unit H, Merritt Island, Florida
4.9 from 32 reviews
Seal Tight Roofing Experts, a reputable name in roofing, has proudly served the Merritt Island community and surrounding areas in Brevard County since 2013. Specializing in comprehensive roofing solutions, such as Commercial Roofing, Residential Roofing, Metal & Aluminum Roofs, as well as Roof Leak Detection; this established contractor at 335 South Plumosa Street Unit H offers unparalleled expertise. Their dedicated team is committed to providing durable, high-quality craftsmanship for every project, ensuring your home is protected with a reliable, long-lasting roof. Trust the experienced professionals at Seal Tight Roofing Experts for all your roofing needs.
Spilker Roofing & Sheet Metal
(321) 459-1176 www.spilkeroofing.com
130 N Plumosa St, Merritt Island, Florida
4.8 from 67 reviews
Spilker Roofing and Sheet Metal is a reputable roofing company located in Brevard County, Florida. With a strong commitment to quality craftsmanship and customer satisfaction, Spilker Roofing has established itself as a reliable provider of roofing and sheet metal services in the local area.

Wiedmann Construction & Roofing
(321) 806-7663 wiedmannroofing.com
777 E Merritt Island Cswy Ste 314, Merritt Island, Florida
4.8 from 56 reviews
Wiedmann Construction & Roofing: Your trusted roofing contractor in Merritt Island, FL since 2013. We offer quality residential and commercial roofing services, from repairs to complete re-roofing and new installations. Our expertise covers asphalt shingle, metal, flat foam, single-ply, natural slate, traditional tile, and wood shake roofing. Whether you're facing leaks or damage, or need a new roof, our experienced team delivers exceptional results with great customer service. Don't let roofing problems persist - contact Wiedmann Roofing for durable solutions that protect your property. Call us today to schedule an appointment or learn more about our services.
Tidal Wave Roofing
(321) 720-5224 www.tidalwaveroofing.com
606 Gladiola Dr Suite 439, Merritt Island, Florida
4.8 from 31 reviews
Top Rated Roofing Company, Tidal Wave Roofing is proud to serve all of Brevard county Florida. If you are in need of a new roof we can help. We specialize in roof replacement and new construction. If you would like to schedule a free estimate you can reach us by phone at 321.720.5224 or visit us online. Follow us on Instagram! @tidalwaveroofing
RWC Roofing & General Contracting
Merritt Island, Florida
5.0 from 13 reviews
Over 20 years experience as roofers in Melbourne installing metal, tile & shingle roofs on the Space Coast. Licensed & insured, serving Melbourne, Cocoa Beach, Merritt Island, Satellite Beach, Indian Harbour Beach, Indialantic, Melbourne Beach, Palm Bay, Cocoa, and Titusville

All Space Coast Roofing
(321) 474-3668 www.allspacecoastroofing.com
606 Gladiola St, Merritt Island, Florida
4.8 from 19 reviews
Welcome to All Space Coast Roofing, the original roofing company of the Space Coast! Proudly serving Brevard County, Florida, and surrounding areas, we have been the go-to source for premier roofing solutions since our inception. With a steadfast commitment to quality, reliability, and customer satisfaction, we are dedicated to delivering top-tier roofing services tailored to meet the unique needs of our clients. Established as the original roofing company of the Space Coast, All Space Coast Roofing boasts a rich legacy of excellence spanning numerous years. Our team comprises seasoned professionals with extensive experience in the roofing industry, equipped with the knowledge and skills to handle projects of any size or complexity.
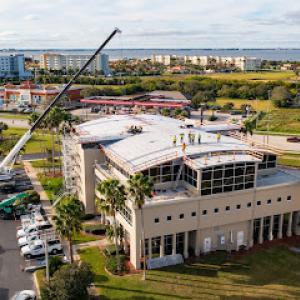
For a full roof replacement, the permit path runs through Brevard County rather than a city clerk alone. In this area, the roofing contractor typically handles the permit application, the necessary project drawings, and any required notices to homeowners. That means you'll usually sign off on the plan with your contractor, while the county issues the actual permit once checks are cleared. This arrangement mirrors the barrier-island realities here: code requirements emphasize wind uplift resistance, moisture control, and proper attic ventilation. Understanding who is responsible for the submission helps you plan the project timeline and reduces surprises when the first crew arrives.
Inspection is not a one-off event; it unfolds as the project progresses and is scheduled with the county. In Merritt Island, the timing depends not only on typical weather windows but also on available inspector time and department workload. Inspectors review critical milestones-framing integrity, underlayment installation, fastener patterns, and the chosen roofing system-during the installation and again after completion. If weather or material supply delays occur, the inspection timeline can shift, so coordinating with the contractor to align work phases with inspection slots helps minimize idle days and potential penalties for holding a permit.
Wind-mitigation documentation may be requested in connection with roofing work, which matters more here because of Florida's wind-exposure and insurance environment. Expect questions about how the roof is fastened, the presence of hurricane clips, the configuration of deck attachments, and any attic ventilation measures that influence wind resistance. Having clear, organized wind-mitigation details on hand can streamline the review and may influence your coverage options down the line. Local practice often requires the contractor to supply or coordinate these records, but you should review what is being documented and confirm that it matches the actual installed details once the job is complete.
Keep a file with the permit number, the contractor's license details, and a summary of the inspection milestones. Communicate early with the contractor about anticipated inspection dates and any weather-based contingencies. If you have existing wind-mitigation forms or prior documentation, bring them to meetings with the contractor so the new work can align with what the county expects for approvals and for potential insurance considerations. In this market, a well-documented, timely permit and inspection process helps protect your investment as storm season approaches.
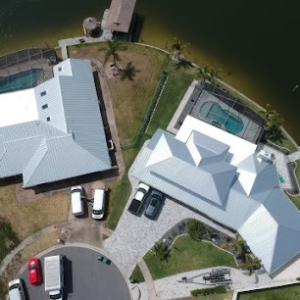
You face a volatile property-insurance landscape in the Brevard County barrier-island zone, and this dynamic hits storm-exposed homes on Merritt Island particularly hard after major events. After a hurricane or fast-moving summer storm, deductibles can shift, underwriting criteria tighten, and renewal terms swing more than in calmer years. The combination of salt air, coastal exposure, and frequent high winds means insurers watch for every indicator of risk: roof age, condition, and the likelihood of hidden vulnerabilities that may flare up when the next windstorm arrives. The consequence is that a roof decision today can influence coverage and cost in ways that feel immediate when the next storm approaches.
Insurers commonly want detailed roof-condition records and wind-mitigation information, making photo documentation and permit records especially important after storms in Brevard County. Photo documentation should cover the entire roof from multiple angles, with close-ups of fasteners, flashing, edge details, and any signs of wear or prior repairs. Attic photos that show roof decking, ventilation, and underlayment are equally useful. After a storm, assemble a concise packet that ties each photo to a date, the observed condition, and any immediate action taken. Retain permit records and contractor details for installations or major repairs, because documentation quality can directly affect claim handling and future underwriting.
Because this is a high wind-risk coastal market, roof age and documented installation quality can directly influence insurability more than in lower-risk inland areas. A roof that has aged beyond typical wind- resistance expectations or lacks verifiable installation upgrades may become a red flag even if visible damage is not yet present. The emphasis is on verifiable details: the exact materials used, the installation method, fastener types and spacing, underlayment choice, and any wind-rated components. When records exist that confirm a compliant, high-quality installation, insurers respond with greater confidence and more favorable outlooks than for roofs with gaps in documentation.
In the days following a storm, a disciplined approach to documentation matters. Photograph any observable damage to shingles, edges, flashings, and vents, and note debris impact on gutters or soffits. Create a simple, organized summary of what happened, what was observed, and what temporary measures were undertaken to secure the roof. Share this evidence promptly with the insurer, accompanied by a clear contact path for adjusters. A well-kept, accessible archive of wind-related observations not only speeds up the recovery process but also reduces friction during claims, providing a clearer path back to normal living space for Merritt Island families.
Connect with contractors who help homeowners navigate the claims process from damage assessment to final approval.
David Keefe Roofing & Construction
(321) 639-3283 davidkeeferoofing.com
Merritt Island, Florida
5.0 from 98 reviews
Clark Brothers Roofing & Construction
(321) 342-2900 clarkbrothersroofingconstruction.com
141 S Courtenay Pkwy, Merritt Island, Florida
4.9 from 87 reviews
IRC Roofing & Construction
Merritt Island, Florida
5.0 from 71 reviews
Local pricing ranges from asphalt shingles at 350 to 700 USD per square up to clay tile at 1200 to 1900 USD per square. This spread reflects Merritt Island's mix of older homes with simple roofs and newer builds that lean toward higher-end materials. When choosing material, the gap between the bottom and top of the range is your signal to consider long-term resilience and maintenance costs as much as sticker price.
Costs can rise on coastal-grade projects where corrosion-resistant flashings and higher-wind installation details are needed for island exposure. If your roof sits near salt spray or faces frequent tropical storms, expect to pay more for upgraded fasteners, sealants, and underlayment choices designed to resist salt creep and wind uplift. These components can push the per-square rate above the base material price, especially if a roof requires additional edge protection or higher wind-rated underlayment.
Storm-driven demand surges in Brevard County can push labor scheduling and material availability in ways that make post-event replacements more expensive than dry-season planning. If you're replacing after a hurricane or tropical event, anticipate tighter schedules and potential markup on both materials and labor. To mitigate, secure a plan well before the peak season and consider ordering common materials ahead of time when possible.
Start with the midpoints: asphalt shingles in the 350-700 range for a standard install, then compare metal at 700-1100, concrete tile at 900-1500, and clay tile at 1200-1900, adjusting for coastal components as needed. Factor in potential upgrades for flashings and wind details early in the budgeting process to avoid surprises during the project window.
In this coastal setting, leak investigations often hinge on transitions between roof planes, low-slope sections, and where penetrations meet the field. The mix of residential and coastal-style homes means that a simple ridge-area repair may miss a slow drip lurking at a wall-to-roof intersection or a flashing bend. Pay close attention to joints around exhaust vents, plumbing stacks, and the perimeter where a wall meets the roof deck. Even small gaps can turn into stubborn leaks after a heavy shower cycle.
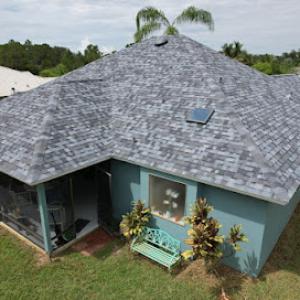
Frequent heavy rain and brisk sea breezes push water toward the roof edges and flashing details. Repeated summer storms aggravate vulnerabilities around skylights and where flashing is tucked under shingle or tile materials. Watch for peeling sealant, lifted edges, or corrosion at metal flashings, especially where salt air meets moisture. After a storm, inspect skylight surrounds first, then work outward along the low-slope zones where water tends to spread before dripping into attic spaces.
Skylights are common pinch points on these homes. The vulnerable areas include the curb flashing, the membrane transitions under shingles or tiles, and any fastener penetrations that loosen with wind or thermal cycling. On flat or low-slope sections, a poor integration of the skylight flashing with the surrounding field can create a capillary path for water. If you notice condensation on the skylight inner pane, damp insulation, or staining near the curb, treat it as an indicator to re-seal or reflash before more invasive damage develops.
Walk the roof after a good rain, focusing on low-slope zones and around every penetration. Look for loose or displaced flashing, lifted shingles near transitions, and any rubber or bituminous sealant that has cracked or shredded. In attic spaces, scan for damp insulation, musty odors, or staining around skylight shafts and eave-to-wall junctions. Address issues promptly to prevent rot, mold, and more costly repairs later.
Find specialists in TPO, EPDM, and built-up flat roofing systems for residential and commercial properties.
JMak Roofing
(321) 759-5625 www.jmakroofing.com
415 W Merritt Island Causeway Suite 1, Merritt Island, Florida
4.8 from 116 reviews

Wiedmann Construction & Roofing
(321) 806-7663 wiedmannroofing.com
777 E Merritt Island Cswy Ste 314, Merritt Island, Florida
4.8 from 56 reviews

All Space Coast Roofing
(321) 474-3668 www.allspacecoastroofing.com
606 Gladiola St, Merritt Island, Florida
4.8 from 19 reviews