Last updated: Apr 19, 2026
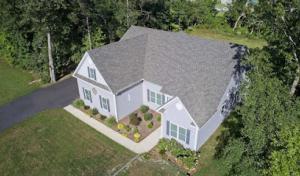
In Monroe, the thunderstorm season-especially June through August-brings sudden shingles loss and active leaks that demand immediate attention. A roof that fails during a storm rarely waits for perfect daylight to reveal its damage. If you notice shingles torn loose, exposed sheathing, or water actively dripping inside, treat it as an emergency. The faster you respond, the more you guard against interior damage, insulation saturation, and mold risk that can spiral after a heavy rain. The phone should stay within reach, your exterior doors closed to keep wind-driven rain from chasing inside, and your ladder feet planted on solid ground away from eaves and damaged edges. Time matters when wind gusts hit and rain arrives mid-cleanup.
Spring and late-summer storm activity in this part of Union County increases the chance that tear-offs, temporary dry-ins, or emergency tarps are interrupted by new rain. If a leak is actively coming in, don't delay a temporary fix to wait for calmer weather. Use a durable tarp, weighted with sandbags or bricks, to cover the most vulnerable area until crews can evaluate and seal the roof properly. While a tarp is not a permanent solution, it buys you critical hours during a storm window and helps protect ceilings, walls, and possessions from further water intrusion. When you do arrange a repair window, coordinate so the timing minimizes exposure to back-to-back storms, and document any interim measures with photos. The goal is to slow the water ingress enough to prevent cascading damage while you pursue a full, code-conscious repair.
Local claim activity is significant enough that insurers will expect clear pre-loss and post-loss photos, roof age details, and evidence separating storm damage from older wear. Before you secure any temporary fixes, take wide and close shots of all damaged areas, the attic spaces if accessible, and the interior signs of leakage. Note the date and the conditions of the storm that caused the damage. If possible, obtain a second set of photos after any temporary tarping or quick sealing to show what changed. Keep a simple written log: who inspected, what was observed, what temporary measures were taken, and when. This documentation helps avoid arguments about pre-existing wear and accelerates the claims review by separating immediate storm effects from gradual aging.
Once the weather allows, call a roofing professional who understands storm-driven claims and the local climate realities. Look for crews that can provide a rapid on-site inspection, a clear assessment of whether the roof can be repaired short-term or needs a full replacement, and a plan that minimizes further disruption during the insulation-dense wet season. Ask for a written scope that differentiates storm-related damage from pre-existing wear, and requests for flashing, underlayment, and ventilation checks that address the root causes of leaks rather than only the symptom. On-site communication should be precise: identify the damaged zones, explain the sequence of fixes, and set a realistic timeline that accounts for potential rain delays.
Do not climb a ladder onto a visibly damaged roof in active rain or high winds. Avoid overstepping weak shingles or walking near loose edges. Do not delay reporting signs of a leak when the attic or ceiling shows staining or there is moisture on insulation. And avoid waiting for perfect conditions to begin documentation; capture evidence now to support a quick, accurate claim review and to guide the repair approach once the weather clears. In this climate, preparedness and prompt, well-documented action are your best defense against escalating damage and protracted remediation.
Find local contractors experienced in assessing and restoring roofs after hail, wind, and severe weather events.
Jeff Freeman's Roofing Siding & Windows
(704) 400-0601 www.charlotteroofpros.com
2840 Gray Fox Rd, Monroe, North Carolina
5.0 from 47 reviews
Innovation
(704) 271-2508 www.innovationrestorationnc.com
100 S Main St suite 104, Monroe, North Carolina
4.8 from 42 reviews
Roofers Monroe NC
(980) 393-6372 roofersmonroencnc.com
1736 Dickerson Blvd, Monroe, North Carolina
5.0 from 4 reviews
Jeff Freeman's Roofing Siding & Windows
(704) 400-0601 www.charlotteroofpros.com
2840 Gray Fox Rd, Monroe, North Carolina
5.0 from 47 reviews
Jeff Freeman's Roofing Siding & Windows has been serving the Charlotte and surrounding areas since 1990. Contact us for all your roofing, siding, and window needs!
Innovation
(704) 271-2508 www.innovationrestorationnc.com
100 S Main St suite 104, Monroe, North Carolina
4.8 from 42 reviews
Your Trusted Local Roofing Experts. Licensed, insured, and family-owned, we specialize in quality roofing solutions and repairs including 100% silicone Comercial coatings.Our services include storm damage, hail damage, hurricane and wind damage, and comprehensive roof repair. Top rated roofing contractors in NC & SC areas.
Old North Roofing & Sheet Metal
(704) 912-4150 www.oldnorthroofing.com
1807 Claude Austin Rd, Monroe, North Carolina
5.0 from 17 reviews
Established in 2017, Old North Roofing & Sheet Metal, Inc. has been a cornerstone of quality and reliability in roofing and construction. With over 25 years of experience, this company offers comprehensive services from full roof installations and replacements to meticulous repairs. Specializing in both roofing and sheet metal, they also provide expert gutter services, ensuring a complete and professional finish. Their commitment to superior craftsmanship and customer satisfaction has made them a trusted partner for residential and commercial projects.
HQ metal Roofing
(704) 219-1698 hq-metal-roofing.com
208 Pennigar Rd, Monroe, North Carolina
5.0 from 10 reviews
We specialize in residential and new construction roof installations, as well as existing roof repairs and replacements in Charlotte, NC, and surrounding areas.
Roofing By The Book
(704) 477-1600 roofingbythebook.com
5119 Waxhaw Hwy, Monroe, North Carolina
5.0 from 9 reviews
At Roofing By The Book, LLC, we’re your trusted professionals for all your roofing, siding, and gutter needs. We know how important your home or business is to you, so our experts strive to provide the absolute best services we can. Whether you need us to install your new high-quality roof with precision, replace or extend your rain gutters, or help you choose the right durable and affordable siding options for your home or office, you can rely on our experienced professionals. Honesty and integrity are at the core of everything we do, and we are proud to provide competitive pricing on all our services. If you need roofing, siding, or gutter services in Monroe, North Carolina or surrounding areas, contact us today to request a free quote.
Zuniga Construction
(704) 258-4082 zunigaconstructionincroofing.com
1523 Tom Williams Rd, Monroe, North Carolina
5.0 from 7 reviews
Roof replacement, new construction roof, Stand and seam metal, Comercial and residencial flat roof TPO, EPDM, Gutters services 20 years of experience we are at BBB Too!

Longhorn Roofing
(704) 774-1080 www.longhornroofinginc.com
1302 Walkup Ave, Monroe, North Carolina
4.3 from 15 reviews
We are a family business that takes pride in the quality of our work. We do commercial, industrial & residential roofing such as Metal, Copper, Modified Bitumen, Single-ply, PVC, TPO, EPDM, Coatings, Shingles, Cedar Shake, Slate, Tile, and other roofing materials.
Roofers Monroe NC
(980) 393-6372 roofersmonroencnc.com
1736 Dickerson Blvd, Monroe, North Carolina
5.0 from 4 reviews
At Roofers Monroe NC, we take pride in providing top-quality roofing services for residential and commercial properties in Monroe, NC, and the surrounding areas. Whether you're in need of a full roof replacement, emergency repairs, or routine maintenance, our team of experienced roofing professionals is here to deliver exceptional results that protect your home or business.
David Haywood Roofing
515 Ridge Rd, Monroe, North Carolina
5.0 from 2 reviews
We are a family owned and operated roofing company serving the Charlotte area. We specialize in storm damage hail and wind. Give us a call if you think your home has suffered hail or wind damage. We look forward to working with you.

McToolman Services
(704) 918-6248 www.mctoolman.com
Serving
5.0 from 106 reviews
Family owned and operated with over 20 years experience. We offer repair and replacement of Roofs, Gutters, Siding, Windows, Doors, and decks along with a wide variety of rotten wood repair and handyman services. All work is guaranteed!!!
Shingles Roof Direct
(704) 320-1896 shinglesroofdirect.com
Serving
5.0 from 289 reviews
Roofing Contractor Charlotte NC Serving Charlotte, Concord, Matthews, Indian Trail, Monroe, and the surrounding Union County and Mecklenburg area for over 16 years! We’re one of the best Roofing Companies Charlotte NC who's committed to expert installations that extend the life of your roof and guarantee your satisfaction. With our professional roof installation services, we expect your roof to outlive a 30-year manufacturer’s warranty if the manufacturer’s care instructions are followed. Not only are we local to the Carolinas, but we’re a family-owned company that handles small to large roofing projects with excellent workmanship and expediency. Call Today for a Free Over The Phone Estimate! Financing Available

Rumble Bee Roofing & Gutters
(704) 993-8181 rumblebeeroofing.com
Serving
5.0 from 201 reviews
Rumble Bee Roofing and Gutters is a trusted, family-owned roofing company proudly serving Indian Trail, NC, and surrounding areas. With over 30 years of combined experience, our team specializes in new roof installation, general roofing repairs, and new gutter installation. We’re dedicated to delivering high-quality craftsmanship, honest service, and reliable roofing solutions tailored to protect and enhance your home. Whether you need a full roof replacement or a complete gutter system, we’re here to help. As a local business, we take pride in our strong community ties and commitment to customer satisfaction. Choose Rumble Bee Roofing and Gutters for expert roofing services backed by decades of hands-on experience and professionalism.
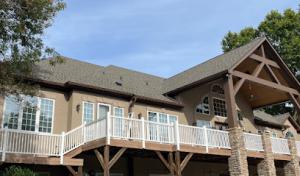
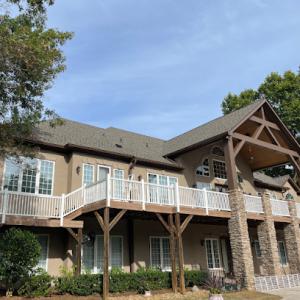
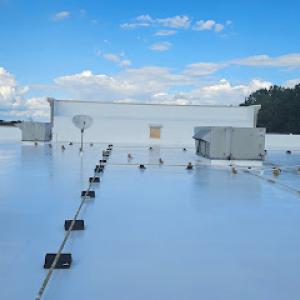
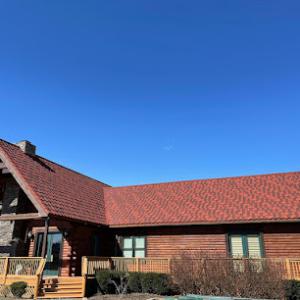
Asphalt shingles are the dominant practical choice for Monroe's storm-prone Piedmont climate. What matters most here is not just the shingle style, but how the system is put together. Year-round rain and the hot, humid summers demand good ventilation to prevent moisture buildup in the attic, a high-quality underlayment to block any wind-driven leaks, and algae-resistant features to slow streaking on the south and west exposures. If a contractor offers the cheapest option without addressing attic ventilation, you're likely trading long-term performance for a lower upfront price. In practice, choose shingles with a robust underlayment and a ventilation plan that keeps the attic near outside temperatures. A well-vented attic reduces condensation risk during storm-driven cool-downs and helps preserve the roof's lifespan through multiple storm seasons.
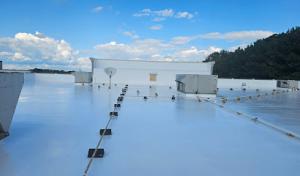
Metal roofing has a meaningful niche locally because it handles repeated rain exposure and sheds water quickly during Monroe's thunderstorm season. If the attic and eave layout already support metal, it can offer quick response to hail and wind-driven rain, with a longer service life in a climate of frequent downpours. The key in this area is proper installation: fasteners must be correctly sealed and flashed to withstand wind loads, and the substrate needs to be solid and well vented. Metal can be a good match for taller homes or those with challenging roof shapes where rapid water shedding reduces the risk of moisture intrusion between storms. Consider color and coating compatibility with local humidity to prevent surface staining and ensure long-term appearance.
Clay tile, slate, fiber cement, and synthetic/composite options do appear in the market, but they are more sensitive to structural load, installer skill, and replacement-part matching on older or custom homes. Clay tile and slate bring distinctive aesthetics and excellent longevity when the roof structure is engineered for their weight, but that same weight can drive structural reinforcement and differential movement issues over time. Fiber cement and synthetic/composite shingles can mimic the look of natural materials while offering improved impact resistance and easier handling, yet they still require careful assessment of roof deck condition and fastener compatibility. On homes with unusual roof angles, historic detailing, or older construction, the risk of cracked tiles or mismatched replacement parts increases if the installation isn't executed with precise alignment and matching materials. In all cases, verify that the chosen system can tolerate Monroe's storm cycle, with attention to proper underlayment, ventilation compatibility, and a plan for future part availability and maintenance.
In practice, start by assessing attic ventilation and confirming that the underlayment is rated for weather exposure common to this area. For any non-asphalt option, review the structural load capacity of the existing roof deck and the feasibility of reinforcement if needed. If algae or streaking is a concern, prioritize products with built-in algae resistance and ensure the color and coating choices are well-suited to year-round sun exposure. When storms threaten, prioritize roofing systems and installations that emphasize tight flashing detailing, wind-rated fasteners, and a proven track record in storm-prone settings. A well-chosen roof in this climate should balance quick water shedding, moisture control, and long-term durability without overcomplicating maintenance or part compatibility on older, character-rich homes.
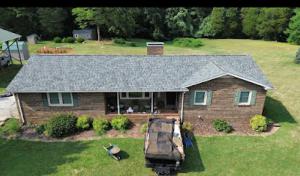
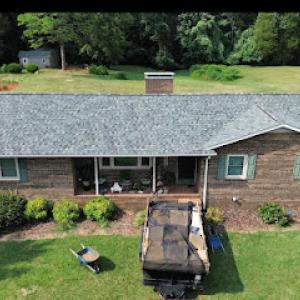
In Monroe, spring humidity raises moisture exposure during tear-off and deck inspection, so dry-in speed matters more here than in drier inland markets. If a hail hit or high-wind event leaves missing shingles, torn underlayment, or lifted edges, the decision to replace rather than repair should weigh the extent of moisture beneath the decking and the integrity of the roof deck. Look for soft spots, dark staining, or a musty odor after a rain. If you see staining on attic sheathing or persistent condensation on insulation, that signals more moisture intrusion than a quick patch can safely manage. When signs point to widespread deck saturation, a full replacement becomes the prudent path, since fast-tear-off without proper deck drying risks hidden mold and warped boards later.
Summer scheduling can be disrupted by frequent afternoon thunderstorms, which affects start dates, open-roof risk, and crew productivity. If a replacement is scheduled in peak storm season, plan for a window of dry days, not just dry mornings. A roof opened during a passing thunderstorm can trap moisture at the deck and underlayment, increasing the risk of post-tear-off leaks. If the project must pause, use that gap to inspect the interior for any new signs of water intrusion and prepare a precise dry-in plan so the crew can resume quickly once the weather settles. In practical terms, block out the first available multi-day stretch with several days of dry weather and no extreme heat, which helps sealants and underlayment align properly and reduces the chance of rapid moisture uptake as the days warm up.
Winter in Monroe is milder than mountain markets, but freezes and temperature swings can still slow installation and affect how some materials seal or perform during replacement. Frost on the roof and cold nights can delay adhesive-setting times and make venting decisions tricky. If a tear-off coincides with a stretch of freezing nights, expect slower progress and potential temporary gaps that need attention once temperatures rise. Conversely, sudden warm spells can tempt rapid work, but flexible flashing and sealants need consistent cool-to-warm cycling to seal evenly; rushing through this transition invites later leaks. Schedule windows that avoid the coldest deposits and aim for mid-range days where shingles, underlayment, and sealants can cure without thermal shock.
Storm response hinges on clear documentation. Before removing roofing materials, photograph the roof's condition from multiple angles and catalog damaged areas with timestamps. Keep a running record of the dates of weather events, the onset of leaks, and interior moisture issues. When contacting the insurer, present these photos alongside a concise timeline of damage and the proposed replacement plan. A well-documented history helps establish the necessity of a full replacement versus a targeted repair and can smooth the claims process during a busy storm season.
Get a clear picture of your project costs upfront - no commitment required.
Roofing By The Book
(704) 477-1600 roofingbythebook.com
5119 Waxhaw Hwy, Monroe, North Carolina
5.0 from 9 reviews

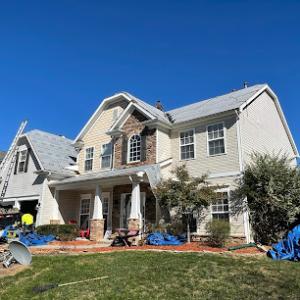
A full roof replacement in Monroe typically requires a permit processed through the local building department serving Monroe and Union County. The permit ensures that the work follows the county's structural, drainage, and ventilation standards that are especially important after frequent thunderstorm and wind events. Before any shingles come off, you should confirm what exact paperwork is needed, whether a contractor license is required for the project, and any neighborhood or homeowner association rules that might apply. The goal is to align the project with the county's safety and moisture-control expectations from day one.
Inspections are commonly scheduled during and after the job, with attention to underlayment, ventilation, and installation compliance rather than only the finished shingle surface. In Monroe, the health of the attic space and the roof deck matters as much as the appearance of the final layer. Expect the inspector to verify proper underlayment type and placement, correct attic ventilation balance, and secure, wind-resistant fasten-down of shingles or other roofing material. A smooth inspection process helps prevent moisture entry during the next storm season and can identify ventilation gaps that often contribute to early wear in humid Piedmont conditions.
Larger projects or roofs involving structural changes may face additional review beyond a straightforward re-roof permit. If framing, rafters, or skylight openings are altered, the permit review can include structural calculations or plans for new support members. In Union County, these steps help ensure the roof remains sound under heavy rain, hail, and high winds. If a contractor proposes any lateral changes to roof lines, dormers, or ventilation paths, expect the permit process to require more detailed drawings and potentially a second inspection to confirm compliance with current building codes.
When you're lining up a storm-repair plan, you'll see a clear spread in material costs per square. Asphalt shingles run roughly from 350 to 700 USD per square, while metal stays between 600 and 1,400 USD per square. If you're weighing higher-end options, synthetic or composite shingles clock in around 450 to 800 USD per square, clay tile can push 1,000 to 2,600 USD per square, slate sits high at 1,800 to 3,500 USD per square, and fiber cement shingles land about 500 to 750 USD per square. In a typical Monroe home with asphalt or metal already in place, the choice is often driven by longevity expectations, wind resilience, and how severe the storm risk profile is in your neighborhood. Here in Monroe, local pricing can rise quickly after regional storm events when re-roof demand spikes and fast-response crews are booked out. That makes it wise to lock in preferred materials early if you're facing a storm-driven timetable.
Costs in Monroe are influenced by whether the project is a straightforward re-roof or includes deck repairs, ventilation corrections, skylight work, or tile/slate handling. A plain re-roof with standard underlayment and no attic adjustments will fall toward the lower end of the ranges, but once you add deck or fascia repairs, you'll see line items for decking material and labor that push the bill higher. Ventilation corrections, such as adding or repositioning soffit vents or a ridge vent, can add days of work and a portion of the labor cost, even if the material itself is simple. If you're considering tile or slate, factor in specialized framing, roof-to-deck adjustments, and the need for skilled installers; those projects routinely land at the upper end of the price spectrum and require careful scheduling. In weather-susceptible periods, scheduling pressures can amplify these numbers as crews juggle multiple storm-driven jobs.
Soft costs-inspection coordination, weather-related delays, and the time spent securing and coordinating deliveries-can extend timelines even when material pricing looks stable. Spring and summer storms in particular can push crews to the back burner, so you might see a few extra days or a week added to the project timeline. If you're balancing a tight storm response window, plan for potential weather delays that stretch as components are staged for install. Additionally, consider that some materials have longer lead times; metal or clay products may require more scheduling coordination when multiple homeowners in town are racing to replace after a big event. In practice, that means your bottom line can drift beyond the material price alone, and a contingency cushion helps keep the project on track. Here in Monroe, the rhythm of the season matters: storm aftermath, fast response, and the reality of busy crews all shape the final cost and timing.
Get a clear picture of your project costs upfront - no commitment required.
Roofing By The Book
(704) 477-1600 roofingbythebook.com
5119 Waxhaw Hwy, Monroe, North Carolina
5.0 from 9 reviews
When a storm shakes through the Piedmont, the claim review in this area often zeroes in on roof age, any prior patching, and whether the visible damage matches a recent wind event. An adjuster will look for patterns that suggest long-term wear versus a sudden claim spike from a single storm. If the roof has patches from previous leaks or partial repairs, expect close scrutiny about whether those fixes were preventive or merely temporary. This reality means you should be ready to explain the roof's history honestly and provide records that tie the damage to a specific thunderstorm or wind surge.
Documentation matters more after a storm than you might expect. Photograph every elevation of the roof and note any soft metal impacts, such as dented flashing or loose drip edges. Inside, keep record of any staining from leaks around ceilings or attic spaces, even if the stains seem minor. If emergency tarping was required, preserve the tarp and the surrounding area; those temporary measures can be evidence of active damage and urgency, but they can disappear quickly once cleanup starts. Before cleanup removes evidence, take clear, dated photos from multiple angles to establish a baseline for the claim.
Clear separation between old deterioration and new storm-caused damage is especially important in this market when seeking full replacement approval. The adjuster will separate preexisting issues from the recent event, so your file should show when and how prior wear occurred and how the latest storm produced the current impact. Present timelines, photos, and any contractor notes that link recent damage to the storm, not to gradual aging.
Connect with contractors who help homeowners navigate the claims process from damage assessment to final approval.
Jeff Freeman's Roofing Siding & Windows
(704) 400-0601 www.charlotteroofpros.com
2840 Gray Fox Rd, Monroe, North Carolina
5.0 from 47 reviews
Innovation
(704) 271-2508 www.innovationrestorationnc.com
100 S Main St suite 104, Monroe, North Carolina
4.8 from 42 reviews
In this humid climate, moisture problems rarely appear from age alone; they show up as you notice damp attic rafters, warped sheathing, or long-lasting condensation along the eaves. Poor attic ventilation lets warm, moist air linger and condense on cooler roof decks, which slowly invites mold, wood rot, and accelerated underlayment breakdown. If soffit vents are blocked by insulation or debris, or if exhaust fans vent into the attic rather than outside, those hidden layers pay the price. The consequence is not just a soggy attic crawlspace-it can fuel hidden leaks that surface later as ceiling stains far from the original breach.
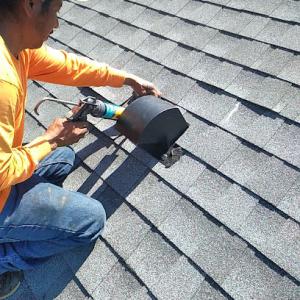
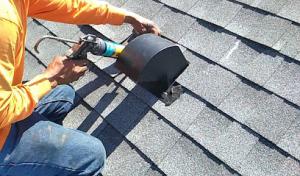
Thunderstorm season in this area often tests every seal at ridge caps, flashing transitions, and previously repaired sections. A strong gust can lift shingles or alloys just enough to let rain follow a seam or nail line down into the roof plane. Turn up your antenna for signs of wind damage after a storm: loose granules in gutters, crown flashing that has shifted, or discoloration along the ridge. Repeated hits create a cycle where tiny breaches grow into persistent leaks, especially around vulnerable joints where two different roof planes meet or where metal flashing overlaps fail to shed water cleanly.
Skylights and irregular roof shapes demand closer leak tracing because repeated storm exposure can make the source appear lower or farther from the actual entry point. Moisture can travel along rafters or insulation and emerge at ceilings far from the original tear. Pay attention to vent pipes, chimney terminations, and transitions around skylights, where flashing can deform with temperature swings or storm pressure. When a leak appears, map a path from the entry point to the apparent stain, but follow any evidence to the true source rather than assuming the first damp spot is the culprit.
Find contractors experienced in skylight installation, flashing, and leak repairs to bring natural light into your home.
Jeff Freeman's Roofing Siding & Windows
(704) 400-0601 www.charlotteroofpros.com
2840 Gray Fox Rd, Monroe, North Carolina
5.0 from 47 reviews
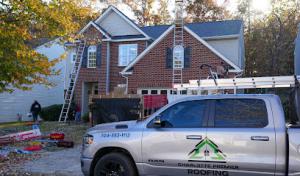
Charlotte Premier Roofing
(704) 352-1112 www.charlottepremierroofing.com
Serving
5.0 from 79 reviews