Last updated: Apr 19, 2026
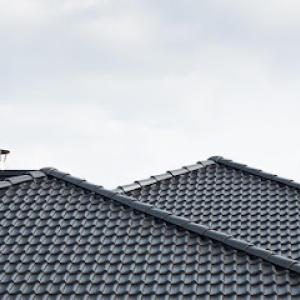
A storm season in this area hits hard and fast. In this neighborhood, a single spring hail event can leave dozens of roofs with damage that isn't obvious from the street. You'll feel the impact in schedules, supply availability, and the urgency to document every ding, crack, and dent. This is a first-order homeowner concern: inspect early, document thoroughly, and act quickly when the sky finally clears.
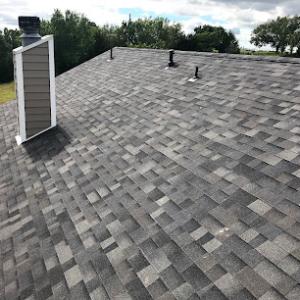
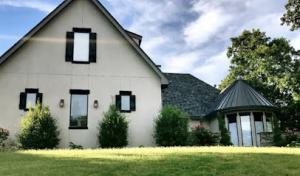
Claremore sits in a high hail and wind claim environment typical of northeast Oklahoma, where repeated events push claim activity into the foreground of every homeowner's to-do list. Because hail can create both cosmetic and functional damage, the biggest risk is letting something slide until it becomes a disputed repair. A roof that looks fine from the ground can hide composite granule loss, hidden fastener damage, or accelerated wear under metal edges. The practical consequence is a domino effect: delayed inspections, compressed windows for documentation, and a rush to secure materials and crews once the insurance process starts.
Because spring weather in this area arrives in bursts, you should expect clustered damage events. A few good days of sunshine don't erase the prior week's impact. The result is crowded schedules for local contractors and adjusters, which can push permanent replacement work into the hot months. The timing matters: the longer you wait after a hail event, the harder it is to prove the full extent of damage with confidence. Pre-loss screening becomes essential to avoid second-guessing later, and post-loss checks should capture every angle of the roof, plus nearby structures where hail may have traveled (gutters, vents, skylights).
Documentation is the linchpin here. In this market, decisions about whether to replace or repair hinge on whether damage is cosmetic or functional. That means date-stamped, comprehensive photos from multiple angles, taken both before and after any temporary tarping or repairs. Keep a clear log of when inspections occurred, who performed them, and what equipment or products were used. If there is a discrepancy between the insurer's assessment and your own findings, you'll need those records to support your position. In practice, that means you should photograph the entire roof line from ground level with a wide shot, then climb safely to document hail impact patterns on shingles, flashing, and edging. Capture close-ups of granule loss, cracks, and dented metal, and don't overlook the interior attic space for signs of latent leakage.
Act with deliberate speed once the claim is opened. Schedule a roof inspection promptly-preferably within days of a hail event-and coordinate with your insurer to align on inspection timing. If multiple storms have occurred, request a coordinated assessment that can address cumulative damage rather than isolated incidents. When you receive an adjuster's report, review it line by line, cross-reference with your photo log and inspection notes, and flag any gaps or disputed items as early as possible. Local crews can fill scheduling bottlenecks only if the documentation is complete and precise, so organize your binders, emails, and photos now. This is about controlling the timeline to avoid a mismatch between temporary fixes and permanent replacement that could linger into the peak of summer.

Summit Roofing & Solar
(918) 346-0675 summitroofok.com
2412 Westwood Dr, Claremore, Oklahoma
5.0 from 86 reviews
Summit Roofing and Solar is a trusted roofing company based in Claremore, OK, specializing in high-quality roof solutions and energy-efficient upgrades. We offer expert solar roof installation services to help homeowners reduce energy costs while increasing property value. Whether you're dealing with storm damage or planning preventative maintenance, we provide a thorough roofing inspection estimate at no cost, so you can make informed decisions with confidence. Serving Claremore and the surrounding areas, we’re committed to honest work, reliable service, and long-lasting results.
Capital Roofing
(918) 260-4075 claremoreroofer.net
18795 Spring Creek Ln, Claremore, Oklahoma
4.9 from 106 reviews
Capital Roofing is the #1 Claremore roofing company with over a decade of experience. The highly skilled team offers residential roofing services throughout Claremore, OK. In addition, Capital Roofing is a certified preferred partner with Owens Corning and GAF. We take pride in partnering with two of America's most trusted brands in roofing. Our projects are always completed on time, and we take great pride in delivering excellent service to every customer.
MMR Home Solutions
Claremore, OK
5.0 from 34 reviews
Welcome to MMR Home Solutions! Proudly serving Tulsa and surrounding areas, we specialize in roofing, gutters, and drywall services. Whether you need repairs, full replacements, or new installations, we deliver quality craftsmanship with honest pricing. 💬 Free Estimates Available – Call or message us today! 🏠 Let us help protect and improve your home — We Make It Happen!
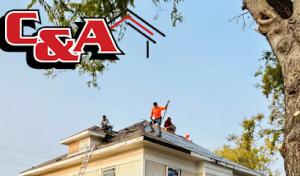
C&A Roofing & Construction
(918) 637-6634 www.caroofingconstruction.com
838 W Will Rogers Blvd, Claremore, Oklahoma
4.7 from 124 reviews
As a leading general contractor and restoration company, C&A proudly serves Claremore, Tulsa, Oklahoma City, and all of eastern Oklahoma. We specialize in comprehensive roofing services, including storm damage repair, new roof installation, and replacement for residential and commercial properties. Beyond roofing, our expert team provides full home remodeling, from kitchen & bath makeovers to flooring, window replacement, and custom decks. In an emergency, we are your trusted partner for water, fire, and mold restoration. With a licensed, insured, and A+ BBB-rated team, we deliver quality craftsmanship and a commitment to customer satisfaction. Contact us for a free estimate and let us restore your home and peace of mind.
Anytime Roofing
(918) 215-8159 anytimehomeinc.com
17222 Stonehedge Ct #9, Claremore, Oklahoma
5.0 from 23 reviews
Top Roofing Contractor in Claremore OK. Storm damage repair specialist servicing Claremore OK and surrounding areas, standing ready to take care of all your roofing and storm damage needs, Anytime!! We are ready to help 24hrs a day, Call Now! #roofrepairclaremore #stormdamagerepairclaremore #roofingcompanyclaremore #rooferclaremore #claremorecontractor
Paramount Roofing & Construction
8860 Allsup Ave, Claremore, Oklahoma
5.0 from 10 reviews
Asphalt roofing and seamless guttering contractors. Storm damage and restoration specialist.
RO-CO Roofing & Construction
(918) 409-2010 www.rocoroofing.net
Claremore, OK
4.5 from 16 reviews
Roofing and Construction For Rogers, Tulsa, Mayes, and Surrounding Counties.
Five Star Roofing & Contracting
(918) 416-7006 fivestarroofingandcontracting.com
24759 S 4100 Rd, Claremore, Oklahoma
5.0 from 1 review
Sick of dealing with sketchy roofers or getting ghosted after a quote? At Five Star Roofing and Contracting, we keep it simple: show up on time, do clean work, and treat your home like it’s ours. From quick roof repairs to full installs — whether it's asphalt shingles or metal roofing Tulsa homeowners swear by — we handle it all with no drama and no nonsense. Real people. Real results. And a roof that’s built to outlast the weather and the competition.
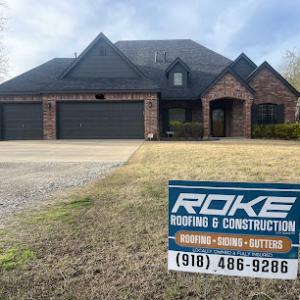
ROKE Roofing & Construction
(918) 486-9286 www.rokeroofing.com
Serving
5.0 from 42 reviews
At ROKE Roofing & Construction, we're committed to providing quality roofing services to our community. We offer full roof replacement, asphalt roof repair, cedar shake replacement, gutter installation, and more. Let us help protect your home with a sturdy, reliable roof.
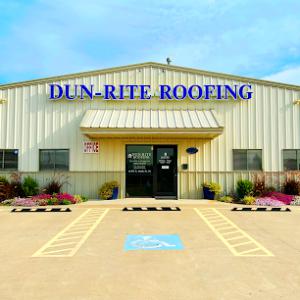
Dun-Rite Roofing
(918) 272-1831 www.dunriteroofing.com
Serving
5.0 from 92 reviews
When Jim and Candie Murr opened Dun-Rite Roofing in 1992, they made a commitment to provide customers with high-quality roofing solutions at affordable prices. Nearly 30 years later, the Murr Family is still doing just that. From roof repair to roof replacement, our family of professionals at Dun-Rite provide service to the Greater Tulsa and Northeast Oklahoma area to ensure that our customers get the very best roof for their money.
Ridgeback Roofing & Construction
(918) 892-2020 www.ridgebackroofingok.com
Serving
5.0 from 72 reviews
Protect your largest investment with our reliable roofing services. We are a locally owned and operated roofing company currently serving Owasso, OK and surrounding communities. If you want to make your roof last as long as possible, it is vital that you never put off a roof repair. Small issues with roofing become big issues in a hurry. No matter how major or minor the repair you need, we are here to help. We offer roofing contracting, roof installation, and roofing repair.
Ryan Roofing Systems
(918) 510-7329 ryanroofing.com
Serving
4.9 from 23 reviews
Ryan Roofing Systems is a family-owned and operated roofing company proudly serving Tulsa, Oklahoma and the surrounding communities—including Collinsville—for over 10 years. We’re your hometown specialists in residential roofing, storm restoration, guttering, and insurance-claim coordination, offering free inspections to assess your home’s needs. Our trusted team helps Fortify your home’s first line of defense—your roof—by guiding you through the best solutions tailored to your home and budget. Whether you're navigating storm damage, needing gutter replacement, or simply due for a roof upgrade, we provide straightforward, honest advice and reliable, quality workmanship.
When a spring storm line rolls through, the priority is to stop the damage from wind-driven rain and protect the insulation and attic spaces. In this climate, exposed decking and active leaks can become a flood path within minutes as the next round of moisture arrives. Start by surveying from the ground with binoculars or a ladder-assisted view to locate obvious gaps, missing shingles, and lifted edges. If you can safely reach the roof, look for torn underlayment, exposed roof decking, and zones where fasteners or nails have pulled loose. Prioritize areas closest to the attic or ceiling stains, as those indicate active intrusion. Wear long sleeves and eye protection, and avoid standing on wet or icy surfaces. If a ceiling leak is evident, contain it by placing a temporary, water-impervious barrier under the leak path to minimize interior damage until tarping can be completed.
A same-day dry-in is essential to slow moisture intrusion until the next storm front arrives. Use a sturdy tarp, anchored with roofing nails or deck screws, and fasten it along the edges well beyond the damaged zone to prevent wind-lift. The wind in northeast Oklahoma storm lines can grab even small shingle blow-offs and turn them into attic and ceiling trouble fast, so ensure the tarp overlaps intact roofing by at least a foot on all sides. If the roof pitch is steep, add a second tarp section overlapped over the first and secured with weighted edges or heavy rocks to resist gusts. Avoid duct tape as the sole hold-tarp anchors should be mechanically fixed to solid roofing or decking, not just the felt layer. If the roof is not safely accessible, place tarps over interior ceilings only after shutting off the compromised area from further water entry and calling for professional help.
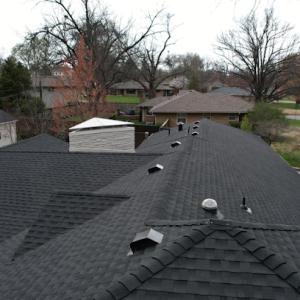
In this region, reinforced ridges and valley intersections often bear the first impact of hail, with wind-driven rain exploiting any seam or boot joint. Areas around chimneys, vent flashing, and skylights tend to reveal leaks quickly after a storm line passes. Shingle blow-offs can expose underlayment, accelerating indoor staining during the next rain cycle. If the attic shows active dripping near rafter tails or ceiling drywall, treat it as an urgent signal to tarp and then mobilize a roofing contractor, because delays can amplify interior damage and complicate later repairs.
Storm-chasing demand spikes can leave homeowners waiting for full reroof scheduling, so timely professional tarping is critical. If tarping becomes impractical due to height, darkness, or safety concerns, call for a rapid-response roofer who has storm-ready tarps and fast-on-site setup. A local contractor will understand the typical wind vectors and hail patterns the area experiences and can secure a dry-in quickly, reducing the risk of further interior damage and keeping the project on track once calmer weather returns. If interior moisture points persist after tarping, seek emergency assessment to pinpoint the best dry-in approach and prevent further ceiling and insulation damage.
When you can't wait, these contractors offer fast response times to stop leaks and prevent further damage.
Capital Roofing
(918) 260-4075 claremoreroofer.net
18795 Spring Creek Ln, Claremore, Oklahoma
4.9 from 106 reviews
M & M Enterprises
(918) 864-9807 mmenterpriseok.com
1514 N4250 Rd, Claremore, Oklahoma
4.9 from 7 reviews

Asphalt shingles dominate Claremore replacements because they fit the local housing stock and are the most common insurance-funded reroof material after hail events. In a neighborhood of steep slopes and brick or wood exteriors, asphalt offers predictable performance, straightforward installation, and a robust supply chain for quick reroof projects between storms. When hail has shortened the life of a roof, the fastest path from inspection to a sealed hat over the home is often asphalt, so homeowners tend to favor this option for ease of color selection, warranty coverage, and crew availability. If hail damage is evident, a solid underlayment with a compatible starter strip and high-quality sealant can help manage wind-driven leaks during the remaining storm season. For Claremore's typical attic spaces, choose an asphalt system with a mineral-s surfaced or impact-resistant variant if you expect repeated hail exposure.
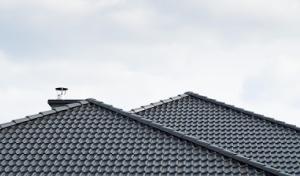
Metal roofing has a meaningful niche in Claremore because homeowners looking past repeated storm cycles often weigh impact resistance, heat shedding, and longer service life against higher upfront cost. Metal behaves well under hail, often showing fewer immediate dents than asphalt, which can translate into fewer leak risks during the spring wind events. However, the heat of Oklahoma summers can be harsh on attic temperatures, so pairing metal with a well-vented roof deck and a reflective coating or light color helps manage interior comfort. If the home has a broader insurance strategy that anticipates multi-year cycles between major hail events, metal can offer lower maintenance needs and longer replacement intervals. Structural evaluation is key: the roof deck and framing must be able to support the added mass in some metal profiles, especially on steeper slopes.
Wood shakes and tile products are available in this market, but Claremore's hail exposure and occasional winter freezes make impact performance, underlayment quality, and structural suitability more important than appearance alone. Shake roofs are vulnerable to denting and splintering when hail is severe, and some tiles can crack under heavy impacts. If choosing wood or tile, insist on a high-quality underlayment, heavy-fastening patterns, and a roof deck built to resist movement from freeze-thaw cycles. Consider impact-rated underlayment and a design that minimizes long overhangs where wind-driven hail can catch and lift material. For those who still prefer the aesthetic of wood or tile, pairing with a reinforced underlayment and proper sealing details can extend life without inviting frequent repairs after spring storms.
In practice, the best choice often lines up with how insurance documentation will unfold after a hail event and how quickly a roof can be installed once a claim is approved. Asphalt remains the most reliable default for reliable coverage, fast scheduling, and compatibility with Claremore's housing stock. Metal offers a longer-term option for homeowners seeking wind resistance and cooler attic temperatures, provided the structure supports it and local crews have experience with the installation. Wood and tile provide distinct looks but demand careful attention to impact performance and structural readiness in this climate. When evaluating options, prioritize underlayment quality, installation detail, and a plan that dates the reroof to minimize exposure to the next severe storm window.
In this market, the numbers you'll actually encounter for common residential roofs run roughly as follows: asphalt shingles from about $350 to $640 per square, metal from $900 to $1400 per square, clay tile $1100 to $1800 per square, concrete tile $1000 to $1700 per square, wood shingles or shakes $600 to $1100 per square, and synthetic or composite shingles $700 to $1200 per square. Those figures reflect typical rooves on steep-slope homes and don't always capture the full story when spring hail hits and demand spikes. Pricing can shift quickly after a big hail event, especially across Rogers County and the broader Tulsa-area labor pool, where workers and crews become scarcer for a few weeks.
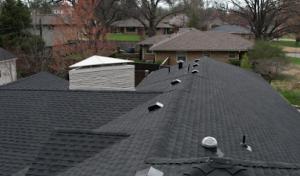
Steep-slope tear-offs are a common reality here, and the work often reveals decking or sheathing damage from storm intrusion that wasn't visible from the attic. When installers have to remove old roofing, replace damaged decking, and re-secure underlayment, costs climb even if the new material stays the same. Heat in the summer also slows production; crews work slowly to avoid mistakes, which pushes daily progress and total project time higher. All of this matters more than the sticker price of the shingle itself.
Spring hail in this area tends to trigger insurance-driven reroof demand. That surge can tighten local labor supply and lead to short-term price jumps, especially for high-demand materials like clay or concrete tile. If a hail event hits late in spring, expect scheduling pressures that compress the installation window and raise temporary costs, such as expedited deliveries or weekend crew work. Plan for a window of higher demand, even if the base material price seems reasonable.
Start with your expected roof size in squares and the material you're leaning toward, then add 15-25 percent for contingencies tied to deck repairs and extended installation time during peak season. If a hail event occurred nearby, build in an additional cushion for potential labor shortages and faster material uptake. Lastly, when comparing bids, prioritize crews that clearly outline tear-off scope, decking assessment, ventilation, and underlayment decisions, since those line items drive the biggest differences in final cost and long-term performance.
Get a clear picture of your project costs upfront - no commitment required.

Summit Roofing & Solar
(918) 346-0675 summitroofok.com
2412 Westwood Dr, Claremore, Oklahoma
5.0 from 86 reviews
C&A Roofing & Construction
(918) 637-6634 www.caroofingconstruction.com
838 W Will Rogers Blvd, Claremore, Oklahoma
4.7 from 124 reviews
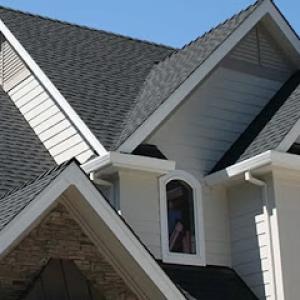
In this city, a full reroof typically requires a permit through the local building department rather than being handled informally. The contractor generally handles the permit filing and submits project details, including the roofing material type, for the city or county record. This ensures the work aligns with local codes and climate considerations, such as steep slopes and the impact of spring hail. Homeowners should expect the permit to be linked to the address and to reflect the scope of work, including material selection and height restrictions on older neighborhoods with mature trees. If any changes occur after permit submission-for example, a switch from asphalt to metal-update requests should be filed promptly to avoid delays at closeout.
Inspections are performed during installation to verify components meet code and wind-load requirements typical of the area's weather pattern, especially after hail events. Additional progress checks are common as the roof nears completion, ensuring underlayment, flashing, and penetrations are correctly installed on the steep-sloped rooflines common in these homes. A mid-point inspection may occur when most of the new roofing material is in place, with a final walk-through to confirm everything adheres to the approved plan. The goal is to catch issues before they become costly brushfire repairs, particularly on roofs with complex hips and valleys that are typical in the neighborhood mix. Keep the permit open and responsive during the installation, and coordinate any needed corrections promptly with the contractor.
A final inspection is required to close the permit, so homeowners should confirm that the permit is actually finalized before making final payment. The final step verifies that the entire reroof, including flashing details, vents, and drip edge, meets the local building code and energy or ventilation considerations that affect attic performance. Do not assume completion is immediate after the last shingle is laid; the inspector will verify documentation, warranty disclosures, and any manufacturer-required attic access or ventilation components. If the final inspection is delayed, coordinate with the contractor to address any deficiencies quickly. Once the inspector signs off, retain the permit closure letter with purchase records and photos for future reference, especially when negotiating hail-damage claims or selling the home.
In this market, detailed photo documentation and a clear line-item scope review are not optional extras but daily realities for Claremore homeowners facing hail and wind losses. Carriers expect a thorough tale of what was damaged, what will be repaired, and how each repair addresses code and durability needs. Take fresh, timestamped photos of all affected surfaces before work begins, and keep a neat catalog of each damaged component. When the adjuster visits, bring a well-organized folder that maps photos to specific line items in the scope. This isn't about drama; it's about preventing a dispute that drags on into the heat of summer.
Settlement procedures in this area can be stricter due to repeated storm events that cloud the timeline of when damage occurred. Insurers scrutinize repairability, straight-line aging, and any supplemental work tied to code updates. If a claim spans multiple storms, expect requests for updated assessments and progressive documents. A prudent approach is to align your contractor's scope with the most current code references and to document any corrosion or wear that predates the last hail event. The goal is to build a transparent narrative that stands up to a long and hot Oklahoma summer.
Some insurers in this region offer discounts or better underwriting treatment for impact-resistant or code-upgraded roofing systems. That influence can sway a replacement decision, especially after a big hail season. If an insurer signals favor for certain materials, weigh that against local performance on steep sloped roofs and the harsh sun. The right combination of durability and documentation can smooth the path from claim approval to a completed, weather-ready roof that resists another spring onslaught.
Connect with contractors who help homeowners navigate the claims process from damage assessment to final approval.
Summit Roofing & Solar
(918) 346-0675 summitroofok.com
2412 Westwood Dr, Claremore, Oklahoma
5.0 from 86 reviews
Capital Roofing
(918) 260-4075 claremoreroofer.net
18795 Spring Creek Ln, Claremore, Oklahoma
4.9 from 106 reviews
Spring is the period when hail, severe thunderstorms, and insurance volume collide in a way that disrupts normal roofing schedules. On steep-slope homes common in the area, every storm can peel back a layer of protection and reveal hidden damage. The timing of roof work needs to align with daylight hours, dry conditions, and a steady breeze to keep debris off driveways and away from landscaping. When damage is spotted after a storm, plan for a short lead time to schedule an inspection, document the hail impact, and prepare for a rapid decision on replacement or repair.
Insurance-related work tends to surge as spring winds down. The key is to build a tight, storm-specific paper trail: before photos of the roof, after photos from a safe vantage point, and a written log of every storm event that could affect the roof. A clear record helps avoid delays caused by late claim adjustments or miscommunications with adjusters. If a generator of wind-driven debris is suspected, document any interior signs as well, such as concealing moisture or attic temperature changes, to strengthen the claim narrative.
Hot summers in Claremore affect crew productivity and can change how quickly seal strips activate on asphalt products. Plan installations for mornings when temperatures are cooler, and anticipate the need for extra hot-weather precautions: steady hydration on site, shaded staging areas, and scheduled breaks to prevent heat-related slowdowns. Weather windows can narrow quickly, so expect short-notice shifts and maintain flexibility with start times and material staging to keep progress steady on steep roofs.
Occasional winter freezes and ice events can slow tear-off, underlayment work, and inspection timing. Frozen shingles crack more easily during removal, and ice can delay material deliveries or make steep slopes extra hazardous. If a winter cold snap hits during a project, expect slower layment and longer inspection cycles. Have a contingency plan that accounts for frost-sensitive underlayment products and the need to verify attic ventilation and moisture control once temperatures rise again.
Begin with an expedited inspection after a hail event, then align with the adjuster's timeline and weather forecasts. Schedule tear-off and replacement in windows that avoid peak heat and moisture risks, while keeping a buffer for potential insurance documentation needs. Maintain clear, frequent communication with the homeowner, the contractor, and the insurer to keep the project moving through Claremore's seasonal rhythm.