Last updated: Apr 19, 2026
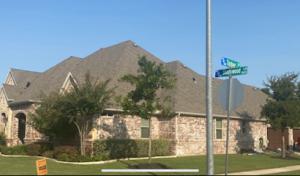
Spring storms in this corridor hit hard and fast, driving a wave of inspections that can come within days of hail. The cycle tends to start when hail meets steep asphalt or composite roofs, leaving quick, visible damage and a flood of questions from homeowners about whether the hail is "really" responsible for wear. You'll see carriers requesting photos, independent adjusters touring properties, and evaluators scrutinizing whether pre-existing wear or recent storm strikes caused the most noticeable damage. If a storm hits, act fast: document everything you can while it's fresh, and align with your insurer on the expected sequence-initial roof assessment, temporary repairs if needed, and the path toward a full replacement if warranted by the damage and the hail's reach across shingles, granules, hips, and flashing.
Carrier photo requirements are a staple after hail and wind events here, and they are no small hurdle. Insurers want clear, dated images that tie damage to the storm window, not to years of aging. Independent adjusters are common, and their conclusions can hinge on whether a roof's wear patterns align with a storm timeline. In this environment, you'll need to build a self-contained narrative: consecutive photos showing the hail impact points, granule loss, lift or curling of shingles, and any resulting leaks or interior staining. Keep a simple diary with storm dates, wind speeds if you have them, and the specific spots on the roof that appear newly damaged. This isn't just paperwork-it's your framework for arguing the claim when a carrier questions the link between aging and recent impact.
Weatherford sits in a climate where summer heat rapidly ages asphalt roofs, making a timely, well-documented claim essential. Post-storm days often reveal granule loss or brittleness that looks dramatic in photos, but the heat exchange can complicate attribution. The key is to separate what's likely storm-induced from what's typical aging for that roof type and color. If granules appear to be missing in areas most exposed to direct sun, that can be a stronger signal of storm-related damage. Document not only the surface but also edge conditions, flashing, soffits, and ridges-these components can reflect whether the roof system was compromised by hail impact or simply worn down by years of sun exposure. Expect questions about whether observed brittleness existed before the latest storm event; your records should demonstrate a direct line from storm to damage.
Temporary repairs are not optional in Weatherford's spring cycle; they are a practical risk-management step. Quick tarp services or board-ups can prevent interior water intrusion while the claim works its way through the process. Prioritize securing vulnerable valleys, skylights, and chimney flashings, because a single leak can derail a timeline and invite further scrutiny of the roof's condition. Document each temporary fix with receipts and detailed notes about what was done and why it was necessary. These records can help if the insurer questions whether the damage required immediate action or could safely wait; they also demonstrate proactive risk management on your part.
Disputes over whether damage is storm-related or normal aging are common, especially after a prolonged heatwave that already stressed an asphalt roof. When a claim stalls, revisit your photos, your storm-dated diary, and any independent assessments that support a storm attribution. If the damage spans multiple roof sections or classes of shingles, you'll have a stronger case for replacement rather than a simple repair. Remember: a full replacement often hinges on establishing that hail damage exceeds the threshold for repair and that the roof's remaining lifespan is insufficient to justify a longer-term fix. Keeping the claim path clear-consistent documentation, timely communication, and a well-supported narrative-helps you move toward a durable outcome instead of a protracted dispute.
Weatherford's cycle is predictable in its timing but unforgiving in its stakes: being prepared speeds the inspection, simplifies documentation, and reduces risk of coverage gaps. Align your pre-storm maintenance plan with a ready-to-activate set of photos, a roof condition map, and a simple timeline template you can reuse each year. When spring storms roll in, you'll be ready to move swiftly from hail impact to inspection, from temporary repairs to a potential full replacement, with the clarity insurers require and the protection your home demands.
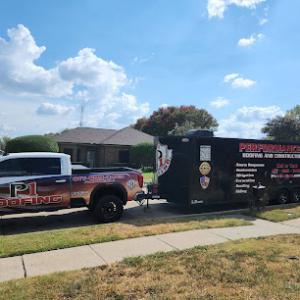
Performance 1 Roofing & Construction
(817) 818-4750 www.p1-roofing.com
1101 Fort Worth Hwy, Weatherford, Texas
5.0 from 217 reviews
Performance 1 Roofing & Construction, with over 25 years of expertise, offers comprehensive roofing and construction services in Parker County, TX, and surrounding areas. Specializing in hail damaged roof replacement, roof repairs, storm restoration, insurance claims specialist, metal and asphalt shingle roofing, commercial roofing, siding, and gutter installation, we are your trusted local partner for all your roofing and construction needs. Quality workmanship with a lifetime warranty roofing system. Customer satisfaction is our top priority.
GreenLight Roofing & Remodeling
(817) 677-9215 greenlightroof.com
224 Santa Fe Dr Suite 600, Weatherford, Texas
5.0 from 148 reviews
Looking for a top-tier roofing contractor in Hudson Oaks, TX? Look no further! Our company specializes in energy-efficient roofing, windows, siding, and insulation. Located in Hudson Oaks, TX, we offer thermal imaging consultations at no charge. From roof repairs to metal roofing, shingles, and tile roofing, our contractors have you covered. Our services include window installation, attic insulation, spray foam, new siding, and even painting. Enjoy discounts for multiple jobs and referrals. We handle storm damage claims, including hail damage, floods, and wind. Fully insured and backed by the best in the industry, we're your trusted roofing contractor for residential and commercial roofing needs in Hudson Oaks and Weatherford, TX.
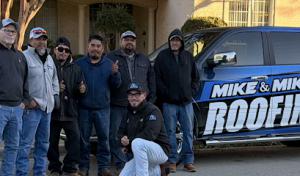
Mike & Mike Roofing
(817) 532-8566 www.mikeandmikeroofing.com
2214 Trace Ridge Dr, Weatherford, Texas
5.0 from 63 reviews
Mike and Mike Roofing, we are more than just a roofing contractor; we are a dedicated family business committed to serving the residential community of Weatherford, TX, and the surrounding areas, with professionalism and excellent customer service. Founded on the principles of hard work and integrity, our company is built upon our founder’s 40 years of industry experience, ensuring top-quality service and unparalleled expertise

DT Roofing
204 Santa Fe Dr Suite 204, Weatherford, Texas
5.0 from 59 reviews
DT Roofing is Weatherford's premier choice for residential and commercial roofing services, committed to superior craftsmanship and exceptional customer care. Serving Weatherford, TX, and surrounding Parker County, we specialize in comprehensive roofing solutions, including new installations, reliable repairs, and meticulous storm damage restorations. Our experienced roofing specialists use industry-leading materials and techniques to ensure durable, aesthetically pleasing results tailored to your needs. At DT Roofing, we prioritize transparency, providing detailed inspections and straightforward estimates, making your roofing experience stress-free and efficient. Trust your home or business to DT Roofing—where quality meets reliability.
Americana Roofing
(817) 704-4776 americanaroofing.net
2323 Tin Top Rd Ste 8, Weatherford, Texas
5.0 from 58 reviews
At Americana Roofing we love the Red White and YOU! Founded in 2005 by Kerry White out of a love for his community and a desire to help those around him. Today Americana Roofing is a full-service restoration and roofing contractor, fully insured and manufacturer trained and certified. Whether your needs are a simple residential roof repair or an extensive commercial reroof and restoration involving both interior and exterior trades, Americana can tackle your project and provide you superior results. With our extensive network of suppliers and installers, no roof job is too big or too small. If you need the best roofing contractor with outstanding customer service and attention to detail, then Americana Roofing is the only call to make.
Lonestar Roofing & Restoration
(682) 302-0707 lonestarroofingandrestoration.com
1045 Flagstone Dr, Weatherford, Texas
5.0 from 47 reviews
Lonestar Roofing & Restoration is a trusted, locally owned roofing company serving Parker, Hood, Tarrant, Wise, Collin, Denton & Johnson Counties. We specialize in roof repairs, replacements, and insurance claim restoration for hail, wind, and storm damage. Our experienced team delivers high-quality craftsmanship using Class 3 and Class 4 impact-resistant shingles. Whether you’re in Azle, Weatherford, Aledo, Colleyville, Prosper, Burleson or Granbury — we handle the entire process from inspection to completion with honesty, speed, and precision.
Mid-Cities Roofing Contractors - Weatherford
(817) 656-2288 midcitiesroofing.com
5193 Zion Hill Rd, Weatherford, Texas
4.9 from 88 reviews
Since 1977, Mid Cities Roofing, Inc., has been providing quality roofing systems - all at an affordable price! We are a licensed and insured company that provides quality roofing products.

Mustang Roofing & Construction
(817) 873-2398 www.mustangrfg.com
4150 FM 920, Weatherford, Texas
4.9 from 94 reviews
Mustang Roofing & Construction is a full-service residential and commercial roofing and general contractor with 40+ years of experience in the commercial and residential construction industry. Specializing in: Property damage restoration Remodeling Contractor Additions Construction New property construction Residential Roofing Expert Commercial Roofing Expert Residential Roofing restoration & Storm Damage Repairs 📍 Proudly serving Fort Worth, Weatherford, Aledo, Decatur, Bridgeport, Stephenville, and all surrounding areas.
One Oak Exteriors
(817) 767-9665 oneoakexteriors.com
1011 Upper Denton Rd #36, Weatherford, Texas
4.9 from 75 reviews
At One Oak Exteriors we are a professional residential & commercial roofing company specialized in metal roofing based in Weatherford, TX, We are ready to repair, replace and install your roof!
Blue Eagle Roofing & Construction
1872 Mineral Wells Hwy # 106, Weatherford, Texas
4.9 from 41 reviews
Voted #1 Best Roofing Company in Weatherford and surrounding areas. Great benefits and income for those looking for employment. Call Blue Eagle Roofing today!
Lighthouse Residential Roofing
(682) 239-8314 www.lighthouseroofingtexas.com
6636 Anns Ln, Weatherford, Texas
4.9 from 42 reviews
Don't try the rest... Go straight to the Best. We opened Lighthouse Residential Roofing in 2014 to service the residential roofing market with our 35 years of experience. We built this business with 4 pillars. *The first is our commitment to expertise with ongoing training and keeping up to date with new material trends. *Our second is our commitment to being properly insured so that you are not held liable. *Our third is our commitment to customer satisfaction with our 100% satisfaction guarantee. *And the fourth is to our community. We do this by feeding a family for a week through Community Link with every roof we install. We believe these commitments are why we were voted the Best Roofer of Fort Worth for 2021 and 2023.
I & A Roofing & Construction
(817) 666-0252 www.iandaroofingandconstruction.com
161 Horseshoe Trail, Weatherford, Texas
5.0 from 20 reviews
I & A Roofing and Construction is dedicated to delivering outstanding quality at competitive prices. Our goal is leave every customer satisfied with long-term relationships and trust.
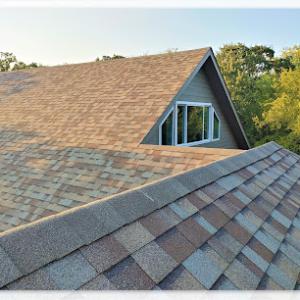
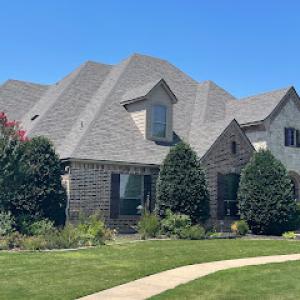
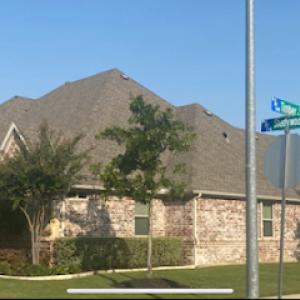
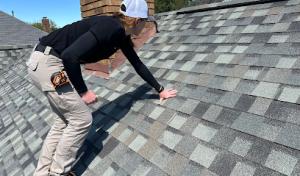
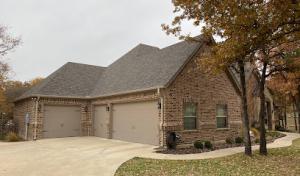
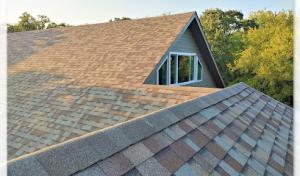
Asphalt shingles are a familiar sight on many homes in this market, but they endure a harsh cycle of UV exposure, heat buildup on steep pitches, and hail bruising. In practice, that combo can shorten the practical replacement timing compared with milder climates. When considering asphalt, look for premium, impact-resistant shingles with higher granule density and a stiff, wind-resistant nailing strip. In hail-prone springs, consider a mid- to high-end shingle line that offers better impact resistance and a longer warranty. Pay attention to edge and ridge protection during installation, since Weatherford heat can loosen laps over time and exaggerate any preexisting weak spots. For operations after storm events, a careful inspection should focus on hairline bruises that may not be visible from the ground, plus any granule loss on gutters and downspouts, which signals the need for closer probes under the shingles.
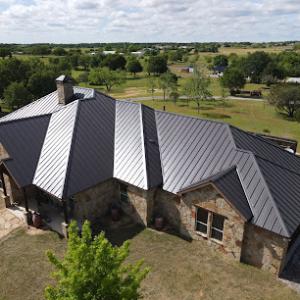
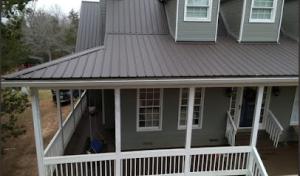
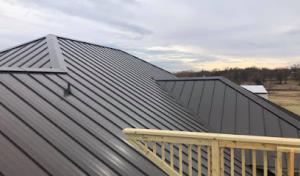
Metal roofing has strong local relevance because it is widely offered in this market and is often considered by Weatherford homeowners looking for better hail resilience and lower heat absorption than standard shingles. Metal panels can shed hail impacts without cracking in many cases, and their reflective surface can help reduce attic temperatures if paired with a proper underlayment and appropriate coating. If choosing metal, opt for a reflective or cool-roof finish and ensure the system includes adequate attic ventilation and a solid hillside or parapet detailing to manage wind-driven hail lofting. Installation quality matters: misaligned seams, improper fasteners, or inadequate sealant at penetrations can lead to leaks after a harsh hail event or a season with extreme temperature swings. For best results, verify panel overlap and fastener pattern match the roof's pitch, and plan for a robust drip edge that channels water away from eaves during rapid spring thaw cycles.
Tile options appear in the local market, but Weatherford homeowners need to weigh impact vulnerability, roof structure loading, and replacement logistics after hail because broken individual tiles can be harder to match. Clay and concrete tiles offer durable, long-lasting performance, but their weight means confirming structural support and local load ratings before installation. Hail can break single tiles yet leave surrounding pieces intact, which creates irregular repairs and matching challenges during a replacement. If tile is your preferred aesthetic, consider a design with a higher impact rating and a plan for on-site tile matching and distribution of new pieces that visually blends with existing installations. After a hail event, tile replacements may require careful re-sealing at penetrations and refinishing at roof edges to prevent water entry, so ensure the contractor has experience with tile roof retrofit and color-matching challenges.
In a high-heat, high-hail climate, a mixed approach can work well on newer homes or remodels with aggressive sun exposure. For instance, pairing a resilient underlayment with a reflective outer layer can help moderate attic temperatures while maintaining hail tolerance. The choice often comes down to balancing roof pitch, structural capacity, and the ability to stage a reliable repair path after storm damage. If the goal is to extend life between major overhauls while preserving curb appeal, a well-ventilated attic, a robust drip edge, and a coating that resists UV degradation become critical parts of the plan. When weather events trigger insurance-driven replacements, the selected system should not only meet local performance expectations but also align with the home's existing look and the household's long-term maintenance capacity.
In this market, post-storm demand surges tighten labor availability and stretch scheduling across Parker County and the wider North Texas region. After a hail event, contractors who specialize in steep-slope residential roofs can be booked weeks out, and price pressure exists as crews funnel toward storm-damaged homes. You'll see pricing drift toward the upper end of the listed ranges when tear-off and decking issues are involved, and when crews have to bring in more materials or equipment to handle higher volumes of work in a short window. Expect pricing fluctuations that reflect not just material choice, but also the speed at which crews can safely complete the job and pass final inspections.
Steep-slope homes dominate the reroof market here, which means tear-off complexity often drives the total cost higher. When hail has penetrated decking or behind-the-soffit spaces, decking repairs or reinforcement become part of the project. Accessory replacement-underlayment, flashing, vents, and ridge cap-also tends to rise in price with storm-induced wear. These factors push projects toward the upper end of the per-square ranges, particularly when full tear-off is required and the roof deck needs repairs before a new layer can be installed.
Material choice matters more in this climate. Homeowners frequently weigh the low upfront asphalt price against metal or synthetic options that may better withstand repeated hail and the intense heat of North Texas summers. In Weatherford, metal roofing commonly merits consideration for longevity and hail resistance, though initial costs are higher. Synthetic or composite shingles can offer a middle ground with improved hail resistance and better performance in heat, while clay or concrete tiles bring distinct durability but add weight and installation considerations on steeper slopes. For steep-slope homes with ongoing exposure to hail and sun, choosing a material with a longer-service life can pay off despite a higher first cost.
Across the typical options, you're looking at asphalt shingles on the lower end, with metal and synthetic options offering stronger hail resistance and longer life. For asphalt, expect the lower end around the shaded mid-range per square, while metal and premium synthetics skew higher, particularly when tear-off and decking repairs are needed. When planning, factor in possible decking repairs, flashing replacements, and the extended scheduling realities after a major hail event. Run a few scenarios: a straight install on sound decking, versus a full tear-off with deck repairs and complete accessory replacement, to understand how much risk the weather and storm timing add to the total cost.
Don't let upfront costs delay a critical repair - these contractors offer payment plans to fit your budget.
Americana Roofing
(817) 704-4776 americanaroofing.net
2323 Tin Top Rd Ste 8, Weatherford, Texas
5.0 from 58 reviews

Mustang Roofing & Construction
(817) 873-2398 www.mustangrfg.com
4150 FM 920, Weatherford, Texas
4.9 from 94 reviews
A full re-roof in Weatherford requires a building permit through the City of Weatherford Building Department rather than being handled informally after a storm. This means coordinating with the city early in the project so the scope of work matches what the permit will authorize. In practice, that means your contractor submits a formal plan that outlines not just the shingles, but any deck repairs, underlayment, and drainage details that might be necessary after hail damage. The permit acts as the city's official record of what is being done, and it helps ensure that any insurance-driven changes-such as adding decking or repairing components beyond a simple shingle replacement-are documented and approved before work proceeds.
Permit applications commonly require contractor information and a defined scope of work. In Weatherford, this matters because storm-driven projects often expand beyond replacing shingles to addressing decking, eaves, gutters, or reinforcement of roof structure. Having a clearly defined scope helps prevent delays caused by back-and-forth with the permit office or disputes with the insurer about what was authorized. Expect documentation that identifies the roofing contractor, license details, project address, and a precise description of materials and methods. If the project involves overlays, repairs to attic ventilation, or weatherproofing measures, include those items in the scope so the city can review and approve them at the same time.
Weatherford inspections are typically scheduled after underlayment or installation work and again at final completion, so project timing has to account for city sign-off rather than only crew availability. That sequencing matters on days when a storm's aftermath motivates rapid replacement, because the permit review and the required inspections cannot be skipped or rushed in favor of expediency. Plan for at least two key milestones: a rough-in inspection after underlayment and first layer installation, and a final inspection once everything is in place, including flashing, venting, and drip edge. If inspections reveal deficiencies, the schedule may shift to accommodate corrective work before the city signs off.
Insurance-driven work often follows storms with tight timelines, but the Weatherford permit process introduces its own checkpoints. Communicate openly with the insurer about the planned scope and the city approvals, so approved adjustments-such as deck repairs or component replacements-are reflected in both the permit and the claim. When the permit aligns with the insurance claim, the project advances more smoothly, and each inspection confirms that the work meets local code, good practice for a durable, hail-resilient roof.
Long, blistering summers in this area dry asphalt shingles faster than most people expect. The exposure isn't just about sunbonnet glare-it's the way the heat bakes the granules loose and makes the asphalt brittle. Over time, that brittleness translates into more hairline cracks and more frequent granule loss after the spring and early summer storms. When a hail hit comes later in the year, those weakened shingles are less able to shed the impact or rebound, so the damage tends to spread. A roof that's already dried out can also suffer quicker wear at seams and around flashing, where joints are most vulnerable after a heat spike.
In this climate, the layer beneath the shingles matters more than many homeowners realize. Prolonged heat can drive moisture and heat deeper into the roof deck, stressing underlayment and sealing layers that would otherwise ride the storm out. If the underlayment has started to delaminate or dry-rot, a seemingly minor wind event or hail strike can push water miles into attic spaces or between your ceiling and rafters. When shingles have been compromised by hail or blown back from their nailing lines, those underlayers become the first line of defense against interior leaks. A roof deck that isn't fully protected in late summer can show leaks in mid-fall or after the first cold front, often prompting a larger repair job than a simple shingle replacement would have required.
A roof can look sound and still be at the point where replacement is the smarter choice. The telling factors aren't age alone but the combination of prior storm hits and cumulative summer heat exposure. If a roof has endured multiple hail events and you've started to notice persistent granule loss, curling edges, or lifted shingles after heat waves, it's a strong signal that the envelope is nearing its resilience limit. Waiting too long invites faster degradation of the underlayment and more widespread interior risk. The decision to replace should weigh the number of storms already absorbed and the degree of heat-related aging visible on the slopes, not just the calendar year.
Autumn wind events in Weatherford can lift shingles that have been softened by an unusually hot Texas summer. When shingles peel or curl, their edges expose underlayment and decking to edge lift, increasing the chance of wind-driven leaks during gusty days. Debris carried by those winds can wedge into valleys and along transitions where shingles meet vents, chimneys, and skylights, creating picket-fence-like entry points for water. This is the moment to inspect ridge lines, hips, and the transitions around dormers; even a small misalignment can funnel water into the attic during a storm.
Leak risk in this market often increases after a spring hail season has already loosened seals and damaged exposed roof components before fall winds arrive. Hail can nick shingles, crack sealant strips, and compromise flashing. By autumn, those micro-damages act like starter holes for water intrusion when wind-driven rain arrives. Pay close attention to ridges, vent boot flashing, step flashing at transitions, and any areas where granules have washed away, signaling compromised protection.
Weather patterns push homeowners toward fast, visible results between storms and full replacement scheduling. Quick tarping or temporary leak control is not optional theater; it buys time and reduces interior damage. If a leak is suspected after a windy day, cover the affected area with a sturdy tarp, secure it to prevent blow-off, and seal around penetrations where water can track. Schedule a professional assessment as soon as possible to identify whether shingle resealing, flashing adjustment, or targeted repairs are needed to prevent a larger failure before the first major cold fronts.
When you can't wait, these contractors offer fast response times to stop leaks and prevent further damage.
Mid-Cities Roofing Contractors - Weatherford
(817) 656-2288 midcitiesroofing.com
5193 Zion Hill Rd, Weatherford, Texas
4.9 from 88 reviews
Rafter T Roofing & Construction
119 N Main St, Weatherford, Texas
4.9 from 29 reviews
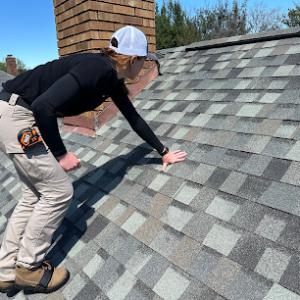
You should expect insurers to be strict about documenting hail damage, especially after spring storms. In a high-claim environment, the focus rests on dated photos, close-ups of impact marks, and evidence that recent damage is not just older wear. If you have a mix of new dents and faded granules, explain what happened when, and keep a simple timeline you can show the adjuster.
In Weatherford, independent adjusters are common after North Texas hail events. You benefit from documenting all roof slopes, soft metals, gutters, and interior leak staining before temporary repairs begin. Take photos from multiple angles, include neighboring houses for scale, and note any patches or quick fixes. Do not remove shingles or metal fixtures until the adjuster has seen them, unless a professional tells you to.
Policy history matters. Windows of renewal and claim outcomes can be influenced by overall roof condition, so you need records of prior repairs, maintenance, and any earlier storm claims. Gather invoices, contractor notes, and photos of past patch jobs. Those details can influence decisions about coverage limits or replacement versus repair, and they often come into play during negotiation with an insurer.
If a storm hits, keep in mind the stakes of timing. Waiting can deepen damage and complicate claims, while rushed, uncoordinated repairs may hurt your case. Document before and after any temporary tarping, and keep a written account of who did what and when. This careful record-keeping is your best defense against settlement gaps when the hail season peaks.
Also, align your documentation with what your insurance adjuster will review after the storm. Make a simple roof map showing slope directions and the location of skylights, vents, and outlets. If gutters lie away from the home's eaves, note whether they are bent, loose, or overflowing with shingle granules. Keep copies of mail-in claim forms and the timeline of communications, including phone notes and email threads. Finally, store everything in a weatherproof folder or cloud drive so it is accessible during a turbulent claim season when deadlines tighten. You will thank yourself later, greatly.
Connect with contractors who help homeowners navigate the claims process from damage assessment to final approval.
Performance 1 Roofing & Construction
(817) 818-4750 www.p1-roofing.com
1101 Fort Worth Hwy, Weatherford, Texas
5.0 from 217 reviews
GreenLight Roofing & Remodeling
(817) 677-9215 greenlightroof.com
224 Santa Fe Dr Suite 600, Weatherford, Texas
5.0 from 148 reviews
Mike & Mike Roofing
(817) 532-8566 www.mikeandmikeroofing.com
2214 Trace Ridge Dr, Weatherford, Texas
5.0 from 63 reviews
When a hail event hits, you'll notice the local market pivot to fast response and re-roofing. Homeowners here often hire under time pressure, aiming to lock in a contractor who can start tear-off, install, and wrap up before spring heat spikes more than once. Look for a roofer that documents arrival times, crews, and a solid plan for wind or shingle debris cleanup, so you aren't left juggling nails and yard mess during peak heat.
Cleanup is a meaningful hiring priority in this area. Ask potential contractors how they plan to protect landscaping, fences, and driveways during tear-off, and whether they provide daily cleanup for nails, roofing nails, and debris. A responsible crew will cover ground around the home or sweep up thoroughly at day's end, minimizing disruption to power washing, alarm cameras, and outdoor living spaces typical of Texas homes.
Weatherford hosts a mix of long-established, family-owned outfits and smaller, residential-focused teams. That influences responsiveness and communication quality. Compare how each contractor documents a storm path, sets expectations for timelines, and communicates weather-driven delays. Prefer teams with clear point-of-contact, on-site foremen, and a schedule that you can track in writing. Your best choice often blends local tenure with prompt, transparent updates and a proven track record handling hail and wind damage with insurance-driven projects.
Insurance-driven work is common after spring storms. A Weatherford neighbor approach is to verify that the contractor can coordinate with the insurer, provide a detailed scope, and deliver a line-by-line change order if the adjuster adjusts coverage. Seek a roofer who explains emergency tarping, roof decking checks, and a staged plan that minimizes exposure to hot sun while protecting interior spaces from wind-driven rain.
Although steep-slope residential roofing dominates, the local contractor mix shows enough flat-roof specialization to justify separate guidance for porches, additions, garages, and commercial-style low-slope sections. On a Weatherford property, a porch or garage often ties into an existing steep-slope system, creating a hybrid that behaves differently in rain and sun. Flat or low-slope areas may use membranes, modified bitumen, or metal deck coverings that respond differently to hail impact than asphalt shingles. Understand which sections are truly low-slope and which are tied into adjacent steep sections, so repairs don't leave a vulnerable seam exposed.
Low-slope areas can be stressed by intense sun exposure and storm-driven water intrusion, especially when tied into older steep-slope roof systems after partial repairs. In summers, heat rises under a flat deck or porch roof, drying seals unevenly and accelerating wear on flashing and transitions. Spring hail can dent or compromise edge details where a flat roof meets a parapet or gutter line. A practical approach is to inspect joints, penetrations, and terminations after major storms, paying close attention to misaligned flashings and blisters that may not be obvious from ground level.
Property owners may need different repair strategies for mixed roof types on the same structure rather than assuming one replacement method fits every section. Targeted repairs to low-slope portions should focus on flashing integrity, membrane seam condition, and proper termination at the interface with steeper sections. When a low-slope area backs up to a steep roof, ensure the transition detail accommodates movement, drainage, and future hail events without creating a drip edge or ponding risk. In practice, plan staged, section-by-section fixes rather than a single, uniform solution across the entire roof.
Find specialists in TPO, EPDM, and built-up flat roofing systems for residential and commercial properties.
Mid-Cities Roofing Contractors - Weatherford
(817) 656-2288 midcitiesroofing.com
5193 Zion Hill Rd, Weatherford, Texas
4.9 from 88 reviews
Clark Custom Roofing
(817) 204-9755 clarkcustomroofing.com
606 Palo Pinto St, Weatherford, Texas
4.9 from 16 reviews
