Last updated: Apr 19, 2026
From roughly June through November, the Atlantic hurricane season can turn quick leaks into urgent, heavy-duty problems. The coastal exposure means wind damage often shows up with rain intrusion, not as neatly as a single shingle missing. In households with older urban or military-era roofs, you're looking at compromised deck boards, blown-under flashing, and vulnerable edge details that can fail all at once when a fast-moving storm hits. The combination of salt air, high humidity, and corrosive spray accelerates wear on metal flashings and exposed fasteners, so a small breach today can become a significant leak tomorrow if left unaddressed. When storms are forecast, prepare for delayed scheduling, potential access restrictions, and the need for rapid decision-making once winds shift.
The moment a roof sounds the alarm with water intruding into ceilings or walls, treat it as a full-stop emergency. Safety first: avoid walking on a wet roof; the combination of wind-driven rain and slick decking can be deadly. If you can access the attic, locate the highest point of moisture or active drips and place a bucket or container to catch runoff. If you can safely reach the exterior, apply a temporary tarping method to cover the active area, prioritizing the most exposed sections and flashing edges. Avoid leaving metal flashing fully exposed to salt spray for extended periods; use a temporary shield or seal, but plan for a proper reseal as soon as weather allows. Document everything with photos from multiple angles-interior and exterior-so you have a clear before-and-after trail for your claim and for any follow-up work. In humid coastal air, temporary fixes should be paired with a plan for expedited permanent repair, because salt in the environment accelerates corrosion on exposed metal and fasteners.
If a temporary patch is necessary, use materials rated for salt exposure and high-velocity rain, and ensure all edges are properly sealed to slow water intrusion. Leave a visible note on the patch with the date and the expected duration of the temporary fix. When choosing a contractor for the follow-up repair, prioritize those with experience on older urban stock and coastal roofs, where deck integrity and flashing detail play big roles. The climate means metal exposed to spray will deteriorate faster than inland markets, so plan for rapid reassessment after the next storm event. If shingles are damaged but flashing remains intact, a careful seaming and resealing approach can buy time-but do not rely on a patch that leaves moisture trapped under layers. The goal is to minimize interior damage while preparing for a comprehensive, wind-resistant repair that stands up to salt air and repeated storm cycles.
Begin with a rapid, organized documentation push: timestamped photos of the roof, attic, and any interior water intrusion; a running list of damaged areas with dates; and notes on the amount of rain and wind during the event. Maintain a record of any temporary repairs, including who performed them and when, and keep copies of all correspondence with the insurer and contractors. Create a simple folder with storm receipts, repair quotes, and the original purchase date of the roofing system, along with any maintenance history that shows how the roof was kept prior to the event. If the wind-driven water reached the interior through multiple penetration points, map those locations to help the adjuster visualize scope. Clear, organized evidence can speed up the claim and help prioritize the most urgent repairs to prevent secondary damage inside the home. This is where a neighborly nod to early action becomes real protection for your property.
Once the initial leak is controlled and the weather cooperates, take stock of the overall roof condition. Coastal exposure and salt humidity mean ongoing attention to flashing, edge metal, and fastener corrosion. Schedule a thorough inspection as soon as possible after the storm window passes and before the next system rolls in. A proactive approach-addressing degraded flashings, compromised decking, and moisture-darkened sheathing-reduces the risk of repeats and helps ensure the next hurricane won't turn a small issue into a major one. You'll benefit from a plan that pairs rapid-response tactics with a clear path to a durable, wind-ready roof.
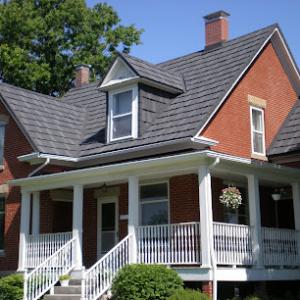
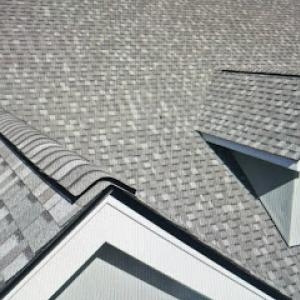
Asphalt shingles are the workhorse on many older neighborhoods and military-era homes, but Virginia humidity can shorten their service life. In practice, expect faster granule wear and algae staining on south-facing roofs or areas shaded by live oaks. Moisture from coastal air accelerates aging, so you'll notice curl at edges and a higher chance of curling shingles after several seasons of salt-lacquered air. When inspecting, look for granule loss, dark streaks, and soft spots near hips and valleys. If you're replacing, consider upgrading to a higher-quality asphalt product with algae-resistant granules and a reflective, UV-stable coating to slow wear.
Metal roofs are popular locally for their longevity and clean lines, but salt-laden air demands extra attention to coating quality, fasteners, and flashing. Choose a metal with a corrosion-resistant finish and a factory-applied coating designed for marine conditions. Fastener choices matter: corrosion-resistant screws or nails with proper sealants reduce rust around penetrations. Flashing should be hemmed or seam-welded rather than relying on exposed screws where possible, and all joints need continuous sealant with a paintable, non-porous finish to deter salt buildup. If you're retrofitting, have the underlayment inspected-salt air can creep into seams and compromise the deck over time.
Clay tile, concrete tile, synthetic/composite shingles, and slate pop up in Norfolk where older neighborhoods and diverse architecture persist. Heavier materials can deliver long service life and a distinct look, but installation requires a structural assessment: heavier roofs demand framing support, especially on aging homes. Clay and concrete tiles resist salt spray well but are brittle in impact-prone areas; ensure proper overhangs and secure fastenings to mitigate wind-driven uplift in hurricane season. Synthetic or composite shingles offer a balance: good color stability and cost efficiency with decent moisture resistance, while slate delivers timeless aesthetics but demands meticulous substrate preparation and professional handling due to its weight. For any of these, verify roof framing can handle the load and that a marine-grade underlayment is installed beneath.
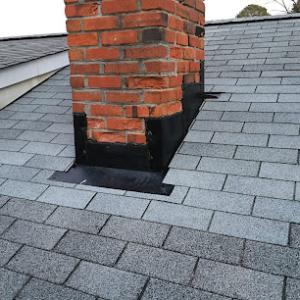
Coastal-climate roofs benefit from a proactive, neighborhood-aware maintenance plan. After major storms, inspect flashings around chimneys, vents, and skylights for salt-induced corrosion or loosening. Clean gutters and downspouts to prevent water backing toward eaves, which accelerates moisture damage in older houses. In humid seasons, check for hidden algae growth along shaded ridges and valleys, and treat promptly with a mildew-resistant cleaner designed for your material type. For metal roofs, frequent visual checks of seam lines and fasteners near the coastline help catch corrosion early. On heavier tile or slate roofs, watch for loose or cracked units, especially after wind events, and call a pro before a minor crack becomes a leak.
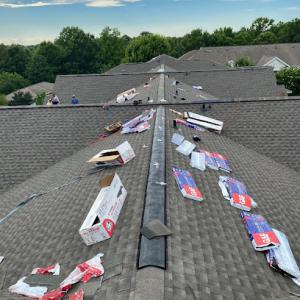
When a tropical system rolls through or a late-season hurricane watches the area, you'll notice a spike in both material quotes and labor calendars. Local pricing is shaped by storm-driven demand, with emergency repairs and full replacements competing for crews and slots on the calendar. In practical terms, expect higher bids in the week after a named storm and in the days following heavy wind events that leave shingles and flashing scattered across yards. Asphalt shingles remain the most common value choice, but the surge affects all material types, from metal to concrete and slate, as crews juggle urgent rebuilds with routine work.
In neighborhoods with long coastal exposure, older roof decks can hide moisture damage that isn't obvious from the ground. Hidden rot, prolonged salt humidity, and corroded metal accessories raise both material and labor costs, because boards may need to be sistered, trusses checked, or substructure rehabbed before the new roof goes on. If deck damage is found once the old shingles are lifted, expect incremental pricing for additional plywood, underlayment, or nailers and a longer installation timeline. In certain blocks, the presence of older flashings and chimney caps can complicate the job and add to the total.
The base cost ranges reflect typical Norfolk realities: asphalt shingles, synthetic/composite options, metal, and the heavier tile families. In coastal markets, metal roofs offer durability against salt-laden winds, but expect higher upfront costs and potential care around fasteners and coatings to resist corrosion. Clay and concrete tiles carry premium install labor and extra weight considerations. For planning, align your budget with spring or fall windows to minimize heat-related delays and storm conflict. Synthetic shingles provide a middle ground between price and performance, while slate remains the premium path for longevity in storm-prone settings.
Contractors in this city often rework calendars to avoid peak heat and the busiest storm seasons. If possible, request a fall start or a late-spring kickoff to secure a steadier crew and more predictable scheduling. When a claim or estimate lands after a storm, set aside time for a careful, itemized review of each line item, especially for hidden moisture work. Clear communication about deck condition, flashing, and attic ventilation helps prevent surprise costs that crop up mid-project.

WT Anderson Roofing & Siding
(757) 816-9203 www.wtandersoncorp.com
4627 Cape Henry Ave, Norfolk, Virginia
4.9 from 625 reviews
At WT Anderson Roofing and Siding, we know that we are not just in the business of roofs we are in the business of people. We are committed to providing honest, quality, and genuine home exterior service without gimmicks or sales pressure. Feel confident that the work will be done right the first time and you will love your home once more.
Matrix Construction of Hampton Roads
(757) 641-0738 matrixconstructionroofing.com
1443 Picadilly St, Norfolk, Virginia
4.9 from 147 reviews
Protect your largest investment with our reliable roofing services. We are a locally owned and operated roofing company currently serving Norfolk, VA and surrounding communities. If you want to make your roof last as long as possible, it is vital that you never put off a roof repair. Small issues with roofing become big issues in a hurry. No matter how major or minor the repair you need, we are here to help. We offer roof installation, roof repair, and roof replacement. Roofers Near Me
Pyramid Roofing (Southside)
(757) 574-9995 www.pyramidroofing.com
4580 Village Ave suite A, Norfolk, Virginia
4.9 from 272 reviews
Pyramid Roofing is a locally trusted residential roofing company since 1986. Proudly serving the Greater Hampton Roads, Middle Peninsula, and Virginia Beach areas. Proudly offering gutter estimates! You can find more information about us through the BBB. As a BBB accredited business, we are proud of our A+ rating! *Drug Screened, Background Checked, and Factory Trained Technicians *100% Satisfaction Guarantee *Financing Available
DSR Exterior Remodeling
(757) 534-8240 drroofingcontractorllc.com
Norfolk, Virginia
4.9 from 160 reviews
DSR Exterior Remodeling was founded in 2016 by Darwin Regalado Sr. And Sofhia Regalado , on the principles of fast, friendly service, fair prices, and quality workmanship. This ensures a high level of quality and effectively eliminates any surprises that may arise during the application of your roof. Our dedication to using quality products and exceptional workmanship deliver value to our customers every time. The products we install are only the highest quality, state of the art materials meant to provide customers with a high quality, long lasting roof. Most importantly we operate on the idea that the customer is an informed and vitally important part of what we do.
Erie Home
7421 Central Business Park Dr #106b, Norfolk, Virginia
4.8 from 329 reviews
Since 1976, Erie Home has manufactured, supplied, and installed the best-performing roofing on the market. By providing ironclad warranties and convenient financing, we ensure that every homeowner we work with receives top quality service and value for their homes and properties. Erie Home professionals are the roofing company of choice in the greater Norfolk, VA area. Whether you need roof inspections or roof damage repair services, Erie Home has been the go-to roofing contractor for nearly 50 years because of our attention to detail and dedication to making sure our customers are satisfied with their results. Contact us today for a quote and see why we're the trusted roofing company Norfolk counts on.
Wholesale Roofers Norfolk
(757) 271-3807 www.wholesaleroofersva.com
1500 E Little Creek Rd Ste. 202, Norfolk, Virginia
4.9 from 38 reviews
Wholesale Roofers Norfolk is the #1 roofing company in Norfolk Va. Our roofing company specializes in roof repair, roof replacement, and other roofing contractor services. We are the best roofer in Virginia Beach, Chesapeake, Norfolk, Portsmouth, Suffolk, Hampton, and Newport News. If you are looking for a “Roofer Near Me,” we are your best choice.
757 Virginia Construction
(757) 453-3165 757norfolkroofing.com
1127 Jernigan Ave, Norfolk, Virginia
5.0 from 17 reviews
757 Virginia Construction specializes in expert roofing solutions, serving as a trusted roofing contractor in Norfolk. Our team is skilled in various roofing styles, including metal roofing, asphalt shingle roof, and flat roofing. We prioritize reliable service and durable results, ensuring each project meets individual client needs and industry standards. For those seeking seamless roofing installation in Norfolk, our services extend to TPO roofing and synthetic roof systems. At 757 Virginia Construction, we focus on providing efficient installations and thorough maintenance. Each roofing project is approached with a commitment to quality and customer satisfaction, aiming to enhance the functionality and appearance of your building.

Contra Roofing
(757) 997-1919 norfolk-roofing.company
300 Monticello Ave, Norfolk, Virginia
5.0 from 12 reviews
Introducing Contra Roofing, Inc.'s extraordinary roofing service. We provide top-tier roofing solutions that exceed your expectations. Our team of experts delivers unmatched craftsmanship, durability, and reliability for all your roofing needs. With Contra Roofing, you can trust that your roof will not only meet but exceed industry standards. Whether it's a repair, replacement, or installation project, our simple yet effective approach ensures a hassle-free experience and exceptional results every time. Experience the difference with Contra Roofing, Inc.'s extraordinary roofing service - where quality meets simplicity for superior performance and peace of mind.
Bumble Bee Roofing
737 Granby St SuiteB, Norfolk, Virginia
4.7 from 13 reviews
Commercial/Residential/Industrial
Stevens Roofing Corporation
(757) 231-9688 www.stevensroofingcorp.com
818 W 39th St, Norfolk, Virginia
3.9 from 35 reviews
At Stevens Roofing, we make it a point to run the gamut, when it comes to the services we offer. While we do specialize in high end roofing and skilled historic restoration services, there’s much more to it than that. Our primary professional focus is premium roofing systems like slate, tile, copper and wood, but we also offer leak repairs, gutter cleaning and much more. So whether you are looking for a reliable Norfolk area roofing contractor or someone nearby Richmond who can install new gutters for your home, Stevens Roofing Corporation has you covered.

Bayview Exteriors
1170 Lance Rd #108, Norfolk, Virginia
3.8 from 37 reviews
Bayview Exteriors is a Remodeling company that specializes in roofing, siding, gutters, windows, decks, porches, We enjoy helping Customers in Hampton Roads
Miles Roofing (JD Miles & Sons)
(757) 545-1777 miles-roofing.com
Serving
5.0 from 16 reviews
Miles Roofing, also known as JD Miles & Sons, has been keeping a roof over Hampton Roads residents heads since 1910. We have established a strong reputation for providing high-quality services to our clients, which is why we are endorsed by experts and recommended by neighbors. Our services go beyond just roofing, as we also specialize in windows, doors, siding, and gutters. No matter the size or complexity of the job, our skilled professionals are dedicated to delivering the best results. Trust a name and a family that has been keeping roofs over heads for over a century. Contact Miles Roofing today for all your roofing and exterior needs. Class A licensed, bonded, and insured. Commercial and Residential.
In Norfolk, a full roof replacement typically requires a permit processed through the city's Building Division rather than being handled informally. That means you should start with the right permits before any tear-off begins, and you'll want to confirm your contractor's current license and specialty endorsements before you sign anything. Expect your application to be reviewed for contractor qualifications, insurance coverage, and compliance with local roofing standards. If a contractor pushes a "do it fast" approach without proper paperwork, see that as a red flag-the city does not tolerate shortcuts when it comes to safety and long-term performance in the salt air and high-wind environment.
The city's review process emphasizes proper contractor licensing before permit issuance for reroofing work. This is not just paperwork; it's a bulwark against shoddy materials, improper installation, and future claim headaches after a storm. Be prepared to present a detailed scope of work, material specifications, and a work timeline. If the contractor cannot provide proof of licensure or cannot show you their wind-resistance and code-compliant details, delay the project and seek alternatives. The permit review gatekeepers are watching for adherence to statewide and local codes that directly affect performance in coastal humidity and gusty events.
Post-installation inspections in this area commonly verify underlayment, fasteners, flashing, and ventilation, and some projects may face added wind-mmitigation or material-specific requirements. Expect an inspector to walk the roof line, inspect flashing around chimneys and valleys, and confirm that underlayment is continuous and properly fastened. Ventilation is checked because proper attic venting helps manage moisture and heat buildup that can degrade roofing components and attic spaces in humidity-heavy seasons. In wind-prone periods, inspectors may look for secure fasteners and proper nailing patterns that resist uplift. If a project triggers wind-mitigation considerations, you will be asked to document features like upgraded fasteners, clips, or straps that reduce wind-related damage.
Keep your permit number, contractor contact, and inspection scheduling handy. If the project misses a required inspection window, you risk delays and possible requirement to reopen or rework portions of the installation to meet code. Because the coastal climate amplifies corrosion risk, the inspector will expect corrosion-resistant hardware, and flashing that remains continuous under pressure from salty spray. If you encounter issues, address them promptly with your contractor and the Building Division, rather than letting small discrepancies accumulate into larger, long-term vulnerabilities during hurricane season.
When a tropical system rolls through, you'll find that the claims environment around here leans toward documentation-heavy handling. Wind and hail losses are scrutinized more tightly, and carriers tend to require solid proof of what happened and when. This is a place where a careful file-photos, notes, and a clear timeline-can make a meaningful difference when an adjuster steps in. The local reality is that hurricanes leave a mix of fresh storm effects and long-standing wear, so the process hinges on clear, organized evidence.
Owners should keep a straightforward album: pre-loss roof photos taken from multiple angles, plus post-storm images taken soon after a storm and again after any interim repairs. In a salt-air coastal market, corrosion and fast wear can masquerade as or hide storm damage, so consistent lighting and date-stamped shots matter. If you can, photograph gutters, flashing, and penetrations as well as large flat areas of shingles or tiles. A simple measurement log of affected areas helps an adjuster see the scope without guessing. Retain receipts or notes for any temporary fixes you apply to limit interior damage while awaiting a formal assessment.
Claims in this coastal climate are often complicated by the need to distinguish new storm damage from older wear accelerated by humidity, salt exposure, and prior patching. For a homeowner, this means documenting the condition of the roof in the months leading up to the incident, not just after. Look for brittle or curling shingles, rusted fasteners, or cracked flashing that predates the storm. When estimating repair needs, be prepared for questions about whether a repair or full replacement is warranted. Keep a concise narrative of what happened and when, so the adjuster can separate fresh impact or wind effects from pre-existing conditions.
Expect adjuster involvement to be part of the process, with a focus on thoroughness and timing. Provide your photo log, a written timeline, and notes on any leaks or interior damage observed after the storm. If questions arise about the extent of damage or preferred repair approach, request a second opinion or an independent roofing professional's evaluation to support your case. In this market, a calm, well-documented presentation helps both sides move toward a fair, substantiated resolution.
Connect with contractors who help homeowners navigate the claims process from damage assessment to final approval.


Norfolk's mix of residential and commercial building types means homeowners may encounter additions, porches, and low-slope sections even when the main roof is pitched. That architectural variety creates more transition points where water can pool or misdirect, especially where flat or low-slope membranes meet steeper shingles or metal panels. Understanding how these transitions behave helps prioritize inspections after storms and during spring maintenance.
Heavy spring and summer rain in coastal Virginia makes drainage details on low-slope sections especially important to prevent ponding and seam-related leaks. Check downstream drainage paths from any flat or near-flat sections to confirm they feed toward gutters, scuppers, or downspouts without backing up. At transitions where a low-slope membrane meets a steeper roof, look for seam integrity, edge flashing, and fastener corrosion. Small deviations here predict larger leaks after a hurricane's wind-driven rain.
Flat or near-flat portions often exist as porch roofs, attached carports, or sunrooms, and may extend from the main roofline. These areas are frequent failure points because salt-laden air accelerates corrosion on metal flashings and fasteners. Pay close attention to the seams, penetrations around ventilation, vents, and skylights, and any history of ponding. In mixed systems, a localized issue can propagate along the transition and manifest as leaks inside ceilings below.
Schedule a careful walk-around after major storms, focusing on edge details and penetrations where membranes lap over steeper substrates. Clean debris from gutters and scuppers to maintain positive drainage, and reseal seams with materials rated for coastal salt air if you notice drying or cracking. When planning repairs, address both the low-slope membrane and its transition to prevent a patchwork fix from failing under future wind-driven rain.
If a professional evaluates the roof, ask for a unified plan that treats low-slope sections in concert with adjacent pitched areas rather than in isolation. Emphasize durable flashing at transitions and corrosion-resistant fasteners. Document observed issues with photos and keep a simple log of storm impacts to guide timely, targeted repairs when the next hurricane season approaches.
Find specialists in TPO, EPDM, and built-up flat roofing systems for residential and commercial properties.

VA Commercial Roofers of Chesapeake
(757) 317-0221 www.vacommercialroofers.com
Serving
5.0 from 44 reviews
Norfolk replacements are commonly scheduled in spring or fall to avoid the combination of peak summer heat and the most disruptive tropical weather windows. Choosing these shoulder seasons helps the roof materials cure properly, reduces heat-related ventilation strain, and lowers the likelihood of weather-driven delays during a busy storm season. By aiming for milder temperatures, you protect sealants and underlayment while the sun isn't blazing on newly exposed shingles or panels.
Heavy warm-season rain can delay tear-offs and expose roof decks to moisture if scheduling is too aggressive during unsettled periods. A mid-spring or late-fall tear-off minimizes back-to-back rain events and gives crews solid daytime windows for drying-in, which helps prevent moisture entrapment and wind-driven damage during the finish stage. If a storm system rolls through, it's easier to pause work, cover exposed areas, and resume without compromising decking or flashing detail.
Occasional winter freezes and icing in coastal Virginia can slow installation and affect how some materials seal or perform during reroofing. Freezing temperatures can hinder asphalt sealants, stiffen underlayment, and complicate the installation sequence for metal or tile products. In practice, that means frost days, frozen boot ladders, and short daylight hours reduce productivity and can impact warranty triggers if performance is stressed during winter.
Coordinate tear-offs to avoid peak heat days, typically by scheduling mid-morning starts that allow shade to move across the deck. Build in buffer periods after heavy storms to ensure attic ventilation remains effective and that any moisture has a chance to vent before insulation and interior spaces are re-sealed. Develop a post-storm leak-response plan with your contractor so that if wind-driven rain occurs, you can act quickly to document damage for insurance considerations and prevent secondary moisture intrusion.