Last updated: Apr 19, 2026
Your roof lives with a constant push-pull from coastal moisture, salt spray, and persistent wind. In Virginia Beach, that combination speeds up deterioration on shingles, flashings, and exposed fasteners far more than inland neighbors see. Edge restorations become critical as salt-laden air attacks underlayment and the fasteners that hold metal vents, drip edges, and trims in place. The result is quicker granule loss, increased curl, and more vulnerable seams that can fail under the first strong storm.
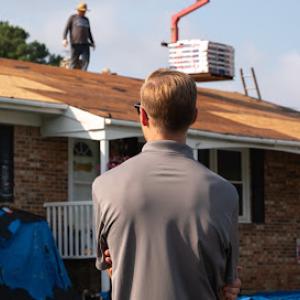
Hurricane season, roughly August through October, elevates risk dramatically. Wind-driven rain can turn minor edge or flashing defects into interior leaks almost overnight. A small wrinkle along a roof edge or a loose vent boot can become a channel for water intrusions after a few hours of driving rain and gusts. Planning around that window means preemptive inspection and timely repairs-not waiting for a visible drip to appear. In practical terms, treat any visible gap, loose shingle tab, or corroded fastener as an urgent repair item.
Oceanfront and bay-facing blocks tend to face harsher corrosion and wind exposure than more inland areas. This means roofing components near the sea wall can corrode faster, and fasteners in these zones may require more frequent replacement or upgrade to corrosion-resistant options. So, if the home sits along the direct spray path or on a bluff overlooking the water, expect more frequent maintenance cycles and a higher likelihood of flashing corrosion.
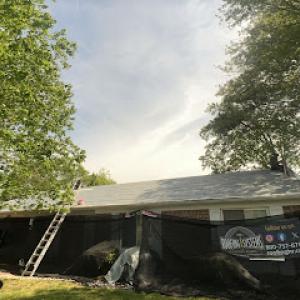
Start with a targeted inspection after any heavy storm, focusing on edge shingles, flashing around chimneys and vents, and exposed fasteners on metal components. Look for loose granules, dark staining at seams, blistering, or signs of salt crusting on metal vent caps and drip edges. If any flashing shows movement or corrosion, treat it as a priority repair-delays compound risk during the next wind-driven rain event. Keep gutters clean and free of debris that can funnel water toward fascia and underlayment during storm surges.
Prepare a proactive maintenance cadence: schedule a professional roof inspection twice a year-ideally after major storm seasons-and after any tropical activity that skirts the coast. For replacement planning, lean toward materials with robust wind performance and corrosion resistance, and ensure fasteners and flashings are matched to coastal salt exposure. Finally, verify that edge protection and terminations are sealed tightly, because small deficiencies in these areas are what transform a routine leak into a home-wide water event during Virginia Beach's volatile late-summer to early-fall conditions.
Spring and fall are the reliable windows for a roof replacement in this coastal area. You avoid the peak heat of summer that can stress crews and materials, and you also sidestep hurricane-season scheduling risks that come with late summer and early fall. If a roof needs replacement, aiming for a late spring or early autumn project minimizes heat exposure for workers and reduces the chance of delays from Atlantic storms. Start by coordinating a window when afternoon temperatures are comfortable and storms aren't forecasted to roll in, so you're less likely to see a rushed job or weather-related setbacks.
Hot, humid summers in this region accelerate aging of asphalt shingles and underlayment, especially on older roofs that already show signs of wear. The combination of salt-laden air and high humidity can corrode fasteners and media around vents and flashings more quickly than inland conditions. When planning a replacement, prioritize attic ventilation checks before the new roof goes on. A well-ventilated attic helps keep deck temperatures down, which protects shingles and underlayment during installation and in the first hot months afterward. If a summer replacement is unavoidable, expect extra inspection time during and after to verify the sealant and shingle edges haven't softened and that wind-driven salt exposure hasn't caused early edge lifting.
Winter in this city is milder than inland Virginia, but that doesn't mean the season is free of risk. Freeze-thaw cycles can create moisture stress on underlayment and gypsum board sheathing, and cold snaps can slow roof repairs. If a leak is active, a temporary patch may be necessary to prevent interior damage while a full replacement is scheduled for a drier spell. When temperatures drop, crews should take extra care with sealants and flashing work, since adhesion can be compromised in freezing conditions. A careful contractor will stage materials to minimize frost exposure and will avoid long stretches of cold weather that could push work drift into the rainier early spring.
Coordinating the project around weather is not just about avoiding storms; it's about ensuring the roof and attic ventilation are compatible with the coastal environment. Before work begins, inspect the existing attic ventilation to confirm it can handle the new roof's loads and airflow. After removal, check for moisture intrusion from salt exposure around penetrations and ensure flashings are reseated correctly. On a practical note, allow a few flexible days in the schedule during shoulder seasons so crews can accommodate an occasional coastal breeze that brings higher humidity or a stray afternoon shower. This approach helps keep the project moving without compromising the roof's long-term performance against Virginia Beach's salt air and storm risk.
Get a clear picture of your project costs upfront - no commitment required.

Custom Home Improvement & Repairs of Hampton Roads
(757) 720-7032 customhomeimprovements.com
2000 General Booth Blvd Ste 204, Virginia Beach, Virginia
4.9 from 973 reviews
Domi Roofing
(757) 737-9286 www.domiroofing.com
2589 Quality Ct # 303, Virginia Beach, Virginia
5.0 from 82 reviews
Marshall Builders USA (MB Roofing USA)
(757) 780-8229 www.marshallbuildersusa.com
1206 Laskin Rd Ste 201, Virginia Beach, Virginia
5.0 from 26 reviews
Custom Home Improvement & Repairs of Hampton Roads
(757) 720-7032 customhomeimprovements.com
2000 General Booth Blvd Ste 204, Virginia Beach, Virginia
4.9 from 973 reviews
Custom Home Improvement and Repairs in Virginia Beach, VA provides professional roof replacement services for homes facing the area’s coastal winds, salt exposure, and frequent storms. We handle full roof tear-offs, shingle replacements, leak repairs, and solutions for aging or weather-damaged roofs common near the shoreline. Our team focuses on durable workmanship, clear communication, and reliable service from start to finish. Turn to our experienced roofers for trusted, high-quality roofing solutions that protect your home year-round.
Best Roofing Of Virginia
(757) 463-2378 www.bestroofingva.com
320 33rd St #1451, Virginia Beach, Virginia
4.9 from 420 reviews
Best Roofing of Virginia is a trusted roofing contractor serving Virginia Beach, VA, & the surrounding areas since 1997. As a GAF Master Elite® Contractor, we provide professional residential roofing services, including roof installation, roof replacement, roof repair, & shingle roofing. Our team is committed to delivering high-quality workmanship while staying within your budget. With decades of experience & the latest equipment, we ensure durable results that protect your home & enhance its value. Whether you need a new roof or emergency roof repairs, our skilled roofing contractors are ready to help. Best Roofing of Virginia for reliable roofing services in Virginia Beach, Chesapeake, Norfolk, Portsmouth, & nearby communities.
Roofing Systems of Hampton Roads
(800) 757-6701 www.roofinghr.com
Virginia Beach, Virginia
4.9 from 124 reviews
Roofing Systems of Hampton Roads is your reliable choice for all roofing needs in Hampton Roads and NE North Carolina. We specialize in installing shingles, flat/membrane, metal, specialty/luxury shingles and tiles, slate, and synthetic slate roofing systems. Our trained and certified team is dedicated to delivering dependable, high-quality products that last. At Roofing Systems of Hampton Roads, we pride ourselves on a legacy of trustworthy service. For more details about how our roofing company, can assist you, please visit our website or contact us today. Let us help you protect your home with a roof you can trust.
Domi Roofing
(757) 737-9286 www.domiroofing.com
2589 Quality Ct # 303, Virginia Beach, Virginia
5.0 from 82 reviews
Domi Roofing provides expert residential and commercial roofing services across the Hampton Roads area. We specialize in roof repair, full roof replacement, and professional installation for homeowners and businesses. Our residential expertise includes shingle, tile, metal, and flat roofing. For commercial properties, we offer durable Modified Bitumen and metal roof systems. Proudly serving Virginia Beach, Norfolk, Chesapeake, Portsmouth, Suffolk, and Hampton, VA, our team understands local weather challenges. Whether you need a leak fixed or a complete upgrade, we offer free inspections and honest advice. Choose Domi Roofing for quality craftsmanship and reliable local service. Schedule your free estimate today!
Wholesale Roofers
(757) 424-5981 wholesaleroofersva.com
1 Columbus Ctr #600, Virginia Beach, Virginia
4.8 from 411 reviews
We are a full-service roofing contractor that offers discount roof replacement to all residences of Virginia Beach, Chesapeake, Norfolk, Portsmouth, Suffolk, Newport News and Hampton. We understand that you're looking for a good quality roof at an affordable price, and that's exactly what we offer. We buy in bulk and pass our wholesale discount on to you. We have industry-leading materials and highly skilled installers--all at an exceptional value. The only thing we ask from you is that you tell your friends about us once your roof is completed.
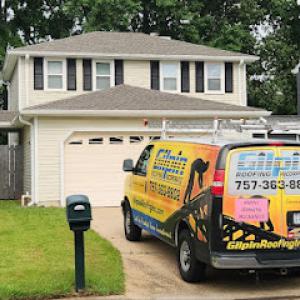
Gilpin Roofing
(757) 363-8802 www.gilpinroofinginc.com
5051 Euclid Rd, Virginia Beach, Virginia
4.9 from 209 reviews
Established in 1997, Gilpin Roofing has dedicated decades to becoming a premier family owned and operated roofing company, operating out of Virginia Beach, providing both residential and commercial properties with professional and reliable roof replacement and repair services. Skilled in their craft, their dedicated team takes pride in providing high-quality craftsmanship to ensure your property is protected and looking its best.
Convert Roofing
(757) 720-2567 convertroofing.com
5770 Thurston Ave #106, Virginia Beach, Virginia
4.9 from 81 reviews
Convert Roofing offers quality and affordable residential roofing services in Virginia Beach and throughout all of Hampton Roads. From full on roof replacements to just a repair, we have you covered. Choose from a variety of different materials and colors to give your roof the look of your dreams.Our team of experienced roofers will be with you every step of the way, keeping you in the loop with consistent updates on the status of your roof. All of our roof installations come with a workmanship and manufacturer warranty, so you can be confident your roof is built to last.
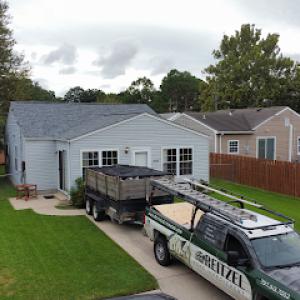
Reitzel Roofing & Exteriors
(757) 513-7053 reitzelexteriors.com
3324 Virginia Beach Blvd #108, Virginia Beach, Virginia
4.8 from 305 reviews
Looking for trusted roofing contractors in Virginia Beach? Reitzel Roofing and Exteriors is your go-to Virginia Beach roofing contractor, specializing in roof repair, roof leak detection, storm damage restoration, and full roof replacements. We serve both residential and commercial clients across Virginia Beach, Chesapeake, Norfolk, Portsmouth, Suffolk, Yorktown, Williamsburg, Newport News, and surrounding Hampton Roads. Our team installs all types of roofing—shingles, metal, EPDM, TPO, cedar, slate, and more. Beyond roofing, we offer expert siding, soffit, trim, gutters, windows, decks, fences, and doors. With high-quality materials, honest pricing, and reliable warranties, we’re the roofing Virginia Beach VA company you can trust.
The Roofing Company Inc. of Virginia Beach
(757) 867-6600 theroofingcompany.com
3640 S Plaza Trail STE 204, Virginia Beach, Virginia
4.9 from 134 reviews
The Roofing Company is a GAF Master Elite® contractor and Slate Roofing Specialist serving the Hampton Roads, Virginia area since 1998. The Roofing Company offers a full range of roofing services and specializes in the preservation and repair of historic homes and structures.

Home Genius Exteriors
(757) 210-7393 homegeniusexteriors.com
5520 Greenwich Rd Suite 204B, Virginia Beach, Virginia
4.7 from 565 reviews
Elevate your home with Home Genius Exteriors, setting the standard in Tidewater by offering full-service solutions for roofing, siding, windows, doors, gutters and insulation. We support our veterans and communities by supporting local and national charitable organizations through our Home Genius Cares initiative. With an Owens Corning® Platinum Preferred designation, we also offer flexible payment options, industry leading warranties and a wide range of premium products tailored for your home. It’s time for a different experience, entrust your next home project to a genius and schedule your free inspection today!
Marshall Builders USA (MB Roofing USA)
(757) 780-8229 www.marshallbuildersusa.com
1206 Laskin Rd Ste 201, Virginia Beach, Virginia
5.0 from 26 reviews
Marshall Builders USA, owned by MONTY Marshall, is a top-tier business offering a wide range of services including roofing, damage restoration, mold removal, and general contracting. With a focus on roofing, the company takes pride in being fully insured and committed to providing quality roofing jobs. Specializing in asphalt shingles roof installation, repair, and replacement, Marshall Builders USA is the go-to choice for all your roofing needs. Additionally, we offer fire damage restoration services and can work with your insurance company to ensure you get the full roof replacement you deserve. As your friendly neighborhood roofer, Marshall Builders USA is dedicated to providing exceptional service and delivering top-notch results.
Roofing Contractors Virginia Beach
121 Sykes Ave, Virginia Beach, Virginia
4.9 from 41 reviews
Roofing Contractors Virginia Beach specializes in expert roof installation and replacement services for both residential and commercial properties in Virginia Beach VA and the surrounding areas. Our skilled team is committed to delivering high-quality, long-lasting roofing solutions tailored to your needs. Whether you’re upgrading your home’s roof or need a reliable solution for your business, we’ve got you covered. Contact us today for a free estimate and experience top-notch service from trusted roofing professionals!
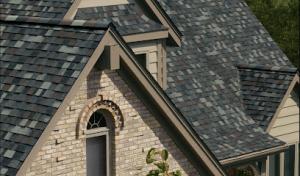
Asphalt shingles remain a dominant choice in Virginia Beach, but coastal humidity and wind exposure make installation quality, sealing, and flashing details especially important. When choosing asphalt in this coastal context, look for high-quality interlocking shingles and a robust underlayment system. The coastal breeze can lift edges if the sealant isn't properly set, so insist on full-coverage nailing patterns and drip edge protection. Regular moisture checks after storms help catch peeling or edges that have loosened, which can occur more quickly near salt-saturated air.
Metal roofing is common in the local market and is often considered for better wind performance, but salt-air environment makes corrosion resistance and compatible fasteners critical. Choose galvalized or aluminum alloys with protective coatings designed for coastal climates. Pay attention to fastener materials and sealant compatibility to avoid galvanic corrosion where different metals meet. A mechanically fastened system with a thorough underlayment plus quality sealants tends to hold up well against salt spray and high-wind events. If you opt for exposed fasteners, ensure proper sealing and remote drainage from hips and ridges to minimize water intrusion risk.
Clay tile, slate, wood shakes, and synthetic products all appear in the market, reflecting the harbor's mix of oceanfront homes, established neighborhoods, and higher-end coastal architecture. Clay and slate bring a distinctive look and excellent longevity, but weight and installation tolerances matter more in coastal builds. In high-wog winds, tile and slate require precise installation with proper battens, underlayment, and wind-resistant fasteners to prevent lift. Wood shakes offer a classic texture that's appealing in traditional designs, yet in humidity-prone coastal air they demand stringent ventilation, treated wood, and regular maintenance to prevent rot and insect activity. Synthetic shingles provide a lower maintenance option with improved resistance to moisture and salt, but verify the product's coast-specific testing for wind uplift and UV exposure. For all these materials, match with a coastal-grade underlayment and ensure flashing at eaves, chimneys, and vent pipes is continuous and corrosion-resistant.
In this market, venting and attic moisture control play a pivotal role in protecting any roof choice from humidity-driven deterioration. The right combination of underlayment, attic ventilation, and sealing at penetrations helps mitigate salt-air corrosion and wind-driven leaks. When evaluating a roof plan, pay attention to edge detailing, ridge cap integrity, and the condition of fascia boards, which can take direct salt exposure. A thoughtful approach to material compatibility-especially at fasteners, sealants, and flashing-supports sustained performance amid Virginia Beach's coastal storms and air quality.
Coastal exposure in this area means salt-laden air accelerates corrosion and accelerates wear on metal components, fasteners, and flashings. When evaluating replacement costs, compare against the provided per-square ranges and expect coastal detailing, corrosion-resistant accessories, and storm-ready installation practices to push pricing upward. For example, premium underlayment and corrosion-resistant fasteners add to the base, while materials chosen for coastal resilience-such as certain metal systems or synthetic shingles with enhanced UV and salt resistance-can shift overall cost ranges toward the higher end. The salt air also stresses sealants and penetrations, so expect extra attention to flashings around chimneys, vent stacks, and skylights.
Virginia Beach's housing stock spans standard suburban asphalt roofs to more complex coastal homes with steeper pitches and multiple penetrations. That mix directly affects labor time and pricing. Replacement costs should be weighed against the per-square ranges provided for asphalt, metal, clay, wood, synthetic, and slate. Steeper pitches and intricate layouts-think multiple dormers, skylights, and vent arrays-tend to elevate labor hours and can broaden the project's total price. In practical terms, a home with premium materials or a higher-end system may push costs toward the upper end of the listed ranges, even before considering coastal hardware and storm-ready installation practices.
Pricing and scheduling in this market can shift after tropical systems or major wind events. Demand spikes can tighten crews and push installation timelines, which may in turn affect pricing and availability more than inland markets. If a storm passes through, expect potential short-term price bumps for expedited material delivery, increased crew mobilization, and possible overtime. Plan accordingly by building in a contingency for weather-driven delays and knowing that coastal installations sometimes require more meticulous detailing and testing to ensure long-term performance under wind-driven rain.
The city's varied housing mix means some projects will require premium detailing, such as enhanced suction hooks, wind-resistant fasteners, and specialized sealants around coastal penetrations. That combination-not just the material choice-drives labor time and total project cost. When choosing materials, consider the long-term value of coastal-ready components and the potential need for additional corrosion protection, especially on exposed elevations and roof intersections.
Don't let upfront costs delay a critical repair - these contractors offer payment plans to fit your budget.
Custom Home Improvement & Repairs of Hampton Roads
(757) 720-7032 customhomeimprovements.com
2000 General Booth Blvd Ste 204, Virginia Beach, Virginia
4.9 from 973 reviews
Most roof replacements in Virginia Beach require a building permit through the city's Building Safety function before work begins. That permit isn't just paperwork-it's sets expectations for material choices, wind resistance, and safe work practices that are checked on site. Without it, you risk stop-work orders and tough rework later, especially after a storm season or an obvious misstep during framing. The Building Safety team reviews plans for underlayment, flashing detail, and nailing patterns, and those reviews influence how the roof finally sits against salt air and high winds. Understanding this early helps avoid delays that linger into the dry-in phase when shingles go on.
Virginia Beach commonly reviews roofing projects and performs inspections at underlayment framing and again at final completion. Those checkpoints are not mere formalities; failing an inspection can trigger a redo that eats into dry-in time and home comfort. If someone else is pulling the permit, you want a clear schedule for when inspections are expected and what documentation is required, such as permit numbers, contractor licenses, and material specs. A proactive plan reduces the risk of moisture intrusion or delayed weather windows.
Because permit review and inspections are part of the local process, homeowners in Virginia Beach should confirm who is pulling the permit and how inspection timing will affect dry-in and completion. Coordinate with the contractor to align weather windows, especially given coastal storms and salt exposure that can accelerate wear on underlayment and framing. Ensure the contractor stacks the project timeline so that underlayment, then framing, then final completion, each receive timely inspection to minimize the chance of backtracking when the Atlantic wind picks up.
Documentation and signatures
Before any roof work starts, ensure the permit file includes all required signatures from the property owner and contractor, and that the scope matches approved plans. In areas, inspectors look closely at tie-downs, hip and ridge details, and venting to prevent water intrusion during rains and winds. Keep a file of inspection stickers to avoid delays from steps and notices.
Coastal storms and frequent wind events keep Virginia Beach in a higher-claim roofing market. That reality isn't about fear-mongering; it's about understanding how insurers view a coastline where salt air corrodes metals, accelerates shingle granule loss, and tests fasteners year after year. When a storm hits, you're more likely to be in a claim cycle than in inland markets, so planning for that reality helps protect your home and your wallet.
Insurers in this market may ask for roof age records, dated photos, and documentation of wind-mitigation features before approving or pricing coverage. If you've recently reroofed or added reinforcements, keep those records accessible. Before a storm, photograph the roof and any visible fasteners, vents, and edge details. After a wind event, document the damage promptly and clearly, focusing on shingles curling, lifted edges, flashing, and gutter impact. This careful record-keeping helps avoid policy surprises and speeds claims when the salt-laden air and salt spray have already started to take their toll.
Coverage remains available, but premiums reflect coastal exposure, so homeowners should document pre-storm condition and post-storm damage carefully. If a storm threatens, secure loose materials and note any pre-existing wear that could be misconstrued as cause for a claim. After a storm, compare the roof's current state to those pre-storm photos to show new damage vs. pre-existing wear. In this climate, timely, organized documentation reduces friction and helps ensure that a legitimate wind event is recognized for what it is.
Connect with contractors who help homeowners navigate the claims process from damage assessment to final approval.
Custom Home Improvement & Repairs of Hampton Roads
(757) 720-7032 customhomeimprovements.com
2000 General Booth Blvd Ste 204, Virginia Beach, Virginia
4.9 from 973 reviews

Gilpin Roofing
(757) 363-8802 www.gilpinroofinginc.com
5051 Euclid Rd, Virginia Beach, Virginia
4.9 from 209 reviews
Marshall Builders USA (MB Roofing USA)
(757) 780-8229 www.marshallbuildersusa.com
1206 Laskin Rd Ste 201, Virginia Beach, Virginia
5.0 from 26 reviews
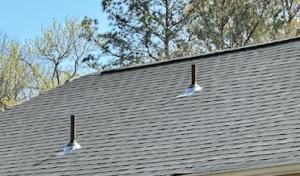
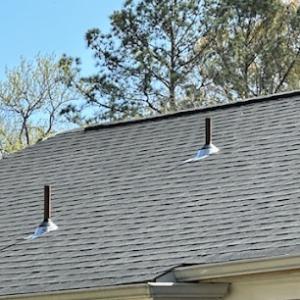
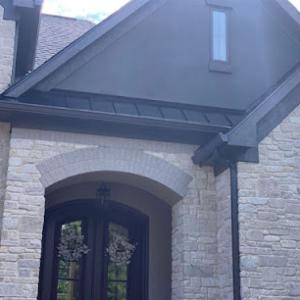
Exposed metal components, such as flashings and fasteners, take a steady beating from salt-laden air. Over years, corrosion can creep in at corners, seams, and connection points, weakening the seal and inviting leaks where you least expect them. In coastal neighborhoods, small rust spots can grow into loose flashings or failed caulking, especially where roof penetrations meet the decking. The consequence is hidden water intrusion that shows up as staining or soft spots inside ceilings after a storm. Regular inspection of every flashing seam and fastener, with immediate attention to any discoloration or loose hardware, is a prudent habit for a roof in this climate.
Coastal storms don't just drop rain; they drive it at high speed against the home. That wind-driven rain tends to exploit weak points at roof edges, around transitions, and where materials meet, rather than only areas with obvious missing shingles. Over time, edge shingles can lift, underlayment can peel, and transitions around chimneys, vents, or dormers can fail if not sealed and properly secured. The result is intermittent leaks that worsen with each seasonal wind event. Prioritize checking edge fasteners, staggered shingle seams, and the integrity of the siding-to-roof interfaces after storms to catch problems early.
Skylight perimeters and other roof penetrations are higher-risk leak locations when repeated moisture exposure meets storm pressure. Sealants can degrade, flashing can compress, and the surrounding deck may loosen, creating a path for water even when the field looks intact. In Virginia Beach, this fragility is amplified by salt exposure and salty spray during humid months. If you notice condensation, damp ceiling patches near skylights, or peeling flashing paint, treat it as a warning sign that the seal and flashing details require prompt repair or reinforcement to prevent costly interior damage.
Find contractors experienced in skylight installation, flashing, and leak repairs to bring natural light into your home.
Roofing Systems of Hampton Roads
(800) 757-6701 www.roofinghr.com
Virginia Beach, Virginia
4.9 from 124 reviews
Gilpin Roofing
(757) 363-8802 www.gilpinroofinginc.com
5051 Euclid Rd, Virginia Beach, Virginia
4.9 from 209 reviews
Reitzel Roofing & Exteriors
(757) 513-7053 reitzelexteriors.com
3324 Virginia Beach Blvd #108, Virginia Beach, Virginia
4.8 from 305 reviews
Virginia Beach features a notable flat-roof segment in both residential additions and commercial properties, so drainage and membrane condition become daily concerns. In this market, a low-slope roof carries the brunt of salt-laden air and summer heat, which can accelerate wear around edges, penetrations, and terminations. Prioritize thorough drainage assessment after heavy rains and coastal storms, ensuring copings, seams, and flashings are secure and free of debris that could impede water flow.
The combination of coastal moisture and high temperatures can shorten the service life of low-slope components if ponding or neglected penetrations exist. Regular inspections should focus on ponding areas, flashing transitions, and the integrity of base sheets or single-pply membranes. In this climate, look for blistering, uplift-induced gaps, and accelerated oxidation around membrane edges. Clean seams that show loose granules or reduced adhesion, and address any UV- or salt-induced chalking promptly to prevent accelerated deterioration.
Roof coatings occupy a niche in the local market, often used to extend the life of aging low-slope systems. Coatings can offer a reflective finish to reduce heat gain and seal minor surface imperfections, but must be chosen with compatibility to the existing membrane and proper surface prep. In practice, coating projects benefit from careful moisture assessment first: cure issues or trapped water beneath the coating can undermine long-term performance. Coatings are most effective on sound substrates with clear ponding management and well-sealed penetrations.
A practical approach is to pair seasonal inspections with after-storm checks, focusing on seams, penetrations, and edge terminations. Salt spray can corrode metal flashings and fasteners, so confirm corrosion resistance and consider upgrades to more durable materials where appropriate. Maintain a documented maintenance log to track patch jobs, coating cycles, and any membrane repairs, helping you anticipate when a full replacement may be warranted.
Find specialists in TPO, EPDM, and built-up flat roofing systems for residential and commercial properties.
Roofing Systems of Hampton Roads
(800) 757-6701 www.roofinghr.com
Virginia Beach, Virginia
4.9 from 124 reviews
Domi Roofing
(757) 737-9286 www.domiroofing.com
2589 Quality Ct # 303, Virginia Beach, Virginia
5.0 from 82 reviews
Reitzel Roofing & Exteriors
(757) 513-7053 reitzelexteriors.com
3324 Virginia Beach Blvd #108, Virginia Beach, Virginia
4.8 from 305 reviews
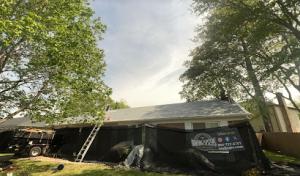
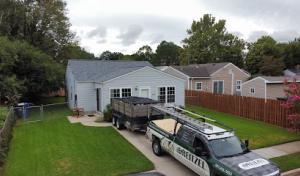
Coastal markets are storm-driven, and a reliable roofer shows up prepared to move quickly after wind events. Look for a contractor with a dedicated crew, on-site supervisor, and equipment that can stage a full roof replacement without long delays. A practical plan includes roping off work areas to protect driveways and landscaping, and coordinating with you to minimize exposure windows between tear-off and reinstallation. The ability to shift schedules around a storm day or two, while still delivering a complete roof, is invaluable in this market.
Cleanup is a frequent homeowner concern in dense suburban or coastal lots where nails and debris can wander into yards and driveways. Ask how the crew handles debris containment, magnet sweeps at the end of each day, and post-project junk removal. A clear process should outline daily cleanup, nail-spot checks in walkways, and a final inspection to ensure no stray fasteners remain. In tight neighborhoods, a tidy jobsite reduces risk to neighbors and vehicles and speeds up final acceptance.
With salt air and steady coastal exposure, material selection matters. A roofer should explain how different products perform here, including salt spray resistance, wind uplift suitability, and long-term durability. Also discuss warranty options: what coverage exists for the underlayment, shingles or panels, and workmanship, and how each component is affected by storm-related wear. Clear answers about sequencing of inspections and how warranty claims are handled help homeowners feel protected after the project wraps.