Last updated: Apr 19, 2026
The hillside and foothill neighborhoods along the Santa Cruz Mountain edge bring a different risk profile than valley floors. Homes here face more frequent ember exposure and wind-driven debris, especially during Santa Ana-like dry spells and afternoon gusts. A roof replacement plan that ignores ember pathways-vents, ridges, and penetrations-pays later in costly repairs and potential damage to insulation and interior spaces. When choosing materials and detailing, think not just about the roof's outer face but the entire assembly: how embers could land, linger, and ignite at overlaps, underlayment seams, and around flashing.
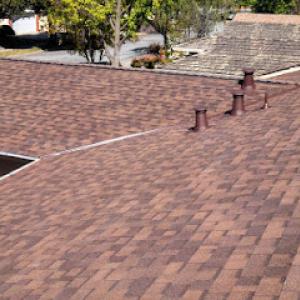
Mature trees and wooded lots are a daily factor in Saratoga's roof health. Leaves, pine needles, and small branches accumulate in valleys and around penetrations; during the dry season, that debris becomes a ladder for fire and a magnet for moisture-related issues. A replacement plan should include robust debris-capturing strategies: a gutter and valley-cleaning cadence that aligns with the Santa Cruz Mountain climate, fortified underlayment at eave lines to resist moisture intrusion, and attention to roof-down debris clearance around penetrations such as vent stacks, chimney skirts, and skylights. If debris has not been addressed before a re-roof, you risk accelerated wear, leaks, and fire-smart performance gaps that undermine the best material choice.
Many substantial homes in these foothill pockets rely on tile or tile-like systems, where the weight and support structure become central decisions. A fire-conscious replacement here isn't about chasing the flashiest option; it's about ensuring the roof can shed embers and resist ignition without compromising structural integrity. When evaluating options, the conversation should focus on how each system interacts with the existing structure: how the battens, offset, and roof deck will bear the load, how ventilation is managed to prevent heat buildup under tile, and how the chosen system handles potential wind-driven debris. In practice, that means inspecting rafter spacing, deck condition, and the compatibility of underlayment with the chosen tile type. A well-balanced choice respects fire resistance without creating undue weight stress that could threaten the roof frame over time.
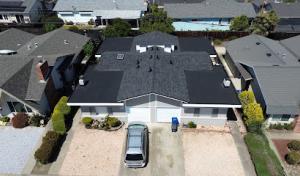
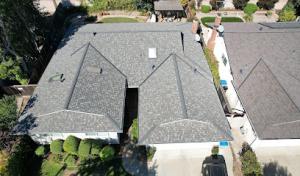
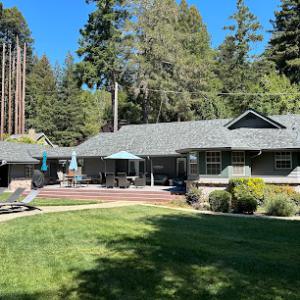
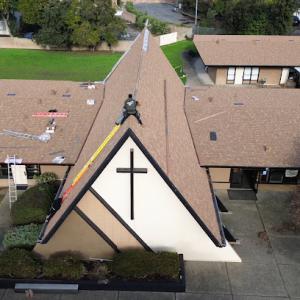
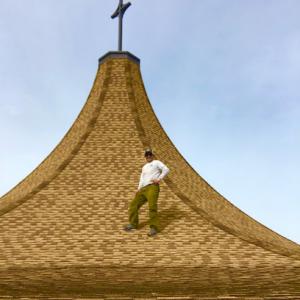
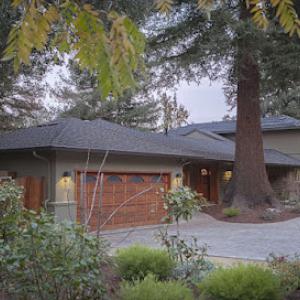
Saratoga's custom homes frequently feature intricate rooflines, varying pitches, and multiple ridges. A straightforward, one-size-fits-all approach falls short when those details are part of the fire mitigation strategy. A careful re-roof plan will map every transition-from high ridges to low eaves, from dormers to skylights-and specify how flashing transitions are executed to prevent ember ingress. Pay special attention to valley detailing and overhangs where debris can collect and where wind can drive embers into vulnerable pockets. The goal is a cohesive envelope where fire-resistant performance is built into every seam, not tacked on in a single product choice.
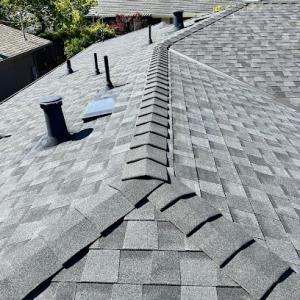
Tile systems, whether clay, concrete, or slate, demand a compatible, secure underlayment and a reliable attachment method. In these hillside settings, the deck condition matters more than in flatter neighborhoods; a warped or damaged deck can compromise the entire system and create hidden leaks that show up after a dry season. Before installing new material, verify the deck is solid, dry, and free of rot or deflection. The underlayment should be rated for fire exposure and compatible with the tile type and fasteners. Flashings around chimneys, vent pipes, and roof-to-wall transitions deserve meticulous attention; ember resistance is as much about what you cannot see as what you can.
A replacement is not a single event, but part of a longer arc of protection. Establish a seasonal cycle: after the dry season's peak, perform a thorough inspection of ridges, vents, and penetrations; before winter storms, clear debris from gutters and valleys; and periodically re-tighten flashings as needed. In hillside neighborhoods where views and masonry details are prized, it's easy to assume a high-quality install will hold up without ongoing diligence. The reality is that ember risk, debris load, and Santa Cruz Mountain winds demand a proactive, mission-focused maintenance plan that treats the roof as a living part of the home's defenses.
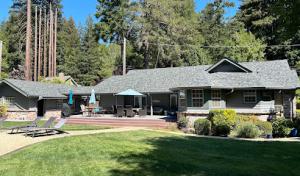
In West Valley neighborhoods, Mediterranean and custom estate architecture dominates, and clay or concrete tile roofs are a natural fit for the look and durability those homes expect. The style pairs well with the lighter colors and textured surfaces common on hillside lots. The long lifespan of tile can be a strong selling point for custom properties, especially where drought-wise landscaping or expansive views reward a cohesive exterior design. The choice of tile directly influences ventilation, attic protection, and the way rain and sun interact with the interior ceiling planes that define these distinctive homes.
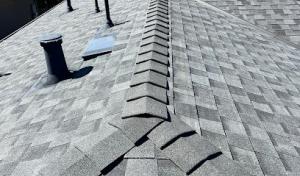
On older tile roofs, the field tile may outlast the components beneath it, making underlayment, flashing, and fastening details a more common replacement driver than broken tile alone. The Santa Cruz foothill climate brings seasonal moisture and dry heats, which stress underlayment seams, flashings around chimneys and skylights, and the fastener patterns that hold the tiles in place. In addition, tree debris and repeated exposure to wind-driven embers can accelerate damage around eave lines and vent penetrations. These conditions mean that a tile replacement project often becomes a comprehensive refresh of the roof assembly, not just the surface tiles.
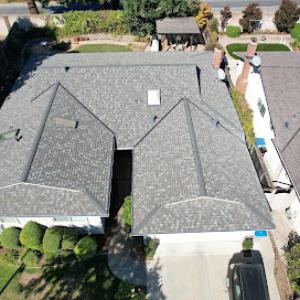
Steeper, more articulated roof designs on larger homes can raise labor time for tile removal, staging, and reset compared with simpler tract-style roofs elsewhere in the valley. Complex valleys, ogee curves, and multiple ridgelines demand careful coordination to avoid tile cracking and to maintain proper alignment with existing gutters and drip edges. Access is frequently constrained by landscaping, driveways, and upper-tier balconies, so plan for extended project staging and precise tile matching. The goal is to preserve the roof's visual rhythm while ensuring the tiles sit correctly over a sound substrate and remain weather-tight under Santa Cruz Mountain weather cycles.
Start by evaluating the roof's underlying layers: the underlayment's age, flashing condition around chimneys and skylights, and how the tiles interact with vents and attic openings. Because field tile can outlive the components beneath, ask for a scope that prioritizes underlayment and flashing replacement if those elements show age or wear. When selecting tile, consider color, profile, and weight compatibility with the existing rafter system and mechanical clearances near the eaves and soffits. Hire a contractor experienced with hillside, tile-heavy homes and with a plan for safe staging on steeper pitches, including fall protection, crane access if needed, and careful tile handling to minimize breakage. Confirm a methodical, tile-by-tile inspection during removal and a precise reset pattern that maintains the roof's character while ensuring a robust seal against wind-driven rain and embers.
After installation, establish a routine that addresses debris removal on high ridges and around valleys, plus regular inspections after autumn leaf fall and winter storms. Target the flashings at chimneys, vents, and transitions, as those areas most often drive leaks in tile roofs with complex geometry. Keep an eye on any moss or organic growth in shaded coves and ensure the roof's drainage pathways remain clear to prevent water backing up against the tiles. A well-planned maintenance cadence helps preserve the intended life of a tile system and the elegant form of a custom hillside home.
Find contractors who specialize in clay and concrete tile roofs, known for their durability and curb appeal.
Redwood Roofing San Jose
(408) 766-3950 redwoodroofing.com
Serving
5.0 from 32 reviews
Redwood Roofing San Jose is a new locally operated office of Redwood Roofing, Inc., a top-rated residential roofing contractor with 10+ years, & 150+ 5-Star reviews of trusted service in the Bay Area. We specialize in roof replacements, repairs, inspections, and TPO, shingle, tile, and metal systems. Known for honest estimates, quality workmanship, and responsive service, we help homeowners protect their homes with reliable roofing. Proudly serving San Jose and nearby areas, including Los Gatos, Willow Glen, Almaden Valley, Evergreen, Cambrian, Blossom Valley, Berryessa, Rose Garden, Campbell, Saratoga, and Morgan Hill, Gilroy, and more. Licensed, insured, and locally trusted—contact us today for a free estimate.

Ferris Roof & Leak Repairs
(669) 310-4632 ferrisroofrepairweston.com
Serving
4.9 from 38 reviews
Ferris Roof & Leak Repairs specializes in fast, reliable solutions to keep your property protected. Our team handles everything from small leak repairs to storm damage fixes with skill and care, using quality materials that ensure long-lasting results. We focus on quick response, dependable workmanship, and clear communication, making it simple to restore your roof’s strength and reliability. When leaks or damage threaten your home or business, Ferris Roof & Leak Repairs is the trusted choice for effective, professional service.
California Roof Runners
(408) 887-5253 californiaroofrunners.com
Serving
4.9 from 38 reviews
California Roof Runners: Silicon Valley's premier roofing experts! Specializing in both residential and commercial re-roofing projects, we bring years of experience and a dedication to superior craftsmanship to every job. We take pride in providing top-notch customer service and delivering exceptional results that protect your property and enhance its value. Trust California Roof Runners for quality roofing solutions tailored to the unique needs of Silicon Valley homeowners and businesses.
Western Roofing Systems
(650) 644-8499 www.westernroofingsystemssanjose.com
Serving
4.9 from 41 reviews
Western Roofing Systems has been serving and re-roofing clients in the greater San Jose area since 2006. Western Roofing Systems does all of our work in-house and we do not subcontract out any Installations. We strive in using only the best material out there and not taking any shortcuts on your home to make sure that you have a roof that will last you a lifetime.
R E Roofing & Construction
(408) 626-9320 www.reroofingshowroom.com
Serving
5.0 from 19 reviews
Family-run Roofing and Construction Company specializing in residential roofing, solar, and energy efficiency. We have been associate installers for NREL (Notional Renewable Energy Laboratory) and featured on CNET as a contributing contractor.
Shadowfax Roofing & Solar
(408) 628-0065 shadowfaxroofing.com
Serving
5.0 from 24 reviews
At Shadowfax Roofing and Solar, delivering reliable and lasting solutions has been the mission since 2005. As a family-owned roofing company based in Campbell, CA, we offer expert residential and commercial services with a focus on quality and integrity. Our experienced roofing contractors handle everything from roof repairs to full replacements and solar panel installation, tailored to meet each property’s needs. With a strong commitment to customer satisfaction, every project is completed with care, professionalism, and long-term value in mind.
Environmental Roofing & Waterproofing
(408) 871-1540 www.enviroroof.com
Serving
5.0 from 11 reviews
Environmental Roofing & Waterproofing (ERW) has led industrial and commercial roofing solutions across the San Francisco Bay Area and Sacramento region for over 30 years. Specializing in eco-friendly roofing, ERW delivers top-tier service and long-lasting solutions. Our "Cool Roofs" meet California’s sustainability standards, ensuring energy efficiency and compliance. With direct owner involvement and a hands-on approach, we provide personalized solutions tailored to your needs. Contact us today to learn how ERW can help protect and extend the life of your roof.

Sunnyside Roofing
(408) 460-8371 www.sunnysideroofinginc.com
Serving
5.0 from 32 reviews
We specialize in high-quality roofing services, including installation, repair, and maintenance. With a commitment to exceptional craftsmanship and customer satisfaction, our experienced team is dedicated to protecting your home with reliable and innovative roofing solutions.
Premier Roofing & Retro-Fit
(408) 440-5226 www.premierroofingretrofit.com
Serving
5.0 from 31 reviews
At Premier Roofing & Retro-Fit, we specialize in providing top-notch roofing services and energy-efficient retrofitting solutions for both residential and commercial properties. With years of industry experience, our skilled team is dedicated to delivering durable, cost-effective results that enhance the value and longevity of your property. From new roof installations to upgrades and retrofits, we use the latest techniques and highest quality materials to ensure long-lasting performance. Our commitment to exceptional customer service and attention to detail sets us apart as a trusted name in the roofing and retrofitting industry. Let us help you protect your investment—contact us today for a free estimate!
Roofs By Reveille
(800) 395-7855 www.roofsbyreveille.net
Serving
5.0 from 71 reviews
Roofs by Reveille, Inc was established in 2016 by Pablo Alviar. Pablo has been in the roofing industry for 32 years and is not slowing down. Pablo is a licensed and certified contractor and a preferred contractor to Sun First Solar, Maverick Renewables, and California’s Great America. Roofs by Reveille is certified with all major roofing suppliers and a GAF Master Elite contractor, which is only given to 2% of contractors.
Eastman Roofing & Waterproofing
(408) 389-1385 www.eastmanroofing.com
Serving
4.9 from 175 reviews
Our team of expert craftsmen have delivered the finest quality roofs for our customers in the Silicon Valley for more than 40 years. We are committed to listening to our customers and ensuring that their unique roofing system needs are met to their full satisfaction. We take pride in our precision craftsmanship, well-trained and professional employees, and superior customer service. We offer roof repairs, restoration, replacements & inspections!
Campbell Roofing
(408) 796-1233 roofingcampbell.com
Serving
4.5 from 15 reviews
Campbell Roofing is a family owned business that offers honest, professional roofing services throughout the greater San Jose area. Call us any time for quick roofing repairs, a new gutter system, complete roof replacement, and everything in between. We are also happy to offer new construction roofing, and our specialty is high quality TPO and EPDM commercial roofing system installations.
In this hillside foothill setting, late spring through early fall offers the most reliable dry conditions for a roof replacement. Dry weather reduces the risk of opening a roof ahead of winter rain and minimizes the chance of weather-driven delays mid-project. When scheduling, align tear-off and deck preparation with long stretches of sun and a consistent scent of Santa Clara Valley air drying out after the wet season. If you live on a slope or in a home with multiple roof planes, target a window of several consecutive dry days to keep crews moving and to avoid a protracted project that drags into the shoulder seasons.
Mild wet winters in Santa Clara County can still create leak exposure if tear-off overlaps storm windows, especially on larger roofs that take longer to dry-in. If a replacement must start in late fall, plan for a tighter, staged sequence: remove a portion, install underlayment and temporary protection, then pause if a storm front approaches. Consider coordinated timing with the roof's lowest exposure to driving rain and wind. Short, controlled tear-offs reduce the window of vulnerability while still leveraging the occasional dry spell between storms. Keep in mind that undisturbed winter moisture can complicate moisture tests and drying-in, so set realistic expectations about how quickly the roof can be weather-tight again.
Summer heat in inland foothill settings can slow crews on unshaded roof planes and affect handling of some materials during the hottest parts of the day. Plan the hottest days around the mid-day sun-early mornings and late afternoons are better for any exterior activity, while mid-day work may require shaded staging or temporary cooling measures. If you choose a summer replacement, ensure there is sufficient shade on the roof or use reflective underlayment strategies to reduce heat absorption. Keep hydration and crew safety top of mind, and coordinate material deliveries for cooler parts of the day to protect delicate components from heat exposure.
Because these homes often face exposure to Santa Ana-like wind shifts and brief, intense spring microstorms, maintain clear contingency planning with the contractor. Pre-arrange protective tarps and staging zones for each roof plane, especially on tile-heavy homes where a mis-timed tear-off can impact adjacent valleys and hips. For large renovations, stagger work across crews to minimize open roof time on the highest-risk segments. A well-structured schedule that anticipates dry spells and wind windows helps keep this town's tile-heavy roofs on track without sacrificing leak prevention or wildfire-conscious considerations.
When you can't wait, these contractors offer fast response times to stop leaks and prevent further damage.


Saratoga's common use of clay tile, concrete tile, slate, and standing seam metal pushes many projects above basic shingle pricing because these systems are more labor-intensive and often appear on larger homes. When planning, you'll likely see clay tile in the $700 to $1000 per square range, concrete tile around $600 to $900, slate from $1200 to $1800, and standing seam metal from $900 to $1500 per square. Asphalt shingles remain on the table in lighter, faster jobs, but for tile-heavy houses, the upgrade is typically chosen for fire resistance and durability. The result is a project that can run well beyond simple shingle pricing, especially if the roof deck needs substantial repair or reinforcement to handle heavier tiles.
Unlike flatter subdivisions, foothill access in town can complicate material deliveries and staging. Steep driveways, tight turns, and long transfer routes through trees mean crews often require more time to set up lifts, scaffold lines, and waste containment. Roof geometry matters here: larger or custom-home footprints, multiple ridges, and complex transitions (valleys, dormers, and curved eaves) add labor hours during tear-off and re-nailing. These factors tend to increase the total project cost and extend timelines relative to more uniform neighborhoods in Santa Clara County. A practical approach is to expect additional days for staging and a contingency for potential deck or roof-structure repairs discovered during tear-off.
Permit lead times, inspection scheduling, and the local high-cost labor market can all affect total project cost and timing in Saratoga. Realistic planning accounts for potential delays caused by weather windows between Santa Cruz Mountains exposure events and wildfire-season preparedness work. Given the labor market dynamics, securing a qualified crew with tile or metal specialty can take longer than standard shingle crews, especially for larger or more intricate homes. In practice, budgeting should include a cushion for staged deliveries of heavy materials and for possible alternations if an under-deck or roof-structure upgrade becomes necessary to meet fire-rated or wind-resistance targets.
Wildfire-aware replacements favor systems with fire-rated performance and robust underlayment. Clay and concrete tiles, when partnered with appropriate underlayment and venting, offer strong fire resistance but require careful detailing around hip or valley intersections to prevent embers from entering gaps. Slate, while highly durable, demands precise installation and professional edge detailing to avoid micro-cracking with thermal cycling. Standing seam metal provides excellent fire resistance and wind performance, but requires precise flashings and re-sealing at penetrations. In practice, a Saratoga project often blends these elements to balance fire performance, weight considerations, and roof geometry on the home.
The most popular roofing material in the US. Find pros who install, repair, and replace asphalt shingles.
Western Roofing Systems
(650) 644-8499 www.westernroofingsystemssanjose.com
Serving
4.9 from 41 reviews
A full roof replacement in this area typically requires a permit through the City, with contractor information and project scope submitted for review before work begins. The permit packet should clearly identify the roof material type, any attic or vent work, and access plans for staging and debris containment. Given the hillside and foothill layouts, City staff will want to see how the project handles debris control and egress for potential wildfire-related safety measures. Your licensed contractor should personally confirm the exact permit requirements with the City's Building Division and ensure the plans reflect the specific roof geometry found on hillside homes, including any contraflow or material transitions that impact drainage and attachment methods.
Plan review and scheduling for inspections do not typically arrive on a next-day timeline. Plan for a sequence where document submittals, plan review feedback, and any required revisions precede the actual start of work. In Saratoga's wildfire-conscious climate, reviewers may request additional details on underlayment type, high-wind fastening, and ember-resistant components for tile-heavy roofs. If the property has unique features-steep pitches, multiple chimney penetrations, or extensive mature tree canopies-City staff might request supplemental drawings or notes. Communicate clearly with the contractor about anticipated review windows and reserve some buffer for potential back-and-forth rather than expecting instant approval.
Inspections commonly occur at two critical milestones: during tear-off and after installation, so the City can verify underlayment, flashing, and attachment details before the project is finalized. During tear-off, the inspector will focus on safety practices, waste containment, and the integrity of the existing structure as it's opened. They'll verify that the chosen underlayment aligns with the new roof assembly and that any ventilation paths remain unobstructed. After installation, expect checks on flashing around eaves, vents, and chimneys, as well as the fastening pattern and alignment of tiles or shingles to ensure long-term leak resistance. For tile-heavy roofs in your area, the City may look closely at wind-rated fasteners, hip and ridge detailing, and proper deck preparation to mitigate debris ingress and wildfire embers. If any deviations from the approved plan appear during work, the inspector will typically request clarification or corrective action before final sign-off.
Because Saratoga's hillside properties can present access challenges and thorough inspection needs, coordinate closely with the contractor to align the schedule with City availability. Expect some days dedicated to inspection windows, so plan for temporary disruptions like ladder and equipment staging near driveways or limited workspace while preserving access for emergency and service routes. Building in these contingencies helps keep the project moving smoothly while meeting the City's wildfire-conscious safety standards.
Saratoga homeowners may face stricter underwriting and documentation because California insurers have tightened standards in wildfire-prone and high-value markets. The hillside and foothill character of the area means carriers look closely at burn risk, material resilience, and overall roof integrity before approving a replacement claim. This reality translates into longer review times and more rigorous file requirements-especially when a roof is tile-heavy or showing age-related wear. Knowing this ahead of time helps avoid a delayed payout when a storm or embers threaten an already fragile roof system.
Adjusters increasingly ask for detailed roof photos, material specifications, and evidence of condition before approving replacement-related claims in this region. Take high-resolution images from multiple angles, showing elevations, penetrations, valleys, and any prior repairs. Include recent contractor notes or third-party inspections that document fastener status, flashing integrity, and any discoloration or water intrusion. Collect product spec sheets for clay, concrete, or synthetic tiles, plus underlayment types and roof deck condition. Present this material in a neat, organized package to streamline the review.
Coverage terms can vary more sharply for wind and wildfire-related losses than homeowners expect, making pre-loss documentation especially important before the winter storm season. If a claim arises, you'll want a clear baseline that demonstrates pre-event condition and capacity to meet wind and ember exposure. Maintain a current roof inventory, including tile type, age brackets, and any recent weather-related impacts. A well-documented history can prevent surprises when a carrier interprets policy language after a damaging season.
Connect with contractors who help homeowners navigate the claims process from damage assessment to final approval.

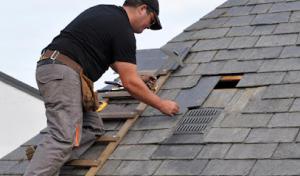
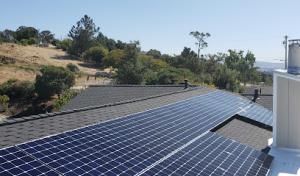
In neighborhoods of larger custom homes, skylights and multiple roof penetrations are common. As the roof ages, each penetration becomes a potential leak point, especially on tile-heavy foams and steep pitches that are prevalent here. The combination of tree debris, wildfire exposure, and Mediterranean climate cycling means you'll see faster wear around flashings, vents, and skylight flashing pans if the roof isn't properly maintained during a replacement.
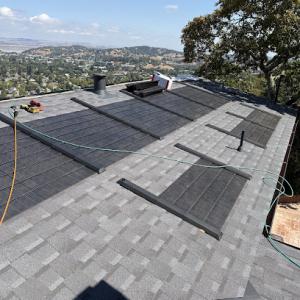
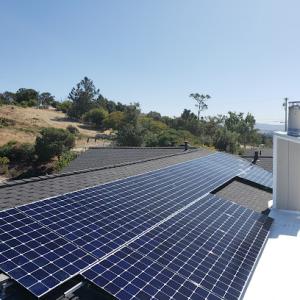
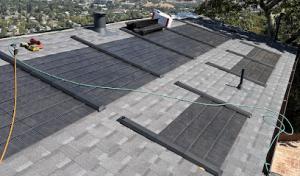
When planning a replacement, treat skylights and solar as integrated parts of the roof system, not add-ons. If long-term energy upgrades are on the table, align the roof replacement with a solar-ready strategy and a properly sized skylight plan. Work with a contractor who can sequence penetrations, match flashing profiles to tile types, and ensure seal transitions are compatible with both the current roof deck and any insulation upgrades. This approach reduces the risk of staggered failures after the new roof is installed.
Complex tile and steep-slope assemblies demand meticulous flashing around skylights, vents, and solar mounts. Choose a crew with proven experience on tile roofs and with integrated skylight boot systems that seal against shifting tiles. Pay attention to maintenance intervals for debris clearing in valley areas and around penetrations; in Saratoga, debris and heat cycles can accelerate wear on flashing. Ask for a detailed flashing plan that shows step-by-step transitions from tile to curb, and confirm the method for resealing after any solar racking or skylight replacement.
Start with a thorough inspection of all roof penetrations during plan development, noting any signs of prior leaks or calcium buildup around flashings. Request a single roof-age plan that includes skylight and solar mount details, then require a water-test mock-up before final approval. Ensure the chosen installer provides compatible flashing kits for tile and has a proven track record with curved tile systems, so every penetration remains airtight for years to come.
Find contractors experienced in skylight installation, flashing, and leak repairs to bring natural light into your home.
In hillside and foothill neighborhoods with Santa Cruz Mountains influence, even when the main roof is tile or shingle, custom homes often include low-slope sections over additions, porches, or transitions that age differently from the primary roof. These zones can hide problems for years because their orientation and drainage patterns differ from the rest of the house. Pay attention to debris flow, pine needles, and seasonal moisture that linger on low-pitch surfaces. The slope change also affects flashing at the eaves and transitions to steeper planes.
Leak diagnosis on these properties is often complicated by multi-level layouts and concealed transitions rather than a simple roof plane. Start with a view and walk the attic or crawl space to locate inconsistencies in insulation, decking, and underlayment sag. Look for algae staining, crumbly sealant, or rusted seam metal at the interface where the low-slope section meets a steeper tile or shingle field. Don't overlook gutters and downspouts near transitions; standing water here is a telltale sign.
For low-slope areas, prioritize a reliable flashing package that accommodates movement between roof sections. Use a compatible underlayment beneath the low slope and ensure proper nailing patterns for the trim and fascia to prevent wind-driven leaks. When replacing a neighboring steeper plane, consider upgrading flashing at the shared boundary to a continuous, integrated system rather than piecemeal fixes. Schedule seasonal checks after heavy winds, tree debris storms, or firescope events, because debris and heat exposure can accelerate wear in these targeted zones.
Create a simple quarterly check focused on transitions: surface cleanliness, visible fasteners, and any discoloration near the edge where the slope changes. Keep an eye on shrubbery that can shed leaves onto the low-slope area and affect drainage. A proactive stance keeps the mixed-roof design performing reliably through fire-season cycles and Mediterranean weather patterns.
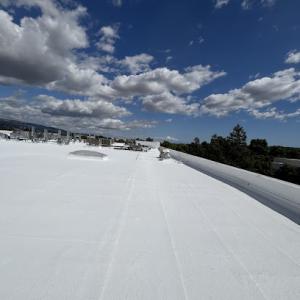
Find specialists in TPO, EPDM, and built-up flat roofing systems for residential and commercial properties.
Some older properties on the hillside carry cedar shake or wood-heavy architectural details that simply don't line up with newer roofing strategies. Those legacy roofs were built when materials behaved differently in our dry Santa Cruz Mountain climate, and over time the combination of sun, wind, and tree debris can push every shingle to work harder. In a home with steep slopes and overhanging canopies, a cedar or mixed-wood system tends to age unevenly, with soft spots and hidden rot that isn't obvious from the ground. If your roof carries that classic look, you're balancing charm with the need for modern performance.
In a city with wildfire concerns and insurer scrutiny, older wood-based roof systems can create more underwriting friction than modern Class A assemblies. Cedar shakes, especially when aged or damaged, may fail to meet current fire-safety expectations, and some carriers push for upgrades or replacements to reduce risk. The decision to pursue a full replacement isn't just about aesthetics; it's about aligning with what agencies and underwriters expect to see on a hillside home that is more exposed to radiant heat and embers. Expect questions about ignition resistance, venting, and the roof deck's ability to breathe without compromising seal.
Matching the appearance of older upscale homes in Saratoga can complicate material selection when replacing aging cedar or specialty roofs. If the goal is to preserve the historic character, options exist that mimic the look while improving performance, but the choices are narrower and more nuanced than you might expect. When a replacement is planned, the emphasis shifts from "what looks right" to "what lasts under our climate and sits well with the neighborhood's architectural language." This delicate balance often drives longer planning timelines and more detailed coordination with design goals.
Connect with specialists in the installation and restoration of natural cedar shake and shingle roofs.
Western Roofing Systems
(650) 644-8499 www.westernroofingsystemssanjose.com
Serving
4.9 from 41 reviews