Last updated: Apr 19, 2026
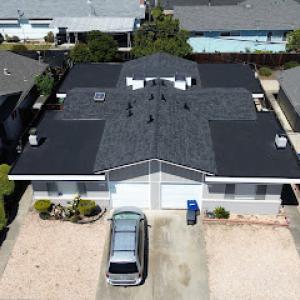
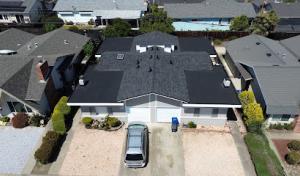
Mountain View's Mediterranean pattern means most full reroofs are best scheduled in the dry season because winter rainfall can interrupt tear-off and underlayment exposure. The typical work window is clearer from late spring through early fall, when you can expect longer dry spells and fewer weather-related delays. A roof that sits exposed to moisture during a wet winter can suffer from prolonged underlayment exposure, which complicates protection against leaks and can affect the long-term performance of wood-based components if there are any. Planning around that pattern helps ensure the roof deck dries quickly after installation and that underlayment protection stays intact through the critical early curing period of the roof assembly.
The city's location near the south San Francisco Bay brings morning fog and humidity in transitional seasons, which can slow drying on shaded roof planes and affect wood-based components. If you have a roof with shaded sections from eaves, mature trees, or nearby structures, expect slower surface drying after tarping or rain events. Schedule tear-off and installation so the sun can reach these planes as quickly as possible, and avoid long sequences of overcast days during the critical drying phase after underlayment goes down. When crews can keep the work moving through days with brief sun, flashing and fasteners settle more predictably, reducing the risk of hidden moisture behind underlayment layers.
Hot, dry summer conditions in Mountain View can increase sun exposure stress on south- and west-facing roof sections even when rain risk is low. Consider material choices and fastener patterns that minimize heat-related expansion and contraction on those exposures. If the roof has a pronounced southern or western aspect, you may want to align the tear-off and re-roof sequence to begin there, taking advantage of cooler morning temperatures and allowing the most sun-exposed areas to clean and dry thoroughly as the day progresses. This helps reduce wind-driven moisture intrusion at seams and penetrations and can improve the life of underlayment, especially on low-slope or flat sections where moisture sits longer.
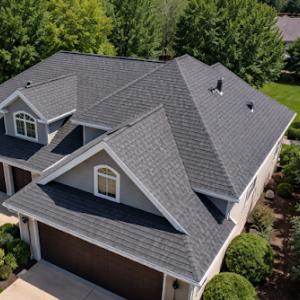
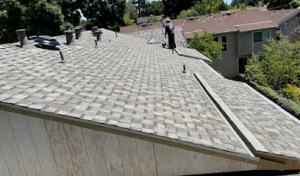
Different roof materials respond to Mountain View's dry-season sun differently. Asphalt shingles, synthetic/composite shingles, and metal are generally forgiving when installed during a dry window, but metal panels and clay or concrete tiles need careful attention to expansion joints and fastener compatibility in heat. Clay and concrete tiles are heavier and can require additional staging for support during removal and reinstallation; in dry months, their weight and handling become more predictable, reducing the risk of breakage. If the project includes tile components, plan for adequate layment and brick-out space to maintain proper drainage and ventilation as the roof deck dries.
Ventilation is a crucial factor in a dry-season reroof, especially in a climate with morning fog and high afternoon heat. Ensure the plan includes proper venting along eaves and ridges to maintain air flow during installation and curing. Underlayment exposure should be minimized; dry-season scheduling helps, but you still want efficient sequencing so that sheathing and underlayment aren't exposed longer than necessary. If a wind event occurs mid-project, secure tarps and protect exposed areas promptly to prevent moisture intrusion, which can compromise insulation and wood components.
Coordinate with the roof crew to keep the tear-off moving steadily, especially if there are multiple roof angles or elevations. Dry-season work benefits from consistent daylight; align material deliveries to morning arrivals so there's no delay while crews are waiting for a window of sun. For homes with solar installations, plan around the solar array's removal and reinstallation if needed, so the plan respects the temporary shading during panel work and the subsequent re-energized roof exposure to sun.
Target a dry-season window that avoids the wettest months but also accommodates Bay-area fog transition periods. Have a contingency plan for a week of overcast mornings, and ensure the crew uses fast-curing sealants and moisture-curing products that perform well in cooler mornings and warmer afternoons. Confirm that roof penetrations, flashing details, and vent connections are pre-checked during the initial teardown so the reinstallation proceeds without lapses in protection.
If possible, coordinate with neighbors for dust control and noise mitigation, particularly on a mid-week schedule that takes advantage of dry, stable days. A well-timed reroof in the dry season reduces the chance of weather-induced delays that ripple into weekends or holidays, keeping disruption to a minimum while preserving the roof's integrity through the windy, foggy transitional periods typical of this area.
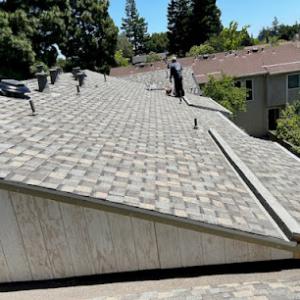
In this part of the Bay Area, many homes blend asphalt shingle reroofs with tile systems and have small low-slope sections tucked behind garages or additions. That mix matters for maintenance and planning because each material handles heat, fog moisture, and wind differently. Asphalt shingles tolerate rapid cycles of sun and fog, but they depend on a solid underlayment and proper ventilation to resist edge curl and ice-dam tendencies in nearby fog streams. Tile systems bring durability on overhangs and entryways, yet field tiles and the supporting underlayment age differently, especially when the roof has mixed pitches. For you, the practical takeaway is to treat a reroof as two projects in one: a primary, pitched high area and any adjacent low-slope sections that require separate detailing, flashing transitions, and venting considerations. When the house includes a mixed roof, demand a plan that addresses each material's attachment and movement, rather than a one-size-fits-all approach.
Clay and concrete tile are especially relevant locally, and older homes may still keep the field tile while needing attention to the underlayment aging beneath it. Tile roofs do excellent weather resistance when properly vented and sealed, but the weight means you must verify the structural condition of the deck and fasteners before committing to a full replacement. The underlayment beneath clay or concrete tiles tends to be more critical than with modern asphalt: if it has aged, you risk slow leaks that travel along purlins and into interior spaces. Pay particular attention to roof penetrations-vent pipes, skylights, and solar equipment-because tile edges can trap moisture and create hidden rot. Additionally, the fire-rated assemblies sometimes require specific underlayment and tile choices that meet local expectations; pairing tiles with a compatible underlayment is essential for long-term performance. If you're preserving older field tile, schedule a meticulous inspection of the underlayment and flashing where the tile meets the roof deck, and plan for periodic reseating or re-grading of tile laps to prevent ice-backups during wetter spells.
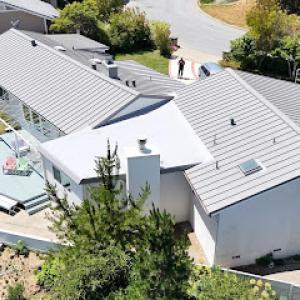
Low-slope roof areas over additions, garages, and recently modernized sections weather differently than the main pitched roof. They'll shed water more slowly and can trap moisture closer to the deck, which accelerates aging of underlayment and edge details. If your Mountain View home has a low-slope zone adjacent to a higher main roof, treat the transition as a joint with its own drainage plan: review the edge metal, boot flashings, and any parapet walls for corrosion, wear, or pooling. Roofing choices for low-slope areas should emphasize a compatible membrane or modified bitumen system that pairs well with the adjacent roof type, ensuring a seamless water management approach. Don't overlook venting in these zones: inadequate exhaust can push humid air into attic or crawl spaces, promoting mold risk in foggy winters. For longevity, insist on matched or properly integrated dew point control between the main roof and the low-slope addition.
Fog moisture and dry sun exposure create a cycle of expansion and contraction that affects all components, especially underlayment and ventilation paths. A robust ventilation plan helps prevent heat buildup that can degrade shingles or tiles and reduces the risk of moisture-related rot. For fire rating, confirm that the chosen assemblies align with local expectations for both tiled and asphalt sections, including the interaction between roof coverings and any sky-access equipment like solar arrays. When planning repairs or replacements, insist on detailing for each roof type and a clear path for transitions between mixed materials to maintain a uniform barrier against moisture and wind-driven debris.
In this market, your material choice largely sets the starting line for cost. Asphalt shingles sit in a broad, affordable range roughly 350 to 700 USD per square. If you're weighing metal, expect 700 to 1200 per square, with metal offering strong sun and fog tolerance but higher upfront premiums. Clay tile runs 900 to 1500 per square, concrete tile 800 to 1400, wood shingles or shakes 700 to 1200, and synthetic or composite shingles 650 to 1100 per square. Those figures reflect how Bay Area labor and scheduling realities push sticker prices higher than in many inland markets.
Labor pricing here is consistently elevated by Bay Area wages, and reroof projects often get clustered around the dry months to avoid moisture-related delays. That means you'll frequently face tighter calendars and, sometimes, premium-day rates for crews that can align with a narrow weather window. Projects that need to coordinate around solar installations, skylights, or low-slope transitions add further complexity, extending the job timeline and increasing notes to suppliers and staging. If you're considering a tilt to tile or a metal system, bank on extra lead time in the plan so crews can stage materials without rushing around weather fronts.
Tile reroofs and homes with solar arrays, skylights, or low-slope transitions aren't "one-plane" projects. Detailing and staging become a bigger portion of the job. For tile, expect more intricate underlayment, flashing details, and potential rework around penetrations. Solar-equipped homes require careful coordination to avoid shingles or tiles being damaged during panel mounting and to ensure a clean seal around mounts. Low-slope sections demand specialized underlayment and edge detailing, which adds labor hours and sometimes necessitates temporary protective measures for interior spaces.
A home that blends roof types-tile over low-slope transitions, or a remodel that adds dormers and new venting-creates nonstandard transitions. Each transition can require custom flashing, additional fasteners, and more time on scaffolding or lifts. That combination of nonuniform planes and penetrations typically pushes costs toward the higher end of the material's range and can extend project tolerance for weather windows.
Sun exposure drives selecting longer-lasting coatings and sometimes higher-grade underlayment. Fog moisture can influence ventilation strategy and moisture management, especially under metal or tile where thermal movement matters. Fire-rating assemblies, though standard in many Valley-area rooflines, can require specific underlayment and water-shed detailing. All these factors pull the project toward the upper portion of the material's price band when a given home includes many penetrations or a tight roofline.
Shelton Roofing
(650) 961-7699 sheltonroof.com
1988 Leghorn St # C, Mountain View, California
4.8 from 109 reviews
Shelton Roofing has proudly served Mountain View and the surrounding San Francisco Bay Area since 1942. Family-owned and operated for over 80 years, we have built a trusted reputation for excellence in roofing. Our goal is to provide every customer with the best products and services available in the roofing industry, ensuring each project is completed with quality workmanship, on time, on budget, and with the highest regard for safety. With thousands of roofs installed over the decades, Shelton Roofing continues to uphold its legacy of reliability, craftsmanship, and customer satisfaction in every job we take on.

Falcon Roofing
(650) 961-3200 www.falcon-roofing.com
990 Terra Bella Ave, Mountain View, California
5.0 from 6 reviews
Falcon Roofing Company is a Diamond Certified roofing contractor proudly serving the San Jose area. We provide high-quality residential and commercial roofing services, including new roof installations, replacements, repairs, and maintenance. With a commitment to durable craftsmanship and customer satisfaction, our team ensures every project is completed with professionalism and care.
Mountain Affordable Roofing Work
819 Villa St, Mountain View, California
5.0 from 2 reviews
Mountain Roofing Work provides reliable and affordable roofing services with a focus on quality craftsmanship and long-lasting results. Serving residential and commercial clients, we specialize in roof installation, repairs, and maintenance. Our experienced team ensures every project is completed with professionalism and care. Trust us to protect your home or business—one shingle at a time.
Home Pro Roofing & Solar
(800) 650-3134 www.homeproca.com
Serving
5.0 from 32 reviews
Home Pro Roofing and Solar Contractor, in Sunnyvale, CA provides comprehensive roofing and solar services, including residential roof installations, solar systems, and solar backup solutions. With financing options available, customers can rely on a single company to handle all their roofing and solar needs—from roof inspections to solar removal and replacement during roofing installation, to solar installations with seamless solar backup solutions. This all-in-one service eliminates the need for multiple contractors, ensuring a smoother, more efficient process. We bring 15 years of high level of expertise in both roofing, solar and solar backup technologies, ensuring that our customers receive top-tier service. We offer free estimates.

Specialist Roofing & Repair
(408) 662-1686 specialistroofing.com
Serving
4.9 from 59 reviews
Specialist Roofing & Repair in San Jose is your trusted choice for residential and commercial roofing services. Backed by over 10 years of experience, we specialize in roof repairs, replacements, and new installations using premium materials from Owens Corning, GAF, Polyglass, and CertainTeed. As an Owens Corning Platinum Preferred Contractor, we deliver long-lasting, weather-resistant solutions with transparency and integrity. Our licensed, BBB-accredited team proudly serves the San Jose area with free inspections, honest assessments, and fast emergency response. Protect your home or business with expert roofing you can count on—call today for a free estimate!

Flawless Roof Repair & Installation
(650) 900-0052 www.roofrepairpaloalto.com
Serving
5.0 from 38 reviews
As a local roofing contractor in Palo Alto California, who have been servicing roofs in Palo Alto CA since 2012, we believe that there is such thing as a roof repair that is too big or too small. Whether you need a minor leaking repair, or complete roof replacement, we can help. We have the tools, the knowledge and the experience to service any roof in Palo Alto. Just as we do in all our roofing projects, Our experts take a personalized approach to your roofing project to ensure the best possible solution and a worry-free experience

Top Roofing
(408) 900-6551 toproofingca.com
Serving
5.0 from 42 reviews
Top Roofing is your trusted Cupertino CA based local roofing company specializing in roof replacements, roof repairs, and roof maintenance for both residential and commercial properties. We use only high-quality materials and expert craftsmanship to ensure long-lasting, reliable roofing solutions. Our fully licensed and insured team is committed to honest communication, fast response times, and exceptional customer service. Whether you need a new roof, leak repair, or routine maintenance, we provide free estimates and guarantee satisfaction on every job. For all roofing work in the Bay Area the team at Top Roofing are ready to help you with professional courteous service.
Lifetime Roofing & Renovation
(408) 685-2177 lifetimeroofingrenovation.com
Serving
4.8 from 142 reviews
If you are a homeowner or business in need of a reliable and experienced San Jose roofing company, Lifetime Roofing & Renovation, Inc. is the solution you need. Finding an reputable company to repair or replace your roof is crucial in ensuring a sturdy and strong investment for your property. Since 2010, we have been solving complex roofing problems and providing high-standard roofing solutions for homeowners and contractors alike. From roof installation, roof repairs to complete roof replacements we can tackle any job of any size. For a free estimate contact Lifetime Roofing & Renovation, Inc. today!

Alpha Roofing
(408) 622-0454 alpharoofing.com
Serving
5.0 from 24 reviews
Alpha Roofing is a family-owned roofing company proudly serving homeowners and businesses across the San Francisco Bay Area. Based in Sunnyvale, we specialize in high-quality roof replacements, roof repairs, roof inspections and new roof installations—with a focus on durability, safety, and customer satisfaction. With over a decade of experience, our team combines hands-on expertise with premium materials and transparent communication to ensure every project is completed on time and on budget. Whether you’re dealing with storm damage, aging shingles, or planning a full roof upgrade, Alpha Roofing delivers peace of mind and lasting protection. We treat every home like our own—honestly, professionally, and with a commitment to excellence.
North City Roofing
(408) 540-3870 www.northcityroofing.com
Serving
4.8 from 61 reviews
North City Roofing — Built on Family, Integrity, and Excellence At North City Roofing, roofing is more than a trade — it’s our legacy. With generations of experience, we take pride in delivering exceptional residential and commercial roofing services. Our team is committed to quality craftsmanship, safety, and transparency, keeping clients informed every step of the way. No job is too big or small, and we offer fast, efficient service with comprehensive evaluations and estimates. As a proud family-owned business, we treat every project like our own. Book your complimentary evaluation today — we look forward to working with you!

NR Roofing
(669) 345-4555 www.nrroofingca.com
Serving
4.9 from 155 reviews
NR Roofing CA is your trusted local roofing company in San Jose, California, offering expert repair, installation, and maintenance services for all types of roofs. Whether you need a quick roof repair or a complete new roof installation, NR’ team of professionals is ready to assist you today. With a rich legacy of providing exceptional roofing services across San Jose and Santa Clara County, NR Roofing CA has built a reputation for reliability, quality, and customer satisfaction that you can count on. NR Roofing offers all roofing services: New Roof installation and Roof Repair service, for commercial and residential properties in the Bay Area. We offer free quotes on roofing projects and welcome you to contact us for free consultation.

Sunnyside Roofing
(408) 460-8371 www.sunnysideroofinginc.com
Serving
5.0 from 32 reviews
We specialize in high-quality roofing services, including installation, repair, and maintenance. With a commitment to exceptional craftsmanship and customer satisfaction, our experienced team is dedicated to protecting your home with reliable and innovative roofing solutions.
A full reroof in Mountain View typically requires a permit through the city's Building Department rather than being treated as minor maintenance. The permit process is designed to ensure that the work aligns with fire-rated assemblies, venting, and underlayment requirements that the city scrutinizes closely. Before any tear-off begins, you should plan for a formal review and approval window to avoid surprises mid-project. The permit is not a box to check at the end; it actively shapes the materials and methods you can use, and it can extend a project timeline if plans don't meet local standards.
Inspections are a routine part of reroofing here, and inspectors commonly verify underlayment, ventilation, and fire-rated roof assemblies during and after installation. That means your choice of underlayment type, attic venting strategy, and the specific fire-rated details of flashing and transition zones will be scrutinized. If the system isn't fully aligned with Mountain View expectations at the moment of inspection, a reinspection or additional corrective work may be required. Plan for potential follow-up work and factor that into your schedule so you're not caught off guard by an inspection hold.
Plan review for reroof work can take several days to a couple of weeks depending on department workload, so scheduling should account for review time before tear-off. Weather can influence both the review process and the on-site work-wet winters and foggy days can slow progress, while dry, hot stretches in the summer demand vigilance to prevent drying leaks. If a project window hinges on permitting, align roof removal, material delivery, and ventilation setup to minimize exposure of the interior to the elements while awaiting approvals.
Coordinate with a licensed contractor who understands the local emphasis on venting, underlayment, and fire-rated assemblies. Have your documentation ready for the plan submittal-rooftop details, attic venting calculations, and product specifications matter. If the schedule tightens around wet-season weather, request a pre-review early in the process to flag any issues before you commit to tear-off dates. Skipping or rushing permit steps can lead to enforcement delays, rework, and elevated risk once moisture moves in.
In Mountain View, the highest disruption risk is winter rain, when active leaks often show up after long dry periods have hidden underlayment or flashing deterioration. That means the first real storms can reveal hidden weaknesses, and prolonged dry spells may have masked weak points. Pay attention to roof edges, flashings around chimneys and vents, and any attic signs of moisture after a few sunny days-those are red flags that a leak is not far behind. Fall winds can also loosen vulnerable components before the main rainy period arrives, especially on exposed edges and upper ridges. If gutters are clogged or soffits sag, the danger compounds quickly once sustained rain hits.
When you sense a coming downpour or notice small drips after dry spells, act fast. Generate temporary protection by covering vulnerable roof valleys or joints with a sturdy tarp secured to avoid wind-driven slips. Clear nearby debris that could trap moisture and cause ice dams later, even if the current weather is mild. Inspect attic access points for moisture staining or unusual warmth, as these indicate compromised underlayment or flashing. Move quickly to minimize interior damage: lay down plastic on floors and cover valuables from potential ceiling leaks. If there are active leaks, place temporary containers under drips and schedule a professional assessment within 24 to 48 hours if possible.
Because many local projects are reroof rather than new construction, homeowners often need fast temporary protection first and full replacement planning second. Plan for a staged approach: secure a rapid assessment of existing underlayment and flashing, implement interim waterproofing where practical, and prepare for a targeted reroof sequence that minimizes exposure during wet months. Ask contractors about wind-rated components and edge protection, as exposed edges are common failure points when storms arrive abruptly. Time the project to avoid peak winter storms, and use temporary protective measures that align with the dry-summer window to reduce moisture exposure.
Keep a close eye on moistureEntry indicators after any dry spell ends and before the next rain. A routine pre-storm check of flashing seams, vent boots, and ridge caps can prevent small issues from becoming costly emergencies. Encourage quick communication with a trusted roofer at the first sign of leaks or wind-driven edge lift, because early response limits interior damage and speeds up the path to a solid, long-lasting solution.
When you can't wait, these contractors offer fast response times to stop leaks and prevent further damage.


Flawless Roof Repair & Installation
(650) 900-0052 www.roofrepairpaloalto.com
Serving
5.0 from 38 reviews
In Mountain View, homeowners are dealing with California-wide insurer pullbacks and rising premiums, which makes roof age, material type, and documented condition more important during underwriting and renewal. When the weather cycles from fog-laden winters to dry, sun-heavy summers, the roof bears mixed stresses that can show up as subtle moisture intrusion or accelerated wear. Insurers increasingly want to see a clear, dated narrative of a roof's history rather than a general description of wear, especially after a major storm season.
Carriers serving this market may request detailed roofing disclosures and documented damage assessments rather than accepting broad descriptions of wear. You should gather concrete evidence: dates of storms, photos showing the exact location and extent of any damage, and notes from any interim repairs. Clear records help insurers judge whether the roof remains structurally sound or if deterioration warrants replacement. Keep a copy of contractor assessments and any evaluation that ties the condition to weather events, not merely aging.
Claim handling can be more exacting in this region, so Mountain View homeowners should keep dated photos, permit records, inspection sign-offs, and contractor documentation when storm or leak damage occurs. A tidy trail of evidence speeds the process and reduces the chance of disputes over causation or scope. If a hail or wind event happens, photograph the adjacent areas of the roof and any visible underlayment changes, and note nearby trees or debris that might have contributed to damage.
Maintain a simple, organized roof file: seasonally refreshed photos, the highest-quality receipts, and a summary of any weather-related incidents. When in doubt, have a trusted local roofer provide a written condition report that ties observed issues to dated events. That level of detail can make the difference between a straightforward renewal and a protracted review.
Connect with contractors who help homeowners navigate the claims process from damage assessment to final approval.

Flawless Roof Repair & Installation
(650) 900-0052 www.roofrepairpaloalto.com
Serving
5.0 from 38 reviews
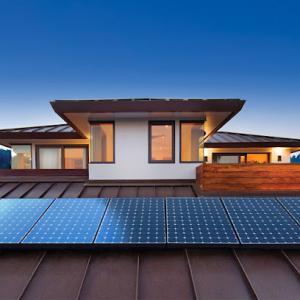
In this tech-driven market, many homes have rooftop solar installed after the original roof. Plan reroofing with the panels and racking in mind: verify panel layout, conductor routes, and edge clearances before tearing off shingles. Coordinate with the installer so mounting hardware is compatible with the new underlayment and flashing details. If panels stay in place, protect them during removal and ensure safe reinstallation of seals around penetrations.
Skylights are a meaningful local service category, making flashing and curb details a recurring issue when older roofs are replaced. Inspect skylight framing, fasteners, and surrounding curb for rot or gaps. Replace compromised flashings and install continuous secondary flashing to bridge transitioning roof planes. On clay or concrete tiles, coordinate with tile setters to avoid cracking and ensure proper clearance between skylight flanges and tile courses.
Homes with multiple penetrations from solar, skylights, and mechanical upgrades need sequencing that avoids creating leak points during reroof work. Start by sealing and flashing penetrations that will be shared or overlapped by the roof cover, then complete with final flashing of the solar racking and skylight curb. Maintain clean depressions for sealant; stagger seal strips so water flows shed away from vulnerable joints. If a roof section must be removed in stages, set temporary waterproofing to cover exposed edges and test for leaks between stages.
Coordinate timing to minimize dry-out and sun exposure on newly laid underlayment during the hot, sunny months. Use compatible flashing membranes around penetrations and verify compatibility with fire-rated assemblies. Document each penetration's routing and flashing changes for future remodeling or panel upgrades.
During wet winter transitions, coordinate panel work and flashing resealing to avoid rain intrusion. In dry months, prioritize ventilation checks and fastener security to resist sun-induced expansion. Keep debris off skylight flanges to prevent sealant pinholes.
Find contractors experienced in skylight installation, flashing, and leak repairs to bring natural light into your home.
Shelton Roofing
(650) 961-7699 sheltonroof.com
1988 Leghorn St # C, Mountain View, California
4.8 from 109 reviews
Flawless Roof Repair & Installation
(650) 900-0052 www.roofrepairpaloalto.com
Serving
5.0 from 38 reviews