Last updated: Apr 19, 2026
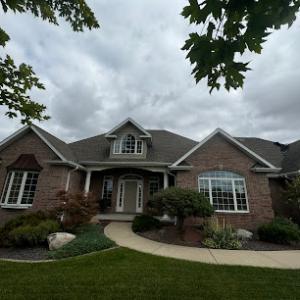
Spring hail and wind storms in this area can trigger a rapid rush of inspections and reroof scheduling. The local weather pattern means a single afternoon hail event can transform quiet neighborhoods into a busy claim landscape within days. Contractors, adjusters, and insurers all feel the pressure, and that urgency shows up in tighter windows for temporary protection, damage assessment, and placement of replacement crews. If a storm hits, expect a spike in calls, text messages, and door-to-door inspections as crews try to keep up with demand. The key is to plan for that surge and move fast when signs of damage appear on your roof or gutters.
Insurers in this market commonly expect thorough photo documentation of pre-existing conditions and storm damage before approving repair or replacement decisions. That means you should amass clear images of the entire roof, venting hardware, skylights, flashing, and any visible interior signs of water intrusion. Capture multiple angles from ground level and from the attic if possible. Document recent maintenance, known pre-existing issues, and any prior patches or patches that were made after a previous event. The goal is to build a concise, chronological record that shows what changed as a result of the storm versus what was already there. When those photos are ready, you're ahead of the curve and can prevent back-and-forth delays.
Adjuster visits and regional underwriting practices can slow claim timelines in this market, making early documentation especially important after hail or wind events. It is common for an adjuster to request additional photos, roof measurements, or even a separate roof inspection before a full replacement gets approved. In some cases, inspectors may wait for clear weather or schedule around busy weeks, which can stretch the timeline further than expected. Understanding this pattern helps you set expectations with neighbors, contractors, and the insurance company. If you're proactive about arranging access for inspectors and sharing information promptly, you reduce the chance of a stalled claim due to scheduling conflicts or missing documentation.
First, file the claim promptly after a significant storm and request an inspection while the memory of the damage is fresh. Second, prepare a detailed damage packet: a written narrative of what happened, dated photos from multiple viewpoints, and a simple diagram of the roof showing damaged areas, impacts, and any suspicious soft spots. Third, designate a single point of contact-either you or a trusted contractor-who can coordinate with the insurer, schedule inspections, and gather additional information as needed. Fourth, arrange for a temporary protective measure if you spot active leaks or wind-driven debris that could worsen damage in the meantime. Finally, keep calendars handy; spring storms can appear suddenly, and the faster you respond, the more control you retain over scheduling and outcome.
Hail, wind, and insurance-driven decisions don't always align with the ideal weather window for full roof replacement. In practice, the timeline is driven by claim approval and contractor availability, not just calendar days. If a storm has compromised venting, ice-dam protection, or underlayment on a full re-roof, readiness is essential. Proactive pre-storm preparation also pays off; knowing your roof's vulnerable points-valleys, penetrations, and the edge details-lets you point to concrete issues quickly when the claim is opened. In this environment, acting decisively after a storm minimizes the risk of extended exposure, further interior damage, and a longer recovery period.
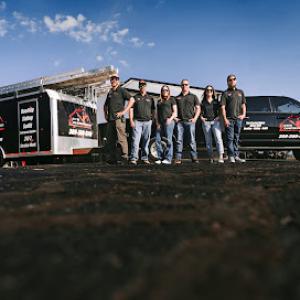
Sunrise Roofing
(309) 267-5115 www.sunriseroofing.us
427 N Cummings Ln, Washington, Illinois
5.0 from 131 reviews
Residential and Commercial Roofing Service.
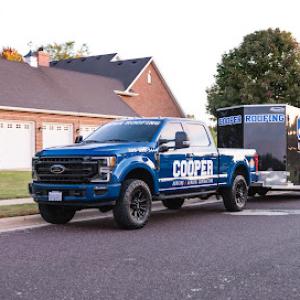
Cooper Roofing
(309) 886-5444 cooper-roofing.com
701 Grandyle Dr, Washington, Illinois
5.0 from 129 reviews
With over a decade of dedicated service in Central Illinois, Cooper Roofing is your premier partner for all your roofing and general contracting needs. Since 2011, this family-owned business has been delivering exceptional craftsmanship and comprehensive solutions for both residential and commercial projects. Their skilled team is equipped to handle everything from new roof installations and siding to complete home builds and remodels. Cooper Roofing is committed to providing reliable service and lasting quality, ensuring every project is completed to the highest standards.
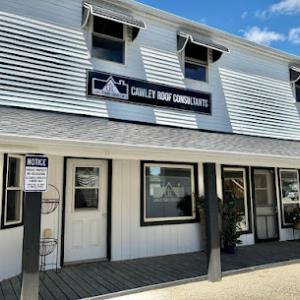
Cawley Construction
(309) 501-2155 www.cawleyconstruction.com
117 Peddlers Way, Washington, Illinois
5.0 from 20 reviews
With over 16 years in the construction and restoration business, we have seen countless homes affected by storm damage that occurred years ago. This meant significant out-of-pocket expenses for these homeowners. If the damage had been assessed after the storm, the homeowners would have been able to file a claim and avoid these expenses. Cawley Roof Consultants is here to help homeowners assess damage early enough to file a claim and avoid costly repairs in the future.
JG Construction Services
(309) 214-3093 topbusinessesusa.top
205 Walnut St, Washington, Illinois
3.4 from 5 reviews
JG Construction Services specializes in roofing, gutters, and siding. We are the fastest growing service company in Washington, IL due to our standard of excellence and great communication from the initial phone call to the post follow-up visit. We value each of our clients like they are family and work on each project like it is our own home.
Smith Remodeling Services
1512 Santa Fe Rd, Washington, Illinois
5.0 from 1 review
Roofing Contractor since 2004
Westside Construction
(309) 605-0528 centralillinoisroofers.com
Serving
5.0 from 12 reviews
At Westside Construction we transform your home exterior through quality products and craftmanship. We specialize in Roofing and Siding replacements. Whether your roof and siding needs to be replaced due to wind/hail damage or because of age, we have you covered.
Messing Roofing & Construction - Peoria Metro
Serving
4.7 from 161 reviews
Looking for reliable roofing services in the Peoria Metro area? Messing Roofing & Construction is a second-generation, family-owned company with over 40 years of experience. As Central Illinois' most trusted roofing contractor, we specialize in residential roofing, commercial roofing, and architectural sheet metal. From asphalt shingles for homes and businesses to metal roofing by McElroy Metal, we’ve got your roofing needs covered. We also offer flat roofing solutions such as EPDM rubber roofing, TPO thermoplastic roofing, and more from top brands like CertainTeed, Carlisle, and Firestone. Our services extend to seamless gutter installation, vinyl siding, and metal soffit and fascia. Contact us today!

Roof Tiger
(309) 505-7627 therooftiger.com
Serving
4.9 from 408 reviews
Roof Tiger is one of the most respected Roofing Companies in Peoria Heights, IL, proudly serving homeowners across Central Illinois. Our expert team specializes in Roof Repair, Roof Replacement, and Roof Installation designed to withstand the Midwest’s demanding weather conditions. Whether you’re dealing with storm damage, aging shingles, or building a new home, Roof Tiger provides dependable solutions built on quality, honesty, and craftsmanship. We take pride in offering transparent communication, durable materials, and 5-star service that homeowners can trust. Each project is handled with precision and care, ensuring long-lasting protection and curb appeal for every property. At Roof Tiger, we treat your home like our own.
G & A General Constructions
(309) 857-3453 gageneralconstructions.com
Serving
5.0 from 16 reviews
G & A General Constructions is a professional construction company specializing in high-quality roofing services, including installation, repair, and maintenance. With a reputation for reliability and craftsmanship, GA General Constructions serves residential and commercial clients, offering a wide range of roofing materials and styles to suit every need. The company is committed to delivering durable, weather-resistant solutions while ensuring customer satisfaction through skilled workmanship and exceptional service.
Koch Konstruction
(309) 360-9740 kochkonstruction.com
Serving
4.8 from 119 reviews
Koch Konstruction offers residential and commercial roofing and construction services. Our services include complete roof tear-off and replacement, along with siding, soffit, roofing repairs, flashing, gutters, deck construction, fence construction, and insurance work. Our experienced Central Illinois roofers are able to complete any roofing project. We install and repair many types of roofs including slate, tile, metal, and composite shingles. We also install, repair and replace flat rubber roofing on commercial properties.
Restoration Builders of Illinois
(309) 346-6604 restorbuilders.com
Serving
4.5 from 110 reviews
Welcome To Restoration Builders of Illinois Restoration Builders of Illinois is a residential & commercial contractor operating in the United States. Our Roof, Windows, Siding and Gutter repair and restoration experts provide assistance with everything from roof inspections and minor repairs to comprehensive storm damage rebuilds and just about everything in between. Our mission is to protect, restore and build properties, strengthen families and support our communities. We are committed locally and ready to serve wide scale for disaster response. Contact us for a free inspection: info@restorbuildersIL.com.
JG Roofing & Company
(309) 316-3652 www.jgroofingco.com
Serving
4.9 from 41 reviews
JG Roofing and Company is a family-owned roofing contractor serving Peoria, IL, and surrounding areas. We are licensed, insured, and bonded, with an A+ rating from the BBB. Our skilled team provides reliable roof replacement Peoria services, along with roof repairs and storm damage inspections. We focus on delivering high-quality craftsmanship and honest service to every customer. Whether you need a roof replacement or have damage that requires attention, we're here to assist. Discover why homeowners in Peoria trust JG Roofing and Company for all their roofing needs. Visit our website for more details!
Washington's cold winters create repeated freeze-thaw cycling that is especially hard on shingle seals, flashing transitions, and vulnerable roof penetrations. In practice, that means the first warm spell after a deep freeze can cause rapid expansion of water trapped in tiny gaps, stressing sealants around vent pipes, skylights, and chimney flashing. Shingle tabs can lift or curl over several cycles, and unsealed penetrations become more prone to leaks as ice forms and expands near the edges of valleys and eaves. Regular inspection after the worst freezes helps identify early signs of damage before a winter storm compounds the problem.
Ice-dam barrier requirements are a practical local issue because the city may check for ice-dam protection and proper underlayment during reroof inspections. The region's freeze-thaw pattern makes proper edge protection essential, especially along gutters and eaves where ice tends to form first. If an existing roof shows signs of ice damming, upgrading to a reinforced underlayment and confirming a continuous barrier at eaves, rakes, and valleys can prevent bulk water intrusion. In winter, modest but strategic penetrations-like venting and pipe collars-need secure detailing to avoid ice-related gaps that become leak paths when temperatures swing.
Replacement timing in Washington is typically best from late spring through early fall because winter snow and ice can delay tear-off, dry-in, and inspection scheduling. Scheduling windows with milder temperatures helps installers achieve a proper seal on flashing, underlayment, and vent penetrations without the rush that winter storms impose. If a roof shows significant damage from a recent hail or wind event, coordinating a timely tear-off in late spring can minimize the risk of repeated freeze-thaw stress during the replacement phase. Dry-in quality often improves when there is a dry stretch of days, reducing the chance of moisture trapped beneath new layers.
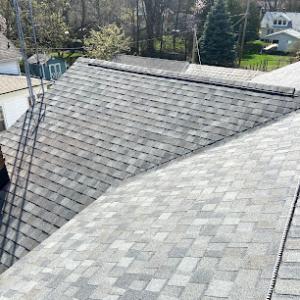
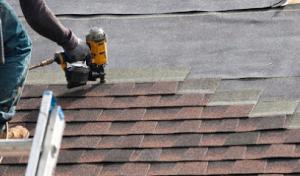
Venting and roof penetrations require careful attention during replacement, especially in this climate. Improperly vented roofs can trap moisture, accelerating ice dam formation and degrading underlayment prematurely. Ensure that attic ventilation is balanced to avoid condensation on the underside of decking, and confirm that vent ducts terminate with compliant caps to resist wind-driven rain. Flashing transitions around chimneys and valleys should be integrated with a high-quality sealant compatible with local temperature swings. The goal is a durable, watertight system that tolerates the county's typical load of hail impacts and strong winds without sacrificing ventilation or indoor comfort.
When you can't wait, these contractors offer fast response times to stop leaks and prevent further damage.


Rainforcing Roofing & Exteriors
(309) 989-3279 www.rainforcingroofing.com
Serving
4.9 from 49 reviews
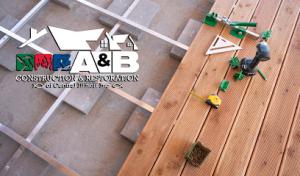
A&B Construction & Restoration
(309) 583-0058 www.anb-constructandrestore.com
Serving
4.4 from 18 reviews
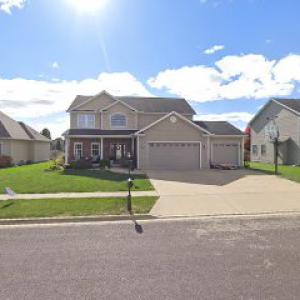
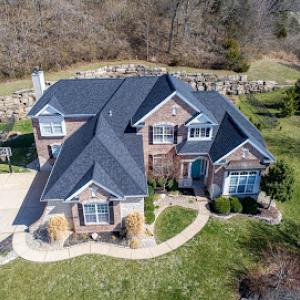
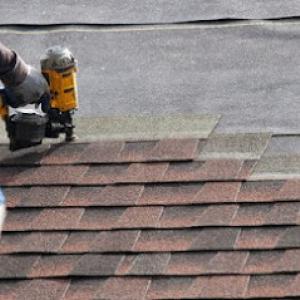
Asphalt shingles dominate the practical choice for homes in this area because they align with the storm-repair volume and the broad residential reroof market. They handle frequent hail impacts and wind-driven issues well when properly installed with a solid underlayment and ice-dam protection. For many homeowners, asphalt provides a reliable balance between performance, availability, and ease of repair after a weather event. When evaluating asphalt, look for to-the-deck silicone- or asphalt-fiber blends, reinforced underlayment, and architectural profiles that shed wind-driven debris more effectively. A well-vented attic keeps sharp temperature swings from taking a toll on these shingles during freeze-thaw cycles, which helps extend life during the multi-year storm cycle common to this city.
Metal roofing is an active specialty within Washington's contractor base, making it a realistic upgrade path for homeowners weighing hail resilience, snow shedding, and lifecycle value. Metal panels or high-quality standing-seam systems offer excellent hail resistance when correctly installed, with fasteners and seals that hold up to wind storms. They also shed snow more readily, reducing ice dam risk on marginally heated roofs. If choosing metal, pay attention to panel profile, sealing details at penetrations, and the quality of the underlayment. A metal roof can be a longer-term investment, especially for homes that recently endured hail or plan to stay in the house for many years, but it benefits from professional flashing and venting strategies that align with Washington's climate realities and the local reroof rhythm driven by insurance decisions.
Clay tile, concrete tile, and slate options exist locally but are niche in this market. Homeowners considering these heavier assemblies should expect more plan scrutiny if structural changes or unusual roof layouts are involved. Clay and concrete tiles bring distinctive aesthetics and durable performance in dry periods, but their weight demands thorough structural assessment and precise framing. Slate offers elegant longevity but often requires additional reinforcement and careful integration with existing ventilation and ice-dam protection details. In this market, tile and slate projects tend to move slower because of the specialty trades, higher vetting standards, and occasional compatibility checks with current attic space and ventilation strategies. If you pursue tile or slate, engage a contractor who has recent Washington-leaning experience with these materials and can coordinate underlayment, venting, and hail-resilience considerations in one cohesive plan.
The best material choice hinges on your home's particular roof geometry, attic ventilation, and exposure to wind-driven hail. In this climate, a well-ventilated, properly underlayed installation matters as much as the top surface. For many local homeowners, asphalt shingles deliver the most dependable, straightforward path to durable performance amid frequent repair opportunities, standard housing stock, and a robust service ecosystem. Those pursuing higher hail resilience or longer lifecycle value should weigh metal as a viable upgrade, while clay, concrete, or slate remain tailored options for specific architectural styles or long-term plans, provided the structural and planning requirements are met. In all cases, ensure that the roofing crew aligns venting, ice-dam protection, and proper underlayment with the city's inspection expectations to smooth the insurance-driven replacement timeline.
After spring hail in this area, cost pressure can rise sharply. Local demand surges as homeowners seek to replace damaged roofs, and material availability tightens during active storm periods. That mix can push lead times and pricing into a tighter window, especially for common asphalt shingles and mid-range metal options. In practice, if a hail storm hits, expect a bit of bidding turbulence as contractors field calls and crews shift to prioritize storm-related work. Knowing this helps you plan for potential price shifts and scheduling conflicts rather than waiting until the last minute.
Late spring through early fall is the preferred replacement window in this market. That means peak-season scheduling can affect labor availability and project pacing. If storms extend into early summer, crews may run full schedules, which can translate to longer waits for start dates and phased work. Conversely, autumn weather can slow progress if a late onset of cold snaps occurs. When you pair a hail-driven claim with the seasonal window, a realistic timetable emerges: expect some variability in start dates and a need to align your preferred start with the crew's availability.
Costs move with material choice, so knowing the options helps you compare apples to apples. Asphalt shingles sit around $350 to $700 per square. Metal roofing ranges from $600 to $1200. Clay tile carries a broad spread from $1000 to $2500, while concrete tile runs about $900 to $1800. Synthetic or composite shingles are typically $550 to $1200, and slate can run from $1200 to $3000. In your neighborhood, the choice often hinges on long-term durability and hail resistance. Heavier, hail-resistant systems can add upfront cost but may reduce replacement frequency and insurance impacts over time.
If a hail event is likely, start with a targeted assessment of the roof condition and an insurance review to estimate recoverable costs. Ask for a detailed bid that breaks out underlayment, venting, ice-dam protection, and shingle or panel options to satisfy local scrutiny during inspections. Plan a buffer for lead times and potential supplier delays in peak season, and align your preferred start date with the contractor's realistic schedule. By comparing the material cost ranges against your home's exposure and wind load needs, you can choose a path that balances reliability with value.
Get a clear picture of your project costs upfront - no commitment required.

Cooper Roofing
(309) 886-5444 cooper-roofing.com
701 Grandyle Dr, Washington, Illinois
5.0 from 129 reviews
For a full reroof, the permit is typically required through the city building department rather than being treated as a purely informal contractor matter. The process is not a formality, and the permitting step signals a careful evaluation of how the roof will function with the local weather realities-hail, wind, and freeze-thaw cycles. If a permit is missed or rushed, the city can halt work or require you to correct deficiencies later, which often means added delays and potential rework. Expect documentation that confirms the chosen roof system meets the area's standards for ventilation, underlayment, and ice-dam protection.
The city commonly schedules an inspection after initial work and requires a final inspection once the roof is completed. The first check is usually to verify that framing, decking, and underlayment are properly installed and match the plan approved with the permit. A subsequent inspection confirms that venting, flashing, and drainage provisions align with the permit and the building code. If anything diverges from the approved plan, the inspector may require corrections on the spot or schedule a follow-up visit. Delays at this stage can push back the project timeline and, in turn, expose the home to winter conditions longer than anticipated.
During inspections, expect the department to review venting adequacy, ice-dam barriers, and underlayment details. Venting quality matters because improper venting can accelerate moisture problems in winter and shorten roof life. Ice-dam barriers are scrutinized to ensure protection against seasonal freeze-thaw cycles that can drive water under shingles. Underlayment quality is checked to confirm appropriate thickness and coverage, especially on full-roof installations. For unusual roof types or when structural changes are proposed, the department can perform plan checks to verify that roof geometry, loads, and fasteners meet local requirements.
If the roof type is unusual or if structural changes are part of the project, plan checks become more likely. Such checks slow the process but protect against compatibility issues with existing framing and the city's weather resilience expectations. If a contractor suggests deviations from standard practice, be prepared for additional review and possible adjustments to the installation plan to satisfy the permit conditions.
Coordinate the permit and schedule with the contractor early, and confirm which documents the city requires for plan checks. Keep a clear line of communication with the building department to anticipate inspection dates and any requested corrections. Have the prepared documentation ready to show during inspections, including venting diagrams, underlayment details, and ice-dam barrier placements, so the process proceeds without unnecessary delays.
Freeze-thaw cycles in this area stress flashing around skylights, chimneys, and any roof penetrations. When ice forms, expands, and then refreezes, those thin metal seams and sealants can start to lift or crack. By early spring, those micro-failures often become noticeable leaks, sometimes long before a visible gap appears on the ceiling. The practical takeaway is to plan for extra attention to flashing details during any reroof or repair, not just the field shingles.
In this city, the emphasis on venting and underlayment during full roof replacements means the penetrations are not afterthoughts. If flashing isn't properly integrated with a solid underlayment and a venting strategy that keeps moisture away from the attic, you end up with damp sheathing and repeated ice-dam issues. A reroof isn't simply a new surface; it's an opportunity to seal and vent correctly, so you don't chase leaks with every spring thaw.
Contractor signals point to steady demand for skylight work and some chimney-related roofing services, which reflects regular repairs at these transitions. You'll notice more frequent ice damming at skylight rims or chimney bases after a heavy wind event or a rapid warm spell followed by a freeze. If moisture shows up around a skylight or chimney sooner than the rest of the roof, it's a warning that the transition details may have failed earlier than the field shingles.
Before scheduling a full re-roof, inspect around every penetration for hairline gaps or loose flashing. Ask for a detailed plan that includes a integrated underlayment, proper venting, and a continuous drip edge at the eaves. If you've got old skylight seals or chimney flashing, consider upgrading those components as part of the reroof to minimize future leaks. Regular mid-winter checks can catch early signs before a small issue becomes a larger, costly repair.
Find contractors experienced in skylight installation, flashing, and leak repairs to bring natural light into your home.
Messing Roofing & Construction - Peoria Metro
Serving
4.7 from 161 reviews
Flat and low-slope roofing is a smaller but real specialty in Washington's market, especially on additions, porches, garages, and some commercial-style sections. In this climate, effective drainage isn't a luxury-it's a threshold detail that keeps interior spaces dry through heavy spring rain and late-summer thunderstorms. You'll want membranes that extend clearly over edge details and termination points, with proper slopes toward concealed or scupper drains. Pay close attention to how the membrane interfaces with any parapets, transitions to higher-slope roofs, and the wall flashings. A vented drip edge and a robust ice-dam strategy matter on every low-slope roof, because freeze-thaw cycles can work the edge of the membrane loose if water isn't shed promptly. In practical terms, plan for redundancy: multiple drain points or scuppers, and a reliable cap flashing that stays tucked under the wall cladding without relying on a single fail point.
Low-slope sections are common on Washington's older homes and newer additions. These spaces often experience more overspray from surrounding storms and a higher risk of ponding when the membrane or deck layers aren't perfectly flush. If you're reroofing an attached garage or a back porch with a flat or gently sloped deck, ensure the underlayment transitions are reinforced where the structure meets timber or masonry, and that deck drainage won't trap water beneath the membrane. Consider a mechanically fastened or fully adhered membrane system with a continuous edge seal, plus a seam detailing plan that anticipates movement from typical seasonal swings.
If a low-slope reroof involves unusual assemblies or structural modifications, Washington's building department may require additional plan review. Prepare for detailed diagrams of how the membrane sits relative to parapets, curbs, or new openings, and ensure edge detailing and insulation continuity are clearly shown. Align your contractor's installation sequence with these reviews to avoid late-stage changes that can jeopardize drainage performance. In practice, a well-documented plan translates into faster inspections and a more resilient low-slope roof that stands up to snow, ice, and summer storms.
Find specialists in TPO, EPDM, and built-up flat roofing systems for residential and commercial properties.
Messing Roofing & Construction - Peoria Metro
Serving
4.7 from 161 reviews
In Washington, the contractor scene leans toward reroofing, storm response, and insurance-driven work rather than flashy premium systems. Homeowners value quick response, cleanup included, and affordable pricing-a pattern that tends to show up after a storm season. Long-established and family-owned firms have a visible presence, and that matters when follow-up is needed after the rush. Acknowledge these tendencies as you compare bids and schedules.
After a hail event, you want a contractor who can distinguish cosmetic denting from structural damage and who understands underlayment, venting, and ice-dam protection. Look for firms that offer a thorough, on-site inspection rather than a quick phone call. A realistic assessment should cover attic moisture, possible fasteners, and potential future warranty considerations. If a contractor pushes a single solution without walking through the full system, keep looking.
Choose a roofer with several years of local work, a stable crew, and a track record of standing behind their projects. Ask for references from Washington-area homeowners who had similar roof types and storm repairs. Favor firms that provide a written scope, a clear schedule, and commitments to cleanup and debris removal. In this market, follow-up after the sale is a key differentiator; ask who will be the point of contact after the install and how defects are handled.
Inquire about the type of underlayment used, venting plan, and ice-dam protection specifics for full re-roofs. Confirm who oversees the project, how subcontractors are managed, and what happens if weather delays push the timeline. Request samples or photos of recent Washington-area installs, and verify that the crew will address insurance-related paperwork and any storm-season contingencies.
Rushed contracts or vague workmanship terms are red flags in this market. Favor estimates that spell out materials, sequence, cleanup, and a warranty while avoiding pressure to sign immediately. A calm, transparent process with a local firm that anticipates follow-up needs will serve long-term peace of mind after a hail event. In Washington, these traits often correlate with reliable aftercare and fewer surprises once the storm season passes.