Last updated: Apr 19, 2026
In Greenbelt, spring weather brings heavy rain and strong winds that can unleash sudden roof damage amid a rapidly changing forecast. The same storms that create leaks often expose vulnerable spots that were tucked away during dry spells. When you're sorting through damage after a storm, keep the clock in mind: storm activity can both create new problems and delay planned replacements because crews get pulled to urgent fixes on other homes. If a shingle edge or flashing pulls back after a wind gust, treat it as an emergency, especially after a heavy rain. The goal is to prevent interior damage, not chase a longer, costlier fix later.
Hot, humid summers push adhesive behavior off schedule. Shingles can bond slower or behave unusually when temperatures swing from cool mornings to hot afternoons, so installation pace can stall mid-project. In practical terms, that means a replacement started in late spring may drift into early summer, while a fall start can slip as humidity rises again. If you're coordinating a repair or full replacement, plan for extended timelines and be ready for days when crews delay because adhesive needs setting conditions or moisture risks compromise the seal. A practical cue: if a roofing crew asks for morning temps to be above a certain threshold or for dry days, you'll want to build in those weather contingencies upfront.
Maryland insurers generally handle wind and hail claims through standard documentation and adjuster review rather than a uniquely restrictive statewide market. That means getting the necessary photos, incident notes, and a clear timeline of damage is critical. After a storm, start cataloging damage immediately and file promptly to avoid any gaps between the event and claim review. When an adjuster does visit, be ready with a concise list of affected areas and a callout for shingles that have curled, edges that are loose, or flashing that's lifted. If a claim is approved, expect a process that moves through documentation, an adjuster visit, and then scheduling a replacement window. Communication matters: keep notes, share updates quickly, and confirm any changes to the scope in writing.
You'll want a proactive plan that acknowledges Greenbelt's storm rhythm. Prioritize protecting overhangs, gutters, and attic vents, because blocked or damaged components compound leak risk when a new storm arrives. Maintain a simple weather-ready kit for quick inspections after big rain events: a ladder, a strong flashlight, a notepad, and a camera to document any changes from the previous day. If you notice loose or curling shingles, respond with a temporary seal or tarp to direct water away from the most vulnerable areas while you line up a professional assessment. In this market, timing is everything: act fast on damage, document thoroughly for the claim, and coordinate with a contractor who understands the Greenbelt rhythm of spring storms and humid summers.

Exteriormax
(301) 750-3899 www.exteriormax.com
6301 Ivy Ln Suite #120, Greenbelt, Maryland
4.9 from 324 reviews
Specializing in exterior remodeling/storm restoration. Installation of roofing shingles, windows, doors, gutters and siding. No money down. Free detailed inspections. Payment options are available.

Roofworks
(301) 352-7222 www.roofworksinc.com
Serving
4.8 from 283 reviews
ROOFWORKS is a locally owned and operated roofing contractor. Whether your roof is in need of repair or replacement, you can rest assured you are in good hands with ROOFWORKS. ROOFWORKS, a Maryland roofing company servicing both Maryland and Washington, D.C., is a locally owned and operated company based in Lanham, MD. Whether you are in need of residential roof repair, total roof replacement, residential gutter service, siding repair or installation, or if you need a new roof or almost any exterior home repair, you can rest assured you are in good hands with ROOFWORKS and our roofing services. That's why we're one of the most trusted Maryland roofing companies out there!

Home Genius Exteriors
(301) 381-1768 homegeniusexteriors.com
Serving
4.8 from 1887 reviews
Elevate your home with Home Genius Exteriors, setting the standard in Maryland and Washington DC by offering full-service solutions for roofing, siding, windows, doors, gutters and insulation. We support our veterans and communities by supporting local and national charitable organizations through our Home Genius Cares initiative. With an Owens Corning® Platinum Preferred designation, we also offer flexible payment options, industry leading warranties and a wide range of premium products tailored for your home. It’s time for a different experience, entrust your next home project to a genius and schedule your free inspection today!

Roof First
(301) 536-7240 rooffirstllc.com
Serving
5.0 from 15 reviews
ROOF FIRST: Your trusted partner for top-quality roofing solutions. As one of the state's leading roofing companies, we handle projects of all sizes with unwavering dedication. We deliver exceptional workmanship and professional service, ensuring your roofing needs are met with expertise and care. At ROOF FIRST, we stand behind our name and take pride in every project we undertake, providing you with reliable and durable roofing for years to come.

Roofing By Elite
(301) 937-4846 www.roofingbyelite.com
Serving
4.8 from 23 reviews
Located in Beltsville, Maryland, Elite’s roofing professionals have serviced and installed thousands of residential and commercial roofing systems all throughout Maryland, DC and Northern Virgina. Elite Roofing is committed to providing our customers with the finest roofing services and installs available today. We use only the highest grade materials, and our standards and quality control are second to none. It is this ” commitment to excellence ” that has established us as the preferred roofing contractor in Maryland, DC and the surrounding areas. Simply put, Elite Roofing is your one stop shop for all your roofing needs. Please contact us today, so one of our service professionals can help with your roofing project.
Champion Home Improvements
(301) 277-7200 www.mychampionhome.com
Serving
4.4 from 157 reviews
We are a leading residential renovation company that has been serving the DC, Maryland, and Virginia area for over 25 years. We pride ourselves in offering a variety of expert Commercial & Residential services including roofing, siding, roof repairs, gutters, sunrooms and more. We are licensed, bonded and insured. We are also guaranteed network providers for many insurance companies. Give us a call today.
Neighborhood Restoration
(240) 502-0996 www.myrooflawyers.com
Serving
5.0 from 49 reviews
Neighborhood Restoration is a 5-star Roofing, Siding, and Gutter Contractor serving the DC, Maryland, and Virginia areas. We specialize in Home Roof Inspections and are a trusted local Roofing Contractor. Your trusted partner in preserving and enhancing your home. ⭐️Discover if you qualify for a no out-of-pocket cost roof replacement! 🏡 Call or Text anytime!

Rooftop Designs
(855) 662-7388 www.rooftopdesigns.net
Serving
4.9 from 475 reviews
Rooftop Designs is a roofing contractor specializing in roof installation and replacement, window installation, siding, door installation, gutters, and attic insulation in Maryland, DC, and Virginia. We measure our success by our customer’s satisfaction with our work and our products. With over 11 years of experience in the home improvement industry, Rooftop Designs delivers world-class service at affordable pricing. Our new roofs include a 50-year warranty and feature a wind resistance rating of up to 130 mph. Our team of certified contractors is committed to bringing your vision to life with unmatched precision and excellence.
MARS Roofing
(240) 820-2483 mars-roofing.com
Serving
4.8 from 720 reviews
MARS Roofing, previously known as MARS Restoration, is a locally owned and operated Roofing and Siding Company specializing in weather-related damages, with a staff of trustworthy, experienced professionals with years of experience in the industry. We are located in Clinton, MD, taking pride in improving our neighborhoods and communities. We would love to make you a member of our rapidly growing family. Contact your leading Maryland roofing contractor today for a free estimate!

Construction Pro HQ
(301) 535-0201 constructionprohq.com
Serving
5.0 from 20 reviews
Construction Pro HQ, LLC is a premier construction company specializing in roofing, storm damage, and restoration services in Maryland and Washington, DC. With a dedicated team of professionals, we strive to be the go-to solution for individuals facing challenges finding a Licensed & Bonded Contractor.
Calderon contractors
(301) 213-0282 calderoncontractorsllc.com
Serving
5.0 from 103 reviews
Roof service

Erie Home
Serving
4.7 from 251 reviews
Since 1976, Erie Home has manufactured, supplied, and installed the best-performing roofing on the market. By providing ironclad warranties and convenient financing, we ensure that every homeowner we work with receives top quality service and value for their homes and properties. Erie Home professionals are the roofing company of choice in the greater Washington DC (Beltsville) area. Whether you need roof inspections or roof damage repair services, Erie Home has been the go-to roofing contractor for nearly 50 years because of our attention to detail and dedication to making sure our customers are satisfied with their results. Contact us today for a quote and see why we're the trusted roofing company Washington DC (Beltsville) counts on.
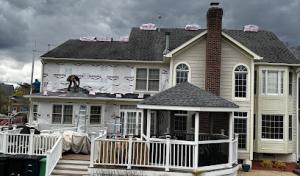
For full roof replacements, the required permit comes from Prince George's County Department of Permitting, Inspections and Enforcement (DPIE), not a city-run roofing permit office. The process is familiar to neighbors dealing with the county's system: the contractor handles the permit application, then the installation proceeds under standard DPIE rules, followed by an inspection, and a final inspection to close the permit. This sequence helps ensure the work complies with county codes and drainage, ventilation, and load requirements that matter in Greenbelt's mature neighborhoods and tree-shaded streets.
Before a single shingle is lifted, confirm with the contractor that the DPIE permit will be used. This is not something to assume is automatic; the county tracks project scope, which means your plan must clearly show the roof's dimensions, venting details, and any structural work. In spring through fall, when storm activity and demand spike, permit timing and plan review can stretch. DPIE workload can push back a start date even after a storm-related assessment, so building a small cushion into your schedule is prudent. If the project begins during a busy period, expect a couple of additional coordination steps with the contractor to align inspections with weather windows.
The contractor typically files the permit with DPIE. Once the permit is issued, the actual roof replacement begins under county-approved plans and code standards. During the installation, inspections are scheduled in stages-often a rough-in or progress inspection depending on the scope-and the final inspection verifies that everything is completed to code and matches the permitted plan. If the final inspection passes, the permit is closed. If any deficiencies are found, the contractor addresses them and re-schedules an inspection. This sequence-permit, installation, then final inspection-helps catch issues related to flashing, underlayment, and ventilation before re-roofing is finalized.
Spring and early summer in this area bring frequent weather swings, which can influence inspection priorities and scheduling. After a storm, crews may experience increased demand for roof work, and DPIE review times can lengthen if many projects are in progress simultaneously. Coordination between the contractor and property owner is essential to align weather windows with inspection slots. If a winter-to-spring thaw or early summer thunderstorm sequence causes delays, communication about revised inspection dates helps prevent unnecessary hold times on the project.
Understanding that DPIE handles the building permit, not a municipal roofing permit office, can avoid confusion during the project. Maintain a clear line of communication with the contractor about permit status, inspection appointments, and any county-required plan revisions. After the final inspection, ensure all documentation from DPIE is retained for your records. This discipline supports a smooth close-out and helps address any post-inspection questions promptly if small corrective items surface after installation.
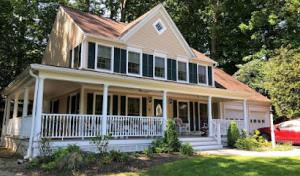
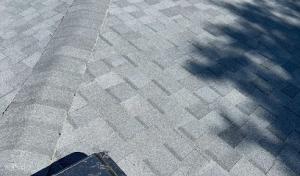
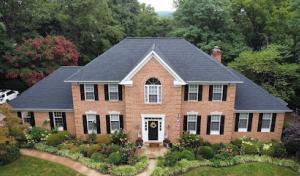
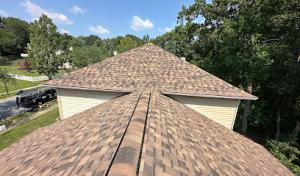
The dominant roofing materials in Greenbelt include asphalt shingles, metal roofing, clay tile, concrete tile, synthetic/composite shingles, and slate. The mix reflects a neighborhood pattern of mature trees, mid-Atlantic climates, and the Prince George's County context for permitting and inspection cadence. The local climate cycles through cold winters and hot, humid summers, which means the most durable choices are those that handle freeze-thaw stress, summer heat, and humidity without cracking, warping, or exposing underlayment too quickly. In practice, that means when you select a roof, you're choosing not just a top layer but a system that coordinates underlayment, fasteners, and flashing to survive a full seasonal swing.
Because Greenbelt experiences temperature swings that produce freeze-thaw cycles alongside hot days and humidity, the underlayment must be rated for both moisture resistance and dimensional stability. The fastener schedule should align with the chosen material and deck type to prevent nail pops or roof edge failures during temperature changes. Metal roofs, for example, benefit from synthetic underlayment and corrosion-resistant fasteners, while asphalt shingles rely on proper nailing for wind uplift and long-term adhesion. Clay and concrete tiles demand careful fastener selection and spacing to resist cracking from shifting caused by freeze-thaw and tree-root-related movement around older homes. Synthetic/composite shingles offer a flexible middle ground, but still require compatible underlayment and flashing details around valleys, chimneys, and transitions. The goal is a cohesive, weather-tight system that can handle spring storms, summer humidity, and fall leaf moisture without sitting exposed.
Autumn leaf buildup is a practical concern in this area because it can trap moisture around valleys, flashing, and gutters on many homes. Any roof type chosen should include robust gutter protection and well-sealed valleys. Clay tile and concrete tile installations must pay particular attention to valley liners and flashing integration to keep leaves from backing up moisture into the attic or along eaves. Asphalt and synthetic shingles benefit from proper valley flashing and clean, accessible drainage paths to prevent slow leaks after a heavy rain or a windy storm front. Metal roofing requires attention to panel overlap and edge flashing to ensure leaves don't collect at joints where water should flow freely.
For homes with mixed architectural styles common in Greenbelt, clay tile and concrete tile offer distinctive looks and long lifespans but demand a strong substrate and precise installation to withstand local weather patterns. Slate and synthetic/composite options provide a balance of aesthetics and durability, with slate offering exceptional longevity but higher installation sensitivity. Asphalt shingles stay popular for their affordability and broad compatibility with existing structures, yet they rely on quality underlayment and precise nailing to perform through multiple seasons. In choosing a roof, the neighborhood's tree canopy, moisture cycles, and seasonal storm risk should guide not just material selection but the full system design, from underlayment to fasteners to flashing details.
Typical Greenbelt-area pricing ranges are about $350 to $700 per square for asphalt shingles, $700 to $1200 for metal, $1000 to $2100 for clay tile, $900 to $1700 for concrete tile, $500 to $900 for synthetic/composite shingles, and $1200 to $2600 for slate. Costs in Greenbelt can rise when county permit processing stretches project timelines or when spring storm demand creates scheduling pressure across Prince George's County. Material choice matters more here because heavier systems like slate and tile can sharply increase labor complexity compared with the area's common asphalt re-roofing work.
In spring and early summer, Greenbelt often sees thunderstorms that can drive rapid leaks and urgent repairs. If a shingle blows off or a flashing fails after a heavy rain, quick tarping and temporary fixes are worth prioritizing to reduce interior damage. Heavier tile systems require careful assessment after a wind event, as extra fasteners and structural checks become critical. When estimating a repair versus a full replacement after a storm, consider the longer lead times for slate or tile and the increased labor demands once the weather clears.
Storm-driven demand across Prince George's County can push scheduling tight in peak season. If you're handling an insurance claim, timing can influence both the claim approval and the timeline to start work. In Greenbelt, adjusters often respond best to a documented, storm-specific repair plan with clear dry-out and temporary protection steps. Roofs in the steelier metal and composite ranges may gain quicker access for materialized crews, while true tile or slate projects may require coordination for heavier crews and equipment.
Material choice matters more here because heavier systems like slate and tile can sharply increase labor complexity compared with the area's common asphalt re-roofing work. For clay tile, anticipate more roof preparation, potential framing checks, and longer installation windows. Concrete and slate demand careful site handling and possibly more crew days, especially on mid-century homes with attic fractions and complex rooflines. Asphalt remains the most practical, fastest path for many Greenbelt homes, but the decision should balance long-term durability against the cost and schedule realities of the spring-to-fall window.
When you're evaluating options, start with the expected storm exposure and the house's weight tolerance. If spring winds tested your current roof, plan to discuss temporary protections and a staged replacement strategy with your contractor. Keep in mind the price bands above, and factor potential delays from county processing and high spring demand into the overall project timeline and budget. For a durable compromise, synthetic/composite shingles offer mid-range weight and cost with solid performance, while metal provides long life with quicker installation, provided the roof structure suits it.
Get a clear picture of your project costs upfront - no commitment required.

In this area, wind and hail claims are generally processed through standard Maryland documentation, photos, and adjuster review rather than a broad statewide insurer retreat. This means that the initial step is to assemble clear evidence of the damage, then coordinate with the insurer on what qualifies as a claim due to weather-related events. The approach in Greenbelt reflects how carriers balance coverage with the realities of mature tree canopies and mid-Atlantic storm patterns. If a hailstorm feathers its way across neighborhood streets, expect a request for supporting material rather than an automatic escalation or denial based on the storm name alone.
After a major storm event, some carriers may ask for more documentation or tighten underwriting, making prompt records and inspection notes more important. The key is to keep a detailed file that can travel with the claim. Photograph the roof from multiple angles, capture close-ups of damaged shingles, and note any granule loss or exposed underlayment. Document exterior staining, such as dark streaks or moisture staining on siding near the roofline, and images of downed or cracked vents and flashing. An adjacent neighbor's utility meter or fence damage can sometimes corroborate wind intensity, so include those shots if relevant. Clear timestamps help; DIY dated photos or a quick note with the date, time, and weather conditions can make a difference when an adjuster reviews the file.
Because spring storms and leak events are common triggers locally, homeowners should document interior staining, exterior shingle loss, and temporary tarping from the first day damage is noticed. If a leak is detected indoors, photograph the stain progression on ceilings or walls, and keep a log of when water appeared after rain events. Temporary tarping is not a permanent fix, but it buys time and demonstrates proactive mitigation to the insurer. Keep receipts for tarps, plastic sheeting, and any contractor visits related to temporary repairs, since those records help separate emergency responses from permanent restorations.
Expect a conversation focused on observed damage, seasonal patterns, and the timing of the storm. The adjuster will compare the insurer's notes with your documentation, and the process can hinge on how comprehensively the evidence was captured within the relevant window. In Greenbelt, the pattern of storms and the surrounding tree cover often makes thorough documentation especially important, because it supports a clear picture of what occurred and when. If questions arise, respond promptly to avoid delays in the claim path.
Connect with contractors who help homeowners navigate the claims process from damage assessment to final approval.

Exteriormax
(301) 750-3899 www.exteriormax.com
6301 Ivy Ln Suite #120, Greenbelt, Maryland
4.9 from 324 reviews

Autumn leaves are a recurring Greenbelt-area roofing issue because they can collect at roof-to-wall transitions, valleys, and gutter lines and hold moisture in place. That moisture retention can complicate flashing performance and increase the chance that small drainage issues become visible leaks during later rains.
As leaves fall, keep a routine check on the roof edge where the wall meets the roof and along any valley channels. Use a stiff broom from the ground or a lightweight roof rake to remove debris before it gets smothered by subsequent winds or rain. Focus on the areas where gutters begin and end, since blockages here back up water onto flashing details. When you do a washdown after a storm, inspect the transitions closely for any loose or lifted flashing.
Valleys attract debris, and moisture can linger there longer than on flat surfaces. At least once a season, run a careful eye along each valley flashing. Look for hairline splits, lifting edges, or corrosion at fasteners. If you see small leaks during rain, start by pulling back nearby shingles to verify the flashing isn't creased or displaced. In Greenbelt's mix of mature trees and frequent spring thundershowers, flashing can be stressed by wind-driven debris; reseat or replace suspect sections promptly.
Gutters collect the bulk of autumn debris, so keep them clear to prevent overrun onto the roof edge. Check at least quarterly for sagging sections, loose hangers, and signs of corrosion near the roof-to-wall junctions. Ensure downspouts discharge away from the foundation and do not channel water directly onto flashing footings, as that continuous moisture can lift fasteners and accelerate flashing wear.
Homes with skylights need closer seasonal checks because debris and moisture can build up around skylight flashing details. Inspect around the flashing ring for sealant gaps, track debris, and any staining that signals slow leaks. Clean nearby shingles gently to avoid disturbing the skylight seal. In spring storms, pay extra attention to any damp patches emanating from these areas.
Find contractors experienced in skylight installation, flashing, and leak repairs to bring natural light into your home.


Although Greenbelt is primarily a residential re-roofing market, local contractor signals show meaningful demand for flat and low-slope roof expertise. The area's mix of bungalows and mid-century homes often places low-slope transitions between living spaces and porches or carports. Understanding how these sections behave helps protect the whole roof system from early wear, pooled water, and hidden leaks.
On low-slope sections, Greenbelt's evenly distributed precipitation makes drainage consistency more important than planning only for one short wet season. Keep a clear path for water to shed toward gutters and downspouts, and verify that scuppers, internal drains, and crickets slope correctly toward your drainage outlets. In practice, that means inspecting for sags, clogged lines, and mismatched transitions where the low-slope meets a steeper roof. A small misalignment here can channel water to vulnerable seams, so routine checks after heavy rains are a smart habit.
Spring rain delays and winter freeze-thaw cycles can expose weaknesses in seams, penetrations, and transitions between low-slope and steeper roof areas. Pay close attention to flashing around vents, chimneys, and skylights, as well as the base of any parapet walls. If a low-slope area shares a boundary with a main roof, ensure the transition flashing is continuous and compatible with the adjacent roofing material. Proactively reseal fasteners and joints where membranes meet old flashing, because overlooked joints can fail when moisture infiltrates.
Create a seasonal rhythm focused on low-slope sections: after each major rain, inspect for damp spots or looser fasteners, especially near corners and transitions. Keep surface debris cleared so water can reach drainage paths unimpeded. When staining or soft spots appear around seams, address them promptly to prevent further damage that could compromise adjacent steeper areas. A well-timed attention plan reduces the risk of larger repairs later while accommodating Greenbelt's mix of homes and storm patterns.
Find specialists in TPO, EPDM, and built-up flat roofing systems for residential and commercial properties.
Greenbelt's contractor market skews toward re-roofing, so the emphasis you hear from crews is often on speed, material choice, and getting the old roof off safely. That can drive pressure to finish in fewer days, which in turn tangles with cleanup practices and attention to detail. You may notice a mix of family-run crews and longer-standing local shops; either way, the neighbors know which crews show up reliably and which ones leave the yard looking rough or fallen utility line debris in the garden. In this climate, where spring storms can migrate into summer and fall surprises, the quality of the installation matters more than glossy brochure claims.
When a local crew talks about warranties, you must connect the dots between workmanship, product, and the site itself. A clean edge line, proper venting, and secure flashing around chimneys and dormers are not luxuries in this market; they protect against the first strong thunderstorm that follows a mid-Atlantic freeze-thaw cycle. Ask for written assurances that the crew will perform a thorough final check, including attic drip points and exterior walls for any hidden seepage. If the company editors or supervisors aren't the ones on site daily, request a specific on-site point of contact who can address on-the-spot concerns during and after the job. The reality here is straightforward: a solid warranty is only as good as the crew's willingness to stand behind it with a documented, post-work walk-through.
Cleanup isn't just a matter of returning the driveway to its pre-storm state. In this market, you want a crew that will remove all debris, seal penetrations properly, and leave no stray granules or nails behind that can damage a mower or tire. Before signing off, insist on a final inspection checklist and a direct line of contact for any follow-up questions. If the final sign-off looks rushed, that is a red flag to push back and seek a more accountable team. This is about protection long after the ladder is put away.