Last updated: Apr 19, 2026
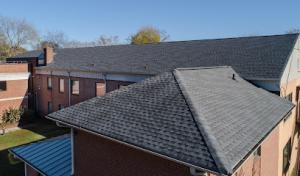
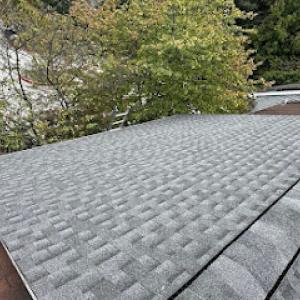
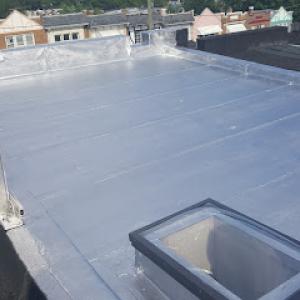
In dense rowhouse neighborhoods, roofs often tuck behind parapet walls and rely on drains, scuppers, and flashing details rather than a true slope for shedding water. That setup makes the system vulnerable to sustained moisture, especially after a heavy rain event followed by a freeze-thaw cycle. When water sits in low spots or along parapet interfaces, ice can back up against flashing, masonry joints can wick moisture, and small gaps become wide leaks. The failure pattern is not random-it's predictable for this housing stock when drainage details are aging or poorly maintained.
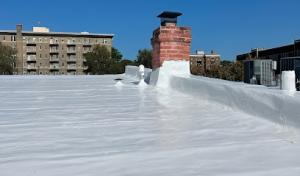
Skylights and penetrations are a recurring concern in the local contractor market, and the leak patterns you'll observe align with densely packed attached housing. Parapet caps crack or lift, flashings at transitions to masonry split under freeze-thaw stress, and seams around drainage outlets weaken with repeated wet-dry cycles. Look for signs of efflorescence, damp staining near parapets, and rust or loose metal around scuppers. On many older flat roofs, ponding-prone low spots collect water long enough to saturate roofing joints, flashings, and sealants, creating a slow but relentless path to interior ceilings.
Start with a visual walk of the roof perimeter after a heavy rain. Note any standing water that remains for more than 24 hours, particularly near parapet edges or along transitions to interior walls. Inspect skylight curb flashing for cracks, paint peeling, or silicone bead failures-these are common breach points where water tracks inward. Examine masonry interfaces for hairline cracks or spalling around metal flashings; those micro-issues invite larger leaks once the next wave of storms hits. Gather a feel for roof surface durability: if the surface feels soft or saturated in high-traffic zones, that's a red flag that water has already compromised the substrate in a hidden way.
Addressing risk begins with targeted maintenance rather than broad, cosmetic fixes. Re-seal all skylight curb junctions and ensure flashing integrates cleanly with the parapet and masonry. Repoint or repair masonry joints where you notice cracking or wicking, and replace compromised sealants at all drainage connections. If ponding exists, elevate or relevel small sections to encourage drainage toward scuppers and drains, but do not shift weight onto weak parapet areas. Keep scuppers clear of debris and confirm that any backwater protection is functioning during the wet season.
If signs of moisture intrusion persist after a rain event, or if parging, peeling coatings, or rusted flashing appear around parapets, call a local roofer with a track record on flat and low-slope roofs in rowhouse blocks. DC-specific issues often involve tight alignment between masonry, flashings, and parapet caps; a seasoned inspector can trace leaks from the interior ceiling up to a small, hidden breach. A professional evaluation can pinpoint whether a targeted flashing retrofit, encapsulation of joints, or selective replacement of decking and underlayment is warranted to stop repeat leaks before the next heavy downpour and freeze-thaw cycle.
Late spring and early summer hail events are a known seasonal roofing risk in the District and often trigger post-storm inspections. The humid DC climate accelerates wear on flat and low-slope roofs, making gutters, parapets, and flashing prime targets for damage after a convective storm. When you hear hail pounding the roof or windows, prepare for a quick, thorough check of roof edges, skylights, and any visible seams. Don't assume a quick walk-around is enough; hail can hide dents, punctures, or bruised shingles that only show up after the rain stops.
The DC metro insurance environment sees a mix of wind, hail, and storm-related roofing claims, making documentation especially important after convective storms. Take timestamped photos from multiple angles: the street, the alley, the roof edge, and any interior signs of entry water around headers or ceiling junctions. Keep a simple log noting when you first noticed leaks, what areas are affected, and any temporary mitigation you apply, such as tarping or covering exposed parapets. If contractors spot wind-driven debris damage, request written notes that describe each affected area and the observed condition before and after the storm. This precise storytelling helps adjusters evaluate the claim swiftly and fairly.
Because attached homes are common in the District, wind-driven rain and debris impacts can affect multiple neighboring roofs at once, complicating damage timelines and claim narratives. Do not rely on a single neighbor's report; document a short survey of adjacent properties if safe to do so. Note shared parapets, common gutters, and linking flashings that could distribute leaks across units. In multi-dwelling rows, a small roof breach can cascade into interior damage on several flats, so timing matters. Early coordination with neighbors can speed up repairs and reduce the risk of further interior water intrusion during heavy rains.
After hail or a major wind event, conduct a careful walk-around within the next 24 hours, focusing on flat and low-slope sections, skylights, and parapet edges. If you observe anything suspicious, call a local roofer who understands drainage flows and the way water travels across a row of homes. Document repair estimates in writing and insist on notes about whether the damage is cosmetic or structural. In this city, prompt attention to potential hidden damage protects multiple units and keeps claim timelines manageable.
Keep your insurer informed with photos after any weather event and after yards are cleared of debris. If leaks recur with rain, escalate to a mitigation plan and request temporary stabilization from your contractor to prevent interior damage while you wait for adjuster professionally.
Find local contractors experienced in assessing and restoring roofs after hail, wind, and severe weather events.
United Roofing
(202) 568-6865 www.unitedroofingdc.com
1404 North Capitol St NW Suite 5, Washington, District of Columbia
5.0 from 221 reviews
CJ Roofing
(202) 770-4971 cjroofingdc.com
1835 7th St NW Suite 250, Washington, District of Columbia
5.0 from 63 reviews

Washington Roofers
(229) 715-7372 washington-roofers.ueniweb.com
1903 14th St NW, Washington, District of Columbia
4.9 from 26 reviews

United Roofing
(202) 568-6865 www.unitedroofingdc.com
1404 North Capitol St NW Suite 5, Washington, District of Columbia
5.0 from 221 reviews
United Roofing in Washington, DC provides professional roof replacement services designed to protect homes and businesses from the region’s heavy rains, winter snow, and seasonal temperature swings. Our team handles complete tear-offs, roof installations, and structural assessments to ensure lasting performance. In a city where older buildings and row homes face unique roofing challenges, we deliver solutions that improve durability and energy efficiency. With a commitment to quality workmanship and reliable service, United Roofing is the choice for property owners seeking trusted roofing contractors with the experience to handle Washington’s demanding climate.
Capitol Improvements Washington DC - Roofing | Siding | Doors
(410) 587-0128 www.improveitmd.com
1015 15th St NW #635, Washington, District of Columbia
5.0 from 65 reviews
We are the family owned and family run team of DC Roofing Specialists servicing, flat roofs in Washington DC and window & door replacement in Washington DC. We are consistently rated as the best in our class for replacement flat roofing, roofing, siding, windows, gutters, trim, deck builder, stone patios & walkways, and door replacements. We provide quality products, expert installation, and lifetime manufacturer backed warranties. All for a fair price.
CJ Roofing
(202) 770-4971 cjroofingdc.com
1835 7th St NW Suite 250, Washington, District of Columbia
5.0 from 63 reviews
We are a full service, family owned business located in the District of Columbia. We’ve been fixing roofs in the District for 30 years. Contact our Washington DC roofing company today if you have questions. From Capitol Hill to Petworth, Dupont Circle to Georgetown, and Chevy Chase to Logan Circle, we cover the entire District of Columbia. We are proud of our work, our customer service and our team. We always endeavor to provide our customers will all the facts before they make their decision on which roofing contractor to hire. Are you looking for an affordable and reliable roofer near you? Give us a call today.
Washington Roofers
(229) 715-7372 washington-roofers.ueniweb.com
1903 14th St NW, Washington, District of Columbia
4.9 from 26 reviews
Washington Roofers offers high-quality roofing design and services in Washington. We are seasoned roofers who deliver top quality and budget-friendly roofing services. Get in touch with us on +12297157372. When you hire us, you know you’re getting skilled, passionate technicians you can trust to do the best job possible. And, as a bonus, we always feature competitive pricing on our services.
RX. Renovation Xperts
(202) 860-3272 www.renovationsxpert.com
36 18th St SE, Washington, District of Columbia
4.7 from 34 reviews
RX. Renovation Xperts is a local, Washington, DC, home improvement company and general contractor. We believe that our customers should never be taken advantage of – no matter if you’re a business or homeowner.
C.K. McConkey
(301) 277-5667 www.mcconkeycs.com
Washington, District of Columbia
5.0 from 13 reviews
Transform your property with C.K. McConkey, Inc. We offer roofing services in the Washington DC, Washington, area.
GoTech Roofing
(703) 417-9200 gotechroofing.com
700 Pennsylvania Ave. SE #200, Washington, District of Columbia
5.0 from 13 reviews
GoTech Roofing has established itself as the Number 1 Provider of Residential and Commercial Flat Roofing Services in Washington DC. We provide flat roof repair and flat roof replacement services with a real focus on customer satisfaction. We are a DC Class A Contractor and fully insured with Workman's Compensation and Liability Insurance. GoTech Roofing provides each and every client with an incomparable roofing experience through our outstanding customer service and exceptional quality. With our GoTech Proprietary Customer Service-Oriented Roofing Process you can skip the headaches, schedule delays, lack of contractor communication, cost increases, and nonsense – we handle every roofing project detail from start to finish.

DC Roofing Repairs
(203) 660-2074 dc-roofing-repairs.ueniweb.com
1205 5th St NW, Washington, District of Columbia
4.5 from 21 reviews
DC Roofing Repairs offers high-quality roofing design and services in Washington. We are seasoned roofers who deliver top quality and budget-friendly roofing services. Get in touch with us on +12036602074.
Flat Roof Experts
(202) 494-3138 www.flatroofexpertsmd.com
Washington, District of Columbia
4.7 from 14 reviews
Professional Flat Roof Experts in Metro DC for Residential Homes and Business. My business is licensed, owned, and operated with a crew of professionals since 1981. I will personally come to your home or business and provide you with a free cost estimate in a timely manner. Thanks, Raymond Johnson
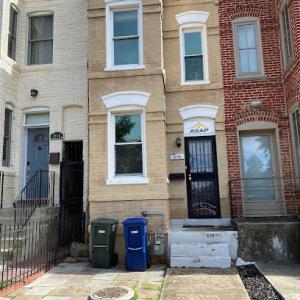
ASAP Roofing & Exteriors
(301) 281-7150 www.asaproofingandexteriors.com
1016 7th St SE, Washington, District of Columbia
4.2 from 26 reviews
ASAP Roofing & Exteriors specializes in roofing, roof maintenance, and roof repair in Maryland, Virginia and Washington D.C. We offer solutions for waterproofing, shingle and membrane roofing, skylights, gutter & downspout for residential and commercial customers. We operate our own sheet metal shop, producing our own custom metal flashing products that fit our client's needs to provide more affordable prices to homeowners.

My Exterior
Serving
5.0 from 30 reviews
My Exterior, located at 1655 Fort Myers Drive, 7th Floor, Suite 724A, is your premier roofing contractor in Virginia, specializing in roofing repair, roofing services, and roof installation. As a trusted residential roofing expert, we offer top-notch roof replacement and emergency roofing services with superior craftsmanship by our Class A licensed and GAF Master Elite team. Our comprehensive exterior solutions include siding, gutter, window, and door services, each enhanced by free drone inspections, no-cost estimates, and flexible financing options. Choose My Exterior for reliable service and community commitment, and discover why we're the go-to roofer near you.
Insured Roofs - Arlington Branch
(703) 828-7462 www.insuredroofs.com
Serving
5.0 from 56 reviews
Insured Roofs is a storm restoration company and roofing contractor serving Arlington, VA and the greater DMV area. We specialize in roofing, siding, solar as well as general home improvements. Contact us for our FREE roof assessment. Our complimentary roof inspections come with a 3d model of the exterior of your home with the measurements attached. We also take over 100 photos of every component of your roofing system.
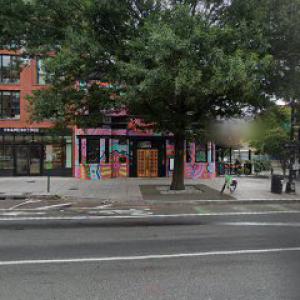
In this market, roof work on tight urban blocks often starts with access challenges. Narrow streets, limited staging space on attached rowhomes, and disposal logistics drive labor time and truck routing fees. Replacement pricing varies sharply depending on whether the house has asphalt shingles, metal, clay and concrete tile, wood shakes, or slate, with slate common on older, historic façades. Historic rooflines, chimneys, parapets, skylights, and rear additions tend to lengthen job timelines and raise waste handling costs compared with simpler suburban replacements. This is why you'll see sizable spread in the numbers for the same material.
Asphalt remains the most common and budget-friendly option for many rowhouses with modest slope or low-slope sections. In DC, expect the practical installed range to align with the low end of the market, given easier waste disposal and faster turnover on standard layouts. Typical per-square cost runs roughly from the mid to upper end of the stated band, reflecting urban staging and dump fees when doors open to rear or alley access. When a flat or low-slope area is involved, you may incur additional edging and flashing work around parapets, which can nudge total a bit higher.
Metal roofs perform well in four-season DC weather and often justify a higher upfront cost for longevity and reduced maintenance. In dense neighborhoods, the value comes from lighter loads and simpler insulation work, but urban logistics keep total installed prices toward the higher side of the metal range. If the roof has an intricate parapet or multiple dormers, expect labor time to increase due to multiple penetrations and more careful sealing around edges.
Clay tile is a frequent choice on inherited or period homes but brings substantial complexity in DC's tight streets. Structural support may need upgrading to carry heavier tile, and edge detailing around parapets, skylights, and chimneys demands careful work. The price will push toward the higher end of the clay tile band when stairs, lifts, or crane access are restricted, or when a rear addition introduces unusual geometry.
Concrete tile shares many of clay tile's installation challenges but can be a bit more forgiving on weight distribution if the structure already accommodates heavier coverings. In Washington's dense urban fabric, labor time rises with specialty metal flashing, precise parapet detailing, and waste management around narrow streets. Expect costs to reflect the premium for careful handling and deck preparation near tight access points.
Wood choices bring distinct aesthetic and performance considerations for DC roofs, especially where moisture and freeze-thaw cycles are a factor. Staging and climate control on older rowhomes can add a noticeable premium because shakes require careful alignment and curing space. If the structure has irregular framing or weatherproofing reversals around skylights, the price will climb within the wood range.
Slate is the standout for historic inventories and high-end rehabilitations. In this market, slate installation costs escalate quickly due to material price, fragility, and the level of skill required for matching existing patterns on complex rooflines. Tight urban access and limited rear staging can push the price toward the top of the slate band, especially if structural reinforcement is needed or if parapets and chimneys demand meticulous flashing work.
Across all materials, the DC environment rewards thorough planning for access, waste management, and sequencing. When you anticipate heavy rainfall followed by freeze-thaw cycles, budget a contingency for moisture-related repairs during tear-off and prep, and plan for temporary enclosures around parapet edges to manage debris. By anticipating the unique urban constraints-narrow streets, attached home layouts, and rear additions-you can align material choice with expected labor time and staging needs, achieving a durable result even in a compact city lot.
In this area, most roof replacements require a building permit through the Department of Consumer and Regulatory Affairs (DCRA). You will need to submit project details for review, then schedule inspections as the work progresses. The authority's stance is not negotiable: permit approval is only part of the process, and skipping steps invites delays, fines, or compelled undoing of work. Because the District uses a centralized city-level permitting structure, the exact requirements can differ from neighboring jurisdictions, so don't assume a neighboring city's practices will match yours. You should plan for a formal submission that includes the roof's scope, materials, drainage changes, and any work impacting parapets, skylights, or vents.
Inspections are not a one-and-done moment when the permit is issued. Expect at least interim checks as the roof comes together, particularly around low-slope and flat sections where leak risk is higher after heavy rain or freeze-thaw cycles. The inspector will verify roof assembly details, flashing at parapet edges, penetrations around vents and skylights, and proper drainage convergence. If the plan calls for alterations to parapets or drainage paths, those elements must be visible to the inspector as work progresses. If a deficiency is found, the permit cannot be closed until corrective work is documented and re-inspected.
A final inspection is required to close the permit; this step is easy to overlook but essential. Ensure the contractor understands that permit issuance signals progress, not completion. The final inspection confirms that the installed roof meets code, that all drawings and permit conditions were followed, and that drainage and flashing details are intact after heavy weather cycles. If the final check passes, you receive permit closeout documentation. If not, expect a corrective plan and another inspection window. Double-check that the contractor has scheduled the final visit and has access to all required areas before the last week of the project.
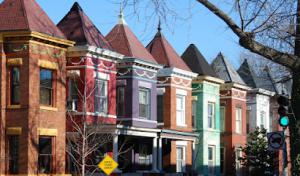
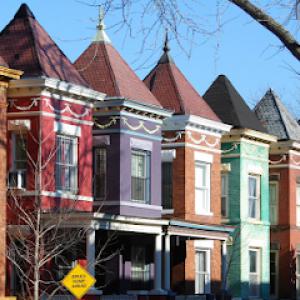
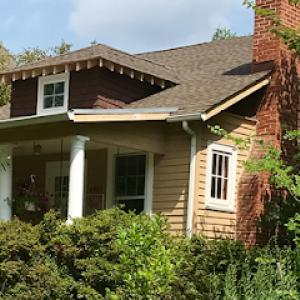
Historic rowhouses and architecturally significant neighborhoods in the District carry a strong visual heritage that shapes material decisions. Slate remains a relevant option on many older homes, not as a niche choice but as a legitimate, long-lasting match for properties where a dark, flat, or slightly textured slate look already exists. In DC, the visible streetscape often dictates material direction: a roof that harmonizes with brick masonry, cast-iron details, and period-appropriate trim tends to preserve the overall character. When a roof change is contemplated, slate's compatibility with surrounding homes, its mature patina, and its proven durability in humid, four-season weather warrant careful consideration.
Clay tile, concrete tile, wood shakes, and metal all appear in the local market, but matching the existing roof style can matter more here than in newer tract-home markets. Clay and concrete tiles can echo brick and terra-cotta accents found on mid-20th-century properties, yet their profiles should align with the existing silhouette and roof slope. Wood shakes and shingles bring a vernacular texture that complements older wood-frame details and interior finishes, but require attention to moisture history and maintenance accessibility, especially where visible from alleys or courtyards. Metal roofing, while often associated with modern updates, can be paired with brick or decorative cornices if the panels' seams and edge details respect historical lines. In all cases, the chosen material should read as a continuation of the home's character rather than a stark departure.
Material selection in the District often has to account for visible streetscape character, masonry interfaces, and the load implications of replacing or upgrading older roof systems. Parapet walls, skylights, dormers, and half-round gutters demand precise detailing to prevent water ingress after heavy rain and freeze-thaw cycles. When slate or tile is selected, ensuring a robust underlayment system and proper flashing around transitions to masonry is crucial, because water frequently travels along mortar joints and into parapet interfaces in DC's humid climate. For flat and low-slope sections common on rowhouses, prioritize an impermeable, well-sealed base with carefully integrated roof-to-wall transitions and edge terminations that respect the building's original line and stone or brickwork. In practice, the best choice balances historical fidelity with modern performance, delivering leak-resilient protection without eroding the home's architectural language.
In DC, spring storms and heavy rainfall can interrupt dry-in and waterproofing schedules, so plan for a gradual push rather than a single push-date. After February's thaw, assess roof access paths, parapet clearance, and skylight flashing before confirmation. Dry conditions in late March through early May are ideal for tear-off, with moisture-sensitive materials kept ready but staged to avoid weather exposure near exposed edges.
In DC, summer heat and humidity shorten safe installation windows and raise attic heat buildup on dense urban roofs. Schedule early-morning arrivals and wrap up by mid-afternoon, when asphalt underlayment and metal flashing tolerate handling best. Ensure temporary shade or cooling measures for crews and confirm attic venting is functional to minimize heat-related distortion of underlayment and fasteners.
Autumn brings cooler temps and more predictable rain patterns, making it the most reliable time for many crews. Aim for a multi-day sequence that allows thorough drying between heavy rain events. Fall schedules should include contingency buffers for late-season downpours and saturated parapet details, especially around skylight penetrations and drainage terminations.
Winter freezes and snow can delay tear-off and installation in the District. If heavy precipitation or freezing conditions persist, shift to interior or non-penetrating tasks and defer full waterproofing until reliable dry periods emerge. When a window opens between storms, prioritize sections with active leakage and use rapid-set sealants only as short-term measures to bridge gaps.
Coordinate with roofing teams to align with local microclimates among rowhouses, where wind exposure and nearby shade alter drying times. Build a weather buffer into every milestone, and keep access to safe staging zones on narrow streets. For tight gaps, pre-plan material staging at a nearby ally or curbside, ensuring storage does not impede utilities or fire lanes.
In the DC metro area, adjusters may request detailed photos, contractor estimates, and weather-related documentation, so you should build a file immediately after a storm. Photograph every visible sign of damage from multiple angles, focusing on parapets, skylights, and edge details where leaks start. Keep dated selfies with weather notes, and save time-stamped meteorological reports if possible. This is not guesswork; it speeds claims and reduces delays that stall payments.
Because carriers in some markets have tightened underwriting, homeowners should document pre-existing conditions and maintenance history before filing a claim. Gather past inspection notes, prior repairs, and service dates for flashings, gutters, and membrane seams. If you have sealant failures or drainage issues, attach professional opinions or photos showing the state before the latest weather. A clean, organized history can prevent disputes about what was already present.
For attached homes in Washington, DC, homeowners should record whether damage appears isolated or shared across adjoining structures, since that can help establish storm timing and exposure. Note party walls, shared parapet sections, and common roof decks. Take photos from the alley and from each side of the row, documenting where the moisture enters. If the damage seems shared, indicate conversations with neighbors and any joint maintenance that occurred after storms.
Create a simple, durable folder system: digital backups plus print copies. Label by date, location, and symptom (leak, crack, sag). Keep all contractor communications, including estimates and scope descriptions. If a storm hits during freeze-thaw cycles, emphasize how rapidly ice buildup or water intrusion appeared, and how that aligns with weather patterns in DC. This alignment strengthens your claim narrative and helps avoid delays.
Connect with contractors who help homeowners navigate the claims process from damage assessment to final approval.
DC Roofing Repairs & Installations
2101 Wisconsin Ave NW, Washington, District of Columbia
4.9 from 23 reviews