Last updated: Apr 19, 2026
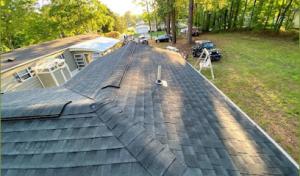
This city sits directly on the Atlantic coast, so roofs face constant salt spray and onshore winds that relentlessly corrode metal fasteners, flashing, and other metal accessories. Over time, corrosion weakens connections, loosens shingles, and invites moisture entry at seams that would otherwise be harmless. You'll notice faster degradation on south and east-facing slopes where salt-laden air hits first and most. In the span of a single season, tiny failures can escalate into active leaks if left unaddressed. The message is blunt: treat salt-driven wear as a primary maintenance focus, not a quarterly afterthought.
Nor'easters and coastal storms dominate the regional weather pattern, blending wind-driven rain with repeated moisture exposure. A small flashing defect can become a roof-wide problem when wind gusts push water underarounds and into attic spaces. In homes with aging underlayment or degraded step flashing, a single high tide of wind-driven rain can paint a path from eave to interior ceiling. The risk is not just a missing shingle but a cascade of compromised seals, warped decking, and accelerated rot. When these storms roll through, the urgency to catch and seal leaks rises dramatically.
Because this is a shore market, storm demand can spike suddenly after regional coastal weather events, affecting scheduling for inspections, tarping, and full replacements. A local crew that just finished a job may be tied up for days with emergency repairs on other nearby roofs, leaving neighbors waiting. Post-storm windows close quickly, and delays can expand small problems into major projects. If you notice granules washing down the gutter, loose flashing at the chimney, or a saw-toothed edge of roof deck, act fast and secure a professional assessment before interior moisture signs appear.
Take a proactive stance by inspecting the most vulnerable edges first: look for loose or corroded nails, lifted shingles, and corroded metal boots around vent pipes. Clean gutters and downspouts to keep water from backing up under flashing during heavy rains. Inspect the flashing around the chimney, skylights, and roof-to-wall transitions; small gaps can become big leaks in a coastal storm. If a storm is forecast, prepare by ensuring tarping is ready and easily deployable-timely tarping can buy critical time to arrange proper repairs without exposing the interior to a downpour. When an issue is spotted, don't dismiss it as cosmetic-coastal conditions turn minor flaws into long-term damage quickly, so prioritize timely repairs with a local roofer who understands salt-driven corrosion and wind behavior.
Choose a system that emphasizes corrosion resistance and wind performance. Consider flashing materials and fastener types rated for coastal environments, and ensure sealants and underlayment are appropriate for repeated moisture exposure. Regular, targeted inspections after storms are not optional here; they are a protective habit. If a roof has seen multiple Nor'easters in a season, anticipate that critical components-like ridge caps and hips-may need attention sooner rather than later. The goal is to keep moisture out and prevent accelerated deterioration from salt and wind, so you stay ahead of leaks and extend the life of your roof in this challenging coastal climate.
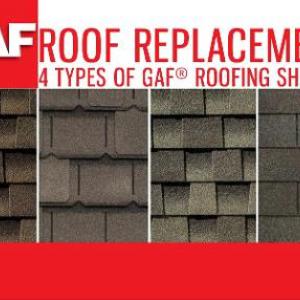
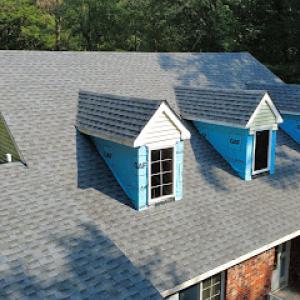
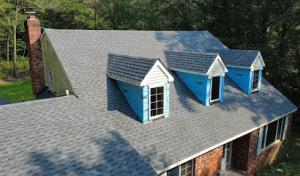
Asphalt shingles are common locally, but in Long Branch the underlayment, flashing quality, and wind-rated installation details matter more because of coastal exposure. When you pick asphalt, look for products rated for high wind and compatible with the climate that pushes salt air into every crevice. The underlayment should be a torque-resistant, sealed layer under the shingles, and the flashing around chimney, vents, and intersections must be heavy-gauge metal with proper sealant choices designed for salt air. If your home is older, consider upgrading the roof deck to a more robust sheathing and verify fastener patterns recommended by the shingle manufacturer for wind zones. A quality attic ventilation plan helps reduce moisture buildup that salt-laden summers can aggravate, so plan intake and exhaust vents to minimize condensation around the eaves and ridge. In a shore market, you'll notice that the long-term performance hinges on how well the edges are sealed and how wind-driven rain is managed at the rake and gable ends.
Metal roofing is a meaningful local option, but Long Branch's salt air makes corrosion resistance and the quality of exposed and concealed metal components especially important. Look for metal panels with a protective coating system designed for coastal environments-galvanized or aluminum alloys with a corrosion-resistant finish are preferable. Pay attention to fasteners: use stainless or hot-dip galvanized screws with neoprene washers that maintain seal over time, and ensure penetration points are sealed with mechanical flashings appropriate for salt exposure. The exposed metal edges near eaves and ridges should have continuous, well-sealed closures to prevent salt-laden air from creeping underneath. If you choose a standing-seam system, confirm that the seam clips and fasteners are rated for wind uplift in our Atlantic-exposed skies and that the installation includes a fully sealed panel-to-panel seam. Concealed components matter just as much as the visible metal-inspect and specify corrosion-resistant hardware for valleys, penetrations, and snow guards if you're in a higher snowfall pattern during Nor'easters.
Tile, slate, and synthetic/composite roofs appear in this market, which matters in a shore city with a mix of older homes and higher-end coastal properties where roof weight, repair skill, and material sourcing can vary. Clay and concrete tile bring longevity, but weight is a critical factor-confirm you have the structure to carry the load, and ensure the roof deck is properly braced for the combined weight and wind pressure. Slate delivers a classic look but demands skilled installation and a compatible substrate; sourcing and replacing cracked slates after a storm can become a project, so plan for available stock and a reliable craftsman who understands coastal moisture effects. Synthetic or composite shingles mimic the appearance of these heavier options while offering lighter weight and often better impact resistance; however, verify that the product's color fade resistance and profile closely mimic the local aesthetics to preserve property value. Regardless of material, ensure ridge lines and hip lines are properly ventilated and flashed to resist salt air intrusion along all ridgelines and dormers.
Coastal exposure means inspection and maintenance schedules differ from inland markets. After strong storms, check for lifted shingles or metal panel misalignments, and verify sealant integrity around vents, skylights, and chimneys. Clean gutters and downspouts at the top of every season to prevent salt-laden debris from backing up and causing leaks at the eaves. Develop a plan to monitor for wind-driven debris and salt build-up on flashing and fasteners, especially at transitions between roof planes. If a roof is aging or shows uneven wear, prioritize a coordinated approach: address underlayment, flashing, and venting together rather than treating them as separate repairs. This keeps your investment resilient against the next Nor'easter and the constant salt cycle that characterizes this coast.
Local reroof pricing can swing after storms, when emergency work and full replacements compete for the same crews. In the weeks after a Nor'easter or hurricane, crews may be tied up with urgent repairs, driving labor rates higher and shortening available scheduling windows. Asphalt shingles remain the most common option for many homes, but the shortage of skilled labor can affect all material types, especially for premium coastal systems. Planning with your contractor for a window that balances urgency and cost can prevent sticker shock when the project starts.
Costs in Long Branch can rise when corrosion-resistant accessories, upgraded flashing, and better ventilation details are needed for humid salt-air conditions. Expect to pay more for snap-fast or corrosion-resistant metal flashings, copper or stainless vent components, and edge metal designed to resist salt spray. Ventilation is not optional in coastal climates; higher-quality soffits, ridge vents, and balanced attic air exchange help prevent moisture buildup and prolong roof life, which adds material and installation labor. If your home has existing penetrations or skylights, plan for additional sealing or flashing upgrades to keep leaks at bay.
The city's housing mix includes both standard shingle roofs and more specialized coastal homes using metal, tile, slate, or composite materials, which can widen labor and material pricing. A metal roof or slate option often requires crews with specific certifications and longer lead times for materials, especially after a damaging event. Tile roofs, whether clay or concrete, demand careful handling and precise underlayment, which can increase both material and labor costs. In practice, a Long Branch project may blend several materials on adjacent structures, adding complexity to ordering, scheduling, and access.
Asphalt shingles generally anchor most budgets, with costs typically quoted per square and ranging from the mid to upper hundreds in coastal markets. Metal roofing tends to sit higher, reflecting its durability against salt and wind, while clay and concrete tiles push the price further due to weight, handling, and specialty installation needs. Synthetic or composite shingles offer a middle ground with resilience tailored to humid coastal conditions. In concrete terms, expect a single-square price spread that reflects both material choice and required upgrades, such as enhanced flashings, corrosion-resistant accessories, and ventilation improvements. Planning for a coastal project means allocating a contingency for storm-driven scheduling and material variability, which can tip total costs upward compared with inland markets.
United Exteriors
(732) 403-4496 unitedexteriorsinc.com
647 Broadway, Long Branch, New Jersey
5.0 from 41 reviews
Our great crew has been with us for many years and have worked on everything from residential to large and complex projects. Our crew is honest, loyal and has proven ability to self-perform produce quality work within budget.
American Dream Contractors
(732) 693-3281 americandreamsbuilt.com
444 Harrison St, Long Branch, New Jersey
5.0 from 14 reviews
American Dream Contractors is New Jersey’s trusted roofing company with over 40 years experience proudly serving homeowners across the state from our home base in Long Branch, Monmouth County. We specialize in standing seam metal roofing, asphalt shingle roofing, and custom gutter systems — delivering lasting protection, curb appeal, and value. Our team uses industry-leading products, backed by top-tier warranties and proven craftsmanship built on decades of experience. Whether you’re upgrading your home or repairing storm damage, we offer 100% financing and friendly, professional service every step of the way. Choose American Dream Contractors — where quality, reliability, and experience come together to protect your American dream.
mj lyons corporation
(732) 693-7150 www.mjlyonscorp.com
434 Broadway, Long Branch, New Jersey
4.8 from 15 reviews
roof siding floors
All Covered Roofing & Exteriors
(732) 963-5312 www.allcoveredroofing.com
Serving
5.0 from 80 reviews
Specializing in roofing, siding, and gutters, All Covered Roofing is a trusted company. Our dedicated team delivers exceptional craftsmanship and uses top-notch materials to protect and enhance residential and commercial properties. Whether you need roof replacement, siding work, or gutter services, we prioritize reliability, efficiency, and transparent communication. Trust us for durable, weather-resistant solutions that ensure your property remains aesthetically appealing. Contact us today for the highest standard of service in the industry.

AA & B Builder
(609) 847-7231 aabbuilders.com
Serving
5.0 from 12 reviews
AA & B Builder is a family-operated construction and roofing company dedicated to excellence in the field. Based in West Long Branch, NJ, we specialize in residential roofing and offer a comprehensive range of services, including roof repair, roof replacement, roof maintenance, and more. Beyond roofing, our expertise extends to siding, metal roofing, and hardwood floor installations. Trust in our legacy of quality and craftsmanship for all your construction needs.
Heritage Builders
(732) 813-0298 www.heritagebuildersnj.com
Serving
4.8 from 329 reviews
Heritage Builders is a high-end family-owned contractor specializing in roofing (all types), siding (all types), custom home building, additions, decks, windows, & renovations. We do both residential & commercial work and we are fully insured. We offer a wide range of construction services throughout New Jersey and Pennsylvania. We can help whether you need roofing, siding, gutters, a new deck, or an entire home. When you work with Heritage Builders, you can expect competitive pricing, along with quick & reliable service; all while keeping a clean, safe work environment.
Davis & Sons Roofing
(551) 250-4777 davissonsroofing.com
Serving
4.9 from 66 reviews
Davis & Sons Roofing is your trusted partner for professional roofing solutions. With a commitment to excellence and customer satisfaction, we specialize in roofing installations, repairs, and maintenance.
Miller & Sons Roofing & Remodeling
(848) 360-3220 millersonsroofingremodeling.com
Serving
4.8 from 52 reviews
We specialize in both residential and commercial projects, ensuring top-notch results.
More Core Construction
(732) 531-5500 www.justroofit.com
Serving
4.9 from 115 reviews
We are NJ's exterior experts. We specialize in roofing, siding, gutters and windows. Call us for a free estimate today We also offer financing Just roof it!
Smith Builders Roofing & Siding
(732) 779-5273 smithbuildersnj.com
Serving
5.0 from 12 reviews
Smith Builders can repair, replace, and install roofs on residential homes or commercial buildings in Monmouth and Ocean County NJ. In addition we can install your siding and gutters. We will provide you with a full consultation to explain all of your available options so that you can choose the roofing plan that’s right for your home or business. We will work with you and adhere to your personal needs. Contact us today for an estimate. 732-779-5273
Five Stars Quality Construction
Serving
4.9 from 141 reviews
Welcome to Five Stars Quality Construction We are a local, family owned business serving central New Jersey. ESTABLISHED ON 2013 We specialize in Roof Installation and Repair. We work with all kinds of roofing SINCE 1996 GIVING TO US 27 years experience, we are licensed and certified in the state of New Jersey. We are available 24/7. Owner Operated, No Subcontractors. Credit Cards Accepted. Call us today for a Free Estimate.
Jar Roofing Repair
(732) 682-5451 jarroofingrepair.com
Serving
5.0 from 100 reviews
At JAR Roofing Repair, we are always ready to serve you! Whether it is an entire roofing restoration or just a single repair, we can do it. We work with top of the line quality brands to bring you the absolute best quality roof for every budget. Each JAR employee is highly trained and skilled to provide the highest level of quality on all of our projects. Call today for your free estimate and see how we can provide you with the best roofing service available!
In Long Branch, a building permit is usually required for a complete re-roof rather than being treated as a no-permit maintenance item. This means the process starts long before any shingle bundles hit the driveway. Before a single shingle is lifted, you'll want to line up your contract and a clear scope of work, including the roof's size, the chosen material, ventilation details, and any attic insulation work. The Building Department reviews the project scope before permit issuance, so homeowners should expect the paperwork stage to matter on full replacements. If you've recently moved or changed property usage, be prepared to show elevation drawings or photos of the existing roof to help the reviewer assess whether a full replacement is truly required.
The permit packet typically asks for contractor credentials, proof of liability and workers' compensation insurance, and a detailed description of the installation method. In coastal towns like this, the Building Department often looks closely at ventilation plans, underlayment choices, and fastener specifications to ensure the system will withstand Nor'easters and salt spray. Expect questions about ridge vent placement, snow load considerations, and flashing details around dormers, chimneys, and skylights. Gather prior roof records if available, including any past leak repairs or vent relocations, so the reviewer sees a coherent, long-term plan rather than a patchwork fix.
A final inspection is conducted after completion to verify proper installation and ventilation, and scheduling can vary with seasonal workload. In practice, that means your project timeline will hinge on both the permit timeline and the inspector's calendar, which tends to tighten during storm season and the peak repair window after winter storms. Plan for a clear rain call window during inspection days, and have accessible attic spaces ready for the inspector to inspect ventilation and insulation terms. If any deviations from the approved scope arise-such as a change in underlayment or vent placement-expect an in-progress revision to the permit, and allow additional time for re-review.
Coordinate closely with your contractor to ensure all permit documents reflect the actual installed system, including a robust coastal-specific ventilation strategy and corrosion-resistant mounting hardware. Schedule the permit submission early in the project so the paperwork doesn't bottleneck a timely start. Maintain open communication with the Building Department through the process, and keep a dedicated project binder with permit numbers, inspector contacts, and expected inspection dates. A well-documented path helps reduce delays and keeps a coastal re-roof on track despite busy seasons or weather-driven setbacks.
Coastal winds and Nor'easters shape every homeowner's experience with roofs in this area. In the wind-driven Atlantic exposure that Long Branch sits in, insurers tend to look closely at roof age, condition, and wind resistance after a loss. The combination of salt air and humid summers accelerates wear, so a roof that seems ordinary inland may register as a higher risk here. When a claim hits, expect questions about how long the roof has been in service, what materials were used, and how the system has held up against coastal weather events.
Insurers in this market often request detailed records to verify performance over time. Build a dossier with photos that show roof material type, fastener condition, flashing integrity, and signs of wind-driven damage such as lifted shingles, damaged edges, or granule loss. Collect maintenance receipts, inspection reports, and any storm-related notes from contractors. Documentation is especially important after wind-related losses, when adjusters compare coastal wind exposure against pre-existing wear. Clear, dated evidence helps establish a credible narrative about contribution from weather versus aging components.
Prompt documentation matters. If a storm has recently impacted a roof, photograph the scene from multiple angles, capturing potential sources of exposure like higher eaves, ridges, and transitions to walls. Note nearby trees, debris patterns, and any seasonal salt spray that might have affected materials. When speaking with an adjuster, provide a concise timeline: the roof's age, the last known inspection results, and a summary of observed wear before the event. This helps determine whether coastal wind exposure or pre-existing wear played a role in the damage, which can influence settlement considerations.
Before filing a claim, assemble a simple, consistent record-keeping routine: preserve all storm-day photos, maintain a log of observed changes, and secure written statements from reputable contractors about material performance in salty, windy conditions. If a roof has already shown signs of corrosion or delamination under coastal exposure, anticipate that adjusters will scrutinize whether those conditions existed prior to the loss. By anchoring the claim with documented, location-specific evidence, the path to a fair evaluation becomes clearer and less prone to misinterpretation.
Connect with contractors who help homeowners navigate the claims process from damage assessment to final approval.
Miller & Sons Roofing & Remodeling
(848) 360-3220 millersonsroofingremodeling.com
Serving
4.8 from 52 reviews
Late spring through early fall is commonly the best reroofing window in Long Branch because winter ice, snow, and access issues make cold-season work harder. When salt air and coastal humidity are at their peak, shingle seals and underlayment need steady, manageable temperatures to cure correctly. By targeting late spring into early fall, you reduce the risk of wind-driven delays and snow-blocked access that can push a project into colder months where repairs become precarious.
Spring into early summer can bring wind and hail interruptions, which is especially relevant in a coastal city where exposed roofs are harder to dry in quickly after weather delays. If you aim to start after the peak of spring storms, you keep the schedule flexible and allow for drying time between passes. On the actual install days, plan for possible gusts and light rain showers, and have a contingency in place for temporary coverings. Coastal conditions also mean higher chances of blowing debris, so reliable tarps and secure fastenings matter more than inland markets.
Summer heat and humidity in coastal New Jersey increase the importance of attic ventilation and can affect how shingles behave during installation. A well-ventilated attic helps avoid deck buckling and reduces heat buildup that could warp underlayment or shingles mid-application. Contractors should coordinate insulation and ventilation checks before the first bundle is laid, so soffit and ridge vent work aligns with material installation. Clear access to the roof and a shaded staging area can minimize heat exposure for workers and protect existing interior spaces from heat buildup during the reroof.
In Long Branch, corrosion at flashing, fasteners, and roof penetrations is a more serious concern than inland markets because of salt-laden air. That salty breeze speeds rust on metal details and guitars the longevity of sealants. Even if the field shingles look sound, the edges where water is supposed to shed can start failing years earlier if corrosion is creeping in behind trims and step flashings. Plan on inspecting these hidden weak spots with the first signs of moisture in the attic or at the roof line.
Wind-driven rain from coastal storms can expose weaknesses around chimneys, skylights, and roof-wall intersections even when the field shingles still look serviceable. The higher gusts push moisture into seams and joints that may not show immediate discoloration, yet small leaks can travel along sheathing and rafters before you notice them inside the attic. Regularly check around penetrations after storms, especially if there's wind parallel to the roof plane.
Freeze-thaw cycles in winter can worsen small defects by opening gaps around vulnerable roof details and contributing to ice-dam-related backup. Even micro-cracks in flashing or aged sealant expand when water freezes, creating pathways for meltwater to back up under shingles. When you see persistent icicles or damp ceilings after a thaw, that's a signal to reassess these critical points rather than assuming the field is the only issue.
Keep fasteners tight and flashing joints clean from corrosion-causing debris. Look for paint bubbling, rust stains, or loose granules near chimneys and skylights. If attic insulation looks damp or there are faint mildew odors after storms, treat it as a red flag and inspect further, focusing on roof-wall interfaces and penetrations.
Find contractors experienced in skylight installation, flashing, and leak repairs to bring natural light into your home.
Miller & Sons Roofing & Remodeling
(848) 360-3220 millersonsroofingremodeling.com
Serving
4.8 from 52 reviews