Last updated: Apr 19, 2026
Your roof endures a harsh year in Cherry Hill: hot, humid summers followed by cold winters with snow and nor'easters. The repeated expansion and contraction of shingles, underlayment, and flashings during temperature swings create micro-cracks and seam failures. Moisture moves more aggressively through vulnerable spots when humidity is high and rain is heavy, especially after a long, steamy summer. The result is accelerated wear at hips, ridges, valleys, and around penetrations like vents and chimneys. If you notice sags, missing granules, or lifted edges after seasonal swings, you are seeing the telltale signs of ongoing moisture stress that can snowball into leaks between reroof stages.
Spring in this area brings heavy rainfall and gusty winds that can complicate active reroof work. Storm-driven conditions mean temporary openings and exposed decking while crews switch off old material and set new underlayment. If your home is nearing a replacement, plan for a window where you can protect interior spaces from sudden leaks during these inevitable weather holds. The same spring winds can drive shingle blows and flashing misalignments that leave roof seams vulnerable until final finishes are sealed. Proactively inspect attic ventilation and look for moisture staining or damp insulation that signals water intrusion when spring storms arrive. Early detection gives you leverage to adjust timing and staging with the contractor to minimize risk.
Fall wind events and nor'easters in South Jersey are a major local reason homeowners schedule replacements in spring or early fall rather than deep summer or winter. A late-season storm surge can slam exposed roof edges, ridge lines, and chimney areas, pushing compromised shingles into failure mode right as the roof is being retired. If your roof already shows curling, cupping, or curling corners, a fall storm cycle can rapidly worsen the damage. Consider prioritizing a replacement plan that avoids mid-season vulnerability: choose a completion window that precedes the harsh wind patterns and avoids the peak of nor'easters when possible. Delays can mean higher risk of wind-driven leaks that complicate installation and extend the time a roof remains partially exposed.
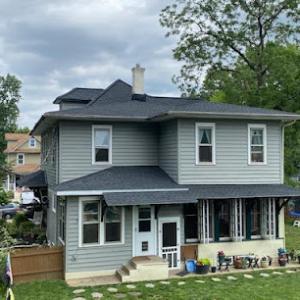
Reroof timing in this climate often hinges on the short windows between storms and the need to maintain interior protection. When a roof is nearing its end, any unplanned weather delay can leave you with prolonged exposure to rain, falling debris, or ice dam risk on colder days. If a tear-off is anticipated, align with the crew for a smooth sequencing of removal, deck inspection, underlayment, and flashing, so that there are minimal gaps where water can penetrate. Pay particular attention to compromised valleys and vent boot seals, which exterior signs can worsen quickly once a storm hits. For homes with two-story configurations or complex penetrations, anticipate a longer staging period and ensure the contractor can coordinate weather windows to avoid long stretches of open decking.
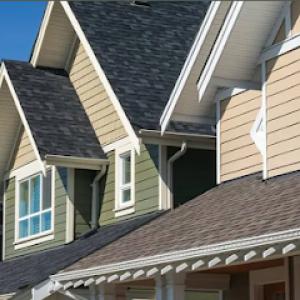
In this market, asphalt shingles are the dominant choice, shaped by decades of residential stock and the practicalities of installation and maintenance here. The region experiences humid summers, winter snow, and nor'easter-driven wind cycles that put shingles to the test. Wind can peel corners, granules shed along gutters, and repeated freeze-thaw cycles encourage early aging of the roof surface. Replacement timing often follows storm-driven wear: a roof that has lived through a few harsh winters and several severe wind events tends to show wear earlier than a perfectly sheltered roof. The typical homeowner here becomes familiar with the telltale signs of asphalt aging-granule loss in gutters or downspouts, dark streaks where granules have worn away, and peel-back near eaves after high-wind episodes. In contrast, metal roofing is increasingly considered for its resilience to wind and snow, but it remains a smaller share of the local market, with installers and specialty materials guiding the decision process. The neighborhood mix-areas with older homes featuring asphalt overlays or tear-offs, and newer builds experimenting with metal-shapes when and how timing decisions are made after a storm cycle.
If the roof is asphalt-first by design and stock, the most practical approach is to evaluate replacement timing based on the aging curve and storm history. After a nor'easter or a heavy-wind event, inspect visible slopes for lifted or curling shingles, particularly at edges and near penetrations. Granule loss translates into accelerated aging in the south-facing exposure of many Cherry Hill homes; notice if gutters and downspouts carry large amounts of dark grit, which signals granule erosion that reduces UV protection and moisture resistance. Curling shingles, brittle edges, and repeated micro-leaks around flashing are red flags that demonstrate how wind and moisture cycles have affected performance. In neighborhoods with dense tree lines, wind-driven debris can exacerbate indentation or impact damage, so look for bruising on softer shingles and minor cracks that can widen with cold snaps. Replacement timing in asphalt roofs often follows this pattern: a roof that has weathered multiple nor'easters and summer heat over a span of 15-20 years shows enough degradation to justify planning a full or near-full replacement rather than partial repairs. A practical rule of thumb is to map storm history against observed wear, then consult local contractors who track the season-to-season performance of asphalt systems in your specific street block.
Metal roofs are increasingly evaluated for their wind resistance and durability in repeated South Jersey wind and snow cycles. If a home already has a metal roof or if a contractor recommends metal for a retrofit, expect a different inspection focus: fasteners, flashings, and the condition of edge trim. Metal panels can resist wind uplift better than asphalt, but improper installation or aging sealant joints can still create leaks after heavy snowfall or ice damming. In practice, homeowners consider metal when they want a longer service life with fewer wind-related maintenance events, especially in exposed exposures or on homes with a history of repeated wind-driven damage to asphalt shingles. For most Cherry Hill properties, the decision between asphalt-first replacements and metal upgrades hinges on existing inventory, contractor availability, and the anticipated life-cycle performance in the local climate. Tile and wood options exist but remain far less common; their planning usually follows asphalt-first pricing and contractor readiness, unless the home already features one of these materials or the homeowner seeks a radical shift in aesthetics and performance. In all scenarios, the best approach is a thorough职业 evaluation after the most recent storm cluster: confirm the extent of wear, verify the underlying sheathing condition, and align the future material choice with how a roof age, wind exposure, and snow cycles interact on your specific house.
In this market, asphalt shingles are by far the most common and predictable choice. For asphalt, you're looking at roughly 350 to 700 USD per square, which covers the vast majority of mid-block homes and ranches typical around town. If you're weighing alternatives, metal roofing runs from about 700 to 1,200 USD per square, while clay tile sits higher at 900 to 1,500, and concrete tile ranges around 800 to 1,400. Wood shingles or shakes typically land near 600 to 1,100 per square, and synthetic or composite shingles come in around 450 to 900 per square. These ranges reflect the local mix of homes and the additional labor or materials that certain systems require, such as underlayment thickness, ventilation needs, or specialized fasteners.
In Cherry Hill, the decision is often driven by durability and long-term performance against seasonal hits. Asphalt remains the practical default because it balances upfront cost, installation speed, and a repair path that most homeowners can manage after a storm event. If you're considering a higher-end system, metal or concrete tiles bring longer service life and, in some cases, better wind resistance, but they also push the price up significantly per square. Clay tiles, while striking, can add weight and require a structural check that may affect overall project scope. Synthetic systems offer a middle ground with easier installation and a lighter footprint, but the color and texture options may influence resale appeal here.
Storm activity in South Jersey can spike prices for teardown, dry-ins, and insurance-related replacement work. When a nor'easter or heavy late-wall storm breaks, you'll often see demand pull these prices upward in Cherry Hill neighborhoods. Expect shorter windows to start and finish a tear-off, with expedited debris removal and potential contingency for water intrusion during teardown. In practical terms, if a claim is involved, be prepared for a tighter timetable and possible surges in material availability. The asphalt path tends to move more predictably through storms, but even it can see lead times extend during regional demand spikes.
Material choice affects review complexity in this area because standard asphalt reroofs are generally straightforward. If you choose metal, clay tile, or concrete tile, some projects trigger more substantial checks or reinforcement considerations, which can alter the overall timeline and cost. Wood systems add their own set of considerations around ventilation, moisture treatment, and potential insect mitigation, while synthetic systems can vary in installation specifics that influence labor hours. In practice, you'll want to discuss these material-specific steps with your contractor early, so you're aligned on anticipated timelines and any extra labor or inspection steps that may accompany a non-asphalt upgrade.
J. Cwanger
(856) 795-5480 www.jcwanger.com
Serving
5.0 from 91 reviews
J. Cwanger, Inc. is a fully insured roofing and siding business that has been in operation out of the Southern New Jersey area for several decades. We will provide you with a free itemized quote on your home, and ensure that all of your questions are
JV Roofing & Exteriors
(856) 546-4708 www.jvroofingnj.com
Serving
4.9 from 54 reviews
Experience the personalized touch of JV Roofing & Exteriors, a husband-and-wife owned and operated residential roofing company dedicated to delivering exceptional quality and service. As a local, family-run business, we prioritize our customers' needs, providing tailored solutions and unparalleled attention to detail. Our expertise shines in Metal, Slate, Shingle, and Tile roofing, ensuring your home's protection and beauty. Trust us for a roofing experience that puts you first. Contact us today! We proudly serve - Moorestown Township - Haddonfield Borough - Mount Laurel Township - Voorhees Township - Cherry Hill Township - Medford Township - Washington Township -Sewell -Mullica Hill & More!

Fortified Roofing
(855) 944-0516 www.fortifiedroofing.com
Serving
4.8 from 24 reviews
Fortified Roofing in Cherry Hill, NJ, is your trusted partner for top-quality residential roofing services and innovative solar roof shingles. Our skilled team is dedicated to enhancing the beauty and durability of your home with expert roofing solutions. Experience the future of energy-efficient living with our solar shingles. We're committed to exceeding your expectations every step of the way. Contact us today for roofing excellence and sustainable energy solutions!
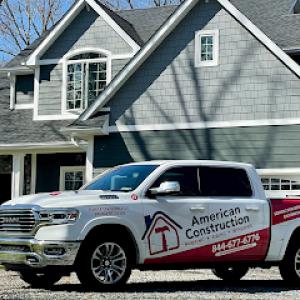
American Construction Roofing, Siding & Windows
(856) 290-8448 amconstruct.com
Serving
5.0 from 185 reviews
American Construction Roofing, Siding and Windows is a family owned and operated business offering the finest quality Cherry Hill roofing and construction services. We have built a solid reputation based on our commitment to providing the best when it comes to roofing, siding, and windows in the area. At American Construction Roofing, Siding and Windows, you’ll find skilled carpenters and project managers that are trained in the best techniques on the market today. They use materials of the highest quality, and employ respectful and dedicated staff that truly listens to your needs.
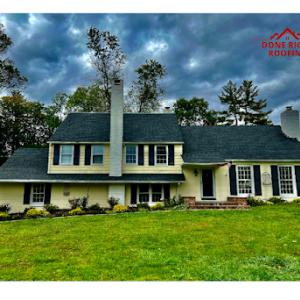
Done Right Roofing
(856) 254-2122 www.doneright-roofing.com
Serving
4.9 from 105 reviews
Done Right Roofing is a family-owned company and have been in the business since 2000. We do our best to make the customer feel comfortable and get the best deal from us. We have many crew members and will always get back to you as soon as possible, so you don't have to wait weeks and months to complete your job. Remember, doing it right costs less than doing it over!

Home Genius Exteriors
(267) 214-5490 homegeniusexteriors.com
Serving
4.8 from 1089 reviews
Elevate your home with Home Genius Exteriors, setting the standard in Cherry Hill by offering full-service solutions for roofing, siding, windows, doors, gutters and insulation. We support our veterans and communities by supporting local and national charitable organizations through our Home Genius Cares initiative. With an Owens Corning® Platinum Preferred designation, we also offer flexible payment options, industry leading warranties and a wide range of premium products tailored for your home. It’s time for a different experience, entrust your next home project to a genius and schedule your free inspection today!
Life Roofing
(856) 547-0237 www.liferoofingllc.com
Serving
5.0 from 29 reviews
Life Roofing Company is a fully licensed and insured business serving customers throughout New Jersey since 2009. From small repairs to complete Residential and commercial roof replacements, our diverse and knowledgeable team allows us to provide the highest quality work to fit to each of our customer’s needs. Quality products, state of the art installation practices and customer service are our primary concerns. We will always treat your home, office or warehouse as if it were our own.
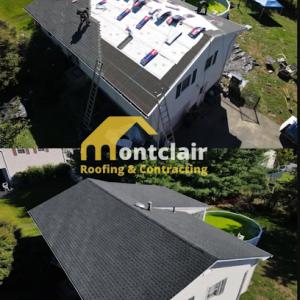
Montclair Roofing & Contracting
(856) 856-2970 montclairroofingcontracting.com
Serving
5.0 from 11 reviews
2 decades of providing professional roofing services, including free estimates, repairs, replacements, inspections, and maintenance. Proudly serving the Tri-State area, we deliver durable, long-lasting solutions with unmatched craftsmanship. Montclair Roofing & Contracting is your trusted roofing expert. With over 20 years of experience, our licensed and insured team delivers durable, reliable roofing solutions with locally sourced, high quality materials. We offer free estimates, fast service, and unmatched craftsmanship. Protect your property and boost its value—call Montclair Roofing & Contracting today for a free quote!
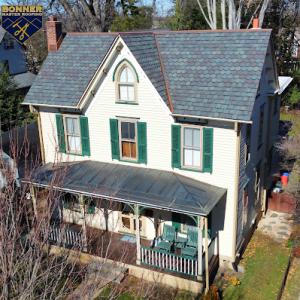
Bonner Master Roofing
(856) 221-8111 www.bonnerroof.com
Serving
5.0 from 22 reviews
Bonner Master Roofing specializes in roofing services from shingles & simple homes to historical restorations, slate, copper, metal roofs, all types of flat roof systems and everything involved with roof related carpentry. We also install everything from vinyl siding to fiber cement and wood cladding on exterior walls. We specialize in all types of gutters from seamless aluminum to half rounds, copper, pole, yankee, built-ins and European half rounds. Most importantly, we pride ourselves in our leak diagnostics and repairs. We are located in downtown Haddonfield, NJ.
Excel Roofing & Siding
(484) 836-6820 excelroofingnj.com
Serving
4.8 from 44 reviews
At Excel Roofing & Siding, we understand the stress and uncertainty that can come with roofing issues—whether it’s difficulty finding a trustworthy contractor, worrying about unexpected costs, or wondering if the repairs will truly last. We’re here to provide a worry-free experience from start to finish. With our commitment to honesty, quality, and clear communication, you can trust us to deliver reliable solutions that stand the test of time. When you work with Excel Roofing, you’re not just getting a contractor—you’re gaining a partner who genuinely cares about your home and your peace of mind.
Big Country Exteriors
(856) 702-3546 bigcountryexteriors.com
Serving
5.0 from 78 reviews
Discover the ultimate home improvement experience with Big Country Exteriors, a premier provider for your roofing, siding, window, and door needs. Since 2019, they have consistently delivered outstanding customer service, top-notch workmanship, and the highest quality materials to every project. As a respected member of the Haddon Township community, they take pride in their commitment to providing homeowners with a seamless home transformation experience.
Under The Sun Roofing & Solar
(609) 534-0339 underthesunrs.com
Serving
5.0 from 55 reviews
Enhance Your Home's Exterior: From roofing to solar, siding, gutters, and beyond, we're your one-stop solution for all exterior needs. With a commitment to quality and sustainability, our expert team delivers tailored services to elevate your home's aesthetic and energy efficiency. Contact us today for a consultation!
When planning a reroof, expect that a building permit is typically required through the township Department of Buildings. The process is structured to verify that the new roof meets local codes, venting, attic access, valley flashing, and ventilation requirements. Even if the existing structure seems straightforward, the permit acts as a formal checkpoint that helps ensure the work holds up to South Jersey weather and the township's storm-driven roofing standards. Start by confirming your address and project scope with the Department of Buildings to avoid delays caused by misclassified work or missing forms.
The inspection sequence in this area commonly includes two key milestones: an inspection after tear-off and a final inspection upon completion. The tear-off inspection confirms that old roofing materials have been removed to the deck in the area being worked and that decking, underlayment, and any necessary repairs meet code before the new roof is installed. This moment often influences how contractors schedule labor and material delivery; crews may plan a concentrated window for tear-off, then pause for any required corrections before resuming with underlayment and shingles. The final completion inspection verifies that everything on the roof and surrounding details-such as penetrations, flashing, drip edge, and ventilation-has been installed correctly and that the work aligns with the approved plan. Communication with the inspector ahead of these milestones helps minimize back-and-forth and keeps the project on track during peak weather windows.
Standard asphalt reroofs typically travel through the permit path with the least amount of nonstandard review, making it the most predictable option if the goal is to streamline approvals. If you're considering nonstandard materials, be aware that some will undergo added review before approval or sign-off. In practice, this means preparing product data sheets, installation details, and, if applicable, warranty documentation for the inspector. Nonstandard choices may require confirmation of fastening schedules, underlayment compatibility, and any required roof venting changes. A proactive approach-sharing manufacturer recommendations and local code references with the permit office-helps prevent hold-ups caused by missing documentation.
Coordinate with the contractor to align a tight sequence around the two main inspections. Confirm the proposed tear-off date, ensure the deck is prepared for any needed repairs, and lock in delivery times for underlayment, flashing, and shingles so materials arrive just in time for the post-tear-off phase. Have backup plans for weather interruptions, since a nor'easter or heavy humidity can push outdoor work into narrower windows. Finally, after the final inspection, make sure you receive the sign-off and retain all permit paperwork with your homeowner records for any future reroofing or property transactions.
You face a climate where repeated wind and rain events cut across seasons, not a single dramatic moment. In this environment, adjusters will look for how age and prior condition interact with the latest weather. New Jersey is a high roof-claim environment after storms, so Cherry Hill homeowners should expect adjusters to ask about roof age, prior condition, and the timing of the weather event. A roof that shows signs of wear before a storm will shift the claim from a straightforward repair to a more scrutinized replacement consideration. Plan for a careful, honest record of the roof's condition before and after any major wind or downpour.
Because Cherry Hill sees repeated wind and rain events rather than one single hazard type, insurers may scrutinize whether damage is sudden storm damage or long-term wear. This means a claim may hinge on distinguishing shingles blown loose during a wind gust from shingles that were already curling or fasteners that were near failure due to age. If the roof looks episodically damaged in multiple areas, the adjuster may question whether maintenance could have mitigated some losses. Documenting the timeline of events helps prevent surprises if a subsequent claim is filed for the same roof within a short window.
Pre-loss roof photos are especially useful in Cherry Hill claims because broad state coverage still comes with detailed adjuster review of pre-existing conditions. When a storm hits, an insurer will want to compare current damage with the condition captured in those photos. If you have clear images taken within the last year, you give yourself the strongest position to prove what existed before the event and what changes occurred since. Keep dated photos of skylights, valleys, hips, and the edge line. If possible, include proximity shots of surrounding trees, gutters, and any recurring problem points. This practice reduces ambiguity and supports a straightforward assessment, even when the weather pattern has already shown its persistent, storm-driven character.
Connect with contractors who help homeowners navigate the claims process from damage assessment to final approval.
Skylight work is notably active in the Cherry Hill contractor market, signaling that flashing and curb transitions are a recurring local repair need. Pay close attention to the base flashing where the skylight meets the roof deck, and watch for lifted sealant or worn shiners around the curb. In this climate, shingles butt up to the skylight curb, so the metal flashing needs solid laps and proper sealant without gaps. If a skylight is more than a decade old, anticipate more frequent resealing or a curb re-flash as a practical upgrade rather than a full replacement.
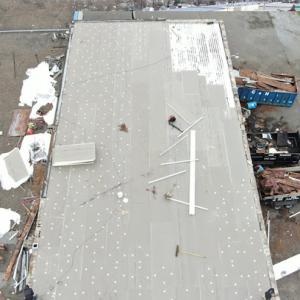
Flat and low-slope roofing is a meaningful local specialty, which matters for homes and additions where ponding and drainage details differ from standard pitched asphalt roofs. Ensure proper slope toward drains and verify that internal crickets or islets are not creating water traps. Pay attention to the transitions from a low-slope section to a steeper plane; that corner is a common source of leaks when counter-flashing or membrane seams loosen. Regular inspection after heavy rain helps catch seam failures before they cause interior staining.
Heavy spring rain tends to expose weak flashing, low-slope seams, and transition details faster than dry-season conditions. Use the change of seasons as a trigger to inspect skylight seams, curb flashing, and all low-slope joints around penetrations. If any roof area near skylights or flat sections shows dampness or loose flashing, address it promptly to prevent interior damage during the next storm cycle.
Find contractors experienced in skylight installation, flashing, and leak repairs to bring natural light into your home.
Garden State Roofing Cherry Hill
(856) 997-2865 neighborhoodroofingllc.com
Serving
5.0 from 37 reviews
In this market, crews that regularly perform reroofs over occupied homes are the norm. When you interview candidates, ask specifically about past jobs where residents stayed in the house during the tear-off and installation. Look for teams that demonstrate a careful, step-by-step plan for keeping debris contained, protecting landscaping, and cleaning the job site at the end of every day. A contractor's ability to coordinate with you on staging, access, and daily cleanup is as important as the actual installation, especially in homes with limited driveway space or tight yards.
The local pool of quick-response contractors tends to emphasize fast scheduling and reliable site protection after storms or during active leaks. If a storm hits, you want a crew that can prioritize access routes for tarping and temporary containment, without compromising safety or leaving your property exposed. Ask for recent turnaround times and how they handle temporary protections if rain or gusty winds complicate work. A clear plan for weather contingencies signals a contractor who won't stall when timing matters for your interior comfort and home integrity.
Warranty options are common and worth comparing closely. Look beyond general promises to examine workmanship coverage and manufacturer-backed options. Workmanship warranties will cover installation-related issues, such as leaks or fastener concerns, for a defined period. Manufacturer warranties can transfer some risk to the shingle or metal product itself, but require proper installation and maintenance to stay in force. Seek a written summary that lists what's covered, what isn't, and how long each portion lasts. A contractor who can articulate both coverage types and how they work with the chosen material provides the strongest long-term protection.
Given the region's mix of single- and multi-family homes with aging roofs, prioritize contractors who can tailor a plan to your roof's specific structure, venting, and attic insulation. Request references from projects with similar roof lines and occupancy scenarios, and verify that the crew will conduct a thorough cleanup and final walk-through. A transparent communication rhythm-pre-job expectations, daily updates, and a definitive completion checklist-helps ensure the project finishes cleanly, on time, and with solid coverage behind the workmanship.