Last updated: Apr 19, 2026
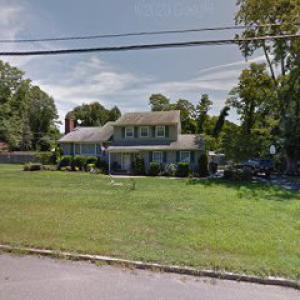
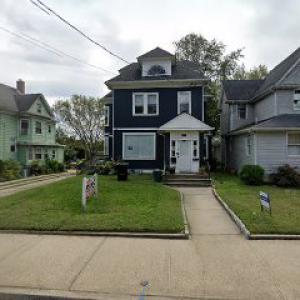
Cold winters slam poorly vented or aging roofs with repeated freeze-thaw cycles, especially around eaves, flashing transitions, and roof penetrations. In this town's dense, older housing stock near the Navesink River, that stress concentrates where ice dam formation can back up water under shingles and into soffits. Regular rainfall keeps moisture high, and older assemblies struggle to shed it quickly. The result is a higher chance of slow leaks that don't show up as a single storm, but as a pattern of damp ceilings and stained walls-often long after the weather has cleared. The risk isn't abstract: winter can lock water into place, then a spring rain cycle can push the problem loose, forcing emergency repairs on tight in-town lots.
Drainage performance becomes a leading clue in leak investigations. Old Red Bank roofs frequently rely on compact drainage routes that were built tight to the roof line, leaving little margin for debris or sagging gutters. When gutters overflow or downspouts clog, water sits at the eave and in valleys, freezing again at night and thawing during the day. Flashing details-especially around dormers, chimney caps, vent pipes, and transitions where different roof planes meet-are another common failure point. If ice damming forms, water can back up under shingles and into the attic or ceiling drywall. Check the drip edge, sealant lines, and metal flashing for cracks, lifting, or missing lap joints. In this climate, a small misstep here becomes a big problem after the first hard freeze of the season.
Replacement timing in this area is driven by winter's interruption, not by sunny days alone. Tear-off and dry-in typically get pushed toward late spring through early fall to avoid snow, ice, and limited access for crews on crowded streets and tight lots. If a roof is nearing the end of its life, wait-for-perfect-weather planning won't help a recurring leak story. Start planning repairs or replacement projects early, aligning with dry periods so that shingles can lay flat, underlayment remains dry, and flashing can be properly integrated without wind-driven rain complicating the installation. The goal is a new roof that dries quickly after each rain and maintains a solid barrier through the most capricious early-spring and late-fall schedules.
If leaks appear near eaves, flashing transitions, or penetrations, don't wait for the next storm. Take immediate stock of damaged areas: make temporary patches with heavy-duty roofing tape or patch or replace flashing where it's corroded or loose. Clear gutters and downspouts while ensuring the drainage path remains unobstructed. Inspect attic insulation and ventilation to reduce ice dam risk: ensure soffit vents breathe and attic vents aren't blocked by insulation. Schedule an inspection with a roofer who specializes in older Red Bank homes, focusing on drainage routes, underlayment condition, and transitions between roof planes. A proactive check now prevents late-winter, storm-season surprises, and keeps your roof from spiraling into costly, disruptive repairs when the weather is least forgiving.
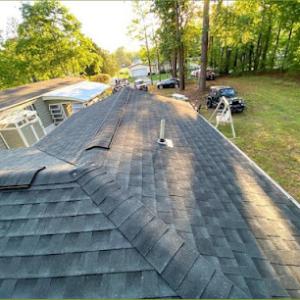
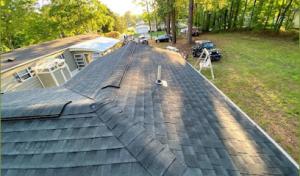
Asphalt shingles dominate the local market because they fit the area's large re-roofing activity and the broad range of older residential homes. In tight in-town lots, a shingles replacement often goes smoothly, and the material's relatively forgiving installation helps with the winter freeze-thaw cycles that can stress the roof edge and flashing. For Red Bank homes, look for a shingle with good granule adhesion and a warranty that covers hail and wind uplift. A practical approach is to pair the shingles with a robust underlayment and sound drip edge detailing to protect against coastal humidity and occasional summer downpours. Over time, ensure the overhangs and valley intersections are cleaned and sealed so water does not stand on weak flashing corners after storms.
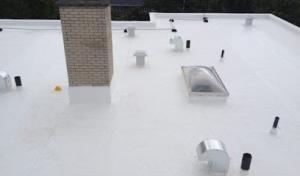
Metal options are active in this market and are often considered by owners aiming for stronger weather performance through humid summers and winter snow cycles. Metal roofs shed snow more predictably and resist ice dams when installed with a continuous sleeve under the ridge vent and well-sealed eave details. In Red Bank's climate, a metal roof benefits from a factory-applied corrosion-resistant coating and carefully placed fasteners to prevent leaks around limited attic space or shallow roof pitches common on older homes. If flashing complexity is high due to irregular rooflines or multiple penetrations, plan for extra flashing transitions and confirm that the metal panels are joined with weather-tight seams. Regular maintenance should include checking for loose screws and ensuring that tree debris does not trap moisture along the eaves.
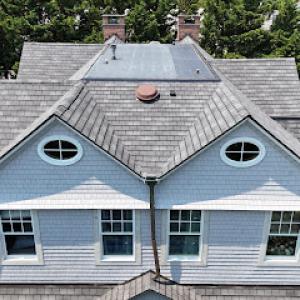
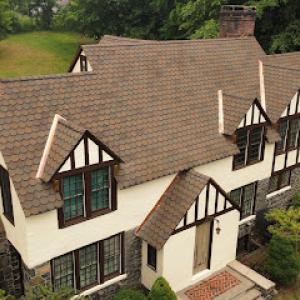
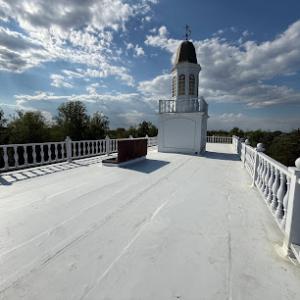
Clay tile and concrete tile systems are present in this coastal Monmouth County climate, but their suitability hinges on structure, flashing complexity, and maintenance expectations. In Red Bank, older homes with heavy snow interest and salt-laden air require solid deck support and precisely detailed flashing around chimneys, valleys, and roof-to-wall junctions. Clay and concrete tiles can be durable, but they demand careful installation to avoid crack-induced leaks during freeze-thaw cycles. If the roof deck is not reinforced to carry the tile weight, or if the attic ventilation is inconsistent, tile roofs may experience faster deterioration at seams and at the eave lines. Regular inspection should focus on cracked or displaced tiles after storms, and on ensuring that parapet and coping details are sealed to prevent moisture intrusion that can propagate along roof planes.
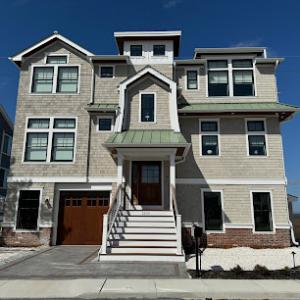
Wood shakes offer a traditional look that some Red Bank homes retain on upper stories or historic sections. However, wood is inherently vulnerable to moisture, insects, and freeze-thaw cycles. If choosing shakes, insist on proper surface treatment, a moisture-resistant underlayment, and a durable water-repellent coating that can stand up to coastal humidity. Shake roofs require meticulous flashing around ridges, valleys, and penetrations, as well as proactive maintenance to prevent warping and rot. In climates with salt air, consider species coatings or rot-resistant wood types and ensure you have a plan for proactive cleaning and resealing.
Synthetic and composite shingles are present and can offer a balanced blend of appearance and performance for Red Bank homes, especially where weight and installation speed matter on modestly pitched roofs. Look for products with validated freeze-thaw resistance and a robust warranty. Choose systems that pair well with effective underlayment and integrated ventilation to manage humid summers. As with any low-porosity surface, ensure that roof penetrations are well flashed and that gutter and downspout lines are kept clear to prevent drainage backups near the coastal shoreline. This combination helps mitigate drainage failures that can occur after heavy rain events.
In this market, the dominant activity is re-roofing rather than new construction. That shift drives several predictable costs: tear-off of existing roofs, potential deck repair, and disposal of old materials. Ice in winter and humid summers attack aging decks and flashing, so crews often price in additional labor for re-nailing or replacing deck boards and verifying structural integrity beneath shallow slopes. Tight in-town lots mean staging space is limited, so crews handle debris in smaller chutes and frequent cleanups-a factor that can nudge both project duration and disposal charges. When you line up bids, expect a higher emphasis on waste handling and on-site safety for neighboring homes.
Red Bank projects commonly include a full tear-off and robust underlayment checks. If the existing deck or roof sheathing shows water staining or frost damage, budget for deck repair or replacement as part of the roof package. Most homeowners find that disposal fees rise in proportion to tear-off size and material type, and old shingles with specialty compositions (like certain tile or shake variants) can incur extra disposal steps. When bids separate tear-off from new installation, you gain visibility into what's truly needed versus what's optional. Account for the possibility that a tighter roof shadow line or adjacent masonry will require more careful flashing work, which adds to both time and material cost.
Prices here reflect the local mix of re-roofing jobs and the impact of tight lots. Asphalt shingles remain the baseline, with a typical range near $420-$800 per square. Metal roofing, clay or concrete tile, and wood shingles/shakes command higher price points, often driven by required underlayment upgrades and increased crane or staging needs for tile. Synthetic or composite shingles present a balance between durability and price, usually around $450-$900 per square. When planning, think about long-term drainage and freeze-thaw resilience; a more resilient system may reduce calls back for leaks after harsh snaps of winter.
Debris control is a top concern for Red Bank bids. Tight lots mean homeowners often require frequent containment and post-cleanup, including removal of mill waste and orderly roof tear-off piles. Bids that include a dedicated cleanup crew or a defined final cleanup checklist tend to be more reliable in this market. Ask for explicit language about weekly cleanup during the project and a final walk-through to confirm all debris is removed and gutters are cleared of shingle granules.
Seasonal demand spikes after winter damage and storm events can affect scheduling and pricing, especially in the late spring to early fall replacement window. If a project is delayed because of weather or material backlogs, expect adjustments in timeline and potentially in labor pricing. For Red Bank, aligning start dates with a clear sequence-tear-off, deck verification, underlayment, flashing, and final install-helps maintain a steady crew and minimize on-site disruptions for neighboring homes.
Neighborhood Roofing
(609) 276-9557 www.neighborhoodroofingnj.com
125 Half Mile Rd Suite 200, Red Bank, New Jersey
5.0 from 23 reviews
Serves All of NJ, Monmouth, Ocean, Middlesex, Essex, Hudson, Bergen, Morris, and Passaic. At Neighborhood Roofing, we take pride in being one of NJ's most trusted roofing contractors. With years of experience and a team of skilled professionals, we are dedicated to delivering top-notch roofing services to our clients in all of NJ, Monmouth, Ocean, Middlesex, Essex, Hudson, Bergen, Morris, and Passaic.
Heritage Builders
(732) 813-0298 www.heritagebuildersnj.com
Serving
4.8 from 329 reviews
Heritage Builders is a high-end family-owned contractor specializing in roofing (all types), siding (all types), custom home building, additions, decks, windows, & renovations. We do both residential & commercial work and we are fully insured. We offer a wide range of construction services throughout New Jersey and Pennsylvania. We can help whether you need roofing, siding, gutters, a new deck, or an entire home. When you work with Heritage Builders, you can expect competitive pricing, along with quick & reliable service; all while keeping a clean, safe work environment.

Mighty Dog Roofing of Central New Jersey
(732) 863-2839 www.mightydogroofing.com
Serving
4.2 from 15 reviews
When it comes to your home’s exterior, Mighty Dog Roofing delivers top-of-the-line services matched with the neighborly customer care our clients have come to love. Our team of skilled experts will conduct a free, detailed inspection of your home, treating it as our own. Whether your home needs a simple repair or a full roof replacement, expect to receive the transparent guidance you deserve. Whatever the case, our team will work to meet your safety and budget needs. We take pride in operating with quality materials, hiring skilled roofers, and providing our customers with a high-quality experience. See for yourself; our reviews say it all. Schedule your free, home inspection today!
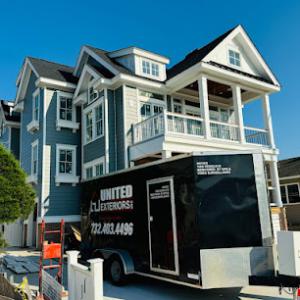
United Exteriors
(732) 403-4496 unitedexteriorsinc.com
Serving
5.0 from 41 reviews
Our great crew has been with us for many years and have worked on everything from residential to large and complex projects. Our crew is honest, loyal and has proven ability to self-perform produce quality work within budget.
Roof Works
(732) 543-7813 www.roofworksnj.com
Serving
5.0 from 104 reviews
At Roof Works, we firmly believe that you deserve nothing short of the best! Specializing in both residential and commercial shingle roof replacements, roof repairs, gutter installations, and siding installations, we're committed to addressing your key needs. Our commitment to providing top-notch service is reflected in our pursuit of excellence. As a testament to our dedication, we proudly hold certifications with both GAF and Owens Corning. When you choose Roof Works, you're choosing quality without compromise. Our focus on delivering a flawless roof installation every single time is our promise to you. It's this promise that sets us apart and affords you the peace of mind you deserve.
Shingle Guard Roofers
Serving
5.0 from 20 reviews
Shingle Guard Roofers is Middletown's premier destination for high-quality roofing services.

AA & B Builder
(609) 847-7231 aabbuilders.com
Serving
5.0 from 12 reviews
AA & B Builder is a family-operated construction and roofing company dedicated to excellence in the field. Based in West Long Branch, NJ, we specialize in residential roofing and offer a comprehensive range of services, including roof repair, roof replacement, roof maintenance, and more. Beyond roofing, our expertise extends to siding, metal roofing, and hardwood floor installations. Trust in our legacy of quality and craftsmanship for all your construction needs.

Salvador Roofing
Serving
5.0 from 8 reviews
Salvador Roofing safeguards Asbury Park and all of New Jersey with residential and commercial roof installations, repairs, and replacements, boasting a decade of expertise.
Davis & Sons Roofing
(551) 250-4777 davissonsroofing.com
Serving
4.9 from 66 reviews
Davis & Sons Roofing is your trusted partner for professional roofing solutions. With a commitment to excellence and customer satisfaction, we specialize in roofing installations, repairs, and maintenance.
All Covered Roofing & Exteriors
(732) 963-5312 www.allcoveredroofing.com
Serving
5.0 from 80 reviews
Specializing in roofing, siding, and gutters, All Covered Roofing is a trusted company. Our dedicated team delivers exceptional craftsmanship and uses top-notch materials to protect and enhance residential and commercial properties. Whether you need roof replacement, siding work, or gutter services, we prioritize reliability, efficiency, and transparent communication. Trust us for durable, weather-resistant solutions that ensure your property remains aesthetically appealing. Contact us today for the highest standard of service in the industry.
American Dream Contractors
(732) 693-3281 americandreamsbuilt.com
Serving
5.0 from 14 reviews
American Dream Contractors is New Jersey’s trusted roofing company with over 40 years experience proudly serving homeowners across the state from our home base in Long Branch, Monmouth County. We specialize in standing seam metal roofing, asphalt shingle roofing, and custom gutter systems — delivering lasting protection, curb appeal, and value. Our team uses industry-leading products, backed by top-tier warranties and proven craftsmanship built on decades of experience. Whether you’re upgrading your home or repairing storm damage, we offer 100% financing and friendly, professional service every step of the way. Choose American Dream Contractors — where quality, reliability, and experience come together to protect your American dream.
mj lyons corporation
(732) 693-7150 www.mjlyonscorp.com
Serving
4.8 from 15 reviews
roof siding floors
The Borough of Red Bank Construction Department mandates a roofing permit for a full re-roof project. This ensures that drainage, flashing, ventilation, and drainage channels are evaluated for the specific constraints of densely built neighborhoods near the Navesink River. Filing a permit signals that the project will meet local standards for ice dam protection and proper termination at walls, chimneys, and dormers, which is especially important on older homes where missteps during winter can lead to freeze-thaw leaks. If the shingles or underlayment are being replaced under a larger exterior renovation, the permit should be obtained as part of the overall project scope to avoid delays.
In Red Bank, the permit doorway is open to both contractors and homeowners. The contractor may file on behalf of the homeowner, but the option to apply directly keeps the process flexible and accountable. When a homeowner applies, attention to the same set of details-drainage routing, vent placement, and flashing transitions-becomes part of the plan review from the start. This is particularly relevant for older houses where roof lines are tight and a misfit can create slow drainage or ice-related issues. If a contractor is hired, verify that the permit application includes the full scope of the re-roof, including ventilation and flashing details, so the review panel can confirm compliance with Red Bank's drainage expectations.
Inspections in this town are scheduled during and after the job to verify flashing, ventilation, and drainage compliance, followed by a final inspection at completion. The early in-progress inspection typically focuses on the rough layout: proper nail patterns, underlayment installation, and the integrity of flashing around chimneys, skylights, and valley intersections. Mid-project checks often confirm that attic ventilation remains sufficient for the season and that ridge or soffit vents are not obstructed, which helps prevent moisture buildup during humid summers and winter freeze-thaw cycles. A post-construction inspection confirms that all drainage pathways are clear, shingles align cleanly with drip edges, and the final work integrates smoothly with existing gutters and downspouts. Scheduling these inspections in coordination with the roofer avoids back-and-forth delays and keeps the project timeline aligned with the seasonal demands on Red Bank roofs.
Prepare clear drawings of the roof plan, including vent locations, flashing details, and drainage routes, so the reviewer can quickly assess compliance with local expectations. If the property has multiple roof planes, document how valleys and crickets will be treated to minimize ice dam formation and drainage backup in winter months. Keep a log of all inspection appointments and be ready to present updated roofing material specifications and underlayment choices that align with Red Bank's climate realities. Clear communication with the Construction Department and the roofing crew helps ensure that the permit process supports a durable, code-compliant re-roof that stands up to freeze-thaw cycles and tight in-town siting.
When weather-related roof damage leads to a claim, expect the insurer to request a clear timeline of events plus visual evidence. Photos should show the affected roof areas from multiple angles, close-ups of damaged flashing, and any interior signs of water intrusion or ice damming around the eaves and dormers. Collecting documentation that ties the damage to a specific storm event helps avoid questions about preexisting wear. In this neighborhood, where tight in-town lots and aging substrates are common, having reference shots of the entire roof line and surrounding drainage features is especially valuable. Being meticulous about what you send can shorten the back-and-forth and reduces the chance of disputes that linger into winter.
Adjusters in this market often request details about the underlayment, ventilation, and the overall roof assembly because those components influence how well a roof sheds ice and manages moisture. Before any work begins, assemble a concise record of the layers beneath the shingles or cladding: the underlayment type, vents and soffit details, attic insulation, and any existing dampproofing or vapor barriers. Documentation that demonstrates proper ventilation paths and a continuous, well-sealed underlayment downstream from ridge to eave can be decisive if a claim hinges on whether drainage failures or freeze-thaw cycles accelerated damage. In a row of brick-and-stone homes with limited attic access, that level of detail helps avoid misunderstandings about what was actually damaged and what was already aging.
New Jersey policy language can materially affect recovery outcomes for a Red Bank homeowner. Depreciation treatment, the applicability of replacement-cost coverage, and how a claim is valued can shift what is ultimately paid. It helps to understand whether the policy distinguishes between actual cash value and replacement cost for storm-related roof damage, and whether partial replacements or repairs trigger different settlements. Having a clear, documented narrative that aligns photos, quotes from reputable contractors, and the full roof assembly details makes it easier to navigate these policy specifics when the claim reaches the adjuster. This is a neighborhood where street-facing roofs and close neighboring structures can complicate the assessment, so precise, organized proof is especially valuable.
Connect with contractors who help homeowners navigate the claims process from damage assessment to final approval.

Miller & Sons Roofing & Remodeling
(848) 360-3220 millersonsroofingremodeling.com
Serving
4.8 from 52 reviews
In Red Bank, the approach of winter brings freeze-thaw cycles that stress flashing around joints, skylights, and chimney lines. The result is not just a drip, but a slow, churning risk that can undermine an otherwise solid roof. Start with a thorough flashing check during a dry day: run your hand along vertical and horizontal seams near the eaves, around dormers, and at the base of the chimney where the roof plane meets masonry. Don't rely on a surface glance-ice and moisture can hide hairline gaps. If any metal edges lift or sealant looks cracked, mark it for repair before spring rains resume.
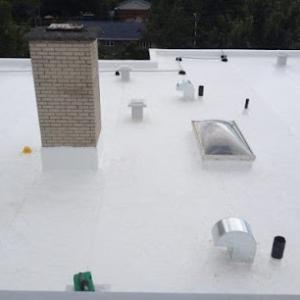
Skylights are a frequent leak point in this market, and their flashings tend to fail sooner than surrounding shingles in older roofs. Begin with a close inspection of the skylight curb and the transition between the curb and the roof surface. Look for loose shingles, weathered sealant, or debris-packed gutters that force water to back up. If you notice staining or damp spots around the skylight interior, schedule a professional check. For homeowners tackling maintenance themselves, keep the flashing clean, reseal with color-matched roofing sealant only after confirming the curb is solid and the gap around the skylight is properly seated.
Chimney-related work shows up regularly because masonry intersections create a lot of moveable seams. In older houses, mortar joints settle and widen, stressing the counter-flashing where it meets the roof. Inspect the base of the chimney for loose mortar, spalling bricks, and rusted or slipped flashing. Pay attention to any water stains on the ceiling near the chimney chase, which can indicate a slow leak behind the flashing. If you see cracking or shifting, plan a targeted flashing repair that ties the chimney into a tight, continuous seal without creating new avenues for water intrusion.
During a routine roof check, start at the most exposed areas and work inward toward the attic. Use a dry ladder system and a stable platform to reach the chimney and skylight surrounds safely. Clean gutters and downspouts to prevent water from backing up at flashing lines. If a section of flashing remains stubborn after resealing, replace the compromised metal and reflash with a continuous metal run, ensuring corners are folded tight and sealed with non-hardening, flexible sealant appropriate for the climate. This approach minimizes recurring leaks in tight, town-length roof lines.
Find contractors experienced in skylight installation, flashing, and leak repairs to bring natural light into your home.
Neighborhood Roofing
(609) 276-9557 www.neighborhoodroofingnj.com
125 Half Mile Rd Suite 200, Red Bank, New Jersey
5.0 from 23 reviews

Mighty Dog Roofing of Central New Jersey
(732) 863-2839 www.mightydogroofing.com
Serving
4.2 from 15 reviews